


That awful grinding sound and the herky-jerky struggle to open your window? That’s not just an annoyance—it's the telltale sign of failed rollers.
Worn-out, broken, or gunked-up rollers are the number one reason sliding windows refuse to cooperate. The good news? A sliding window roller replacement is a surprisingly simple DIY fix that will have your window gliding smoothly again.
Why Your Sliding Window Is So Hard to Open
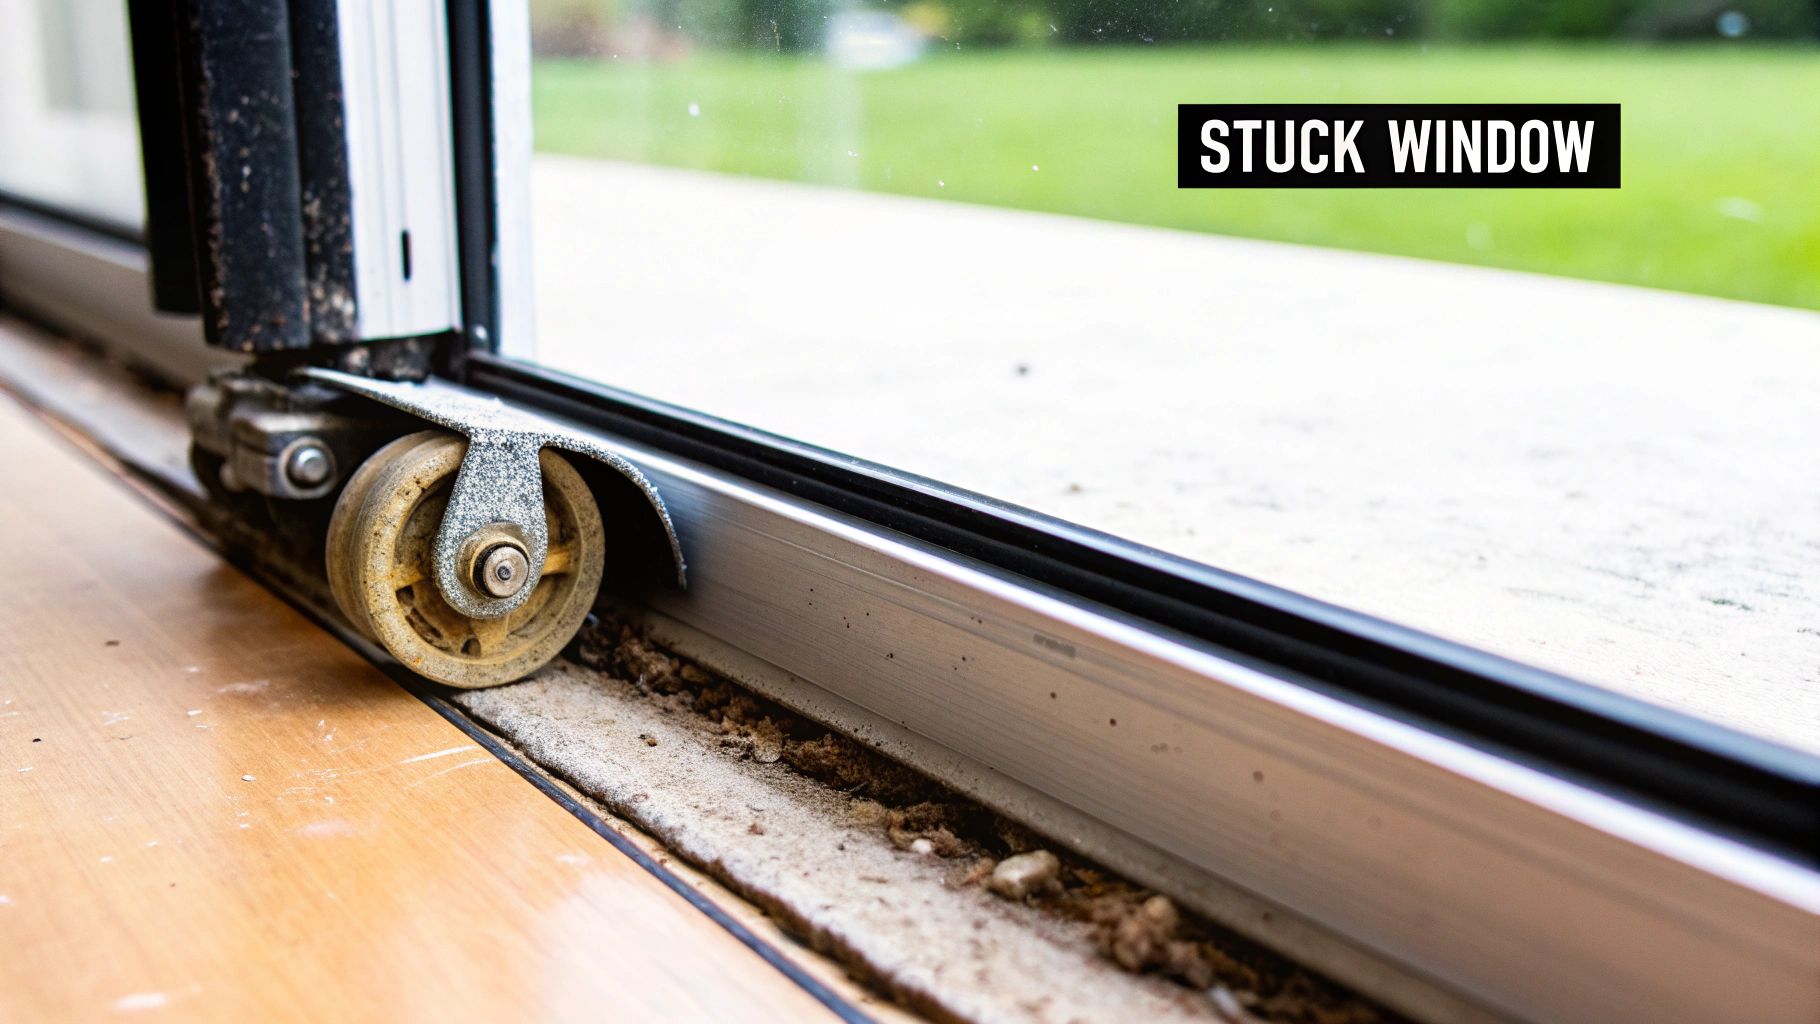
Before you reach for the phone to call an expensive pro, know that this is a very common issue. A stubborn window almost always points to the small wheels tucked away inside the bottom of the sash. After years of use, they simply wear out, get jammed with dirt and debris, or sometimes just break apart.
This guide will walk you through the whole process, from finding the exact parts you need to making those final little adjustments for a perfect slide. It’s the same basic principle we use for bigger jobs, which you can see in our guide on patio door slider repair.
With a little bit of time, you can absolutely tackle this yourself and get that window working like it just came from the factory.
Gathering Your Tools and the Right Replacement Rollers
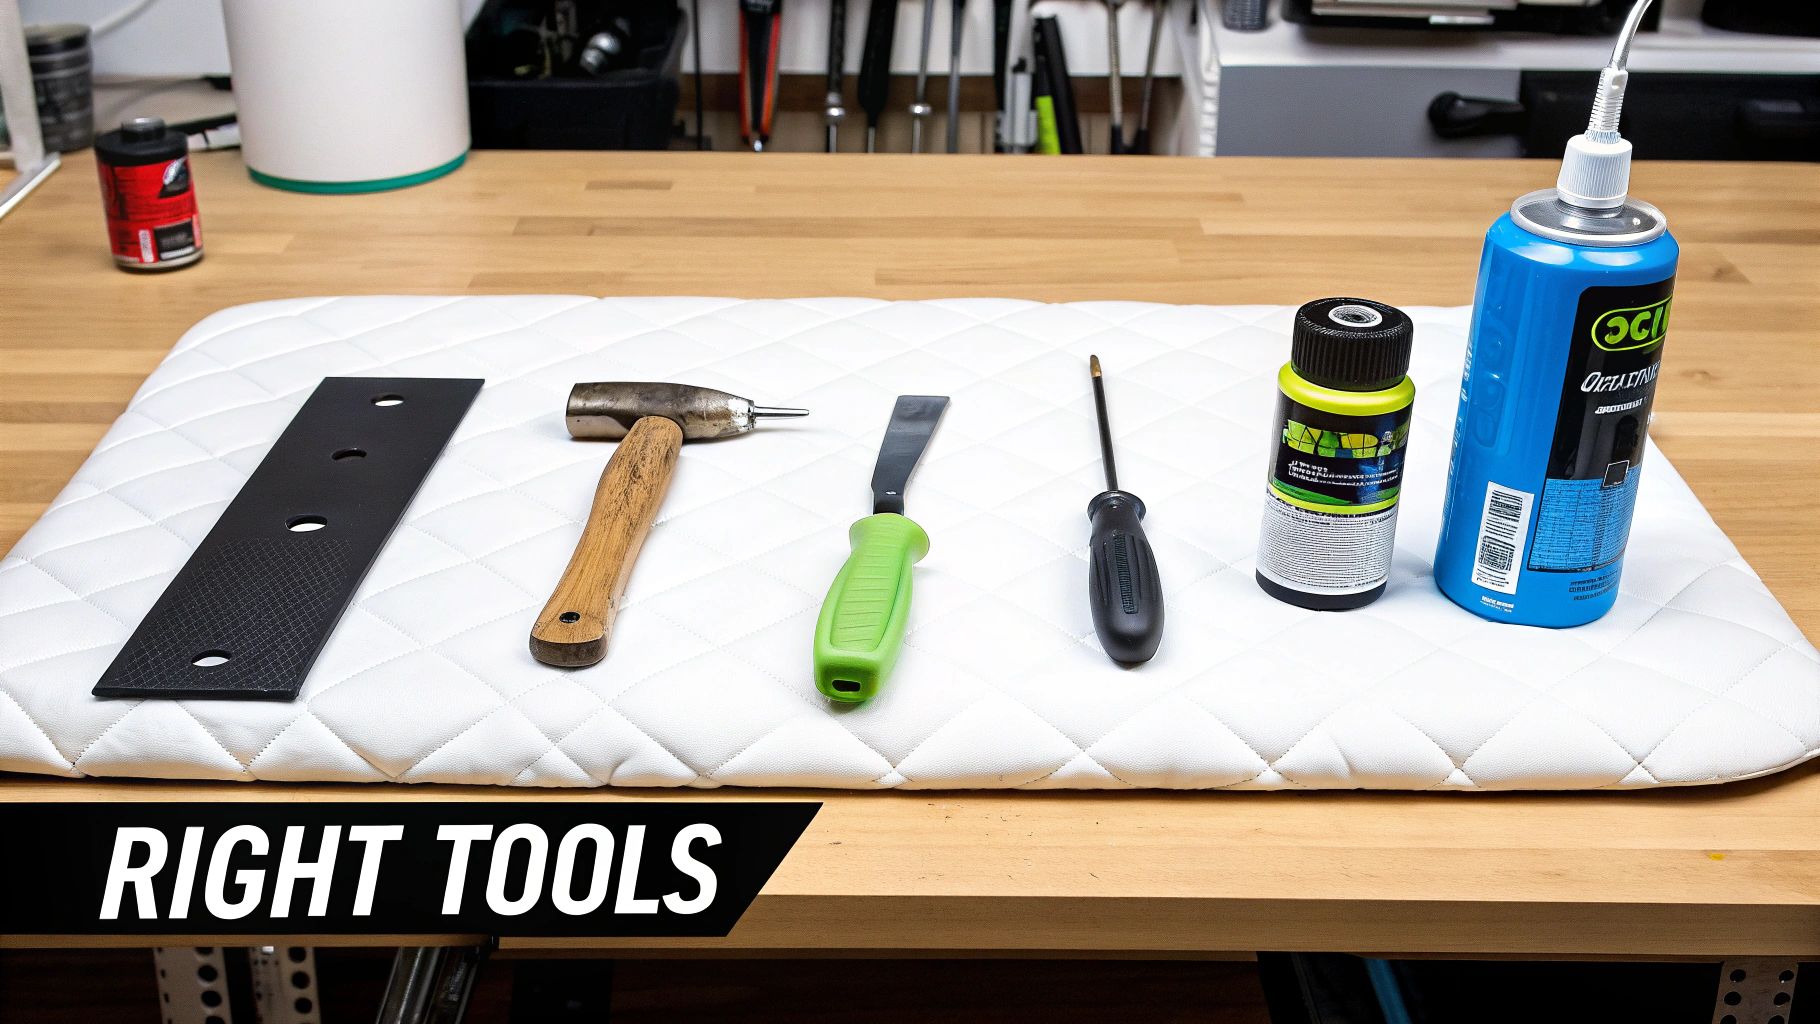
Any job is easier when you have the right tools on hand from the start. For this sliding window roller replacement, you won't need anything too specialized. Just grab a few basics like a putty knife, a set of screwdrivers, a small pry bar, and a can of silicone spray. If you want a more comprehensive breakdown, we've got a great list of essential window screen repair tools you can check out.
Finding the Perfect Match
Now for the most important part: getting the right replacement rollers. This is one of those times where "close enough" just won't cut it. Your best bet is to physically take the old, worn-out roller with you to the hardware store. It’s the only surefire way to get an exact match.
Pro Tip: Look beyond just the size. Pay close attention to the roller's material—nylon is great for quiet operation, while steel offers more durability—and the unique shape of the housing it sits in. Getting an identical match is the secret to a smooth, frustration-free installation.
It might seem like a tiny part, but these rollers are part of a huge industry. Believe it or not, the global market for just replacement conveyor rollers is valued at around $20 billion annually. You can see more on the larger roller market on marketreportanalytics.com.
Here’s how you can rewrite the section to sound more human and natural:
Getting the Window Sash Out Safely
Alright, let's get that window sash out of the frame. This part can look a little daunting, but trust me, it's usually straightforward once you know the trick.
First, unlock the window and slide it open until it's near the middle of the track. This gives you a much better grip and more room to work than trying to wrestle with it at either end of the frame.
Now for the key move: you need to lift the sash straight up, pushing it into the top channel of the window frame as far as it will go. This simple upward push creates just enough space at the bottom for you to swing the lower edge out and toward yourself. Once the bottom is clear of the track, you can gently guide the entire sash down and out.
Heads Up: Before you start lifting, take a close look inside that top channel. You're searching for small plastic or metal pieces called security stops or anti-lift blocks. They're designed to prevent the window from being lifted out from the outside, and they'll stop you, too. Usually, they're just held in with a single screw—loosen it or take it out completely, and you'll be good to go.
Getting the Old Rollers Out and the New Ones In
Now that you have the window sash safely out of the frame, the real work begins. Find a good spot to lay it down—a workbench with a blanket or even just a piece of cardboard on the floor will do the trick to prevent any scratches.
You'll see the roller assemblies housed in the bottom corners of the sash frame. Before you try to yank them out, look for a small adjustment screw. Give it a few turns; this retracts the roller and releases the tension, which makes popping it out a whole lot easier. Once it's loose, you can usually persuade it the rest of the way out with a flathead screwdriver or a putty knife. Just be gentle.
With the old roller gone, take a moment to clean out the cavity where it was sitting. Don't skip this part! I've seen countless rollers fail simply because the track was full of years of accumulated dirt and grime. A quick wipe-down can make a huge difference in how smoothly your new rollers operate.
This infographic breaks down the basic moves for getting the window sash out of the frame.

That simple slide-lift-tilt motion is the key to removing most horizontal sliding windows. Once you've cleaned the pocket, you're ready to install the new roller. Just press the new assembly firmly into place until it sits flush with the frame. It should click or snap in securely.
Reinstalling the Sash and Making Final Adjustments
Alright, you're on the home stretch now. Getting the window sash back in is basically the reverse of how you took it out. First, carefully guide the top of the sash into the upper channel. Once it's seated, swing the bottom back in and gently lower it onto the track.
Dialing in the Perfect Glide
Now comes the most satisfying part: fine-tuning. Grab your screwdriver and find the adjustment screws on the new rollers. These little screws are what allow you to raise or lower each side of the sash independently.
Your goal is to get the window perfectly level so it glides like it's on air. Give it a few test slides back and forth. You're also checking to make sure the lock lines up perfectly with the keeper on the frame. It's amazing how these tiny roller bearings—part of a global market expected to reach $48.12 billion by 2034—can make such a huge difference. You can read more about the growth of the roller bearings market on precedenceresearch.com.
The Finishing Touch: Once you’re happy with how smoothly the window operates, give the track one last cleaning. Then, apply a light spray of silicone lubricant. This isn't just a suggestion; it's the secret to keeping that effortless glide for years to come. For more helpful tips like this, take a look at our guide on sliding screen door adjustment.
Got Questions? We've Got Answers
Even the most straightforward DIY project can throw you a curveball. If you've hit a snag or just want to double-check something before you start, you're in the right place.
We've gathered some of the most common questions that pop up when tackling a sliding window roller replacement. Think of this as your personal troubleshooting guide to get you unstuck and back on track.


