


So, you're ready to tackle that stubborn sliding screen door. Good. Most of the time, what seems like a major problem is actually a pretty straightforward fix. It almost always comes down to one of three things: a dirty track, shot rollers, or a frame that's gone crooked.
Figuring out which one it is before you start pulling things apart is the secret to getting this done fast and without a headache.
Pinpointing Your Sliding Screen Door Problem
Let's do a little detective work first. That sticky, wobbly, or grinding door is giving you all the clues you need. A few minutes of diagnosis now will save you from making multiple trips to the hardware store later. Trust me on this.
You’re not the only one spending a Saturday afternoon on a project like this. The whole home improvement market, which includes these kinds of essential repairs, is expected to grow by about 4.3% each year. People are spending more on keeping their homes looking good, running efficiently, and keeping bugs out. If you're curious, you can read up on home improvement market trends to see the bigger picture.
Now, let's get to the nitty-gritty of what's wrong with your door.
Start with a Quick Visual Check
First things first, get down on your hands and knees and inspect the track. This is the most common culprit and the easiest to fix. You'd be shocked at what can jam up a screen door—a tiny pebble, caked-on dirt, or a clump of pet hair can bring the whole thing to a grinding halt.
If the track looks clear, the next suspect is the rollers. These are the little wheels at the top and bottom that the door glides on. Give the door a gentle shake. Does it feel loose and wobbly in the frame? That's a classic sign of worn-out rollers. The bottom ones take the most abuse and usually fail first.
My Go-To Trick: I always use my phone's camera to solve this mystery. Turn on the flash, stick it down by the track, and snap a few pictures of the rollers. It gives you a perfect, up-close view of any cracks or flat spots without having to take the door off just yet.
Finally, eyeball the door's alignment. Stand back and look at the vertical gap between the screen door and the door jamb. Is it even all the way down? If it looks tilted, the door is out of alignment, which means it's scraping against the frame and causing that awful friction.
To make this even easier, here's a quick cheat sheet for figuring out what's going on.
Common Sliding Screen Door Issues and Causes
This table should help you quickly match the door's behavior to the most probable cause. It's a great starting point before you decide what tools you need to grab.
| Symptom | Likely Cause | Difficulty to Fix |
|---|---|---|
| Grinding or scraping noise | Debris in the track (dirt, pebbles) or bent track. | Easy |
| Door is hard to slide | Dirty track, damaged rollers, or door is misaligned. | Easy to Medium |
| Door wobbles or feels loose | Worn-out or broken rollers are the prime suspect. | Medium |
| Door jumps off the track | Damaged rollers, bent track, or severe misalignment. | Medium to Hard |
| Door is crooked in the frame | The door's adjustment screws need to be tweaked. | Easy |
Once you've zeroed in on the likely cause using this table and your own inspection, you'll be in a much better position to gather the right tools and parts for the job.
Your Essential Toolkit for a Smooth Repair
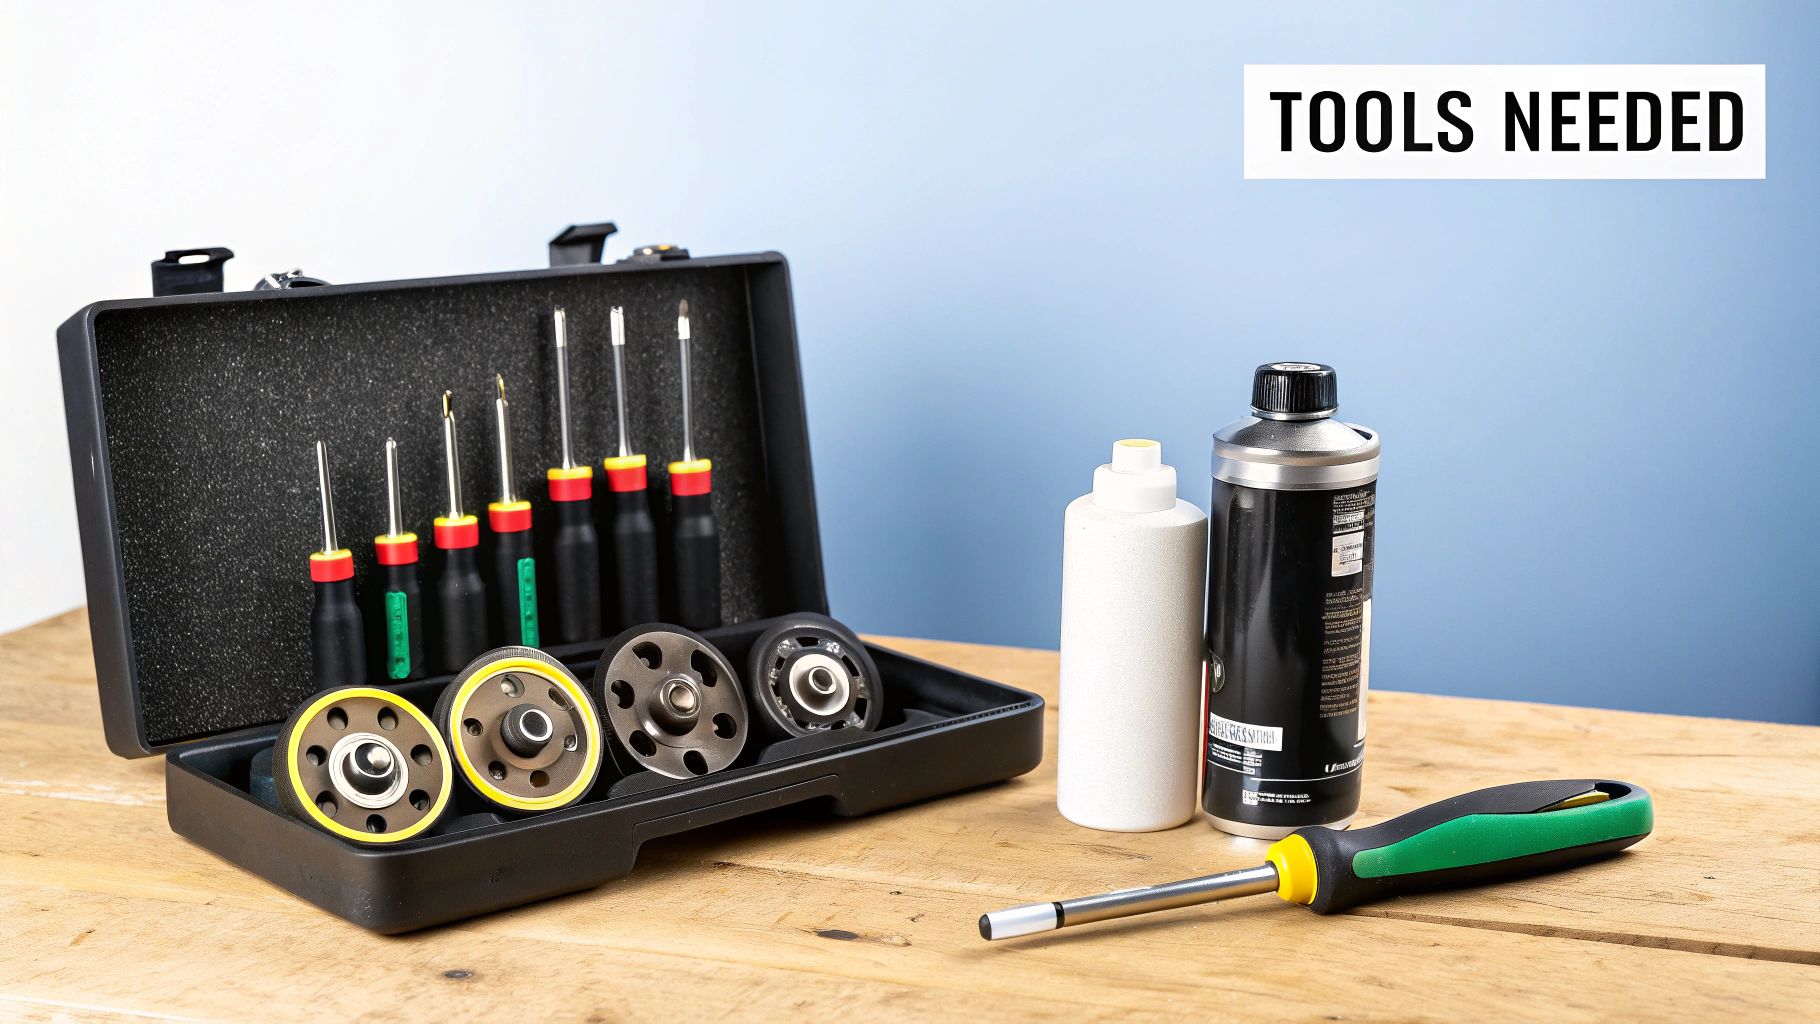
Before you even think about pulling that door off its track, let’s talk tools. Having everything you need within arm's reach is the difference between a quick, satisfying fix and a day of frustration. Trust me, you don’t want to be balancing a door with one hand while digging for a screwdriver with the other.
You've probably got the basics, like a Phillips head screwdriver and a sharp utility knife, sitting in a drawer somewhere. But for this job, a couple of other items can be real lifesavers. A small, flat pry bar or even just a stiff putty knife works wonders for popping out old rollers without bending the door's aluminum frame.
Tools and Materials You'll Actually Need
Here's a rundown of what to gather. You might not need every single item, but having them on hand will save you a mid-project trip to the hardware store.
- Stiff-bristled brush: You'll be surprised how much gunk can build up in the door track. This is your first line of defense.
- Silicone-based lubricant: This is key. Avoid oil-based products like standard WD-40, as they become sticky magnets for dust and grime. A dry silicone spray keeps things gliding smoothly.
- Replacement rollers: This is the most common culprit for a stubborn door. When you go to buy new ones, take an old roller with you to ensure you get a perfect match.
- Screen spline and spline roller: If the mesh is torn and you're replacing it, these are non-negotiable. They're what you use to lock the new screen into the frame for that tight, clean look.
Here’s a piece of hard-won advice: when you buy new rollers, measure the old wheel's diameter down to the millimeter. A seemingly tiny 1/8-inch difference is enough to make the door jam up or constantly jump the track. Getting this one small detail right is often the secret to a repair that lasts for years.
Get That Track and Frame Spotless
More often than not, when a sliding screen door starts sticking, the real culprit isn't a broken part. It's usually just fighting a losing battle against years of built-up gunk in the track. But before you can get to cleaning, you have to get the door off, and doing it wrong is a great way to permanently bend the lightweight aluminum frame.
The trick lies in the small adjustment screws you'll find on the top and bottom edges of the door. Grab a Phillips head screwdriver and turn those screws counter-clockwise. You'll see the rollers pull back into the door frame, giving you the slack you need.
Once they're loosened up, just lift the door straight up into the top channel, and then pull the bottom out toward you. It should pop right out. If you find yourself having to pry or force it, stop! That's a sure sign you need to loosen those screws a bit more.
A Deep Clean for a Smooth Glide
Now that the door is safely out of the way, it’s time to really tackle the track. Honestly, this is where the magic happens. A truly clean track is often the only thing standing between you and that smooth, factory-fresh glide.
First, grab your vacuum and use a crevice tool to suck up all the loose stuff. Really get into those corners where dirt and pet hair love to collect. Next, mix up a simple cleaning solution of warm water and a little bit of dish soap.
Pro Tip: Don't just wipe the track—you've got to scrub it. An old toothbrush or a small, stiff-bristled brush is your best friend here. It's the only way to break up the compacted grime that a cloth will just glide over. Get in there and scrub the entire length of both the top and bottom tracks.
After you've scrubbed everything, use a clean, damp rag to wipe away all the soap and loosened dirt. You want to see that metal surface completely free of any film or grit. To finish, dry the track completely. Leaving any moisture behind is just an open invitation for new dirt to stick.
Taking the time to do this deep clean is probably the single most important step in any sliding screen door repair. You will be absolutely amazed at how much gunk comes out and how much of a difference a clean path makes.
Tackling the Rollers and Realigning the Door
If a good cleaning didn't get your door gliding smoothly again, it's time to look at the rollers. Honestly, worn-out or broken rollers are the culprit behind a stubborn sliding screen door more often than not. This is where the real hands-on repair work starts.
With the door already off its track, find a flat surface to work on—a pair of sawhorses or even a lawn with a blanket over it works great. You'll spot the roller assemblies tucked into the corners of the door frame, usually at the bottom and sometimes the top. Most are held in by a single Phillips head screw. Just back that screw out, and you can typically pop the old roller assembly out with a flathead screwdriver.
Getting the New Rollers Installed Right
Once the old roller is out, take it with you to the hardware store. This is, without a doubt, the most crucial step to get right. You absolutely have to match the wheel diameter and the style of the housing, or the new part simply won't work.
After you've secured the matching parts, putting the new ones in is pretty simple:
- Slide the new assembly in: It goes right back into the same slot the old one came out of.
- Fasten it down: Line up the screw hole and secure the new roller. You want it snug, not cranked down so tight you strip the screw.
- Retract the wheel: Before you even think about putting the door back, use the adjustment screw on the new roller to pull the wheel up into the housing. This little pre-adjustment trick makes getting the door back on the track a thousand times easier.
It's no surprise that homeowners are investing in these features. The global market for modern screen solutions reflects this growing demand. In 2024, the Retractable Screen Door market was valued at USD 371.5 million, with the Asia Pacific region contributing USD 85.45 million to that total. It just goes to show how much we value a home that functions smoothly. You can dig into the numbers in the full market research report.
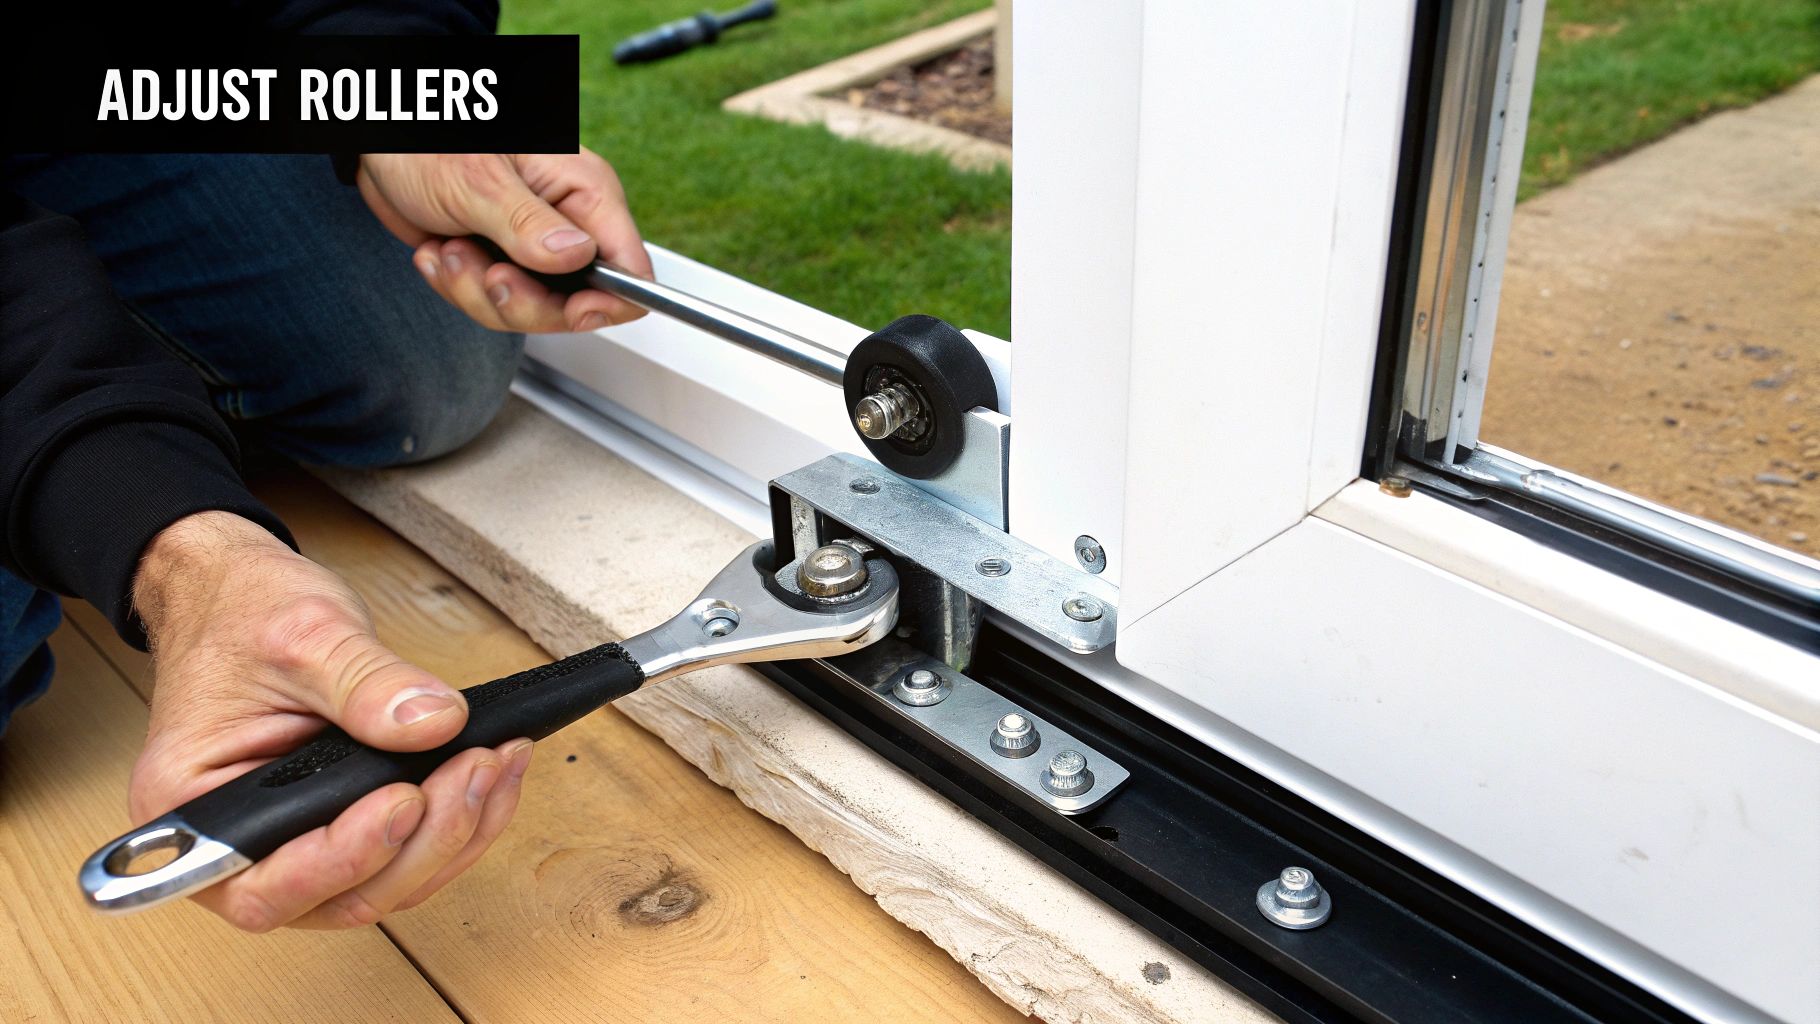
The Art of a Perfect Realignment
Putting the door back is just the reverse of how you took it off. Start by guiding the top of the door into the upper channel. Then, gently swing the bottom into place over the bottom track. Now for the final, and most important, adjustment. This is what makes the difference between a quick fix and a repair that lasts for years.
Grab a carpenter’s level and set it on top of the door. Using your screwdriver, turn the adjustment screws on your new bottom rollers. Turning them clockwise will raise that side of the door. You're aiming to get the door perfectly level while making sure it just barely clears the bottom track.
Pro Tip: A perfectly aligned door closes flush against the frame with a consistent, even gap all around. It shouldn't scrape or catch anywhere, which ensures you get that tight seal to keep the bugs out where they belong.
Even with brand new rollers, a clean, lubricated track is essential for that effortless glide, as this image shows.
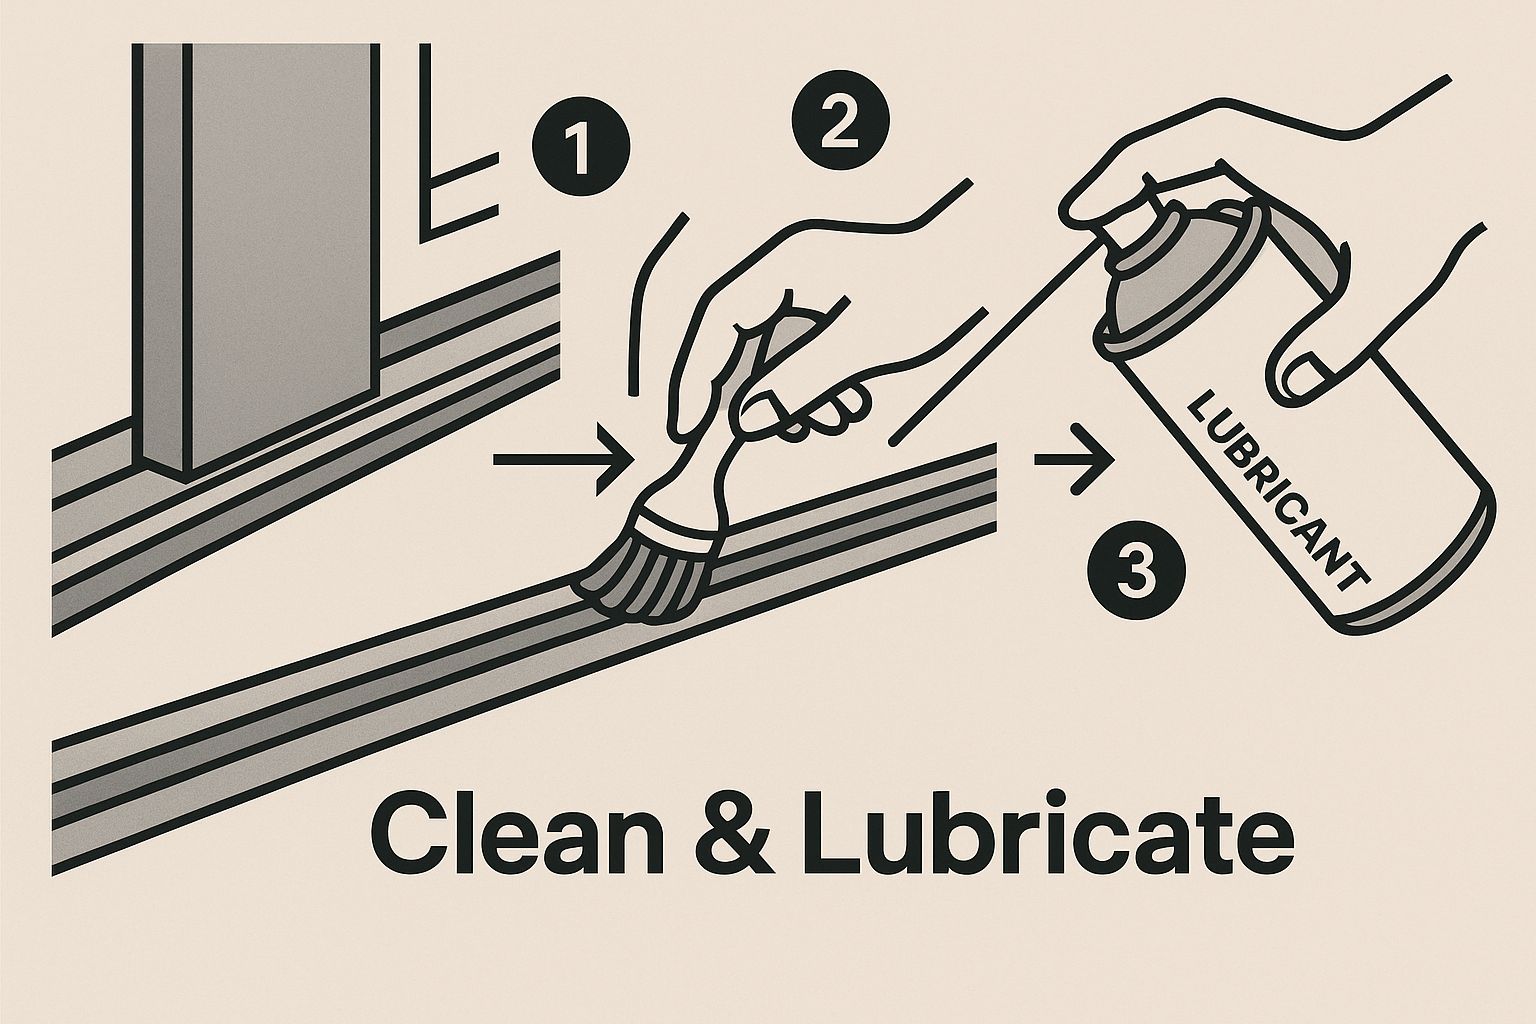
Think of it this way: the rollers are the engine, but the track is the road. Both need to be in great shape for a smooth ride.
How to Repair or Replace the Screen Mesh
A torn screen pretty much defeats the whole purpose of having one, doesn't it? It’s like an open invitation for every fly and mosquito to come on in. The good news is that replacing the mesh is probably the most rewarding part of fixing a screen door—you get an instant, satisfying result with a bug-free, crystal-clear view.
If you're just dealing with a tiny puncture or a small rip, you don't need to go all out and replace the whole thing. A simple screen patch kit is your best friend here. It's usually a small piece of mesh with an adhesive back. Just clean the area around the hole, stick the patch on, and you’re done.
Re-Splining for a Full Screen Replacement
When the damage is more extensive, or the screen is just old, faded, and brittle, it's time for a full replacement. This job is called re-splining, and while it might look a bit daunting, it's totally doable once you get the hang of it. Start by laying your door frame on a flat work surface like a garage floor or a pair of sawhorses.
Your first move is to get that old spline out. The spline is the rubber cord tucked into a channel that holds the screen material in place. Grab a small flathead screwdriver or an awl, dig into a corner to lift the end of the spline, and then just pull the entire thing out.
Once the old spline and mesh are gone, roll your new screen material out over the frame. Make sure you have at least an inch of overhang on all four sides. Don't skimp here—that extra material is your safety net for getting the tension just right.
Pro Tip: The secret to a perfectly tight, professional-looking screen is to work in opposites. Secure the top first, then pull the screen taut (but not so tight you warp the frame!) and do the bottom. After that, do one side, then the other, always keeping that gentle, even tension.
For this job, a spline roller is an absolute must-have. Use the rounded (convex) wheel to create a little channel by pressing the mesh into the groove. Then, flip it to the grooved (concave) wheel to press the spline down deep into the channel, locking the screen in place.
After all four sides are splined in, take a sharp utility knife and carefully trim away the excess screen material right against the spline. The result is a clean, sharp finish that looks brand new.
Doing this yourself is a huge money-saver. A professional replacement might run you from $50 to $200, but re-screening it yourself costs just a fraction of that. Plus, keeping your door in good working order is a smart move, especially as the sliding door market continues to grow, making well-maintained features a valuable part of your home.
Of course. Here is the rewritten section with a more natural, human-expert tone.
Tackling Common Sliding Screen Door Headaches
Even with the best instructions, you can hit a few snags. It’s perfectly normal. After years of sliding back and forth, every door develops its own personality and quirks. Let’s walk through a couple of the most frequent problems people run into when fixing their sliding screen doors.
Getting these last few details right is often what separates a frustrating repair from a door that glides like new for years to come.
"Why Does My Door Keep Derailing?"
Ah, the classic. A door that constantly pops off its track is incredibly annoying, and it's almost always one of two culprits: worn-out rollers or a simple alignment issue.
First, take a good look at the rollers themselves. If they're cracked, flattened, or just plain old and crusty, there’s your problem. They simply can’t grip the track anymore. But if the rollers look fine, the door is probably just sitting too low. You’ll need to find the adjustment screws on the top or bottom of the door frame and turn them just enough to lift the door so the wheels sit snugly in their tracks. It’s often a surprisingly small adjustment that makes all the difference.
Expert Tip: A door that falls off isn't just a hassle; it can be a hazard, especially with kids or pets around. Taking a minute to adjust the roller height is the quickest way to make the door stable and secure again.
"What’s the Best Screen Material to Use?"
For the vast majority of homes, standard fiberglass mesh is the go-to. It hits that sweet spot of good visibility, solid durability, and a reasonable price. But sometimes, your situation calls for something a bit more specialized.
- Pet-Resistant Screen: If you have a dog that scratches at the door or a cat that likes to climb, this stuff is a lifesaver. It’s much thicker and more resilient, designed to stand up to claws and occasional bumps without tearing.
- Aluminum Screen: For a super crisp, clear view, aluminum is a great choice. The one thing to watch out for is that it can dent or get a permanent crease if you mishandle it during installation, so you just have to be a little more careful.
Choosing the right material from the start means you won't be doing this job again anytime soon.
If you decide you'd rather hand this project off to a pro, whether it's for a full rescreening or a tricky repair, Sparkle Tech Screen Service offers quick quotes and same-week service. Find out more about our screen services.
Article created using Outrank


