


That sticky, grinding patio door isn't just an annoyance—it's a warning sign. I've seen it countless times: homeowners put off what seems like a minor hassle, only to face a much bigger, more expensive problem down the road.
I remember one client who ignored their door’s stubborn protest for a whole summer, figuring it was just getting old. That "old" door was actually just suffering from a track packed with dirt. Eventually, the gunk derailed the rollers, bent the aluminum track, and turned a 20-minute fix into a costly replacement job.
Why This Is More Than Just a Nuisance
Keeping your patio door in good shape is about more than a smooth glide. It’s a crucial part of your home's security and energy efficiency. A door that doesn't seal properly or lock securely is a weak link, plain and simple. It lets in drafts and offers an easy opportunity for would-be intruders.
Proactive care is the difference between a door that lasts a decade and one that lasts a lifetime. Small, consistent efforts prevent the kind of cumulative damage that leads to expensive, premature replacement.
The payoff for a little bit of regular attention is huge.
- Better Security: A well-maintained door locks like it's supposed to. The latch engages firmly, and the door sits squarely in its frame, preventing it from being jiggled or lifted out.
- Lower Energy Bills: When the tracks are clean and the weatherstripping is intact, you get a tight seal. That seal stops air leaks, which means your heating and cooling systems don't have to work so hard.
- A Longer-Lasting Door: This is a big one. Simple cleaning and lubrication can extend your door's lifespan by up to 30%. In fact, dirt and debris clogging the track are responsible for over 40% of all sliding door problems. You can dig deeper into patio door market trends on Allied Market Research.
A few minutes of work each season can turn a potential headache into a feature of your home you can rely on. Making sure these maintenance steps are easy to follow is key, which is why creating effective step-by-step instructions with pictures is so helpful for any DIY project.
To make it even easier, here's a quick rundown of what to do and when.
Seasonal Maintenance at a Glance
This table breaks down the most important tasks to keep your sliding door in top shape throughout the year. Think of it as a simple checklist to prevent bigger issues.
| Maintenance Task | Recommended Frequency | Key Benefit |
|---|---|---|
| Track Cleaning | Monthly or as needed | Prevents debris buildup that causes jamming and roller damage. |
| Roller Lubrication | Twice a year (Spring/Fall) | Ensures a smooth, quiet glide and reduces wear on moving parts. |
| Weatherstripping Check | Annually (before winter) | Stops drafts, improves energy efficiency, and keeps moisture out. |
| Lock & Latch Adjustment | Annually or if loose | Guarantees the door locks securely, enhancing home safety. |
Sticking to a simple schedule like this is the single best thing you can do to avoid frustration and unexpected repair bills.
Gathering Your Essential Toolkit
Before you even think about touching that door, let's get our tools in order. Trust me, having everything you need within arm's reach turns a potentially frustrating job into a smooth, satisfying project. There’s nothing worse than getting halfway through, covered in grime, only to realize you need to hunt down a screwdriver or a specific brush.
Think of it as setting up your workshop. A little preparation now saves a ton of headaches later. If you want to get really organized, checking out some innovative tool storage solutions can be a game-changer for keeping all your DIY gear in one tidy spot.
Choosing the Right Supplies
You don't need a professional-grade toolbox for this, just a few key items that will do the job right.
- Vacuum with a Crevice Tool: This is your heavy lifter for sucking up all the loose dirt, dust bunnies, and pet hair that inevitably collects in the tracks.
- Stiff-Bristled Brush: An old toothbrush is perfect for this. It’s the best way to get into those tight corners and scrub out the gunk the vacuum misses.
- Microfiber Cloths: Have a couple on hand. They are great for wiping everything down without leaving behind lint or streaks.
- Plastic Putty Knife: I emphasize plastic because a metal one can easily scratch your door frame. This is your secret weapon for scraping out that really stubborn, caked-on grime.
Now for the most crucial part: the lubricant. Please, do yourself a favor and get a silicone-based spray lubricant. Many people reach for WD-40, but that's a big mistake here. Oil-based sprays are sticky and will attract even more dust and dirt, eventually creating a gunky mess that makes the problem worse.
With your door gliding like new, take a moment to inspect the screen. If you spot any rips or weak spots, it might be time for an upgrade. Knowing when you need a https://sparkletechscreenservice.com/screen-replacement-for-patio-door/ is the final step to getting your entire patio entrance in perfect working order.
Deep Cleaning Your Door Tracks and Frame
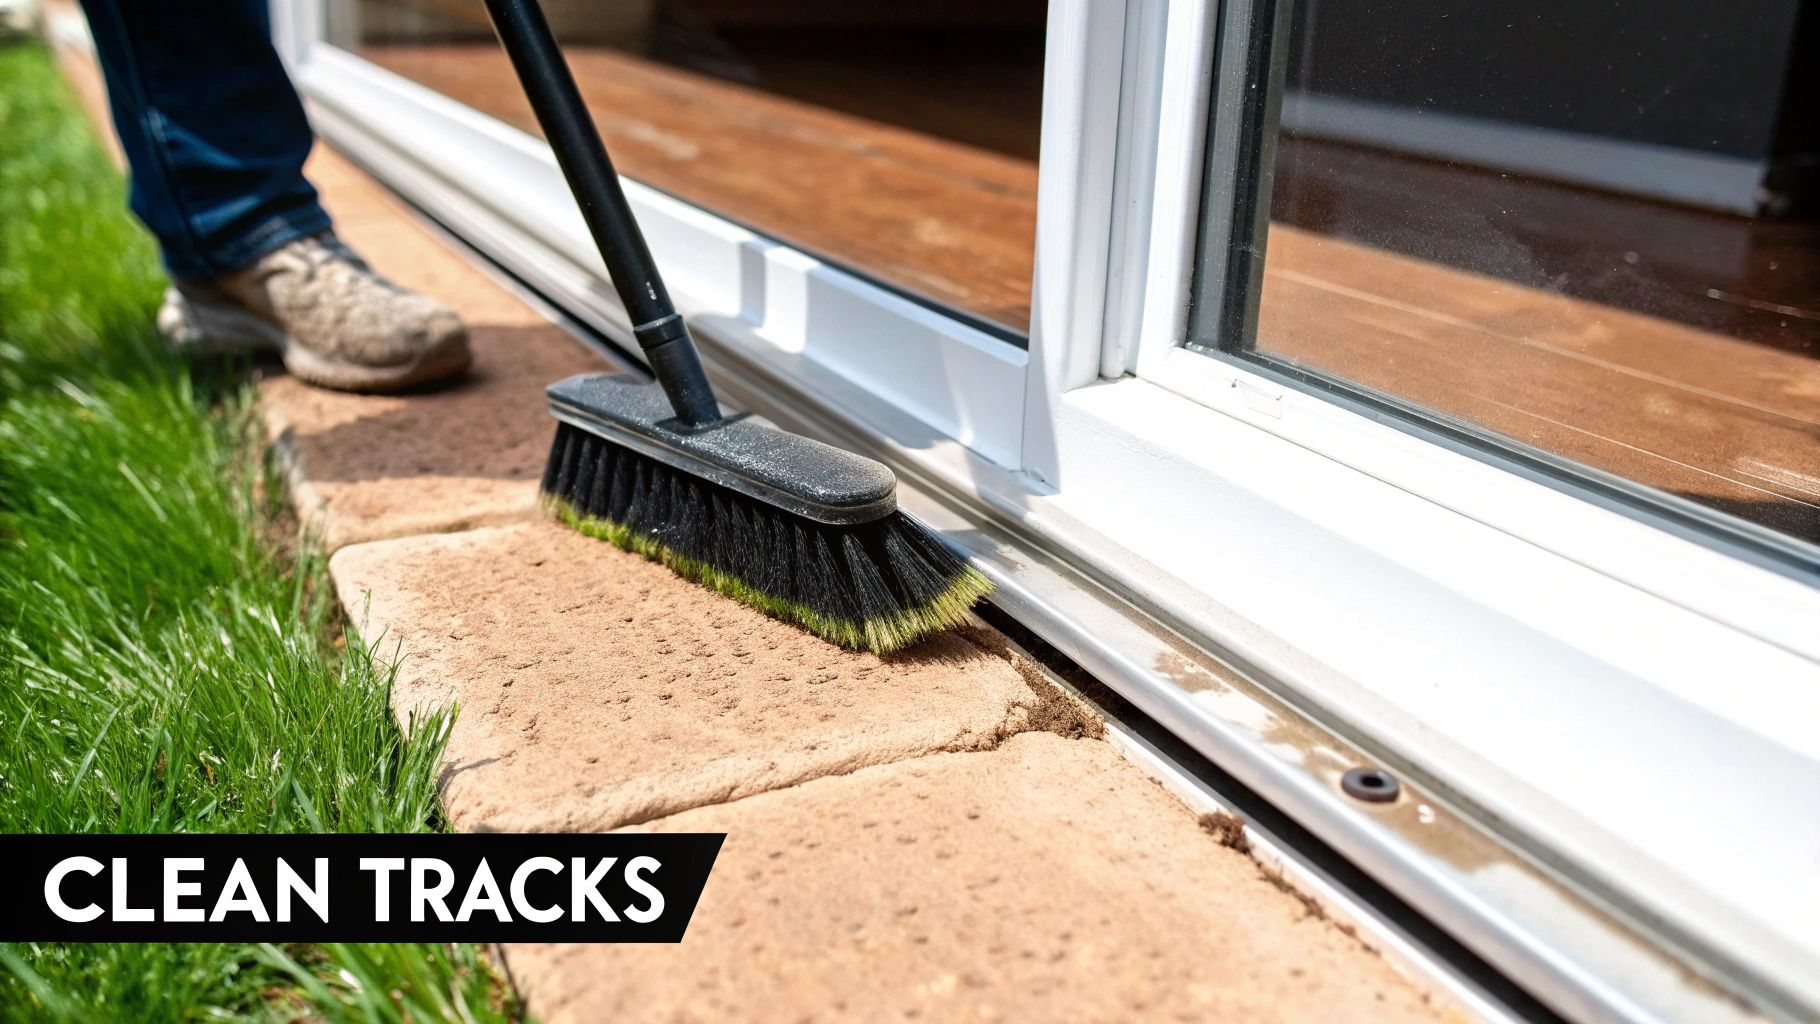
Alright, this is where a little elbow grease makes a huge difference. Honestly, it’s the most satisfying part of getting a sliding door back in shape. A truly clean track is the secret to a door that glides like it's brand new. Think of it as clearing a path—once the junk is gone, everything moves without a fight.
Let's start by getting rid of the easy stuff. Grab your vacuum, pop on that narrow crevice tool, and go to town on both the inside and outside tracks. You're aiming to suck up all that loose dirt, dust, and pet hair that's been collecting. This first pass clears the way for the real deep clean.
Getting Rid of the Stubborn Grime
With the loose debris gone, it's time to tackle the gunk that’s been mashed into the corners. This is where an old toothbrush or a similar stiff-bristled brush becomes your best friend. Really get into those tight spots and scrub away. You’re trying to break up all that compacted grime.
After you've loosened everything up, run the vacuum over the tracks one more time. It's amazing how much more dirt you'll pick up. If you still see some caked-on spots, a plastic putty knife is perfect for gently scraping them off without scratching the track's finish.
Now, let's wipe it all down. Mix a little bit of mild soap with some warm water—no need for harsh chemicals that can damage the vinyl or aluminum. Dip a microfiber cloth in, wring it out well, and give the entire track and frame a thorough cleaning.
Don't Forget the Weep Holes and Glass
Here’s a step most people miss: cleaning the weep holes. These are tiny slots on the exterior bottom of the frame that let rainwater drain out. If they get clogged, water can get trapped, leading to leaks and damage.
A simple trick I use is to wrap a clean part of my microfiber cloth around the tip of a screwdriver or putty knife. Gently poke it into the weep holes to push out any blockages. It takes seconds but can save you from major water-related headaches.
Finally, let's get that glass sparkling. Clean glass isn't just for looks; it helps you spot any problems with the seals or weatherstripping.
For a perfect, streak-free finish, I always recommend this simple method:
- Mix a simple cleaner. A 50/50 mix of white vinegar and water in a spray bottle is all you need.
- Use a squeegee. Start at the top and pull it down in slightly overlapping strokes. This is how the pros do it.
- Wipe the edges. Use a separate, dry microfiber cloth to catch any drips and clean up the edges.
Getting glass perfectly clean is a skill. If you want to learn more, our guide to professional window cleaning has some great tips. With everything completely clean, you're now ready to move on to lubrication and adjustments, which will truly complete the job.
How to Properly Lubricate for an Effortless Glide
Now that your tracks are sparkling clean, it’s time for the most rewarding part: lubrication. This is the step that brings back that brand-new, whisper-quiet glide. I've seen countless homeowners grab the wrong can for this job, creating a sticky mess that actually attracts more dirt and makes the problem worse down the line.
The absolute key here is choosing the right product. You want a silicone-based spray, not an oil-based one like the classic WD-40. Why? Silicone spray goes on, does its job, and dries without leaving a greasy film. That means it repels dust and grime instead of trapping it, keeping your door gliding smoothly for much longer.
Applying the Lubricant Correctly
Less is more when it comes to applying lubricant. Your goal is a light, even coat, not a soaking.
Hold the can about eight to ten inches from the track and spray a thin, consistent layer right into the channel where the rollers travel. Don't forget to hit both the top and bottom tracks to get everything covered.
After you've sprayed, work the door back and forth several times. This is a crucial step—it distributes the lubricant evenly along the track and gets it deep into the roller mechanisms. You'll likely feel an immediate improvement as that grinding friction disappears.
Here's a pro tip: After you're done, grab a clean microfiber cloth and give the tracks and surrounding frame a quick wipe. This catches any overspray and prevents drips, leaving a clean, non-greasy finish that won't stain your floors or become a dirt magnet.
What to Do If the Door Is Still Stubborn
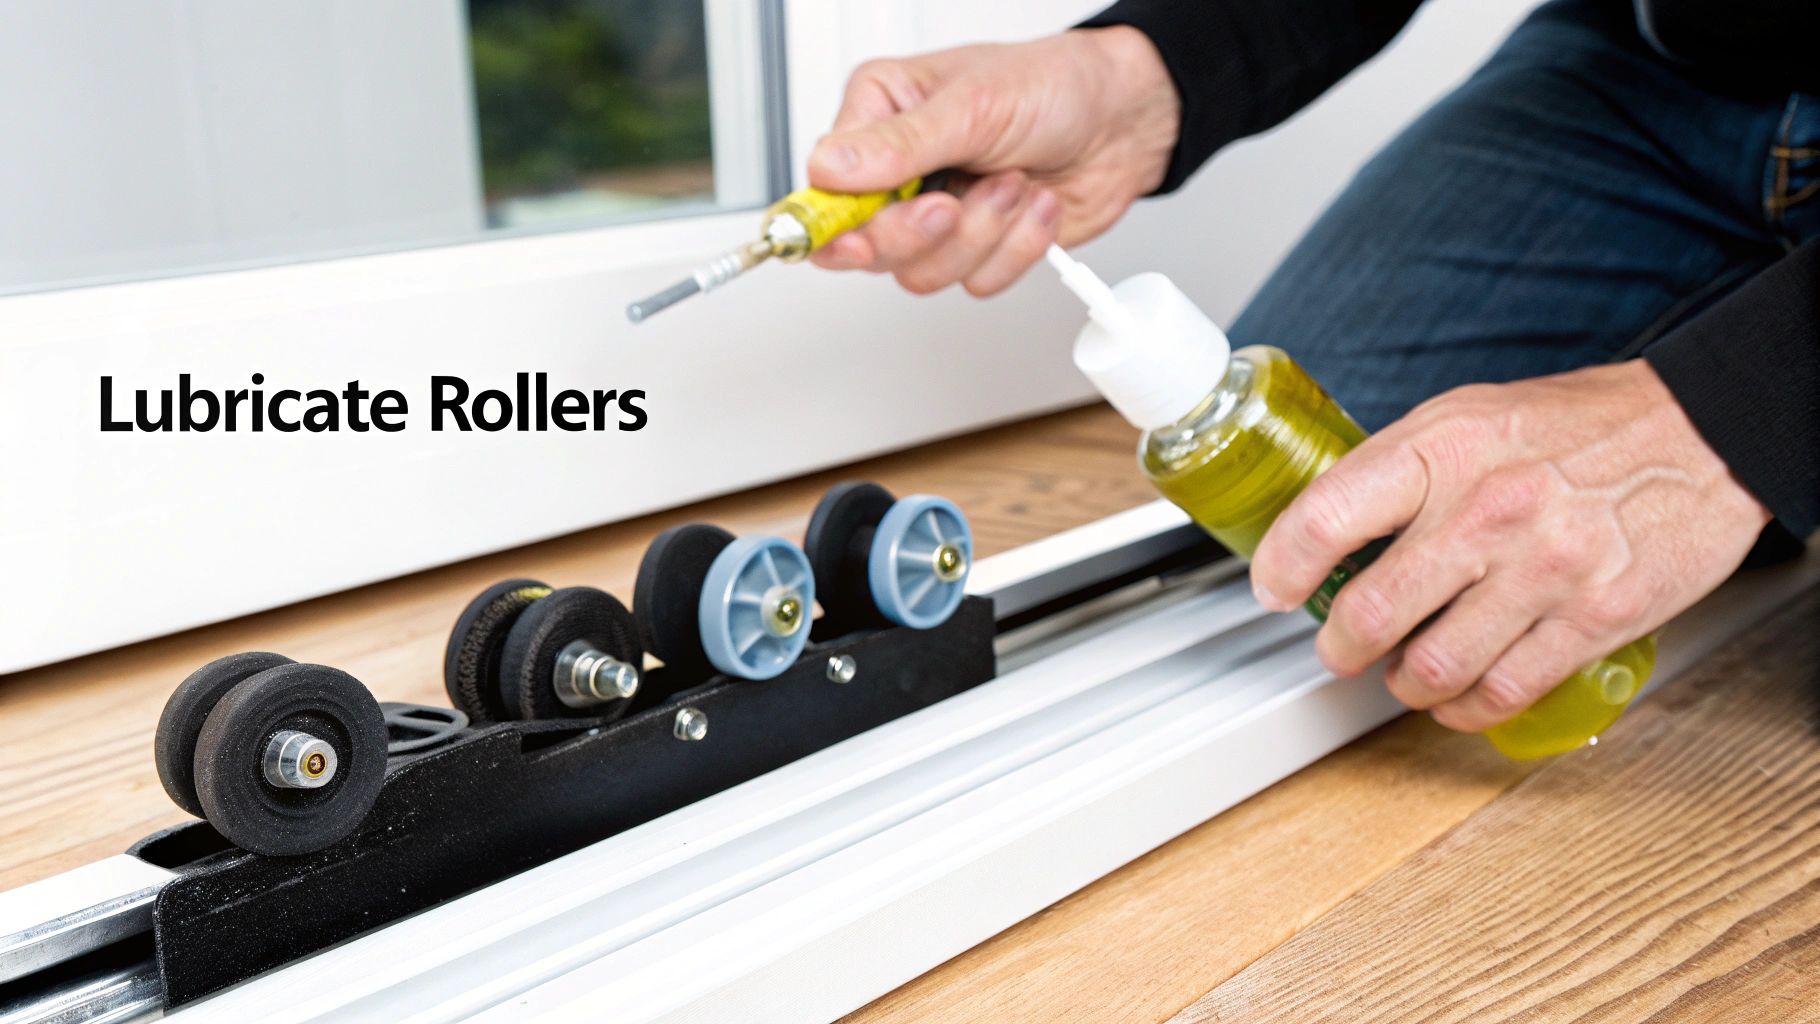
So, you've cleaned and lubricated the tracks, but the door still feels heavy or makes a scraping sound. This usually points to the roller assemblies themselves. These are the little wheels hidden inside the bottom of the door panel, and they often need a direct hit of lubricant.
Getting to them means carefully lifting the door off its track, which is almost always a two-person job for safety. Once the door is off and resting securely, you can spray the silicone lubricant directly onto the roller wheels and their axles.
This direct approach, much like the process for replacing weatherstripping, often solves the most persistent issues.
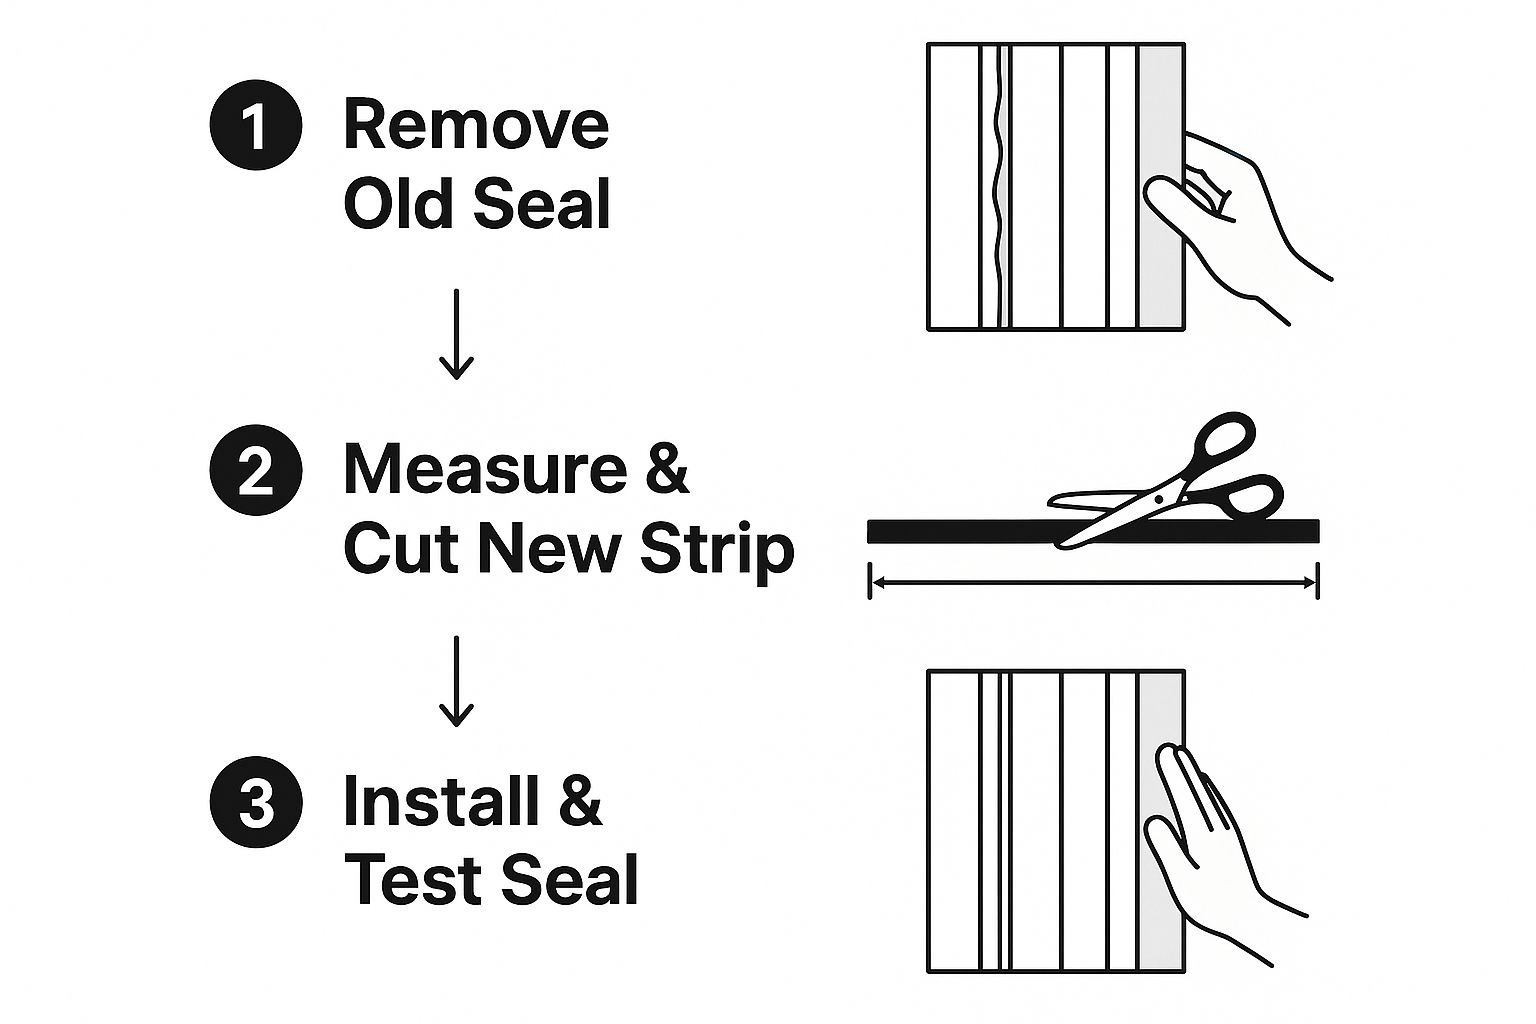
Just as the infographic shows a systematic process for creating a perfect seal, taking the time to lubricate these hidden components is often the secret to restoring a heavy, old patio door. It's amazing what a difference it can make—it can truly feel feather-light again.
Inspecting and Adjusting Your Door Rollers
Now that you've cleaned and lubricated the track, it's time for the real magic: fine-tuning the rollers. This is the mechanical heart of your sliding door. When a door is out of alignment, it doesn't just feel heavy and clunky—it can scrape the track, make the lock impossible to engage, and eventually lead to much bigger, more expensive problems.
Think of it like getting a wheel alignment on your car. You can have brand-new tires, but if the alignment is off, you'll get uneven wear and a rough ride. It's the exact same principle here. A few simple adjustments to the rollers can completely change how your door operates, making sure it sits perfectly square in the frame and glides like it's brand new.
Finding and Using the Adjustment Screws
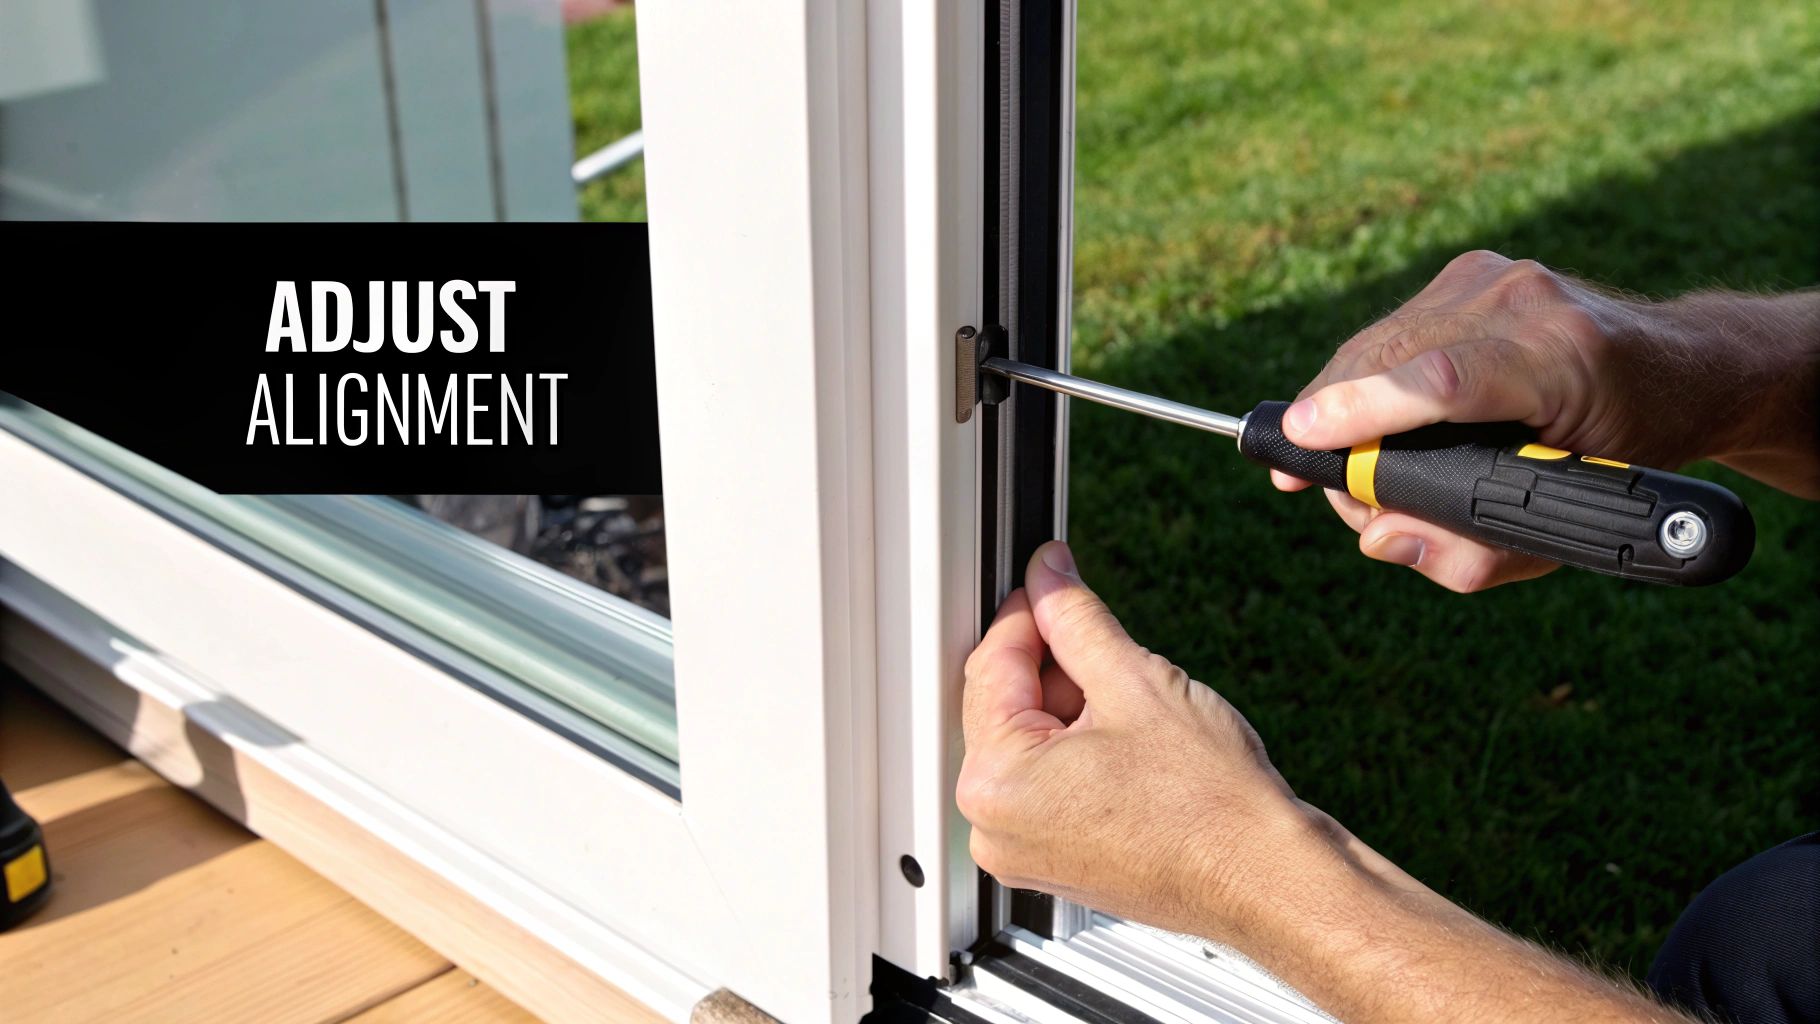
On most sliding patio doors, the adjustment screws are hiding in plain sight. Look along the bottom edge of the door panel, and you’ll likely see small plastic plugs or covers. Pop these off with a flathead screwdriver, and you'll find the screws that control the roller height.
These screws are your key to a level door. Turning them clockwise will typically raise that side of the door, while a counter-clockwise turn lowers it. The mission is simple: get the door perfectly level so it doesn't drag on the track or scrape the top of the frame.
Expert Tip: Before you touch a single screw, grab a level. Place it on the bottom of the door panel to see which side is high and which is low. This takes all the guesswork out of the process and stops you from just making things worse. A level door is a happy door.
The key here is patience. Make small, incremental adjustments—I'm talking a quarter-turn at a time—and then slide the door back and forth to test it. You'd be surprised how much of a difference a tiny tweak can make. You’re looking for a smooth glide and a consistent, even gap between the door and the frame when it's closed.
A Quick Inspection Checklist
While you’re down there with your screwdriver, it's the perfect opportunity to give everything a quick once-over. Spotting small issues now can save you a world of hurt down the road.
- Roller Condition: Get a good look at the rollers themselves. Are they cracked, worn flat on one side, or wobbly on their axles? Worn-out rollers are one of the most common reasons a door becomes a nightmare to open. If they look shot, it’s time for a replacement.
- Weatherstripping Seal: Close the door completely and check the seal. Can you see any daylight peeking through? Run your hand along the edges to feel for drafts. Gaps are an open invitation for drafts, dust, and pests, not to mention a drain on your energy bill.
- Lock Alignment: Try locking the door. Does the latch slide smoothly into the strike plate on the frame? If you have to jiggle, lift, or slam the door to get it to lock, your alignment is definitely off. This isn't just an annoyance; it's a major security flaw.
If you find that the rollers are beyond a simple adjustment and are clearly damaged, it might be time to call in some help. Exploring professional patio door slider repair services is your best bet to get things working right again.
Troubleshooting Common Sliding Door Problems
To make things even clearer, here's a quick guide to connecting the problem you're experiencing with the likely cause and fix.
| Problem | Likely Cause | DIY Solution |
|---|---|---|
| Door is hard to slide | Dirty track or worn-out rollers | Thoroughly clean the track and lubricate it. If that doesn't work, inspect rollers for wear and consider replacement. |
| Door scrapes the track | Door is not level or rollers are damaged | Adjust the roller height screws to level the door. Check for and replace any broken or flattened rollers. |
| Lock won't engage easily | Door is misaligned in the frame | Use the adjustment screws to raise or lower the door until the latch aligns perfectly with the strike plate. |
| There's a draft | Worn or damaged weatherstripping | Inspect all weatherstripping around the door and frame. Replace any sections that are cracked, compressed, or missing. |
This table should help you quickly diagnose the issue and get straight to the solution. Most common sliding door annoyances can be fixed with these simple maintenance steps.
With home renovations on the rise, keeping these features in top shape is more important than ever. The global patio doors market was valued at around $38 billion in 2022 and is projected to hit $59.3 billion by 2032. Proper sliding patio door maintenance is a smart way to protect that investment and avoid costly replacements down the line. You can dive deeper into these trends in the full sliding door market report.
Frequently Asked Questions
https://www.youtube.com/embed/GMY3YygYUus
Even with the best instructions, sometimes you run into a problem that leaves you stumped. Let's tackle some of the most common questions that pop up during patio door maintenance.
My Door Still Won't Budge. What Now?
So you've cleaned the track, sprayed the lubricant, and fiddled with the adjustment screws, but the door still feels like you're trying to move a boulder. If that’s the case, the problem is almost certainly the rollers themselves.
After years of use, those little wheels wear out. They can develop flat spots, crack, or their bearings can just seize up completely. When that happens, you’re not rolling the door anymore—you’re just dragging it.
Replacing the rollers means taking the door completely off its track, which is a bit of a bigger job. It's definitely doable with two people and some patience, but this is often the point where calling in a professional is the smarter, safer bet. A pro can swap them out quickly and get the door re-hung and perfectly aligned.
Whatever you do, don't force it. Trying to muscle a stuck door can wreck the rollers beyond repair, bend the track, or even put enough stress on the frame to crack the glass. If the basic fixes don't work, it's time to investigate the wheels.
Can I Just Use Whatever Lubricant I Have in the Garage?
This is a classic mistake, and it can make things so much worse. It’s really tempting to reach for a can of WD-40 or some other household oil, but please don't. Petroleum-based products are sticky. They attract every bit of dust, dirt, and pet hair, eventually turning into a thick, gummy sludge that grinds your door to a halt.
You absolutely want a silicone-based spray lubricant. The key difference is that silicone spray dries completely, leaving behind a slick, slippery surface that doesn't attract gunk. It’s what the pros use because it works, lasts a long time, and won't create a mess you'll have to clean up later.
When Is It Time to Call a Professional?
Knowing when to step back and call for help is crucial. While cleaning and minor adjustments are perfect for a Saturday afternoon project, some issues really need an expert's touch.
It’s time to pick up the phone if you see any of these problems:
- Cracked or Foggy Glass: If you notice moisture or fog between the panes of glass, the seal is broken. This isn't a simple fix and requires a specialist to replace the insulated glass unit.
- A Bent or Damaged Track: If the metal track is warped, dented, or gouged, the door will never slide right. A pro will need to repair or replace it.
- The Door is Too Heavy or Awkward: These doors are heavy and can be incredibly dangerous to handle. If you aren't completely confident you and a helper can safely lift it off the track, don't even try. It's not worth the risk.
It's also worth noting that automated sliding doors are a different beast entirely. Their maintenance often costs 25-35% more due to the motors and sensors involved. New AI-driven diagnostic systems are helping to predict when these doors might fail, which has reportedly cut unexpected breakdowns by up to 30%. You can dive deeper into these advancements in the latest automatic sliding door market research.
Whether your door just needs a quick tune-up or a more serious repair, making sure every part of it—including the screen—is working properly is key. For expert screen repair, rescreening, and slider services, trust the team at Sparkle Tech Screen Service. Get a quick quote and same-week service by visiting https://sparkletechscreenservice.com.


