


Before you even think about pulling that old screen out, let’s talk prep. Getting all your ducks in a row first is the secret sauce to a smooth, headache-free screen replacement. It’s the difference between a pro-looking finish and a frustrating afternoon of running back and forth to the hardware store.
Gathering Your Tools and Materials
Think of this as setting up your mission control. When you have everything you need within arm's reach, the whole process just flows better. This is especially true for a job like this, where the little details really do matter.
Essential Tools for the Job
Good news: you probably already have most of what you need lying around. There are a couple of specialty items you’ll need to pick up, but we're not talking about a major investment. The right gear makes all the difference.
For a deeper dive into the best tools for the job, our guide on essential window screen repair tools is a fantastic resource.
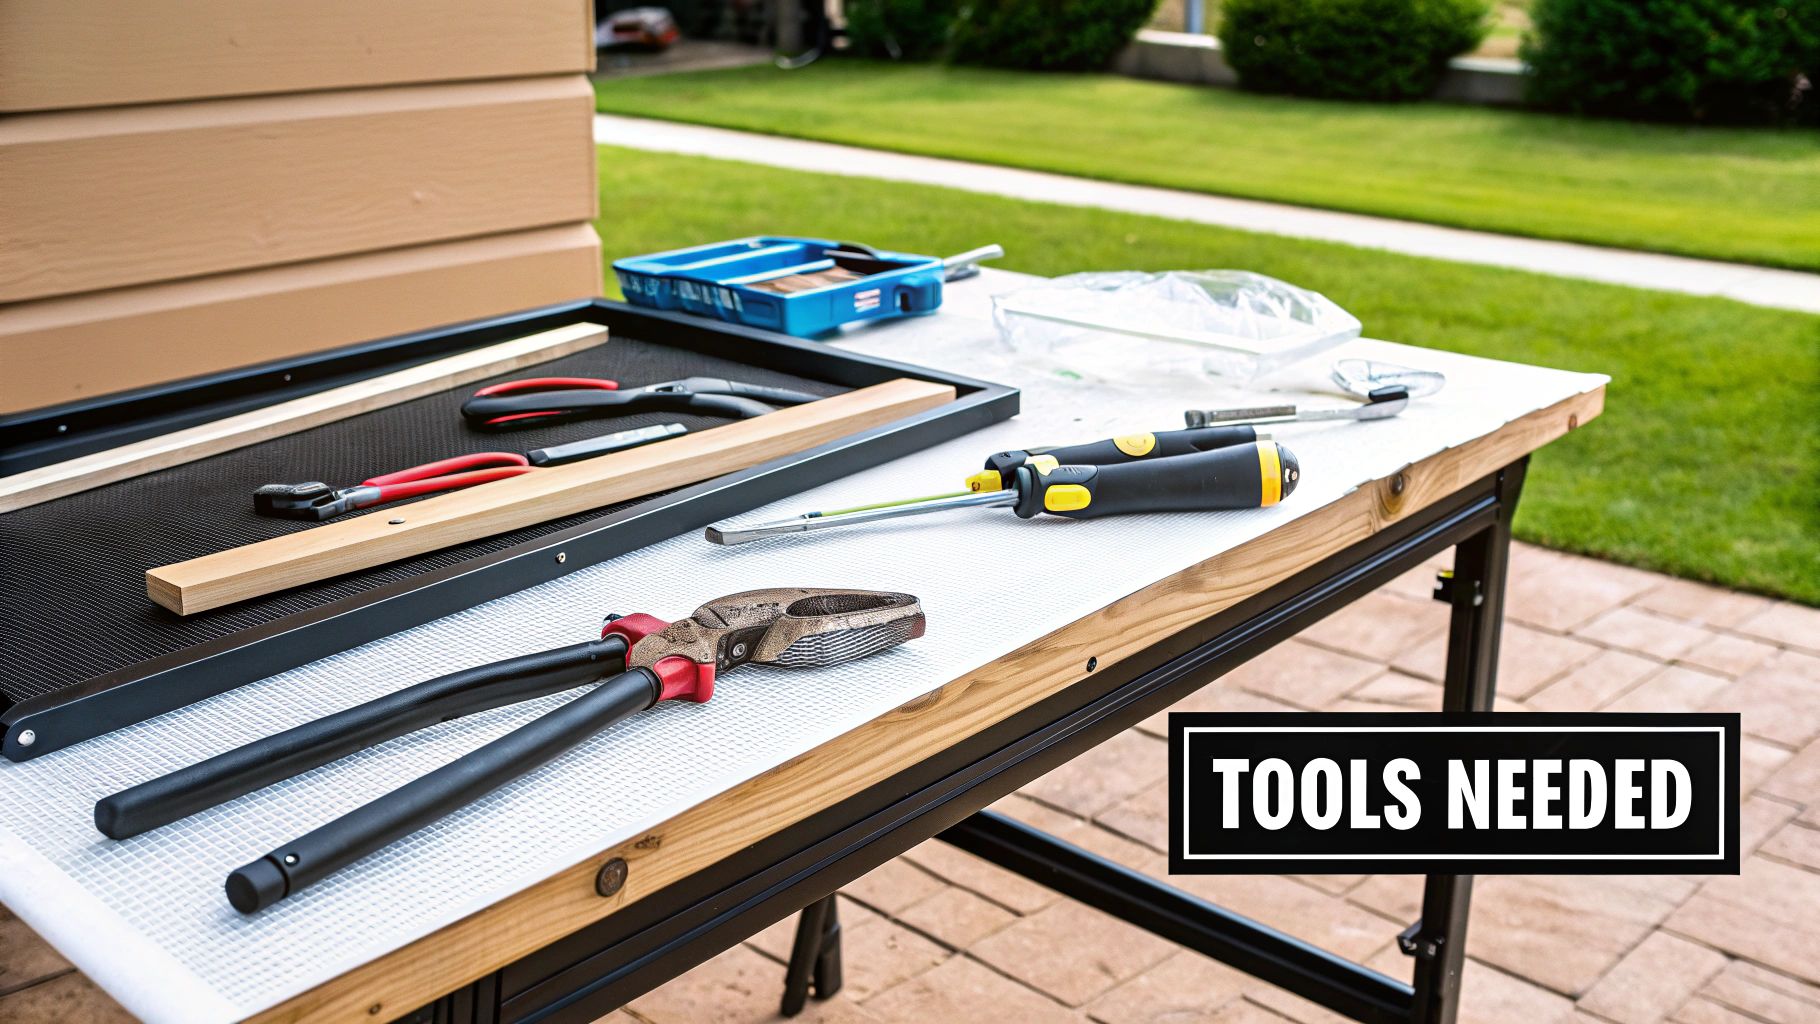
Here's a quick rundown of the must-haves:
- Utility Knife: Don’t even try this with a dull blade. A fresh, sharp knife is absolutely critical for trimming the new screen and spline cleanly without any snags.
- Spline Roller: This little gadget is your best friend for this project. It has two wheels—one to push the spline into the frame's channel and another to seat it securely. It’s a non-negotiable tool.
- Flat-Head Screwdriver or Awl: You'll need something thin and sturdy to dig out the old, sun-baked spline. Be gentle so you don't scratch up the frame.
- Tape Measure: Accuracy is everything. Measure twice, cut once isn't just a saying; it’s the golden rule here.
To make things even clearer, here's a quick reference table of the tools you'll need.
Essential Tools for Patio Screen Replacement
| Tool | Purpose | Pro Tip |
|---|---|---|
| Utility Knife | For trimming excess screen mesh and spline. | Start with a brand-new blade. A dull one will snag and ruin your new screen instantly. |
| Spline Roller | To press the spline into the frame's channel. | Use the convex wheel first, then the concave wheel to set the spline deep into the groove. |
| Flat-Head Screwdriver | To pry out the old, brittle spline. | Gently work a corner loose first. Once you get it started, it's much easier to pull out. |
| Tape Measure | For accurately measuring the screen frame. | Add 2-3 inches to each side of your measurement when buying new screen mesh for wiggle room. |
Having these four tools ready will make your project go ten times smoother.
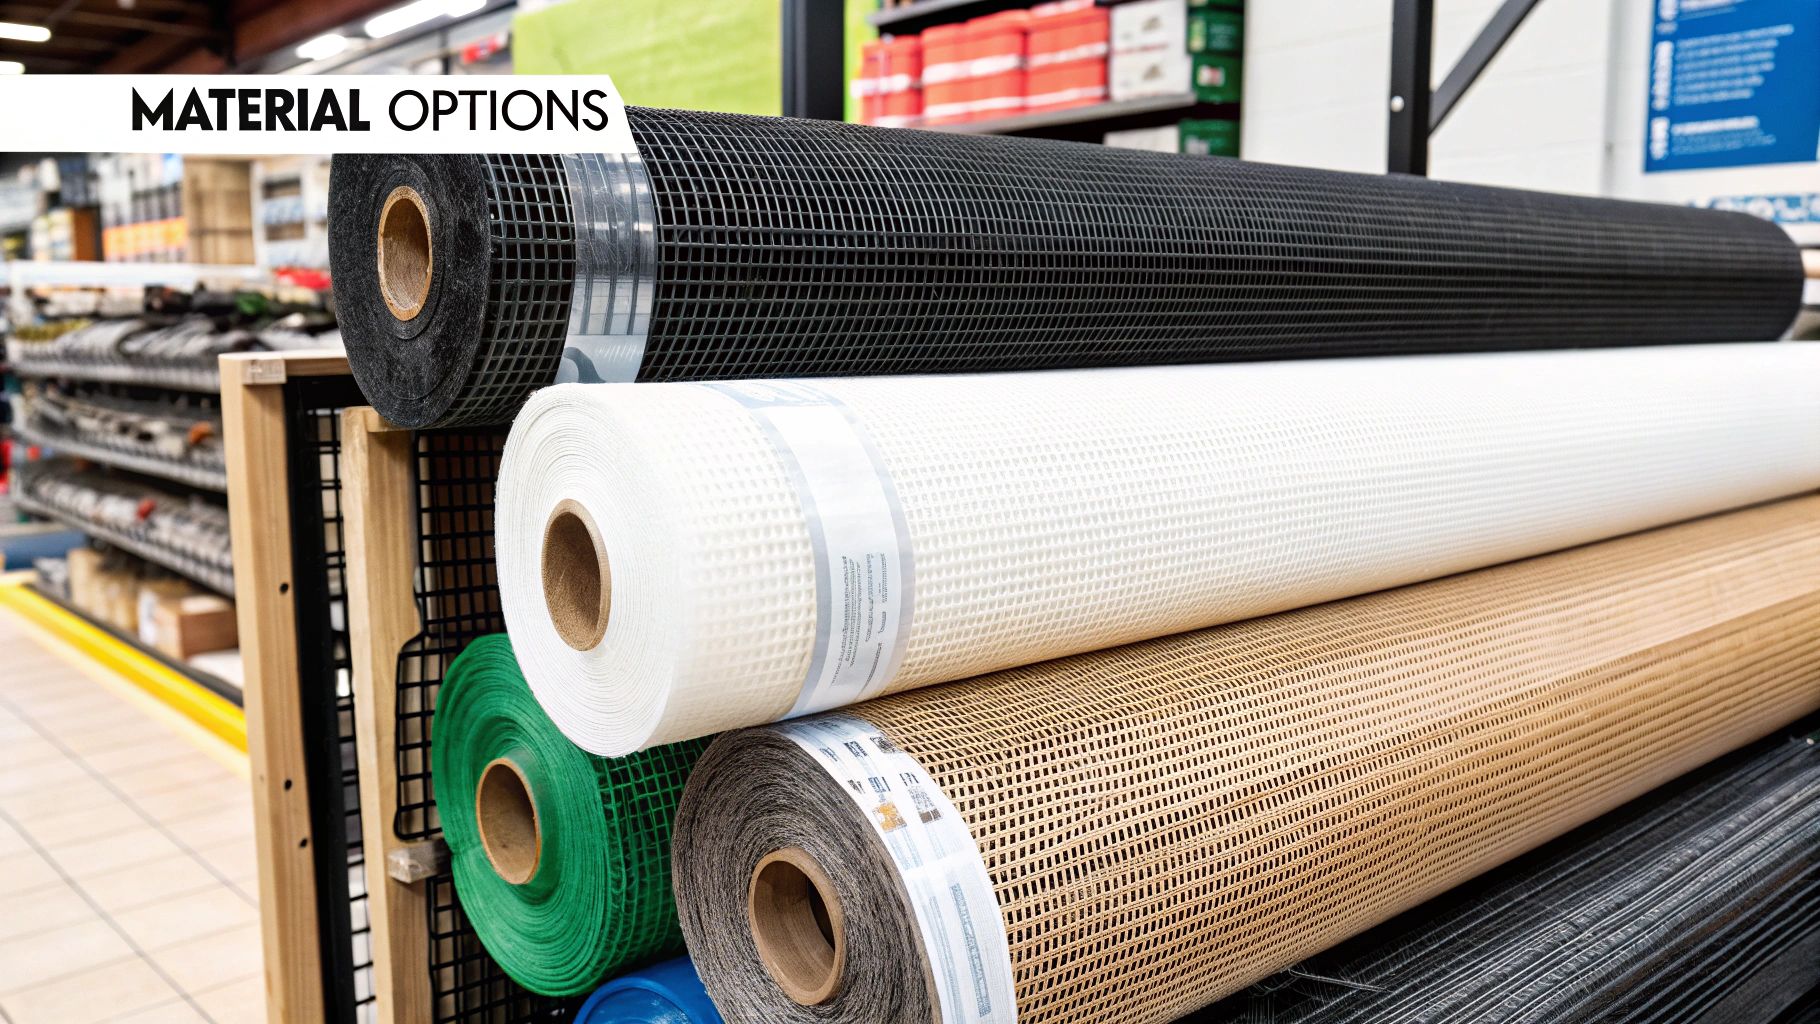
Choosing the Right Materials
Picking the right materials is just as crucial as having the right tools. Your choices here directly impact the durability, function, and even the look of your finished screen door. It's a big deal for homeowners—the global patio doors market was valued at around USD 38 billion in 2022 and is expected to climb to USD 59.3 billion by 2032. That's a lot of people investing in keeping their homes looking good and functioning well.
Pro Tip: Snip off a small piece of your old spline and take it with you when you go shopping. Matching the diameter perfectly is the single best trick for getting a tight, professional-looking fit.
You really only need to make two key material decisions:
1. Screen Mesh: This isn't a one-size-fits-all situation. Standard fiberglass mesh is a great default—it's inexpensive and easy to work with. But if you've got a dog or cat who loves to scratch, you'll be much happier with a tougher, pet-resistant screen. For those who want a crystal-clear view of the backyard, you can even get "invisible" or high-clarity screens.
2. Spline: This is the rubbery cord that locks the screen into the frame. It comes in different diameters, and getting the size right is non-negotiable. If it's too thin, the screen will sag or pop out with the first gust of wind. If it's too thick, you'll fight a losing battle trying to get it into the channel.
Removing the Door and Prepping the Frame
Alright, the first real hands-on part of this project is getting that screen door off its track. It might look a bit daunting, but it's usually just a matter of a few turns of a screwdriver and a little bit of muscle.
The secret lies with the rollers. Most sliding screen doors have wheels at the bottom that run along the track, though a few designs are top-hung. To get the door out, you need to retract those rollers. Look for small access holes on the vertical edges of the door frame, usually near the corners. Pop a Phillips head screwdriver in there and turn the adjustment screws counter-clockwise. This should pull the rollers up into the frame, giving you enough wiggle room to lift the door up and pull the bottom out of the track.
Taking Apart the Old Screen
Now that the door is off, lay it down on a flat, clean surface like a driveway or a large workbench. This next step is pretty satisfying: dismantling the old screen. The key here is to remove the spline, which is that rubber cord tucked into the channel that holds the screen fabric in place.
I usually just grab a small flat-head screwdriver or an awl, dig into a corner to get under the spline, and pry up an end. Once you have enough to grip with your fingers or a pair of pliers, the whole thing often pulls out in one long piece. With the spline gone, the torn screen material just lifts right out. Easy as that.
Getting a feel for how these doors operate can make the whole process smoother. If you want a deeper dive, check out this comprehensive guide on installing sliding doors for more detail on their mechanics.
Don't Skip the Cleaning
This is the part everyone wants to rush, but trust me, it makes all the difference. That channel where the spline was sitting is probably packed with years of gunk—dirt, pollen, spiderwebs, you name it. If you try to install a new screen on top of that mess, the spline won't seat properly, and you'll end up with a loose or wrinkly screen.
Here’s a simple but effective cleaning process:
- Scrub it out: Grab a stiff brush (an old toothbrush is perfect for this) and scrub out all the loose debris from the channel.
- Vacuum it up: Next, use a vacuum with a crevice tool to get every last bit of dust and dirt out of there.
- Wipe it down: Finish by giving the entire frame and channel a quick wipe with a damp cloth and a bit of all-purpose cleaner.
Taking an extra five minutes to get that frame spotless really sets you up for success. It ensures the new spline has a perfect surface to grip, which is the key to getting that tight, professional-looking finish we’re all after.
Getting the Right Cut for Your New Screen
Alright, your frame is prepped and clean, so now it's time for one of the most critical parts of the job: measuring and cutting the new screen. Getting this right is what separates a tight, professional-looking screen from one that sags and looks sloppy.
Here’s a common mistake I see people make: they only measure the inside of the frame's channel. Don't do that. You'll end up with a piece of screen that’s exactly the size of the opening, leaving you with absolutely nothing to work with when you try to install it.
Instead, stretch your tape measure across the frame from the outside edge of one channel to the outside edge of the other. Get this measurement for both the width and the height. Once you have those numbers, add at least two to three inches to each one. This extra bit of material is your best friend—it gives you something to hold onto and pull taut later on.
Laying Out and Cutting the Mesh
With your measurements in hand, you're ready to cut. You'll want a large, flat, and clean surface for this. I usually use a garage floor or a driveway, but a big workbench works great too.
Unroll the new screen mesh and let it relax for a minute, smoothing out any curls or kinks from the packaging.
Now, lay the empty screen frame right on top of the mesh. Eyeball it or use your tape measure to confirm you have that essential two-to-three-inch overhang on all four sides. It doesn't have to be perfect down to the millimeter, but having a consistent amount of extra material all the way around will make your life much easier in a few minutes.
Pro Tip: Your utility knife needs a fresh, sharp blade. A dull one will just snag and stretch fiberglass mesh, or it'll leave nasty burrs on an aluminum screen. Trust me, it’s worth the 30 seconds it takes to snap on a new blade.
Once you're lined up, grab a straightedge and press it down firmly. Make each cut with one long, confident stroke. Try to avoid sawing back and forth with short, choppy motions, as that’s how you get a jagged, messy edge. After cutting all four sides, you’ll have a perfectly sized piece of mesh, ready to be installed.
Knowing a little about your material helps, too. Different types handle differently when you cut them. You can learn more about the pros and cons in our guide to the best window screen material. A little prep here goes a long way in avoiding wasted material or the frustration of cutting a piece just a little too short.
Putting in the New Screen and Spline
Alright, your frame is prepped, and your new screen material is cut and ready to go. This next part is where the magic happens. A bit of patience here goes a long way and is the difference between a professional-looking job and a sloppy one.
Your best friend for this task is the spline roller. Go ahead and lay your new screen mesh over the frame, making sure it’s lying flat and centered with a little overhang on all sides. Pick one of the long sides to start.
Using the convex (the rounded, pizza-cutter-like) wheel of the roller, gently press the screen fabric down into the frame’s channel. This creates a neat little crease and helps hold the screen in place while you work.
The whole process is actually pretty straightforward when you see it broken down.
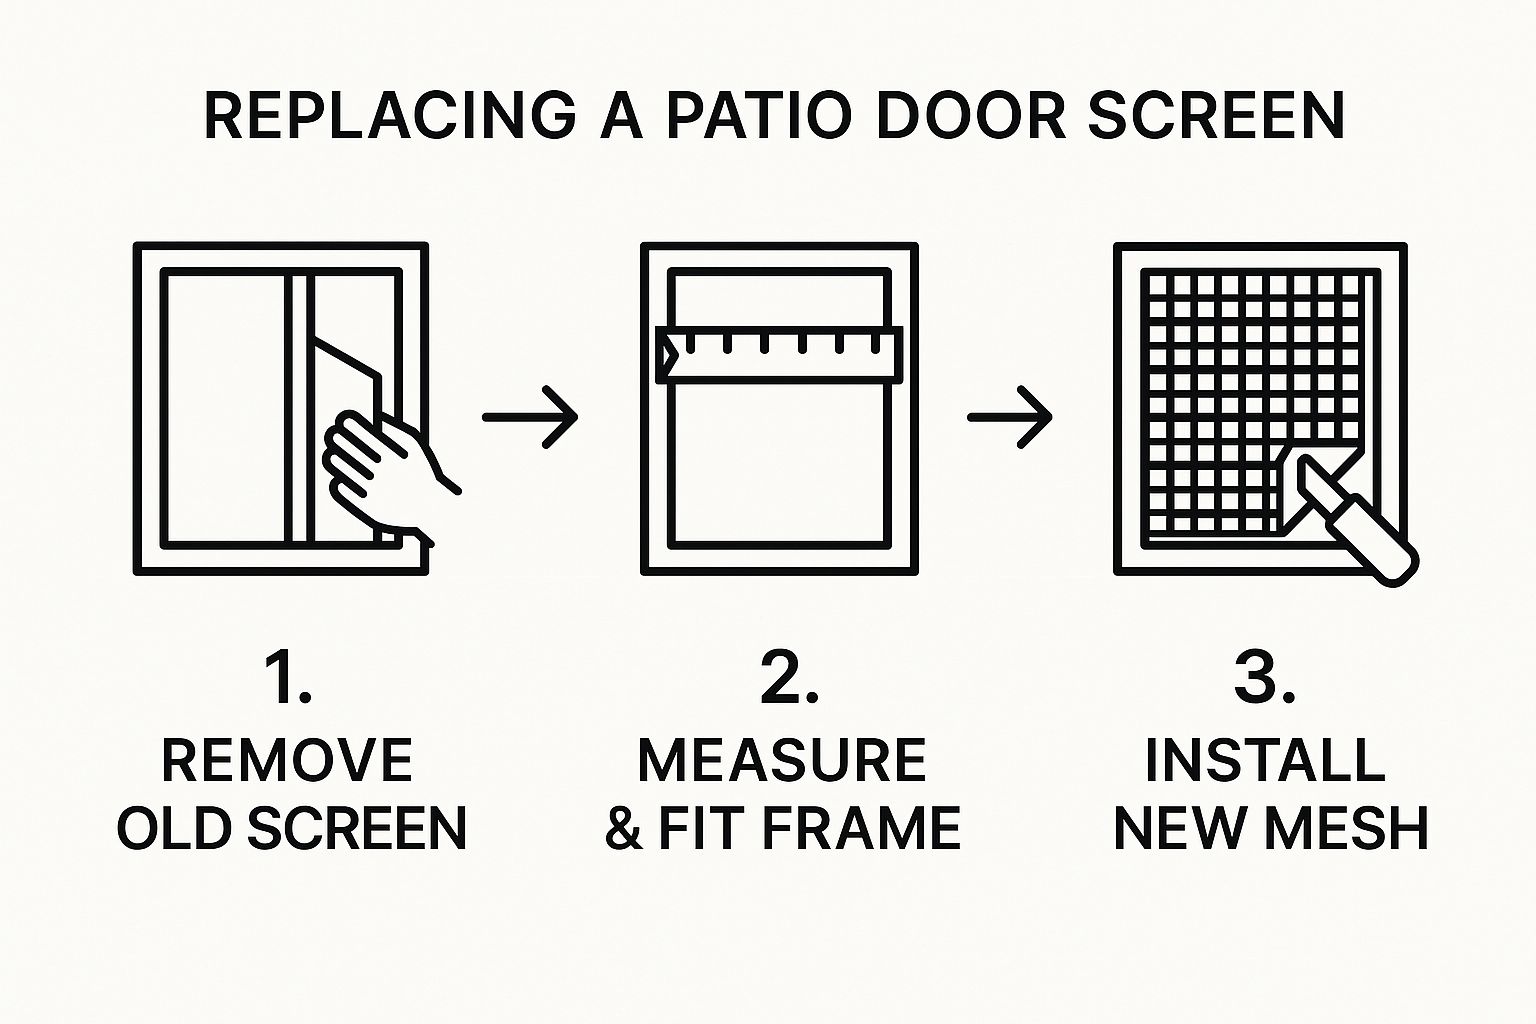
As you can see, it’s a logical flow from taking the old screen out to putting the new one in. Totally doable for a weekend project.
Getting the Spline Just Right
Now, grab your roll of new spline. Start at a corner and switch to the concave (grooved) wheel of your roller. Press the spline firmly into the channel right on top of the screen mesh you just creased. Don’t cut the spline just yet—keep it on the roll.
As you work your way down that first side, use your free hand to keep a gentle but steady pull on the screen fabric. This creates a little bit of tension, which is exactly what you want.
Once the first side is done, jump to the opposite long side. This is the crucial step for getting that tight, sag-free finish. Pull the screen mesh taut—not so tight that you're bending the aluminum frame, but just enough to eliminate all the slack. Repeat the process: crease the screen in with the convex wheel, then roll the spline in with the concave wheel.
Pro Tip: Corners are where most people get tripped up. The spline will want to pop out. Instead of fighting it with the roller, grab a flat-head screwdriver and use it to firmly poke the spline deep into each corner. This seats it securely and keeps it from coming loose later.
Finish up by doing the two shorter sides with the same technique. Always remember to pull the screen taut away from the center before you roll the spline in. This method guarantees you get nice, even tension across the whole screen. If you want a deeper dive into different screening jobs, our guide on https://sparkletechscreenservice.com/how-to-install-screens/ has some great extra details.
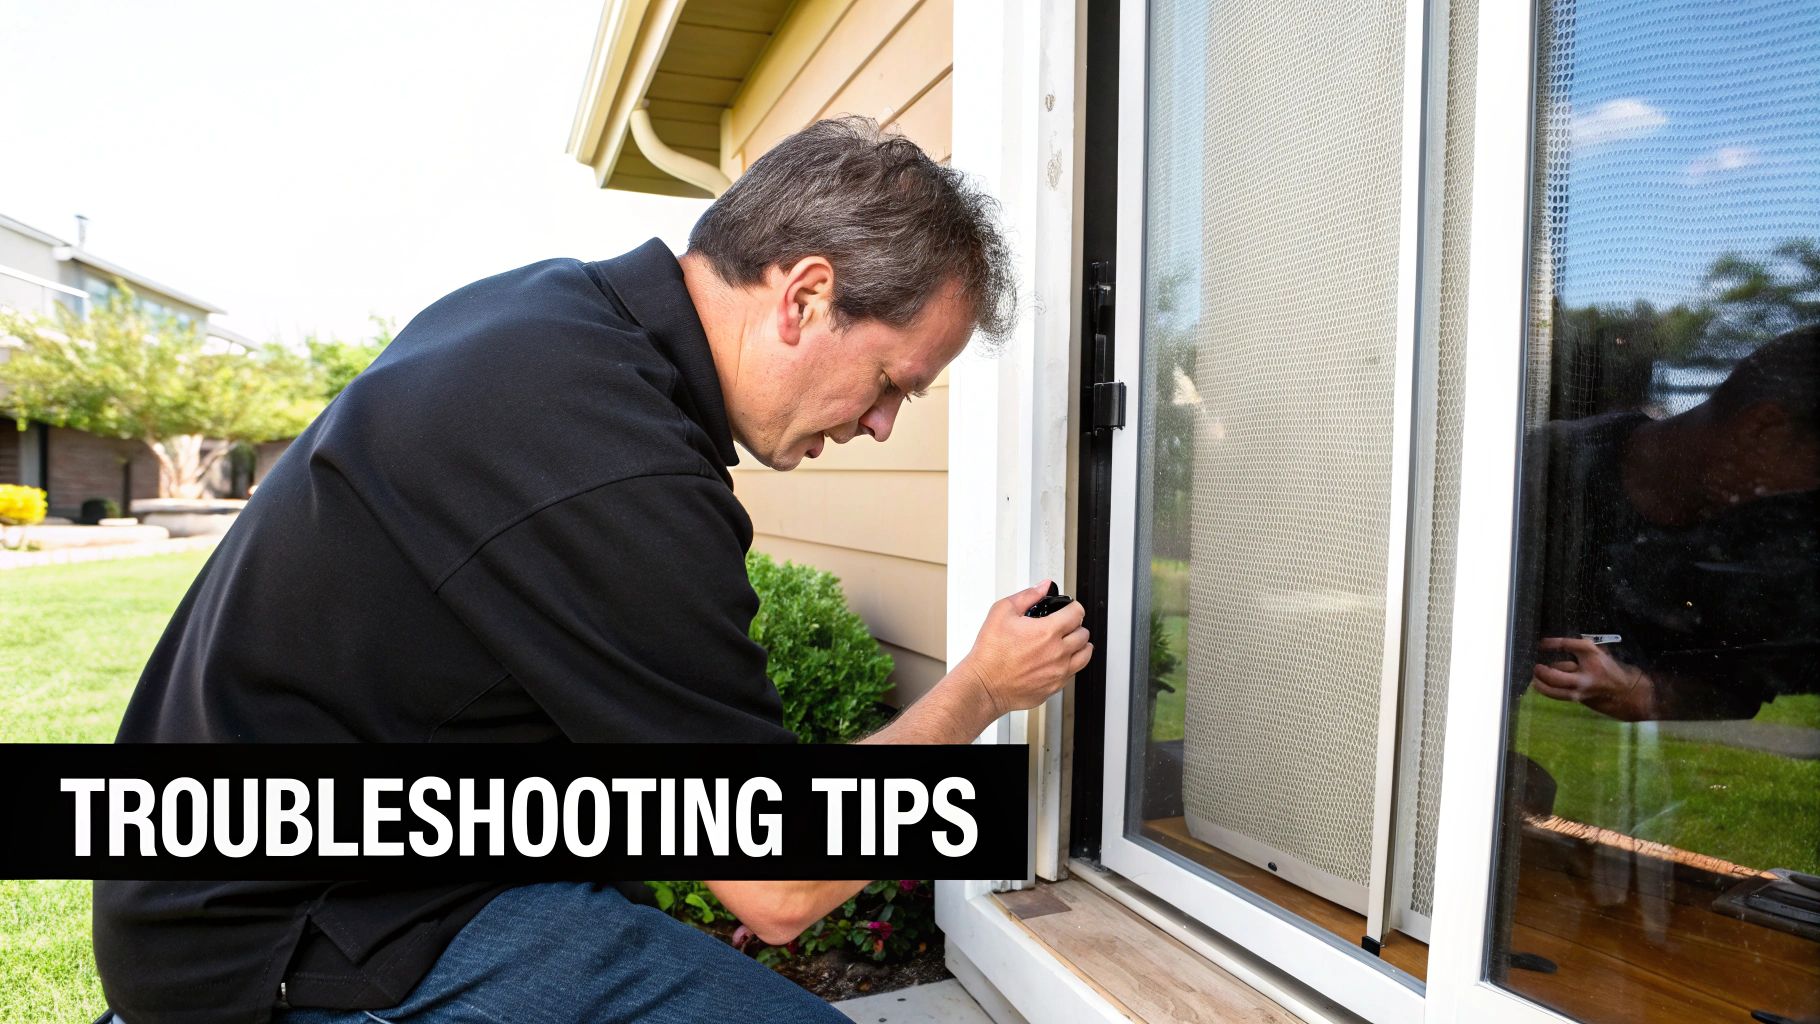
Common Rescreening Mistakes and How to Avoid Them
Even if you're careful, things can go a little sideways. Knowing what to look for helps you fix small mistakes on the fly before they become big headaches. The table below covers the most common issues I see and how to handle them.
| Common Mistake | What It Looks Like | How to Fix or Avoid It |
|---|---|---|
| Wrinkles or Waves | The screen has ripples or looks wavy, especially in the middle. | This is almost always from uneven tension. Back the spline out a few inches, gently pull the screen fabric to smooth the area, and reinstall the spline. Don't be afraid to redo a section. |
| Spline Popping Out | The spline won't stay seated in the channel and keeps lifting up, especially at the corners. | Your spline is probably too thin for the channel. It’s critical to use the same diameter as the original. If it's still popping, use a screwdriver to seat it firmly in the corners. |
| Accidental Tears | A small slice or hole appears in the new mesh near the frame. | This happens when the spline roller slips out of the groove. The metal wheel is sharp enough to cut the mesh. The solution is simple: slow down. Use steady, controlled pressure. |
| Bowed Frame | The long sides of the screen frame are bent inwards like a bow. | You've pulled the screen way too tight. You need to remove the spline from the short sides, let the frame relax, and then reinstall the spline with less tension. |
Getting this right not only feels satisfying but also adds real value to your home. It’s a skill worth having, especially since the market for retractable screen doors was valued at USD 371.5 million in 2024 and is only expected to climb. People want functional, high-quality outdoor living spaces. For more great pointers, check out these DIY tips for installing building hardware.
Getting Your Screen Door Trimmed and Back on Track
You've got the new screen and spline locked in, which means you're in the home stretch. Now it's time for the finishing touches: trimming the excess mesh and getting the door back in its place. This is where a little bit of care really pays off, giving you that clean, professional look.
First things first, let's trim off that overhanging screen material. You'll need your utility knife for this, and trust me, you want a fresh, sharp blade. A dull blade is your enemy here—it will snag and pull the fibers, and you could end up with a frayed mess that ruins all your hard work.
Nailing the Perfect Cut
To get that perfect, clean edge, the trick is all in the angle of your blade. Place the tip of your utility knife inside the spline channel, but—and this is important—angle it away from the new screen. You're essentially running the blade along the outer wall of the channel, not against the spline you just put in.
Why is this angle so critical? It keeps you from accidentally slicing the screen you just so carefully installed. It also protects your door's finish from getting scratched up.
Apply some light, steady pressure and make one continuous, smooth cut down each of the four sides. Let the frame itself be your guide. Avoid any sawing motions; just a single, clean pass is what you're after. Once you're done, the extra material should just fall away, leaving you with a perfectly flush screen.
Pro Tip: Always angle your utility knife blade outward, away from the center of the screen. This uses the frame as a natural guide and is the single best way to avoid accidentally cutting your brand-new screen.
Take a second to stand the door up and admire your work. You should see a nice, tight screen with zero wrinkles or sags. Feels good, right?
Rehanging and Fine-Tuning the Door
With the trimming done, it’s time to put the door back where it belongs. You're basically just doing the removal process in reverse.
Lift the door and guide the top rollers into the upper track first. Then, push up slightly on the door while you coax the bottom rollers back onto the lower track. You should feel it pop securely into place.
Now for the final adjustments. Grab your screwdriver and find those adjustment screws again. This time, you'll be turning them clockwise to lower the rollers and put the right amount of tension on the track.
Here’s how to dial it in for a perfect fit:
- Lower the Rollers: Tweak the screws at the top and bottom until the door feels solid and secure in its track.
- Test the Glide: Slide that door back and forth a few times. You're looking for a smooth, effortless glide—no grinding, sticking, or wobbling. If it feels too tight, back the screws off a tiny bit. If it's loose and wobbly, lower the rollers a little more.
- Check the Latch: Finally, close the door and make sure the latch engages properly with the catch on the frame. If it's not lining up, a few small adjustments to the roller height should do the trick until you hear that satisfying click.
After a few minor tweaks, your screen door should be sliding better than ever. It's a deeply satisfying way to wrap up the project.
Got Questions About Your Patio Door Screen? We've Got Answers.
Even the most detailed guide can't cover every little hiccup you might run into during a DIY project. Getting a quick, clear answer can be the difference between a job well done and a frustrating afternoon. Let's walk through some of the most common questions homeowners have when they tackle a screen replacement.
It’s a project that countless people take on, contributing to a massive global market for windows and doors that was valued at USD 248.48 billion in 2024 and is expected to climb to USD 436.74 billion by 2034. A functional screen is a surprisingly important part of that, affecting everything from your home's comfort to its energy efficiency. You can discover more insights about this growing market and what's driving its growth.
What’s the Best Material for a Patio Door Screen?
The honest answer? It depends entirely on what you need. There isn't one "best" material, but there's definitely a best one for your home.
Let's break down the most popular choices:
- Fiberglass: This is the workhorse of screen materials. It's affordable, flexible, and won't crease or dent if something bumps into it. For a standard, no-fuss replacement, you can't go wrong here.
- Aluminum: If you're looking for something a bit tougher and more rigid, aluminum is a great step up. It's more durable than fiberglass, but keep in mind that it can get dented if it takes a hard hit.
- Pet-Resistant Screen: Have a dog that loves to scratch at the door or a cat that climbs? This heavy-duty polyester mesh is your best friend. It’s built to withstand claws and paws, saving you from constant repairs.
- High-Clarity Screen: For those who want to preserve a beautiful view, these nearly "invisible" screens are fantastic. They're made with super-fine fibers that maximize visibility, so you almost forget they're there.
To make the right call, just think about your budget, your lifestyle (kids and pets are a big factor!), and even your local climate.
How Do I Figure Out What Size Spline to Buy?
This is one of the most critical steps, and getting it right is non-negotiable. If the spline is too small, your screen will be loose and saggy. Too big, and you’ll never get it into the channel.
The absolute easiest and most foolproof way to get the right size is to cut a small piece of the old spline and take it with you to the hardware store. You can physically hold it up to the new rolls and find a perfect match.
If you tossed the old spline already, you can try to measure the channel in the frame, but it's far less accurate. Trust me, matching it to the original is the way to go.
I Put in the New Screen, but It Has Wrinkles. How Do I Fix It?
Don't panic! Wrinkles are super common, and they almost always happen because the tension wasn't quite even when you rolled in the spline. The good news is you can usually fix them without starting from scratch.
Find the wrinkled area. Use a small screwdriver or an awl to carefully pry the spline out of its channel, starting a few inches before the wrinkle and ending a few inches after it. Now, gently pull the screen mesh taut across that section to smooth out the crease. With the screen held tight, use your spline roller to press the spline firmly back into place. Steady, even pressure is the secret here.
Can I Just Patch a Small Tear in My Screen?
For a tiny hole or a very small rip, a screen repair patch can be a decent quick fix. They’re basically heavy-duty stickers designed to cover a minor blemish and buy you some time.
But let's be realistic. For anything bigger than a dime, multiple holes, or if the screen material is just old and brittle, a full replacement is a much better long-term solution. A complete screen replacement for your patio door gives you a strong, secure, and uniform look that a patch just can't match.
For professional and reliable screen services, from minor repairs to full replacements, trust the experts at Sparkle Tech Screen Service. Get a quick quote and enjoy same-week service for all your screen needs. https://sparkletechscreenservice.com


