


That awful grinding sound your patio door makes? It’s more than just an annoyance—it's your door screaming for help. When a sliding door becomes a workout to open, most people jump to the conclusion that the rollers are shot. And while they’re often right, taking a few minutes to properly diagnose the problem is the most important part of any sliding door roller repair.
Is It Really the Rollers? How to Diagnose Your Sliding Door
Before you rush out to buy parts or start pulling your door apart, you need to play detective for a few minutes. A stubborn door is the classic symptom, but it doesn't always mean the rollers are the culprit. Other common issues can feel exactly the same, and a misdiagnosis can lead to a lot of wasted time and money. Let's make sure you're fixing the right thing the first time.
Looking Beyond the Obvious Symptoms
It’s time to look for the subtle clues that point directly to failed rollers. Does the door feel wobbly or loose in its track as you move it? That’s a huge red flag. It often means the roller wheels have worn down, creating too much space between the door panel and the track itself.
Another dead giveaway is a door that sits crooked in the frame or visibly scrapes along the bottom threshold. When you see that, you're almost certainly looking at a mechanical failure in the roller assembly, not just a dirty track.
Pro Tip: Try what I call the "lift-and-wiggle" test. With the door closed, grab one end of the panel and try to lift it straight up. If there’s a lot of vertical movement or you hear a clunking sound, the roller on that side is probably compressed, broken, or completely shot.
Ruling Out Other Common Culprits
While bad rollers are the usual suspect, they aren't the only possibility. Two other common issues can make a perfectly good door feel stuck:
- A Debris-Filled Track: You'd be amazed at what can build up in a door track over the years. Dirt, pet hair, leaves, and all sorts of grime can create a very real obstruction. A deep clean is always the easiest first step. Our guide to sliding patio door maintenance has some great tips on this.
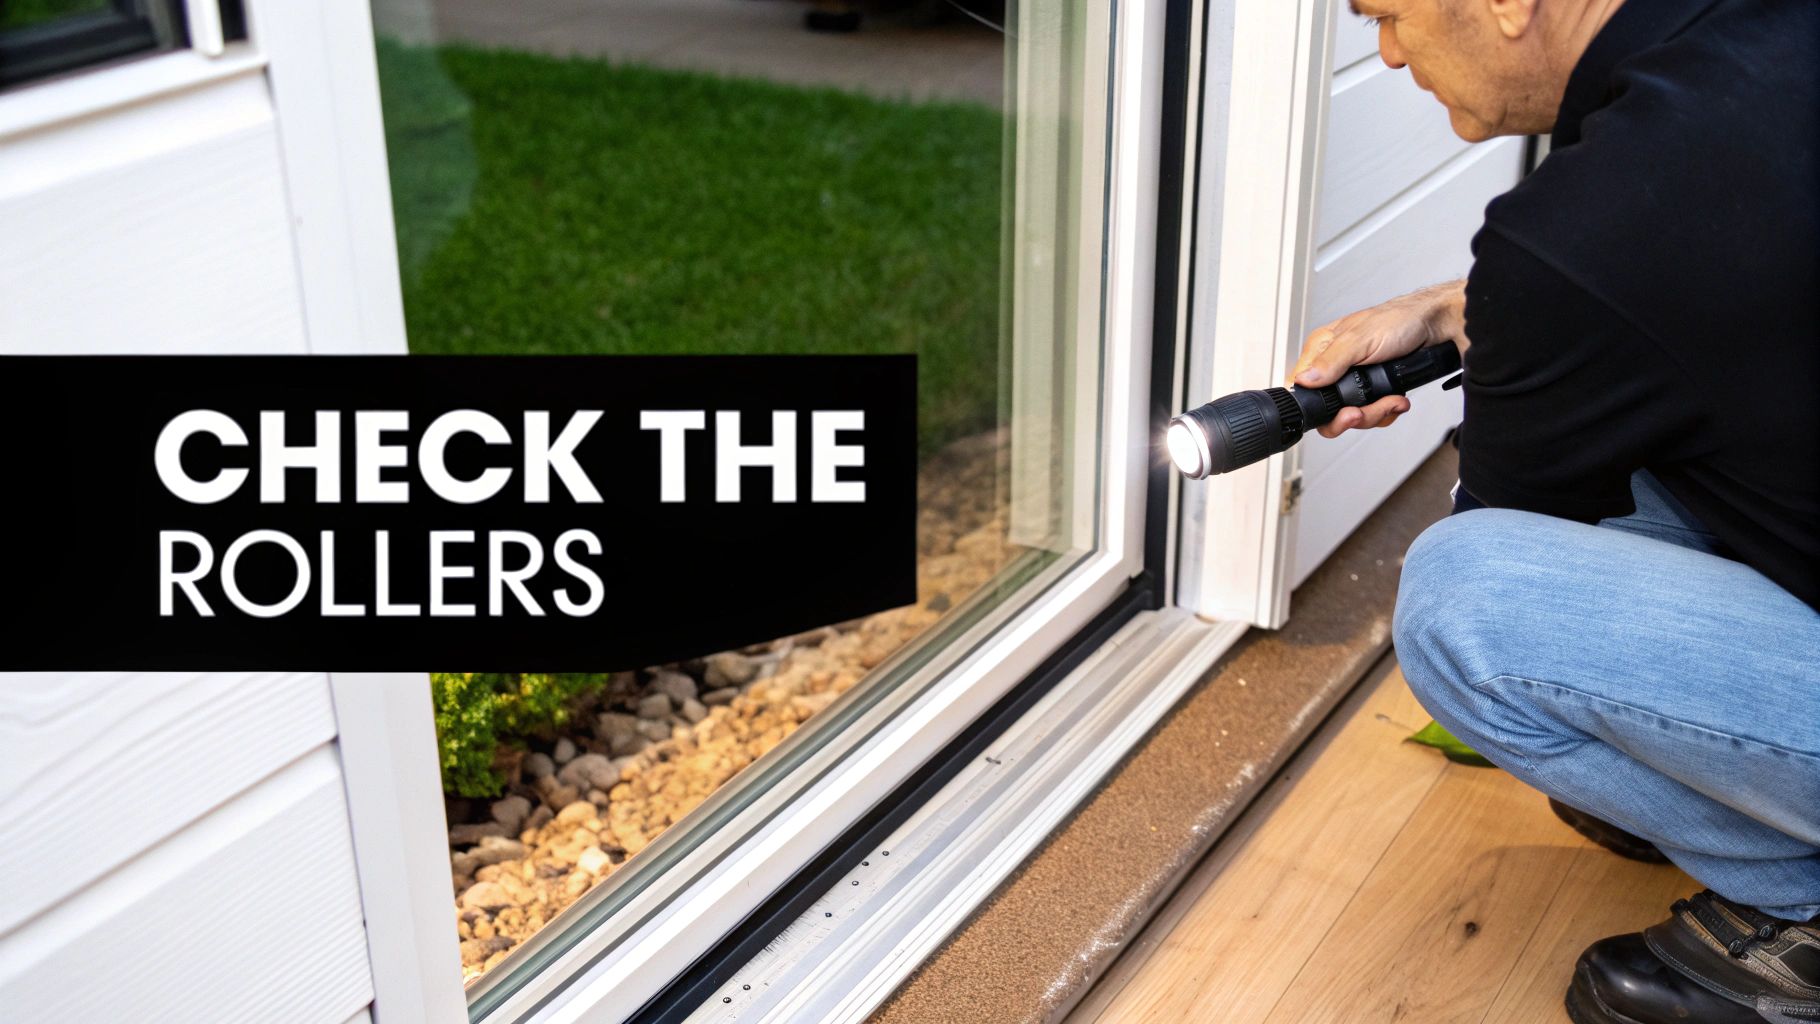
- Track Damage: Get a flashlight and get down low. Carefully inspect the metal track for any dents, dings, or warps. Even a tiny imperfection can stop a roller dead in its tracks, making the door feel jammed or causing it to jump off the rail.
To help you narrow it down, here’s a quick cheat sheet for matching symptoms to their likely causes.
Common Symptoms and What They Really Mean
Use this table to quickly match what your door is doing with the most likely cause, helping you decide your next move.
| Symptom | Most Likely Cause | What to Do First |
|---|---|---|
| Grinding or scraping sound | Worn out or seized roller wheels | Inspect the rollers and track for damage. |
| Door is wobbly or loose | Worn rollers or a bent track | Perform the "lift-and-wiggle" test. |
| Door is hard to move, but smooth | Debris in the track | Clean the track thoroughly. |
| Door stops abruptly at one point | Damaged or dented track | Inspect the track with a flashlight. |
| Door sits crooked in the frame | Failed roller on one side or misaligned | Check roller adjustment screws. |
Looking at this table should give you a much clearer idea of where to focus your efforts.
Figuring out the root cause is everything. Industry reports show a typical sliding door repair can range from $150 to $800, and the roller assemblies alone can cost between $75 and $200. Taking the time to nail the diagnosis ensures your investment in parts and effort actually solves the problem for good.
Getting Your Tools and Rollers in Order
Before you even think about tackling that stubborn door, let's get your gear sorted. Trust me, having everything you need within arm's reach from the start is the difference between a smooth one-hour fix and a frustrating afternoon of trips to the hardware store.
Most of what you'll need is probably already rattling around in your toolbox. This isn't a job that requires a bunch of specialized, expensive equipment—just the right basics to get it done safely.
The Essential Toolkit
Lay these items out before you start. You'll thank yourself later.
- Phillips Head Screwdriver: This is your go-to for the roller assembly screws. A multi-bit driver is a smart choice, just in case you find a flathead or other surprise holding things together.
- A Pair of Sturdy Pry Bars: You'll need two of these. They give you the leverage to safely lift that heavy door panel out of its track without throwing out your back.
- Wood Blocks or Shims: Don't skip these. Tucking a block under your pry bar is a simple trick that prevents you from denting the soft aluminum track or scratching your floor.
- Work Gloves & Safety Glasses: This is non-negotiable. These doors are heavy and awkward. Protect your hands from getting pinched and your eyes from any dust or debris that gets kicked up.
A lot of this stuff pulls double-duty for other projects around the house. In fact, for a good look at tools that can handle multiple jobs, check out our guide to window screen repair tools.
Finding the Perfect Replacement Rollers
Getting this part right is absolutely critical. If you buy the wrong rollers, you're just setting yourself up to do this whole job a second time. The secret? Figure out what you need before you take the door off.
Get down on your hands and knees and use your phone to snap a few clear, well-lit photos of the roller currently in the door. That picture will be your best friend when you head to the store or search online.
When you're shopping, you need to match three key details:
- Tandem vs. Single Wheel: Look closely. Does the roller assembly have one wheel or two wheels sitting side-by-side? Heavier doors often use these tandem rollers to spread the load.
- Steel vs. Nylon Wheels: Steel rollers are tough and last a long time, but they can be a bit noisy. Nylon offers a much quieter, smoother glide but might not last as long on a really heavy, high-traffic door.
- Wheel Edge Profile: Pay close attention here. The edge of the wheel will be either flat, concave (with a groove), or convex (rounded). It must match the shape of your door track perfectly, or it simply won't work.
My Personal Trick: After I snap a photo, I'll slide a tape measure in there and get the wheel's diameter and the size of the housing it sits in. Walking into the store with a clear picture and exact measurements makes finding the right part a breeze. It practically eliminates any guesswork.
Safely Removing the Sliding Door from Its Frame
Alright, this is the part of a sliding door roller repair that often makes people a bit nervous. Wrestling with a big, heavy glass door can seem daunting, but with the right technique, it’s completely manageable.
Let's get the most important rule out of the way first: this is a two-person job. Seriously. Never, ever try to lift a sliding glass door by yourself. They are deceptively heavy and awkward, and trying to go it alone is a fast track to a broken door or a trip to the emergency room.
Before you can even think about lifting the door, you've got to retract the rollers to give yourself some wiggle room. Take a look at the bottom edge of the door panel. You'll spot small access holes on each side, hiding the roller adjustment screws. Grab your screwdriver and turn those screws counter-clockwise. This will lower the door onto the track and pull the rollers up into the frame, creating the clearance you need to pop it out.
Getting Ready for a Safe Lift
Once the rollers are retracted, take a minute to set up your work area. The last thing you want is to successfully get the door out and then realize you have nowhere to put it.
- Create a Safe Landing Zone: Lay down a couple of thick blankets or, even better, set up a pair of sawhorses. This protects both the door frame and your floor from getting scratched up.
- Keep Your Tools Handy: Have your pry bar and a couple of small wooden blocks within arm's reach. You don't want to be fumbling around for them while you're holding up a heavy door.
A little prep work here makes the whole process go from clumsy to smooth. This quick diagram shows the key things to get right before you start.
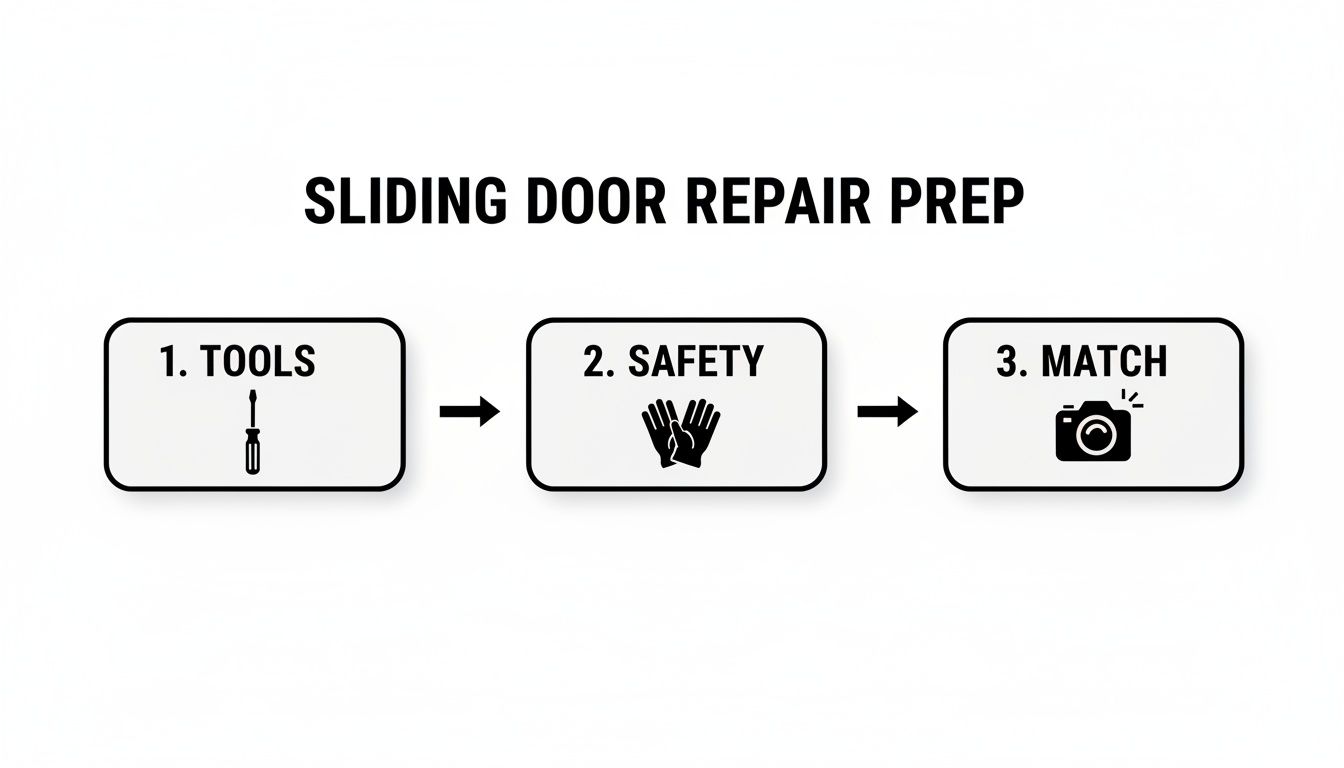
As you can see, getting your tools together, thinking about safety, and having the right parts on hand are the building blocks of a successful repair.
Making the Lift
Now for the main event. You and your partner should position yourselves at opposite ends of the door, one inside and one out. Get a solid grip on the frame.
The move is to lift the door straight up, pushing it as high as you can into the upper track. This will create a gap at the bottom, just above the lower track.
With the door at its highest point, carefully swing the bottom edge out toward whoever has more space to maneuver. Once the bottom is clear of the track, you can slowly lower the entire door down and away from the frame.
Here's a little pro tip I've used countless times: If the door is being stubborn, place a thin wooden block on the track to protect it from scratches. Then, you can use a pry bar on top of the block to gently give you that extra bit of leverage needed to lift the panel all the way into the top channel.
This coordinated lift-and-swing motion is everything. Go slow, keep talking to your partner, and you'll have it out in no time. Carry it over to your prepared spot and lay it down flat so you can finally get to those pesky rollers.
Swapping Out Old Rollers for a Smooth New Glide
Alright, the heavy lifting is over. With the door safely off its track and resting on sawhorses or its side, you’re at the core of the sliding door roller repair. This is where the magic happens—out with the old, busted parts and in with the new.
First things first, find those roller assemblies. They're almost always tucked away in little pockets at the bottom corners of the door. You should see a screw or two holding each one in place.
Removing the Old Roller Assembly
Grab your Phillips head screwdriver. Now, here's a dose of reality: if your door is old or has seen a lot of weather, these screws might put up a fight. Rust is a common enemy. If a screw feels like it's welded in place, don't force it and strip the head. A little penetrating oil can work wonders. Just give it a few minutes to soak in before you try again.
Once the screws are out, the old roller assembly probably won't just drop out. It's likely wedged in there with years of grime. Gently use a putty knife or a flathead screwdriver to pry it loose. A little patient wiggling is all it takes to free the whole unit.
Crucial Prep Step: Before you even think about putting the new roller in, take a look inside that now-empty cavity. This is a step most DIYers miss. Years of dirt, dust, and metal shavings collect in this pocket, and leaving it there is asking for trouble.
Get a vacuum with a crevice tool and suck out all that junk. Then, take a damp cloth and give the inside a good wipe. Starting with a perfectly clean pocket ensures your new roller assembly sits flush and doesn't immediately start grinding on old grit.
Installing Your New Rollers
Now for the satisfying part. Take one of your new rollers and hold it up next to the old one. Make sure you have it oriented the same way—the wheels need to face down to meet the track. It's a simple check, but it'll save you a headache later.
Slide the new assembly right into that clean cavity. It should be a snug fit. Line up the screw holes on the new unit with the ones in the door frame.
Go ahead and put the screws back in, tightening them until they're secure. You don't need to crank down on them with all your might. The goal is to get the assembly seated firmly against the frame, with zero wobble. A solid, flush installation is the secret to a door that glides perfectly.
It’s this constant need for smooth-operating doors that fuels a huge market. Industry analysts actually project the automatic sliding door sector to grow to between $3.9 billion and $4.54 billion by the early 2030s. That just goes to show how many people are looking for quality replacement parts to keep their homes working right. You can read more about the global sliding door market on coherentmarketinsights.com.
This same basic process—clean the cavity, replace the part—applies to more than just doors. If you're dealing with a stubborn window, check out our guide on sliding window roller replacement.
With both new rollers screwed securely in place, you're on the home stretch. It’s time to get that door back on its track and dial in the final adjustments.
Putting It All Back Together: Reinstalling and Adjusting the Door
Now for the most satisfying part of the job: getting that door back in place and fine-tuning it. This is the moment your hard work pays off, and you get to see that once-stubborn door glide like new. Essentially, you're just reversing the steps you took to remove it.
Grab your partner again—this is a two-person lift. Carefully angle the door, guiding the top edge up and deep into the upper track until it's secure. Then, gently swing the bottom of the door back over the lower track and let it settle down onto your brand-new rollers. Now the real fun begins: the final adjustments.
The Art of Perfect Door Alignment
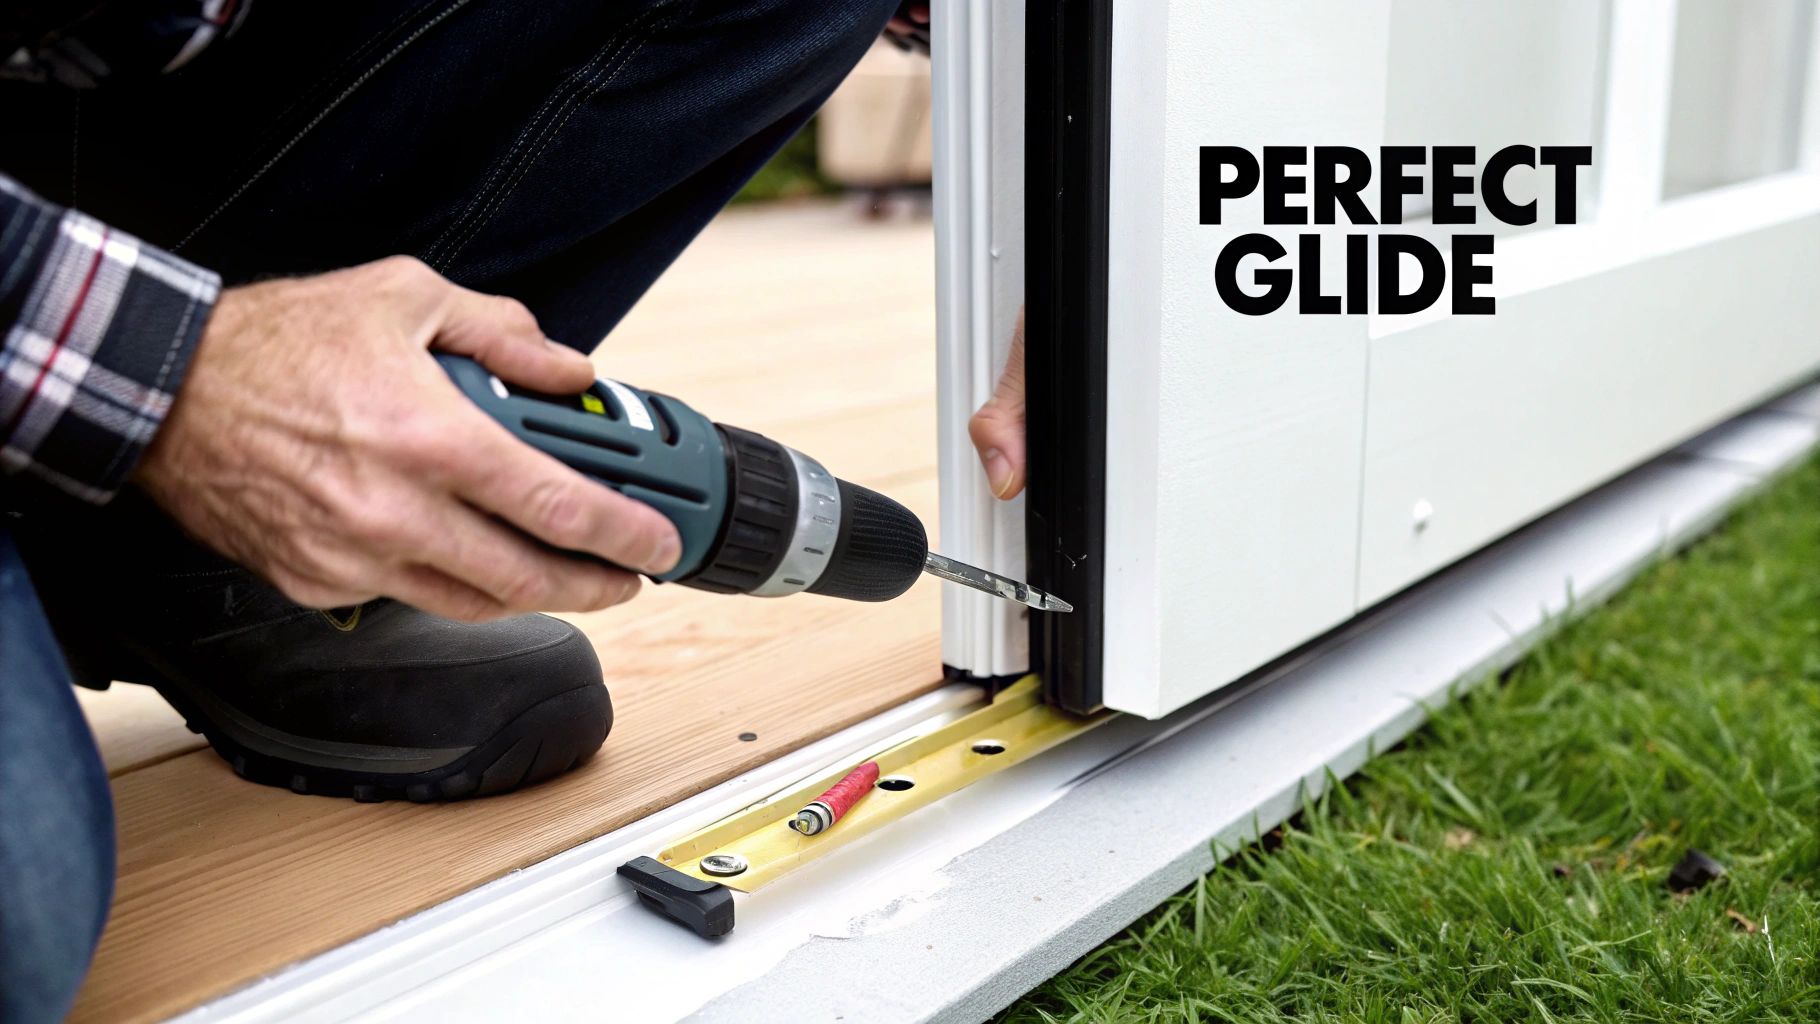
With the door back on its track, it's time to dial in the height and get it perfectly level. Find those same adjustment screws you worked with earlier. This time, you'll be turning them clockwise to raise the door.
This isn't about cranking them as high as they'll go. It's a game of patience and precision.
- Start on One Side: Give the screw on one side a few turns to lift that corner.
- Grab Your Level: Place a level along the bottom of the door to check your progress.
- Adjust the Other Side: Now, move to the other screw and adjust it until that bubble on your level sits perfectly in the middle.
Getting this right is absolutely critical. A perfectly aligned door not only glides smoothly but also creates a proper, weather-tight seal against the door jamb when closed. If it’s even slightly off, it will bind and scrape, and you’ll be right back where you started.
This hands-on adjustment highlights the elegant simplicity of manual doors. In contrast, automated systems come with their own set of headaches. High-profile safety incidents and recalls have shown the significant maintenance burden of powered doors, often leading to more frequent repairs. You can learn more about the complexities of sliding door systems from Cognitive Market Research.
Final Checks for a Professional-Grade Finish
You think you've got it perfect? Let's be sure. Running a few final performance tests is the only way to know the job is truly done. A door that passes these checks will give you years of trouble-free operation.
First, give it a few good slides. Move the door all the way from one end of the track to the other. You’re listening and feeling for any bumps, hitches, or grinding sounds. If you feel even the slightest bit of friction, get that level back out and make tiny adjustments until the movement is buttery smooth.
Next, test the lock. Close the door fully and engage the latch. It should click into place securely without any need to lift, push, or jiggle the panel. If the lock and strike plate don't line up, it’s a dead giveaway that the door isn't quite plumb with the jamb. A tiny tweak should fix it.
When it glides silently from end to end and locks with a satisfying click, you can officially call your sliding door roller repair a success.
Got Questions About Sliding Door Rollers? We've Got Answers.
Even after walking through the repair process, a few specific questions always seem to pop up. It’s completely normal. Getting ahead of these common head-scratchers can save you a lot of frustration and make sure the job gets done right. Let's dive into the questions we hear most often.
How Often Do Rollers Really Need to Be Replaced?
Honestly, there’s no magic number here. How long your rollers last depends entirely on how much you use the door and the environment it's in. A busy patio door that gets opened a dozen times a day might need fresh rollers every 5-7 years. On the other hand, a door on a guest room that's rarely used could easily go for a decade or more.
Forget the calendar and pay attention to the door itself. That's your best guide. When you start to hear that awful grinding sound, or it feels like you're wrestling an alligator just to open the door, it’s time for an inspection. The absolute best thing you can do to extend their life? Keep that track clean.
Can't I Just Spray Some Lubricant on the Old Rollers?
This is probably the number one question we get, and it’s a great one because it highlights the difference between maintaining and fixing. Lubrication is key for maintenance. If your rollers are just a bit noisy from some built-up dust and gunk, a good silicone spray can make a world of difference.
But, and this is a big but, lubricant is not a miracle cure. If the wheels are physically damaged—we’re talking cracked, flattened from wear, or the bearings are completely seized up—spraying them is just putting a bandage on a broken bone. It's a messy, short-term patch that won't last. The problem will be back before you know it.
Expert Tip: Think of it this way: lubricant helps healthy parts work smoothly, but it can't bring broken parts back to life. If the roller itself is shot, replacement is the only real fix.
I Put in New Rollers, but the Door Is Still a Pain to Move. What Gives?
This is incredibly frustrating, I know. You did all that work, and the problem is still there. When this happens, it’s almost never the new rollers. The culprit is usually hiding in one of two places.
First, check the track again, but this time, be a detective. Run your fingers along the entire rail. You're looking for something you might have missed visually—a tiny dent from something being dropped on it, or even a slight warp. It doesn't take much to create enough friction to make a brand-new roller feel like an old, worn-out one.
Second, let's talk alignment. If the door isn't hanging perfectly straight in the frame, it's going to bind and drag. Grab your level again. Make those tiny, patient adjustments to the roller height screws until that door is perfectly plumb. Nine times out of ten, this fine-tuning is what solves the mystery.
If you've gone through these steps and your door is still putting up a fight, don't sweat it. Sometimes you just need a professional eye. When you'd rather have an expert handle it from the get-go, Sparkle Tech Screen Service is ready to help. Contact us for a quick quote and let us get your door gliding smoothly again.


