


Fixing a window screen isn't just about patching a hole; it's about getting a tight, clean finish that looks like it was done by a pro. The secret? It's all in the tools and the technique. You'll need a couple of specialized items, like a spline roller and a utility knife, along with your new screen material. The basic idea is to pull out the old screen and the rubbery spline holding it in, cut a new piece of mesh, and then use the roller to lock everything back in place.
Your Essential Window Screen Repair Toolkit
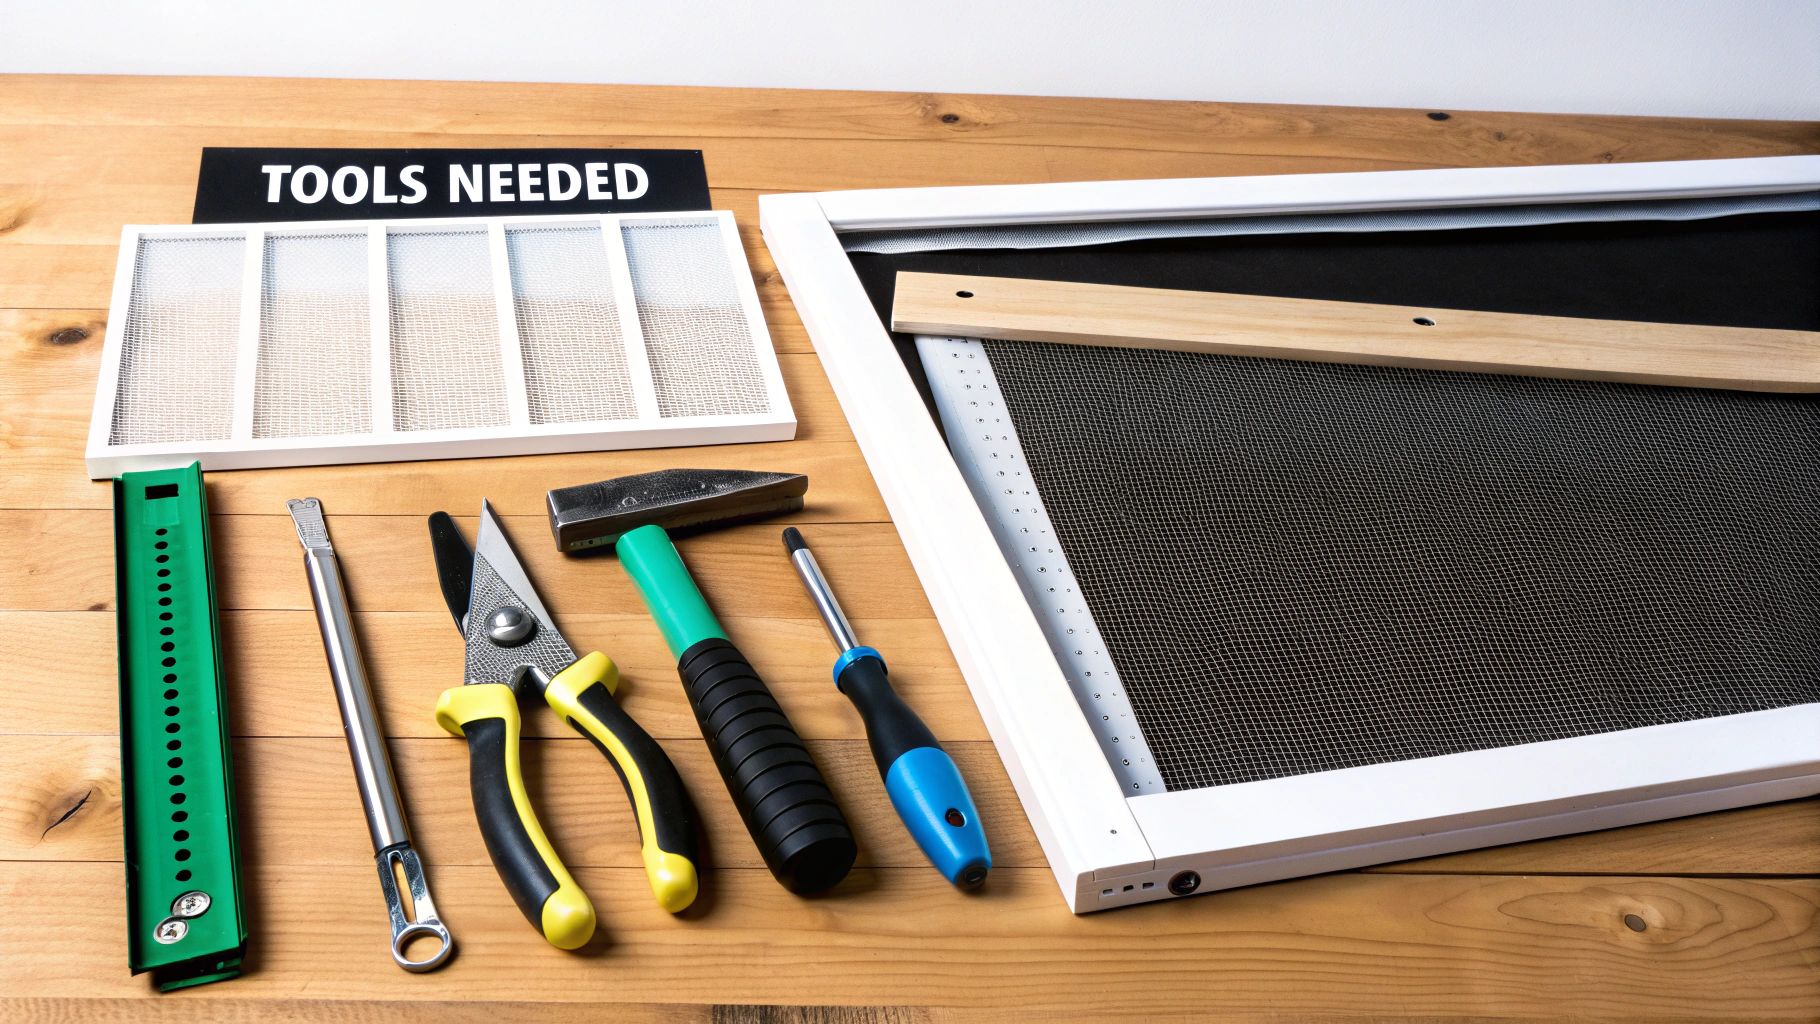
Before you even think about pulling that old screen out, let’s talk about getting your gear in order. Having the right tools on hand can turn a potentially frustrating project into a genuinely satisfying weekend win. I've seen it time and time again—someone tries to improvise, and they end up with a creased screen or, even worse, a bent frame. A little prep goes a long way.
It’s no surprise that people are paying more attention to home maintenance these days. In fact, the market for window repair services was already valued at around USD 9 billion back in 2022 and is still on the rise. Homeowners know that well-kept windows boost property value and energy efficiency, which makes a simple skill like screen repair incredibly useful.
The Must-Have Tools for the Job
Your success really comes down to a few inexpensive but critical tools. This is one area where you don't want to cut corners. For instance, I’ve heard of people trying to shove the spline in with a screwdriver, and it almost always ends with a tear in the brand-new mesh. Just don't do it.
Here’s your non-negotiable list:
- Spline Roller: This little gadget is the MVP. It has two wheels: a rounded (convex) one to gently press the screen fabric into the frame's channel and a grooved (concave) one that seats the spline perfectly on top.
- Utility Knife: Make sure you have a fresh, sharp blade. A dull knife will snag and pull the delicate mesh, ruining your clean finish when you trim the excess.
- Flathead Screwdriver or Awl: You'll need something with a fine, sturdy point to pry out the old, hardened spline. It can be surprisingly stubborn.
- Tape Measure: The old saying holds true: measure twice, cut once. Screen material isn't free, so accuracy is key.
My Go-To Tip: I always keep a couple of small spring clamps on my workbench. Clamping the screen frame to the table stops it from wiggling around while I'm stretching the mesh. It's a simple trick that helps you get that super-tight, professional look.
Choosing Your Replacement Screen Material
The type of screen you pick does more than just keep bugs out; it affects everything from durability and visibility to even your home's airflow. Making the right choice upfront is crucial, so here's a quick rundown of the most common options you'll find at the hardware store.
Screen Material Comparison for Your Repair Project
| Material Type | Key Benefits | Best For | Average Cost |
|---|---|---|---|
| Fiberglass | Affordable, flexible, doesn't dent or crease easily | Standard windows and doors; general-purpose use | $ (Most affordable) |
| Aluminum | Excellent durability and strength, crisp appearance, won't sag | High-traffic areas, homes in sunny climates | $$ (Mid-range) |
| Pet-Resistant | Extra-strong vinyl-coated polyester, resists tears from claws | Homes with cats or dogs that like to climb or scratch | $$$ (Pricier) |
| Solar/Sun-Control | Blocks 65-90% of solar heat and glare, improves energy efficiency | South- or west-facing windows, hot climates | $$$ (Pricier) |
Fiberglass is the go-to for most people because it's cheap and forgiving. But if you want something that will stand the test of time and won't sag, aluminum is a fantastic upgrade, though it can dent if you're not careful. And for anyone with furry friends, the pet-resistant screen is an absolute lifesaver.
For a more detailed breakdown of the tools I use and why they're so important, you can check out this complete guide on essential window screen repair tools.
Quick Fixes For Small Tears And Holes
So you've found a tiny hole or a small L-shaped tear in one of your window screens. Don't panic. Before you start thinking about a full-on replacement project, you should know that for minor damage like this, a quick patch is usually all you need.
This is the perfect fix when the rest of the screen is still in great shape. You can squeeze a lot more life out of it with just a few minutes of work, and knowing how to patch a screen is a fantastic skill for any homeowner. It stops a tiny hole from turning into a bug superhighway.
The Easiest Fix: Adhesive Screen Patches
By far the simplest route is to use a pre-made adhesive screen patch. These are basically little stickers made of screen mesh. They're designed to be incredibly user-friendly—just peel and stick. No special tools required, which is why they’re my first recommendation for a quick-and-dirty repair.
For these to work well, though, a little prep goes a long way. Take a cloth with some rubbing alcohol and give the area around the hole a quick wipe-down. You need to get rid of any dust or grime that could weaken the adhesive.
Let it dry completely, then peel the backing off the patch and press it firmly over the tear. I always make a point to pinch it from both sides of the screen for about 30 seconds. That pressure really helps the adhesive grab hold and create a bond that will stand up to the weather.
Pro Tip: Take a second to line up the grid on the patch with the grid on your screen. It’s a small detail, but it makes the repair far less obvious from a distance.
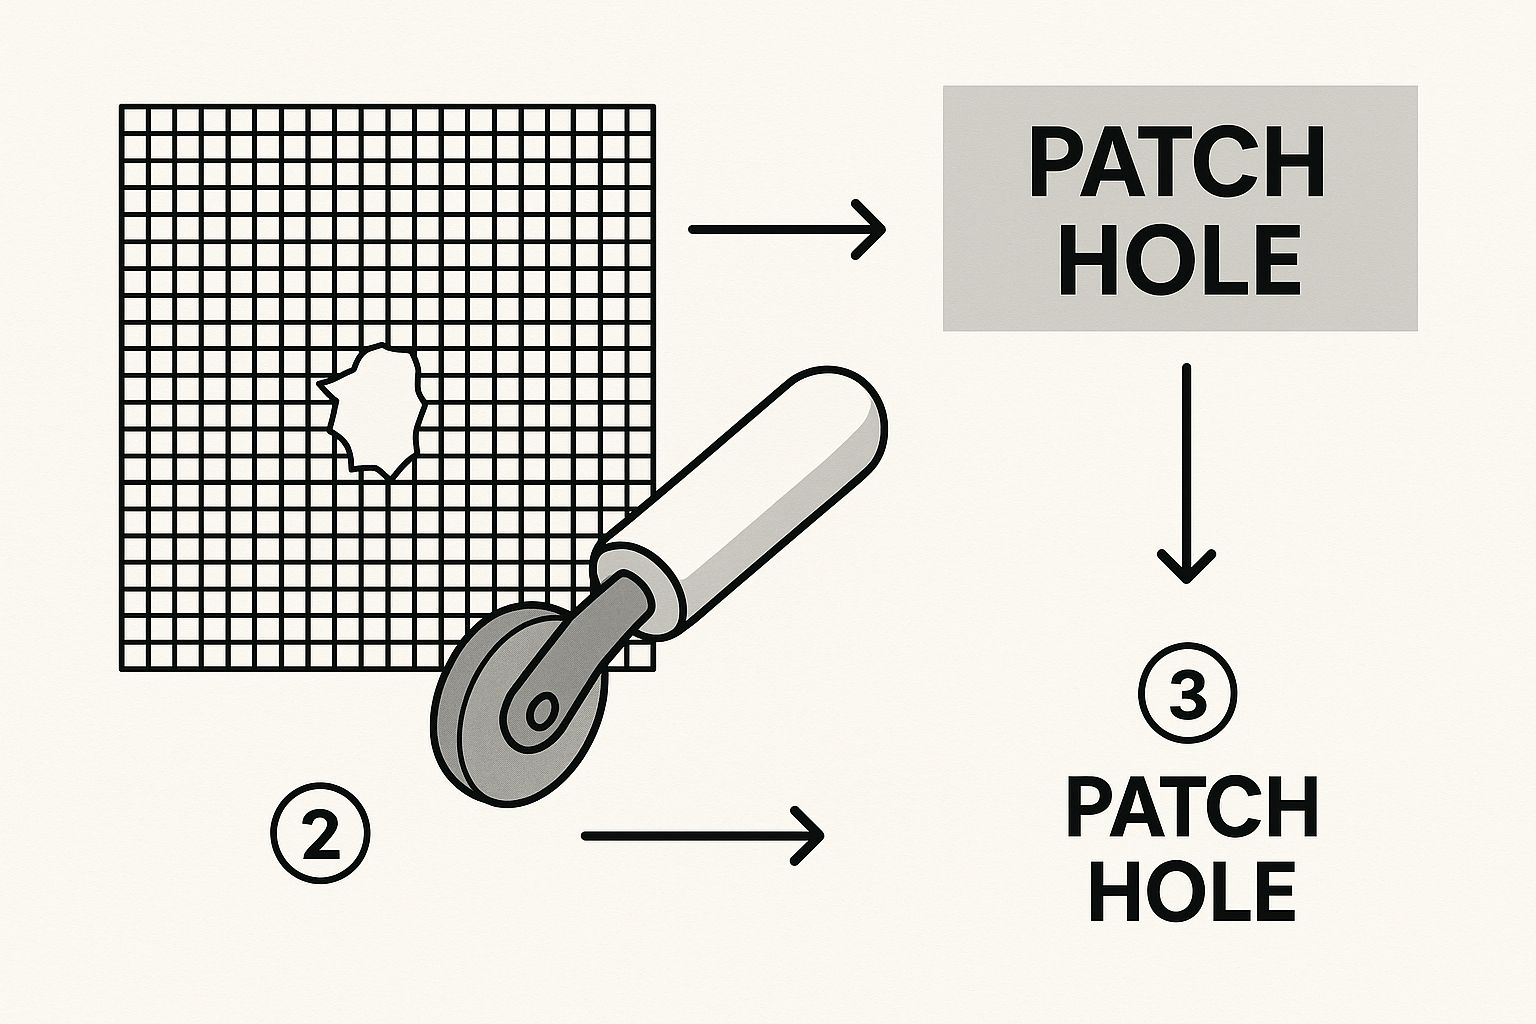
The DIY Method: Patching With Mesh and Glue
If you happen to have a scrap piece of screen material lying around, you can make your own patch. This is a great option for holes that are just a bit too big for a standard adhesive square. All you need is that scrap piece and some clear, waterproof silicone or even super glue.
First, cut a piece of your scrap mesh so it's about one inch larger than the hole on all sides. That overlap is everything—it gives the adhesive a solid surface to stick to.
Now, run a very thin bead of the glue around the edges of the tear itself. Carefully place your patch over the hole and gently press it into the adhesive. The trick here is to use just enough glue to hold it without making a gloopy mess.
- Be patient: Give the adhesive plenty of time to cure. Check the instructions on the tube and don't rush it.
- Extra security for fiberglass: On fiberglass screens, I’ve even used a needle and thread to put a few quick stitches in place before dabbing on a sealant. It makes for a seriously durable repair.
Going the DIY route gives you a really strong, long-lasting fix for those smaller issues, saving you the time and hassle of a full screen replacement.
Replacing the Entire Screen Mesh in an Aluminum Frame
Sometimes, a simple patch just won't do the trick. For screens that are badly torn, brittle from sun damage, or just plain worn out, replacing the entire mesh is the best way to get your window looking and functioning like new again. It might sound like a big job, but with the right approach, it's a very satisfying DIY project.
The secret to a professional-looking finish isn't brute force—it's technique. Getting the mesh perfectly taut without any wrinkles or sags comes down to how you handle the material and the spline. Let's walk through it.
This image shows you the most important tool you'll be using: the spline roller. Getting familiar with it is key.
As you can see, the roller is designed to fit perfectly into the frame's channel, which is exactly what you need to secure the spline and get a tight fit.
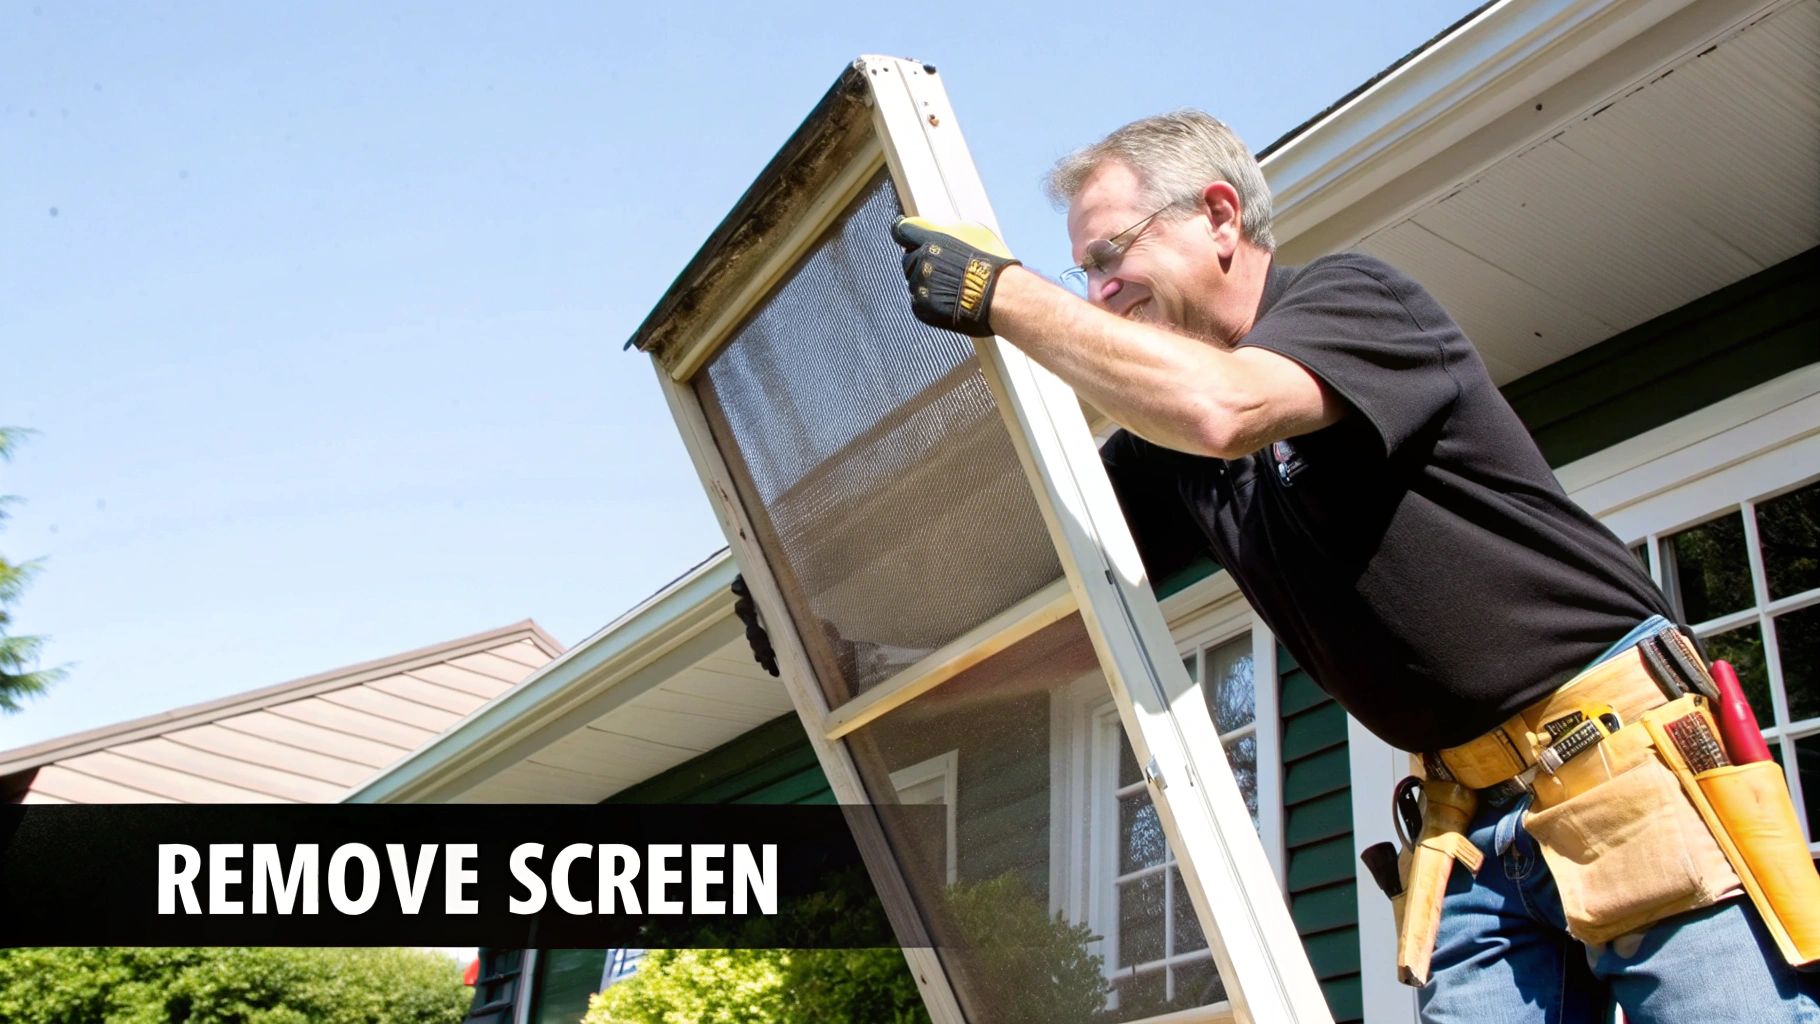
Removing the Old Screen and Spline
First things first, find a large, flat surface to work on—a garage floor or a big workbench is perfect. Lay the screen frame down.
Your first move is to get that old spline out. The spline is the rubber cord tucked into the channel that holds the mesh in place. Grab a small flathead screwdriver or an awl, dig into a corner to lift an end, and then just pull it out. It should come out in one long piece.
With the spline gone, the old screen will practically fall out. Before you go any further, take a minute to clean out that empty channel. Use a stiff brush or even a screwdriver to scrape out any dirt, debris, or bits of old spline. A clean channel makes installing the new screen much easier.
Installing the New Screen Mesh
Unroll your new screen mesh and lay it completely over the frame. You’ll want at least two inches of excess hanging over all four sides. This overlap is your safety net—it gives you something to grip and ensures you don't come up short.
Now for the fun part. With your spline roller in hand, start at one corner. Use the convex wheel (the rounded one) to lightly press the mesh into the channel. This creates a helpful little groove for the spline to follow. Don't worry about making it tight yet; the goal here is just to get it seated.
Begin pressing the new spline into the channel right on top of the mesh. Switch over to the concave (grooved) wheel on your roller and use firm, steady pressure to push the spline deep into the channel.
Crucial Technique for a Tight Screen: Here’s the pro tip that makes all the difference. As you roll the spline in with one hand, use your other hand to gently pull the screen mesh taut. The trick is to pull diagonally away from the corner you're working on. This motion creates perfectly even tension across the screen and is the absolute secret to preventing sags and wrinkles.
Once the spline is set all the way around, the screen should feel tight and smooth. All that's left is to trim the excess mesh. Take a sharp utility knife and run the blade along the outside of the spline. Angle the blade slightly away from your new screen to avoid any disastrous slips. For a deeper dive, our article on rescreening a window screen covers every detail.
Knowing how to do this is a great skill to have. With the global windows market projected to reach $52 billion by 2029, there are millions of screens out there that will eventually need this exact repair.
To help you keep track of the process, here's a quick checklist you can follow. It breaks down the key actions into manageable phases.
Step-by-Step Screen Replacement Checklist
| Phase | Action Item | Pro Tip |
|---|---|---|
| Preparation | Remove the old spline and screen mesh. | Use a small screwdriver or awl to lift a corner of the spline for easy removal. |
| Preparation | Thoroughly clean the frame's channel. | A stiff brush works well to clear out any dirt or old spline fragments for a smooth installation. |
| Installation | Lay the new mesh over the frame. | Ensure at least a two-inch overlap on all sides to have enough material to work with. |
| Installation | Press the mesh into the channel with a spline roller. | Use the convex wheel first to create a guide crease before inserting the spline. |
| Installation | Insert the new spline over the mesh. | Use the concave wheel for firm pressure, seating the spline securely into the channel. |
| Finishing | Pull the screen taut while installing the spline. | Pull diagonally from the corner you're working on to create even tension and avoid sagging. |
| Finishing | Trim the excess screen mesh. | Use a sharp utility knife and cut along the outside edge of the spline for a clean finish. |
Following these steps methodically will ensure you get a professional-quality result every time. Good luck with your project
How to Straighten and Repair Bent Screen Frames
It doesn't matter how perfect your new screen mesh is if the frame holding it is bent out of shape. A warped frame leaves gaps for bugs to sneak in, and honestly, it usually makes the screen impossible to get back into the window. So, before you even think about the mesh, the first real step in a proper screen repair is getting that frame straight.
Most screen frames you'll run into are made of aluminum. It's light, which is great, but it also bends pretty easily. Thankfully, you can usually persuade a slightly bent frame back into shape with a little patience and the right approach. Getting that frame back to its original, flat self is absolutely critical for a tight-fitting, functional screen.
Assessing and Straightening Minor Bends
First things first, take the screen frame and lay it on a flat, solid surface. Your garage floor or a heavy workbench is perfect for this. Right away, you'll see exactly where it's bowed or bent—the high spots will be obvious.
For a minor bend, your go-to tools are a rubber mallet and a couple of scrap wood blocks. Whatever you do, don't hit the aluminum frame directly with a metal hammer. You’ll just dent it, or worse, break it.
Here’s the process that works for me:
- Protect the Frame: Lay a wood block over the bent section. This spreads the impact out and prevents you from damaging the frame itself.
- Gentle Taps: Use your rubber mallet to give the wood block a few gentle taps. Lift the block every so often to check your progress and see if the frame is flattening out.
- Work Gradually: Don't just focus on one spot. Move the block up and down the length of the bend, tapping lightly and evenly. You're trying to coax it back into shape, not force it.
This technique is surprisingly effective for most common warps and bows. The whole key is to be patient and check your work constantly.
A common mistake I see is people getting impatient and whacking the frame too hard. That’s how you overcorrect the bend in the other direction or even snap the aluminum. Slow and steady pressure is the only way to get a straight, usable frame without creating a bigger problem.
Dealing with Damaged Frame Corners
The corners are almost always the weak link in a screen frame. They're usually held together with small plastic or metal inserts that get brittle and crack over the years. If a corner has pulled apart, just straightening the rails won't solve the problem.
You can grab replacement screen frame corners at any home improvement or hardware store; they’re cheap and make all the difference. To replace a broken one, you'll have to gently pull the two frame pieces apart, dig out the old broken plastic bits, and then tap the new corner piece securely into place with your rubber mallet.
This simple fix is what gives the frame its structural squareness back, which you absolutely need to pull the new mesh tight and get the screen to pop neatly back into your window.
Knowing When to Skip the DIY and Call a Pro
Having the skills to fix your own window screens is great, but even the most dedicated DIYer knows when it's time to call in a professional. This isn't about giving up; it's about making a smart, safe choice for your home. Some jobs are just bigger, more complex, or riskier than they look, and that's where an expert's experience really pays off.
Recognizing the line between a manageable project and a potential headache is the key. A perfect example is any screen on a second-story window or higher. Juggling tools and a screen frame while perched on a ladder is asking for trouble. It's simply not worth the risk.
The same goes for those huge screens on sliding glass doors or custom-shaped windows, like arches or circles. These aren't your standard frames. They need a tremendous amount of tension to keep the mesh taut and prevent sagging, something that's nearly impossible to get right without a professional screening table.
Scenarios That Warrant a Professional
Some screen types are just built differently and are best left to the pros. Retractable screens, for example, have spring-loaded mechanisms that are easy to break if you don't know exactly what you're doing. If your screen is built into a security door or is part of a motorized system, the repair is far more complicated than just swapping out the mesh.
Here are a few clear signs it's time to pick up the phone:
- High-Story Windows: If the job requires a tall ladder, the safety risk skyrockets. It's a no-brainer to call a pro.
- Oversized or Custom Frames: Big patio door screens and odd-shaped window frames demand special tools and techniques for a perfectly tight finish.
- Complex Screen Types: Don't mess with retractable, motorized, or security screens. Their internal parts are intricate and easily damaged.
- Multiple Damaged Screens: Facing five or more screens that need fixing? The time you'll spend can quickly add up, often making a professional service more cost-effective than you'd think.
The real trade-off here is your time versus the cost. A pro can knock out several screens in the time it takes a homeowner to do one, and they'll guarantee that drum-tight, flawless finish every time.
There's a reason this is a growing industry. The global market for door and window repair is expected to hit USD 1 billion by 2032. That kind of growth shows that plenty of homeowners see the value in paying for expert work. You can dig deeper into these numbers by checking out the findings on the door and window repair market.
At the end of the day, if a repair feels overwhelming or just outside your comfort zone, trust your gut. Getting professional help is always the right call. For a quick assessment and a job done right, take a look at our professional window screen repair services.
Got Questions About Window Screen Repair?
It's one thing to read a set of instructions, but it's another thing entirely to be in the middle of a project with a roll of screen mesh in your hands. Questions are bound to come up. Let's walk through some of the most common ones I hear from homeowners, so you can keep your repair on track.
Lots of people ask whether they should just patch a small hole or go ahead and replace the whole screen. My rule of thumb is to look at the overall health of the mesh.
If you have one small tear but the rest of the screen is still flexible and in good shape, a patch is a great, quick fix. But if that mesh feels brittle to the touch or you can spot a few other weak areas, you're better off just replacing the whole thing. It’ll save you from doing the job again in six months.
What’s the Best Screen Material to Use?
This really comes down to what you need that screen to do. You've got to balance how tough it is, how well you can see through it, and what you want to spend.
For most people, standard fiberglass mesh is the perfect all-rounder. It's easy on the wallet, it won't dent or crease like aluminum, and it’s pretty forgiving for first-timers.
However, if you've got a cat that thinks the screen is a climbing wall, you absolutely need to upgrade to a pet-resistant screen. It’s much thicker and tougher than fiberglass and will stand up to claws and paws. And for those windows that get cooked by the afternoon sun, a solar screen is a fantastic choice. It can seriously cut down on the heat coming into your house.
The right material can make a real difference. For example, homes in sunny places like Arizona or Florida can benefit immensely from solar screens. They can block up to 90% of solar heat, which doesn't just lower your AC bill—it also protects your floors and furniture from fading.
How Do I Get the Screen Super Tight?
Getting that perfect, tight finish without any wrinkles is the goal, right? It's also where most people get tripped up. The trick isn't to yank the screen tight from the start. The secret is to create even tension as you roll in the spline.
Here’s a technique that has never failed me:
- Pick a corner to start. Press about a foot of spline into the channel along one side.
- Now, move to the side next to it. As you press in the spline there, give the screen a gentle, diagonal pull away from the first corner.
- Keep going around the frame like this, always pulling the screen fabric taut away from the spline you're currently pushing into the groove.
That steady, diagonal tension is what prevents sags and gives you that clean, professional look every time.
Can I Just Reuse the Old Spline?
I know it’s tempting to save a couple of bucks, but trust me on this one: reusing old spline is a recipe for frustration. After years of baking in the sun, that old rubber or vinyl gets hard, brittle, and actually shrinks.
A shrunken, stiff spline just won't grip the new mesh properly in the frame's channel. Before you know it, your brand-new screen will be sagging or even popping right out. A roll of new spline costs next to nothing. Think of it as cheap insurance for the time and effort you’re putting into the job.


