


Getting the right fit for a new screen door all comes down to one simple rule: measure your door frame's width in three spots (top, middle, and bottom) and its height in three spots (left, middle, and right). You'll then use the smallest of each measurement. This little trick guarantees a perfect fit, even if your door frame has settled over time and isn't perfectly square.
Your Quick Guide to Screen Door Measurements
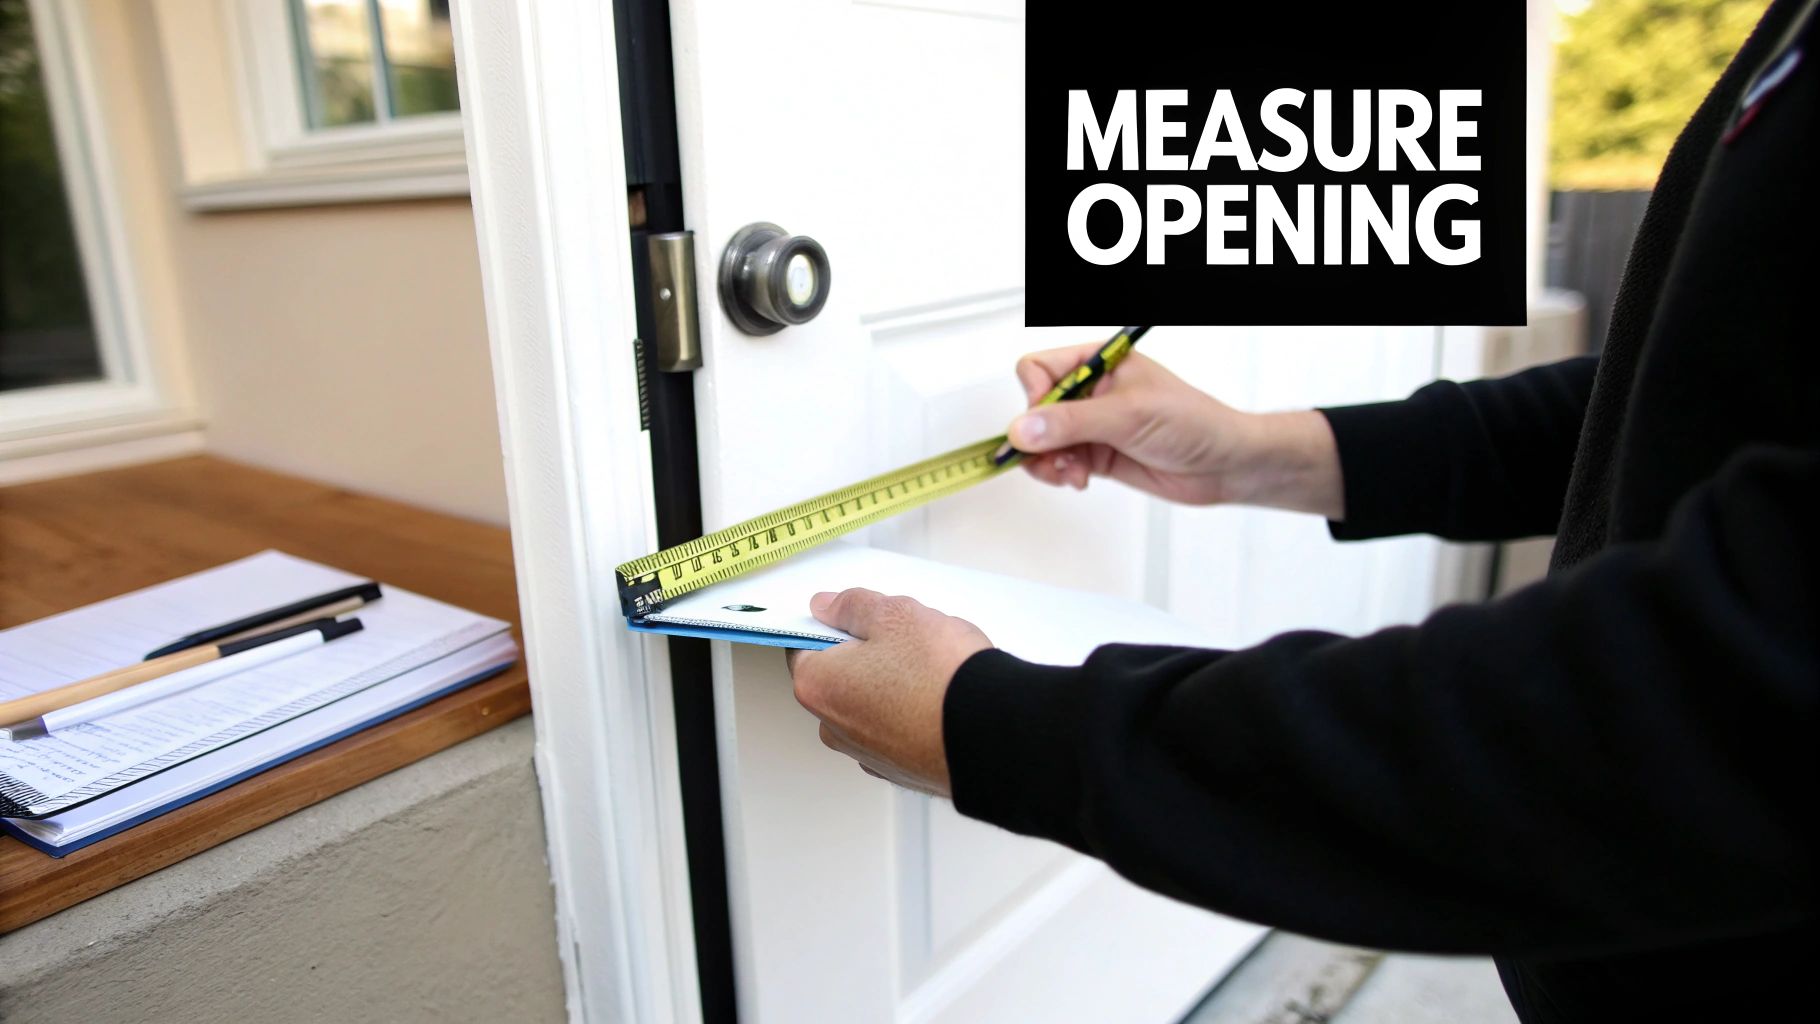
Before you do anything else, grab a quality tape measure, a notepad, and a pencil. The single most important thing to remember is this: always measure the door opening itself, not your old screen door. It’s a common mistake, but an old door can be warped, worn down, or might have been trimmed to fit years ago, making it a terrible template for your new one.
This first step is crucial for getting that smooth, gap-free fit we all want. We'll walk through the essentials—width, height, and jamb depth—and explain why each one matters.
Where to Start: The Basic Measurements
Getting the width and height right is 90% of the job. It's not as simple as just measuring once, because very few door frames are perfectly plumb and square, especially in older homes.
Here’s the method I always use:
- For the width: Measure across the top of the door frame, then the middle, and finally the bottom. Jot down all three numbers.
- For the height: Do the same thing, but vertically. Measure along the left side, down the center, and along the right side. Again, write them all down.
Pro Tip: Don't round your numbers! Precision is key here. If your measurement is 35 7/8 inches, write that down. Don't round it up to 36. That tiny eighth of an inch can be the difference between a door that glides smoothly and one that sticks.
Essential Measurements at a Glance
This simple checklist will help you capture the core measurements needed for any standard screen door. It’s a good idea to keep this handy right by the door when you’re measuring.
| Measurement | Where to Measure | Why It Matters |
|---|---|---|
| Width | Top, middle, and bottom of the inside door frame | Door frames are rarely perfectly square; this accounts for bows. |
| Height | Left, middle, and right of the inside door frame | Catches any sagging or unevenness from top to bottom. |
| Jamb Depth | The thickness of the door frame where the door will sit | Ensures the screen door fits flush without protruding or gaps. |
Once you have these numbers, you're well on your way. Taking a few extra minutes to be precise here will save you a massive headache later on.
While we're focused on screen doors, the principles are similar for any door project. You can find more great advice on mastering door measurements in this guide. And if you decide you'd rather leave it to the pros, our page on professional screen door installation breaks down what's involved in getting a flawless result.
Getting Your Tools and Setting Up for Success
Before you even think about pulling out the tape measure, let's get a few things in order. Getting this prep work right from the start is the secret to a perfect fit later on.
First up, your most important tool: a good quality, rigid metal tape measure. Don't even think about using a cloth sewing tape or a flimsy plastic one. They can easily stretch or sag, and even a tiny error here can mean a big gap in your new door. If you're curious about what else the pros use, we've put together a list of essential screen repair tools that make any job easier.
With your tape measure in hand, take a moment to inspect the door frame itself. You'll want to clear out any old caulk, lingering debris, or worn-out weatherstripping from the jamb where the new door will sit. A clean, smooth surface is non-negotiable for an accurate measurement.
A Pro Tip to Avoid Frustration: Check if your door frame is truly square. This is a game-changer. Just measure diagonally from the top-left corner to the bottom-right, then do the same from the top-right to the bottom-left. If those two numbers are the same (or very close), your frame is square and the installation will be a breeze.
Taking Your Core Width and Height Measurements
Getting the width and height right is the most critical part of this job. I can't tell you how many times I've seen homeowners measure just once, only to find their doorframe is slightly wonky and the new screen door won't fit. Door frames are almost never perfectly square, especially in older homes.
Here’s the pro method to get it right every time:
- For the width: Take three separate measurements inside the door jamb. Measure across the top, then the middle, and finally at the bottom.
- For the height: Do the exact same thing, but vertically. Measure from the top jamb down to the threshold on the far left, in the dead center, and on the far right.

Now, here’s the key. Don't average them out. The golden rule is to always use the smallest of the three dimensions you recorded for both your final width and your final height. This simple trick guarantees the screen door will fit into even the narrowest part of the opening, preventing a frustrating trip back to the hardware store.
This principle of measuring multiple points and using the smallest dimension is a universal rule in this kind of work. It’s the same basic logic you’d use if you were going to learn how to measure window screen size.
Aim for accuracy down to the nearest 1/16th of an inch. This level of precision is what separates a clean, professional-looking seal from a sloppy, bug-inviting gap. If your measurements are in feet, a quick feet to inches conversion tool can be a real lifesaver to make sure the math is spot-on.
Standard vs Retractable Screen Door Measurements
The type of screen door you're installing—a classic hinged model or a sleek retractable one—changes the game a bit. The core principles are similar, but where you measure and what you account for can differ significantly.
Here's a quick breakdown of what to keep in mind for each type:
| Measurement Aspect | Standard Hinged Screen Door | Retractable Screen Door |
|---|---|---|
| Primary Measurement | Inside the door jamb where the screen will sit. | The full opening, including the surface area where the housing and tracks will be mounted. |
| Width Consideration | Use the smallest of three measurements to ensure it fits within the frame. | Requires precise width for the cassette housing plus clearance for operation. |
| Height Consideration | Smallest of three vertical measurements from the top jamb to the threshold. | Full height of the opening is critical for the track length. Threshold type matters. |
| Key Factor | Ensuring the door swings freely without catching on the frame. | Making sure the mounting surfaces are flat, plumb, and provide enough space for the hardware. |
Ultimately, standard doors are a bit more forgiving if your frame is slightly out of square. Retractable screens, on the other hand, demand much higher precision because the tracks need to be perfectly parallel for the screen to glide smoothly. Always double-check the manufacturer's specific instructions for the model you choose.
Get the Door Thickness and Jamb Depth Right
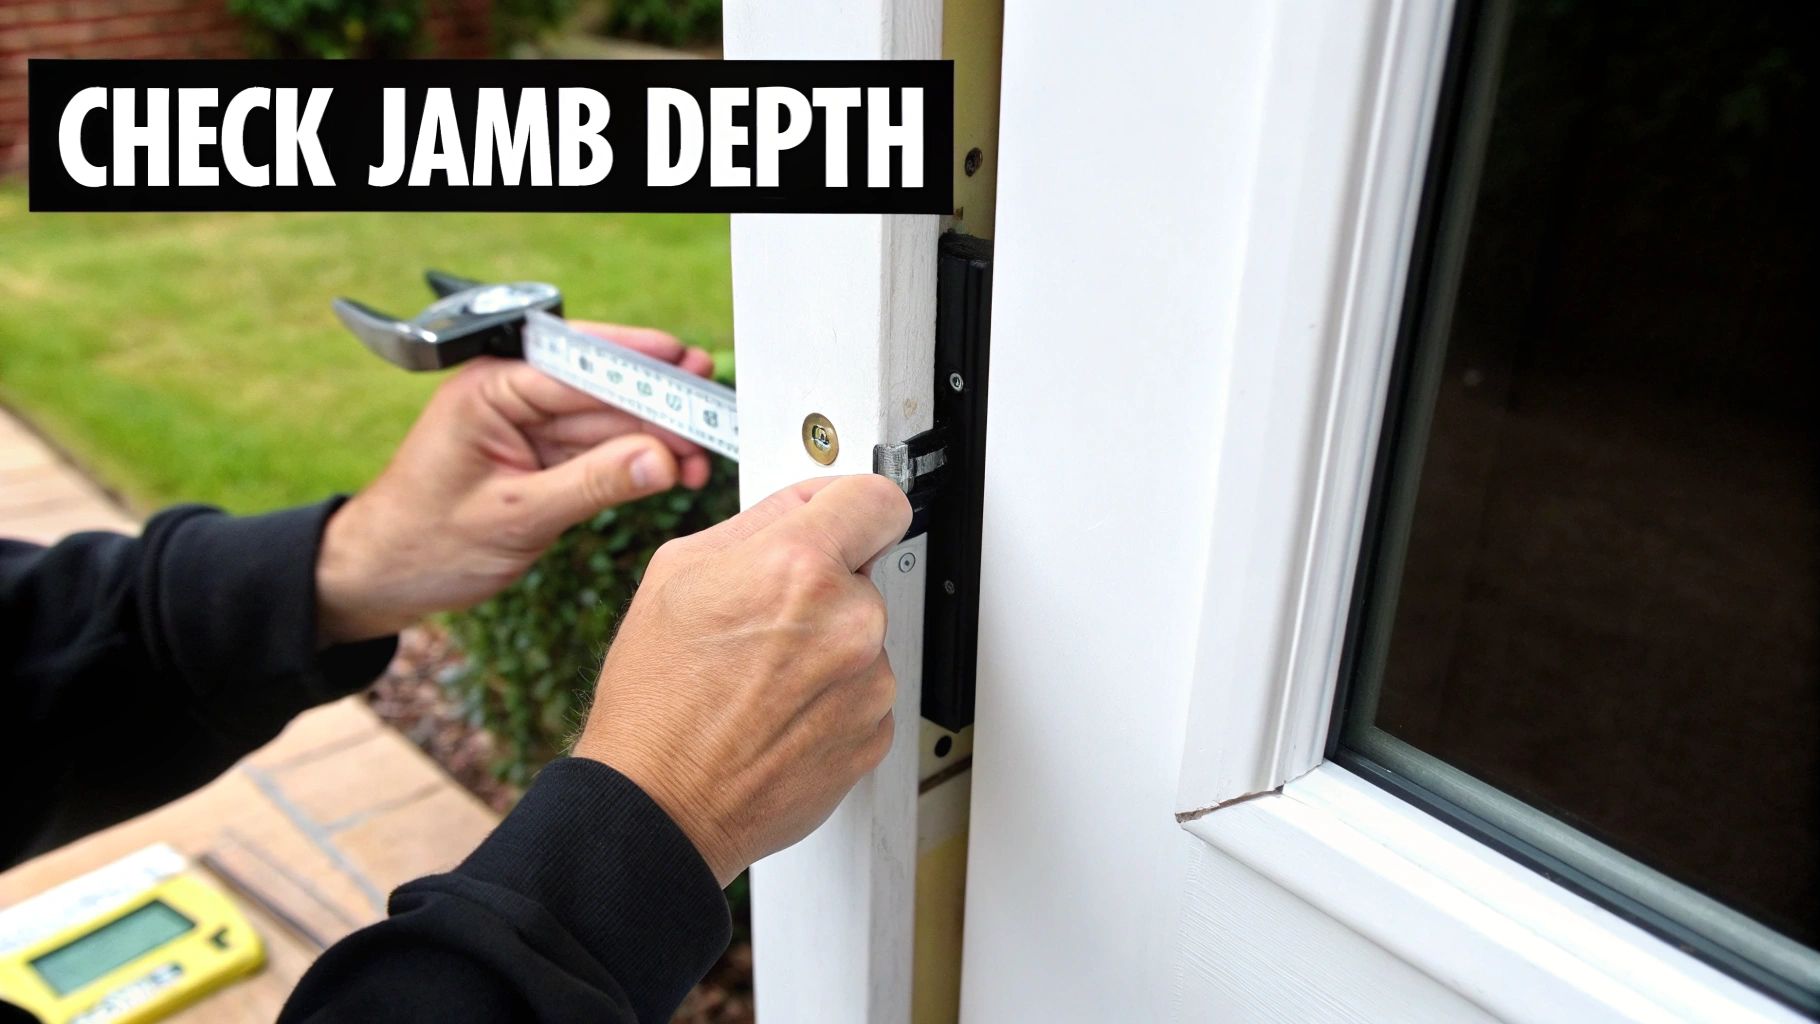
While width and height are the big numbers, the fit and finish of your new screen door really come down to two other details: door thickness and jamb depth. Getting these wrong is a classic rookie mistake. An incorrect measurement here can mean your new door won't close all the way, or the latch won't even line up with the strike plate.
How to Measure Jamb Depth
This one is simpler than it sounds. Place the end of your tape measure on the outside face of your exterior trim—right where you expect the screen door’s hinge to sit. Now, extend the tape inward until it touches the face of your main entry door.
That distance is your jamb depth. Most modern screen doors are designed for a jamb that’s at least 1 inch deep. If yours is shallower, you might need to look for specific "thin-frame" models or consider adding some trim to build out the depth.
It's interesting how these standards came about. The move toward aluminum doors in the mid-20th century really helped standardize sizes for modern homes. You can actually read more about the evolution of screen doors on stormdoorguy.com if you're curious about the history.
Common Measurement Mistakes to Avoid
Even if you're meticulous, a couple of common slip-ups can derail your whole project. I've seen it happen time and again.
The number one mistake is measuring the old screen door instead of the actual door frame where the new one will sit. Over time, old doors can warp, sag, or may have been shaved down to fit an uneven frame. Using it as your template is a recipe for a poor fit. Always measure the opening itself.
Another classic error is forgetting to account for a clearance gap. It’s a huge issue in door replacements—industry data shows 30-40% of replacements have sizing problems that cause sticking or drafts.
To get it right, you need to subtract a tiny bit from your final measurements to give the door room to breathe and operate smoothly. A good rule of thumb is to take off 1/8 to 3/16 of an inch. For a deeper dive into getting that clearance perfect, check out this guide on proper door sizing from Columbus Woodworks.
Got Questions About Measuring? We’ve Got Answers.
We get a lot of the same questions when homeowners start measuring for a new screen door. Let's clear up some of the common sticking points and tricky situations you might run into. Getting this right from the start makes the whole project go smoother.


