


Fixing a torn or worn-out window screen is one of those home repair jobs that seems intimidating at first, but is actually surprisingly straightforward. With just a few basic tools and a bit of patience, you can get a professional-looking result in less than an hour, saving yourself a decent amount of money in the process.
The whole job boils down to pulling out the old screen and the rubber cord (the spline) that holds it in, cutting a new piece of mesh to size, and then securing it back into the frame.
Why You Should Handle Your Own Screen Replacement
Taking on your own window screen replacement is a genuinely satisfying project. Yes, the cost savings are a big plus, but it’s really about having total control over the finished product. When you do it yourself, you get to choose the exact materials.
Instead of whatever standard-grade mesh a repair service uses, you can pick something that actually suits your life. For instance, you could go with:
- Pet-resistant screens if your cats or dogs have a history of shredding weaker mesh.
- Solar screens which are great for cutting down on energy bills and blocking harsh UV rays.
- High-visibility mesh if you want to keep the bugs out without spoiling your view.
Boosting Curb Appeal and Confidence
There's no denying that fresh, tight screens make a huge difference to your home's curb appeal, instantly getting rid of those sad, sagging eyesores. From the inside, they let the breeze in while keeping pests out where they belong. But beyond the aesthetics, completing a window screen replacement DIY project is a fantastic confidence booster for tackling other home repairs.
This project is a classic gateway to becoming a more self-sufficient homeowner. Once you master this simple repair, you realize you don't have to call a pro for every little thing, which saves you a ton of time and money down the road.
The DIY home repair movement is definitely on the rise. You can see it in the numbers—the overall window repair market was valued at around USD 3.2 billion in 2024 and is projected to hit USD 5.5 billion by 2033. Thanks to online guides and accessible tools, it’s never been easier for homeowners to take charge of their own maintenance.
In the end, that feeling of accomplishment is priceless. And while you're definitely saving on labor, it's still smart to know the full financial breakdown. You can check out our guide on the typical window screen replacement cost to see just how much this DIY approach can save you.
Gathering the Right Tools and Materials
Walking into a hardware store for a DIY screen replacement can feel a bit overwhelming. The aisle is a sea of options, and it’s easy to feel lost. Let’s cut through that confusion and put together a simple, effective shopping list so you can get in, get what you need, and get back to your project.
Having the right gear on hand is the difference between a frustrating afternoon and a finished job you can be proud of. You don’t need a workshop full of expensive equipment—just a few specific items will get you professional-looking results.
The Essential Toolkit
Your success really comes down to a few key tools. Trust me, you don't want to improvise here. Using a butter knife instead of a spline roller is a fast track to a torn screen and a lot of wasted time.
- Spline Roller: This is your non-negotiable, most important tool. A good one has two different wheels: a convex (rounded) wheel to gently push the screen fabric into the channel, and a concave (grooved) wheel to press the spline in for a super tight fit.
- Utility Knife: Make sure you have a fresh, sharp blade. A dull knife will snag and pull the mesh, potentially ruining your brand-new screen right at the finish line.
- Flathead Screwdriver or Awl: You'll need something small and pointed to pry out the old, brittle spline. Sometimes it comes out easily, but often it needs some coaxing.
- Tape Measure: The old saying "measure twice, cut once" is the golden rule of screen replacement for a reason. Accuracy is everything.
If you want to see exactly what to look for, we've broken down the best options in our guide to essential window screen repair tools.
Choosing Your Screen Mesh
This is where you can really tailor the project to your home. Before you just grab the standard roll, think about what you actually need from your screens.
A little forethought here can make a big difference in the long run. To make it easier, here's a quick rundown of the most common choices.
Choosing Your Screen Mesh: A Quick Comparison
| Material Type | Average Cost (per roll) | Best For | Key Feature |
|---|---|---|---|
| Fiberglass | $15 – $30 | First-timers, general use, budget projects | Flexible and forgiving; doesn't crease easily |
| Aluminum | $20 – $40 | A crisp, clean look and added durability | Stronger than fiberglass but can dent if mishandled |
| Pet-Resistant | $40 – $60 | Homes with cats or dogs that climb or scratch | Heavy-duty polyester mesh that resists tearing from claws |
| Solar Screen | $50 – $80+ | Sunny climates, south-facing windows | Blocks UV rays and heat, helping to lower cooling costs |
Ultimately, the right mesh comes down to your priorities. Fiberglass is a fantastic, all-around choice, but spending a bit more on a pet-resistant or solar screen can pay off for years to come.
Expert Tip: One of the biggest perks of doing this yourself is saving on labor, which can account for 50% or more of a professional's bill. Your material choices are where you have the most control over the final cost. As a recent report from Angi shows, professionally installed screens can run anywhere from $30 to over $550, so your choices really matter.
Last but not least, don't forget the spline! It’s the rubber cord that locks the mesh into the frame. The easiest way to get the right size is to pull out a small piece of the old spline and take it with you to the hardware store to match it up. A perfect match is crucial for a tight, secure fit.
Getting Down to Business: The Screen Replacement Process
Alright, this is where the magic happens. You’ve gathered your tools and materials, and now it's time to transform that ripped, sad-looking screen into something you can be proud of. The key to a successful window screen replacement is taking your time—no need to rush, just follow a steady, methodical approach. We'll walk through it step-by-step.
This visual guide breaks down the core of the project into a simple, easy-to-follow flow.
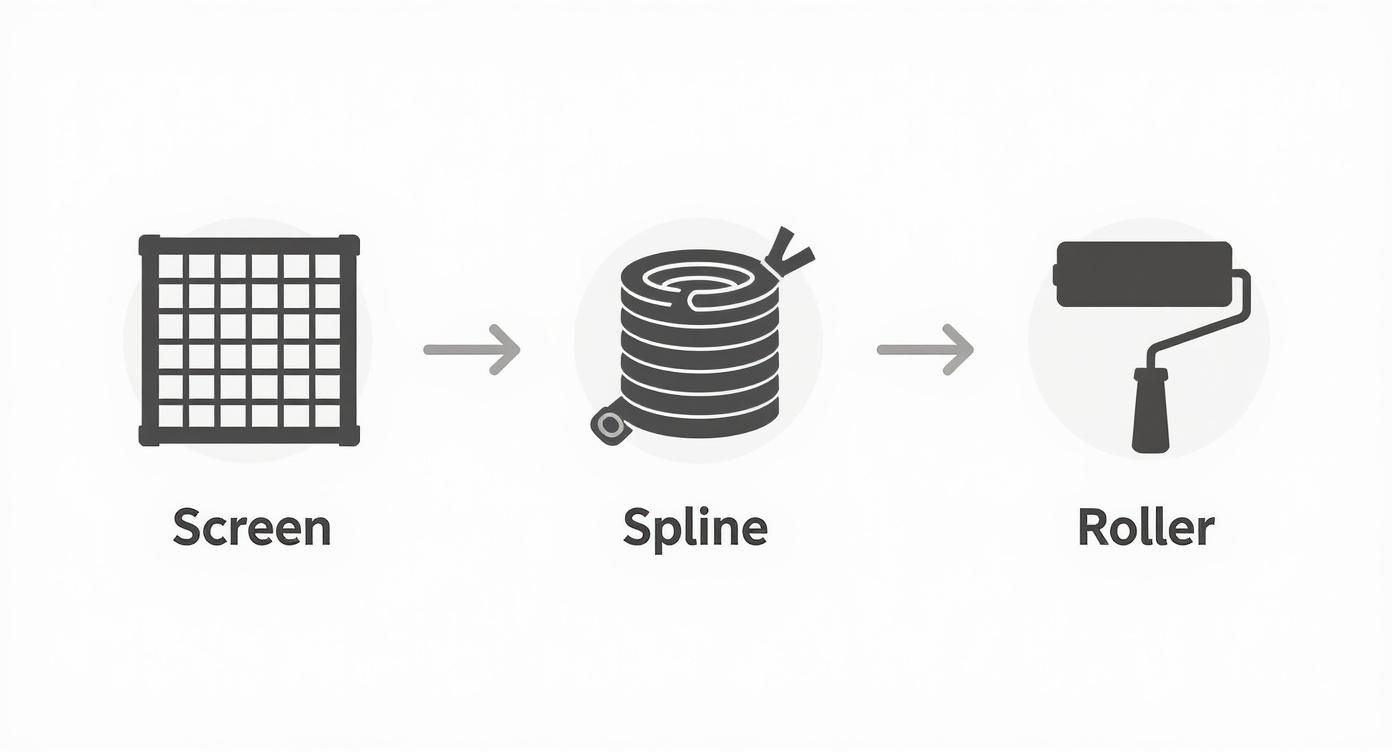
As you can see, it really boils down to three key players: the screen, the spline, and the roller. Once you have these, you’re ready to move from preparation to the final installation.
Removing the Old Screen and Spline
First things first, let's get that frame out of the window. Most are held in place by tension springs or small clips. You might see a couple of pull tabs, but if not, just push the frame toward one side to release the tension on the other. A little wiggle and it should pop right out.
Find yourself a good, flat workspace—a garage floor, a sturdy workbench, or even a large table will do. Lay the frame down and get ready to evict the old spline. This rubbery cord is what locks the screen into the frame’s channel. I usually grab a small flathead screwdriver or an awl to dig into a corner and pry up an end.
Once you’ve got a piece you can grab, the rest often pulls out in one long, satisfying strip. Don't be surprised if it's old and brittle, though; it might break into pieces. Just be patient and work your way around the frame until it's all out. With the spline gone, the old screen material will lift away easily.
Prepping the Frame and Cutting the New Mesh
Before you get too excited about the new screen, take a minute to clean out the frame's channel. A quick wipe with a cloth or a brush will clear out years of accumulated dirt and debris. This is a small step that makes a huge difference—a clean channel ensures the new spline will seat properly for a secure, long-lasting fit.
Now for the new mesh. Unroll it and lay it over the frame, making sure it overlaps the channel on all four sides. This next part is critical, so pay close attention.
Give yourself at least two inches of overlap on every side. This extra material is your best friend—it gives you something to hold onto when creating tension and provides a much-needed margin for error. Cutting the mesh too short is a rookie mistake that sends you right back to the hardware store.
If you haven't measured your frame yet, now's the time. A perfect fit starts with perfect numbers. For a full breakdown, check out our guide on how to measure window screen size. Once you've cut the mesh to size, lay it evenly across the frame.
Setting the Stage for a Perfect Install
With your new screen mesh laid out, you're ready for the most important part of the job: installing the spline. But hold on—before you grab that spline roller, let's talk about tension. The goal is a smooth, drum-tight finish with no sags or wrinkles. The trick is to avoid pulling the screen too tight too early, which can cause the frame to bow inward like a banana.
Here's a little pro tip I've learned over the years to get it started just right:
- Start on a Short Side: Begin by using your roller to press just a few inches of spline into one of the shorter sides. This acts as a temporary anchor.
- Move to the Opposite Side: Now, go to the opposite short side. Pull the mesh gently taut—not tight enough to bend the frame, just enough to remove the slack—and press in another few inches of spline.
- Repeat on the Long Sides: Do the exact same thing for the two longer sides.
This "tacking" method creates a nice, even tension across the entire surface before you fully commit to rolling the spline all the way around. You’ve now set the foundation for a flawless installation. Next up, we'll master the spline roller and lock that screen in for good.
Mastering the Spline for a Drum-Tight Finish
This is where the magic happens. Installing the spline is the step that separates a decent DIY screen repair from a truly professional-looking one. That flexible cord is what gives you a perfectly taut, wrinkle-free finish, but it’s also where things can go wrong if you rush it.
The good news is, you've already set yourself up for success. By "tacking" the screen mesh in place on all four sides as we did before, you've prevented the screen from shifting around. Now, it's just a matter of technique.
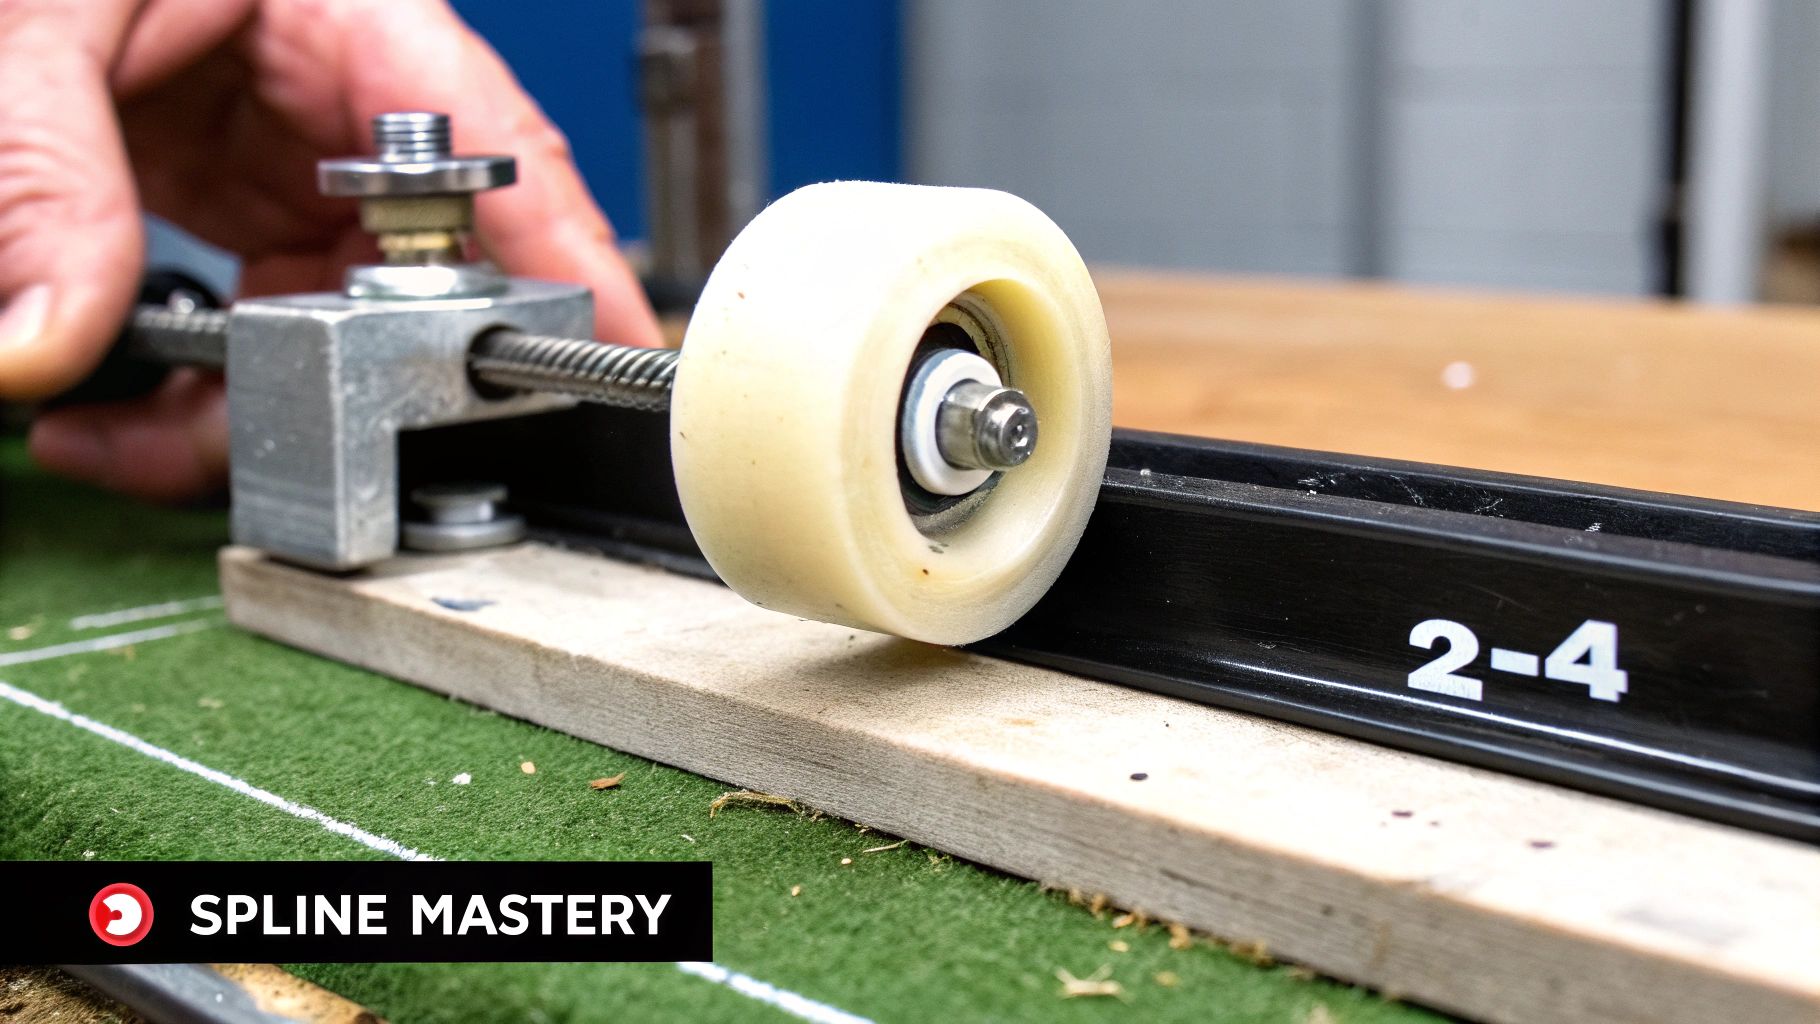
Using Your Spline Roller Correctly
That little spline roller tool has two different wheels for a reason, and knowing when to use each one makes all the difference. You'll want to start with the convex wheel—the one that bulges outward.
Pick one of the shorter sides you already tacked and gently press that convex wheel onto the spline. Your goal here isn't to force it in, but to lightly push the screen mesh down into the channel, creating a neat little groove for the spline to follow. Work your way around the entire frame with this wheel first.
Now, flip the tool over to the concave wheel. This grooved wheel is your workhorse. It's designed to firmly seat the spline deep into the channel, creating that final tension.
As you roll with the concave wheel, apply firm and consistent pressure. This is what pulls the screen taut and locks it in place. If a pucker or wrinkle starts to form, don't panic. Just back the roller up, lift out the last few inches of spline, smooth the screen by hand, and roll that section again.
This two-wheel approach is my go-to method. It systematically creates the tension and then locks it down, preventing the mesh from slipping as you go.
Navigating Corners and Finishing Touches
Corners trip a lot of people up, but the solution is simple: don't cut the spline. When you get to a corner, just use a flathead screwdriver to carefully poke the spline down into the corner of the channel. This gives you a clean, continuous fit without creating a potential weak spot.
Once you’ve made it all the way around the frame, you're on the home stretch. The last step is to trim off all that excess screen mesh. Grab your utility knife and hold the blade at a slight angle, pointing away from your brand-new spline.
- Angle the Blade: Always point the tip toward the outside of the frame. This ensures that if you slip, you won't slice the spline you just worked so hard to install.
- Use the Frame as a Guide: Let the metal frame guide your knife. Running the blade right along the outer edge of the spline channel will give you a perfectly straight, clean cut.
And that's it! With the extra mesh trimmed away, you're done. You haven't just replaced a screen; you've learned the proper technique for a flawless finish that will last for years.
How to Fix Common DIY Replacement Mistakes
Even with the best instructions, a window screen replacement diy project can hit a snag. It happens. The good news is that most of these "oops" moments are pretty easy to fix without having to scrap everything and start over. Let's walk through the most common frustrations and how to solve them.
One of the biggest culprits is the bowed frame. You finish rolling in the spline, step back to admire your work, and notice the long sides of the frame are curving inward. It’s a classic sign you've pulled the screen mesh way too tight. Don't panic—just pull the spline out from the bowed sides, let the screen relax, and then gently roll the spline back in with a bit less muscle this time.
Another headache? Finding wrinkles or puckers after you've already set the spline. This almost always points to uneven tension. You don't need to rip the whole thing out. Just lift the spline in the wrinkled area, use your hand to gently smooth the mesh toward the outside of the frame, and reinstall that section of spline.
Diagnosing and Correcting Spline Issues
So, what happens when the spline itself is the problem? You're working your way around the frame, and the spline keeps popping right back out of the channel behind you. This is a dead giveaway that your spline's diameter is too small for the groove.
Key Takeaway: Don't try to force a spline that keeps popping out. The only real fix is to get the right size. Your best bet is to take a small piece of the old spline with you to the hardware store to find an exact match or one that's a tiny bit larger. A spline that’s slightly too big can usually be compressed into the channel, but one that’s too small will never create a secure fit.
It's also surprisingly easy to accidentally tear the mesh, especially during that final trim with the utility knife. A slip of the blade can feel like you've ruined the whole project, but a tiny nick right next to the frame is usually just a cosmetic flaw. If it's small and tucked against the spline, it won’t affect the screen’s integrity at all.
Evolving DIY Standards and Solutions
As more homeowners get comfortable with these kinds of projects, the quality and variety of materials have improved right along with them. We're seeing this in the market for specialized screens, like retractable options, which is on track to hit around USD 2.5 billion by 2025. This isn't just a random statistic; it shows a real demand for better home solutions that boost comfort and airflow. You can discover more insights about these market trends and how they influence the products available for your DIY projects.
This evolution means there are more clever solutions available than ever before. For instance, if you find a small hole in the middle of your brand-new screen, you don't have to start from scratch. Try one of these quick fixes:
- Screen Repair Patches: For small punctures or tears, these little adhesive-backed patches are a quick, easy, and nearly invisible fix.
- Clear Nail Polish or Super Glue: Got a tiny, pinhole-sized tear? A small dab of clear nail polish will seal it up and stop it from spreading.
With a few of these tricks up your sleeve, you can turn a moment of frustration into a professional-looking repair you can be proud of.
Answering Your Top DIY Screen Repair Questions
Even the best guides can't cover every little thing that might come up. When you're in the middle of a project, a few specific questions always seem to surface. Let's walk through some of the most common ones I hear from people tackling this for the first time.
Getting these details right can make all the difference between a frustrating afternoon and a job well done.
What’s the Best Screen Material for a First-Timer?
If you're new to this, do yourself a favor and start with standard fiberglass screen mesh. It's the most forgiving material by a long shot.
The reason is simple: it's flexible and doesn't crease permanently. If you mess up with an aluminum screen, that dent you just made is probably there for good. Fiberglass, however, has a bit of stretch, which is a huge advantage. It lets you pull things taut and make small adjustments as you press the spline into place, making it much easier to get that tight, professional finish on your first try.
How Do I Know What Spline Size to Buy?
This is one of the most critical parts of the job—get the spline size wrong, and the whole thing will fail. The most foolproof way to get it right is to cut a small piece of the old spline and take it with you to the hardware store. Match it up right there in the aisle, and you eliminate all guesswork.
What if the old spline is gone or disintegrated? Your next best bet is to measure the channel in the screen frame itself.
Here’s a pro tip: Always choose a spline that is just a little bit larger than the channel's width. You can compress a slightly oversized spline into the groove for a super snug fit. A spline that’s too small, on the other hand, will just pop right back out. Most common sizes fall between .125" and .250".
Do I Have to Remove the Entire Window to Replace the Screen?
Definitely not! This is a common misconception that makes the job sound much bigger than it is. You only need to remove the screen frame, which is a separate piece from the main window.
Look for tension springs on the sides, small clips, or little pull tabs. Once you find them, you can easily release the frame and pop it out. From there, you can take it to a workbench, a large table, or even a clean spot on the garage floor to do the work. The window itself stays put.
If you get stuck or decide you'd rather leave it to the pros, Sparkle Tech Screen Service is ready to step in. We provide same-day quotes and can get your screens fixed up in no time.
Head over to our website to get started.


