


That little tear in your window screen isn't just a cosmetic issue. Think of it as an open invitation for every bug, bit of pollen, and piece of debris to come right into your home. The damage I see most often ranges from small holes clawed by pets to entire sections of mesh that have become brittle and frail from years under the hot sun.
Figuring out exactly what you're dealing with is always the first step. It's the only way to know if you're looking at a quick fix or a bigger project.
How To Identify Common Window Screen Damage
Before you can fix the problem, you need to play detective. Different kinds of damage point to different culprits, and a quick visual check can tell you a lot about the overall condition of your screens.
This is a huge issue for homeowners in sunny spots like Phoenix, where the intense UV rays and dust storms really do a number on screens. I've seen countless cases where screens look old before their time. In fact, it's estimated that up to 40% of residential window screens in hot climates show noticeable damage within just three years because of solar degradation. From Scottsdale to Tempe, the stories are the same: torn screens from pet claws, hail damage, or high winds.
Telltale Signs of Screen Failure
The most obvious signs are, of course, holes and tears. These can be tiny punctures or bigger gashes. It's often the family cat trying to climb the patio screen door one too many times that finally weakens the mesh until it gives way.
Another common problem I see is discoloration and brittleness. If you touch your screen and it feels stiff, or if it looks faded and almost chalky, you're likely dealing with sun rot. The UV rays have broken down the material, making it so fragile that it can crack with just a gentle push. This is a major weakness of standard fiberglass mesh. You can explore the pros and cons of different materials here: https://sparkletechscreenservice.com/types-of-window-screen-mesh/.
A screen that looks fine from a distance might be one strong gust of wind away from complete failure. Always check for brittleness during your inspection, as it's a clear indicator that a full replacement is needed, not just a patch.
To make it easier, here's a quick reference table. Use this to match what you see with the most likely cause and your best next move.
Diagnosing Your Window Screen Damage at a Glance
| Type of Damage | Most Common Cause | Recommended First Action |
|---|---|---|
| Small Holes or Punctures | Insects, flying debris, embers | Patching kit or small dab of super glue |
| Large Rips or Gashes | Pets (claws), children, accidental impact | Rescreening the entire frame is best |
| Faded, Chalky, or Brittle Mesh | UV sun damage ("sun rot") | Full rescreen; the material is compromised |
| Sagging or Loose Screen | Spline has shrunk and popped out of the frame | Replace the old spline with a new one |
| Bent or Warped Frame | Physical impact (ball, storm debris, etc.) | Complete screen replacement (frame and all) |
This table should help you quickly diagnose the issue and decide whether it’s a simple DIY fix or something that requires a new screen.
Inspecting the Frame and Spline
Don't forget that the damage isn't always in the mesh itself. The metal frame can get bent or warped from a stray baseball or debris kicked up during a monsoon storm. Once the frame is bent, it creates gaps that let pests slip right through, completely defeating the purpose of the screen.
While you're at it, take a close look at the rubber spline that holds the mesh in the frame's channel. Over time, it dries out, shrinks, and can pop right out of its groove. This is what causes the screen to look saggy or pull away from the edges, creating a loose, ineffective barrier. Just as you learn to spot these issues with your screens, knowing the early warning signs for other parts of your home is crucial—for example, it's just as important to be identifying signs of damage for your roof.
Don't Let a Torn Screen Inflate Your Energy Bills

It’s easy to look at a small rip in your window screen and think, "I'll get to that later." It seems like a minor cosmetic issue, but that tiny flaw is quietly costing you money, especially during a brutal Arizona summer. The real expense of window screen damage isn't what you pay for a repair—it's the steady, unchecked rise in your monthly energy bills.
Think of your screens, particularly solar screens, as your home's first line of defense against the relentless sun. When they’re in good shape, they create a powerful thermal barrier, reflecting a huge amount of solar energy before it even touches your window glass. The moment that barrier is broken by holes or tears, your home’s efficiency takes a nosedive.
What happens next is simple: your air conditioner has to pick up the slack. It's forced to work much harder and run far longer just to keep your home comfortable. Every little tear is a gateway for heat to pour inside, and your AC unit pays the price.
Putting Numbers to the Problem
Let’s paint a picture. Picture two similar homes side-by-side in Mesa during the peak of summer. One has high-quality, intact solar screens on every window facing the sun. The house next door has screens with a few "minor" rips and is starting to sag with age.
- House A (Intact Screens): The AC runs in normal cycles. The temperature inside stays consistently cool all day.
- House B (Damaged Screens): The AC is on constantly, fighting a losing battle as heat blasts through the compromised screens. You can feel the difference, especially upstairs in the afternoon.
When the power bill arrives, the owner of House B could easily be looking at a bill that’s 20-30% higher than their neighbor's. That’s not a few pocket pennies; over a whole cooling season, we’re talking hundreds of dollars wasted.
With energy costs on the rise, window screen damage has become a hidden budget killer for homeowners. Torn screens can let in up to 25% more heat. In places like Surprise and Queen Creek, damaged solar screens are practically useless against UV rays, causing indoor temperatures to climb by 10-15°F. For an average family, that can mean an extra $500 a year just on AC costs.
Suddenly, fixing that tear isn't just about keeping the flies out. It’s a direct investment in your home's efficiency and your wallet. Addressing window screen damage is one of the smartest financial moves you can make, and it pays for itself in savings.
If you're starting to weigh the options, our guide can help you break down the window screen replacement cost.
Practical DIY Fixes for Minor Screen Issues
When you find a small tear or a slight bend in your window screen, your first instinct might be to call for help. But honestly, for many minor issues, a little DIY can save you time and money, and it’s surprisingly satisfying to fix it yourself.
Tackling these small jobs empowers you to keep your home’s first line of defense against bugs and blowing leaves in top shape. You don't always need a full replacement for tiny holes in fiberglass mesh or a frame that's just a little out of whack. With a few common tools and a bit of patience, you can get a lot more life out of your screens.
Patching Small Holes and Sealing Tears
For those annoying little punctures you sometimes find in fiberglass screens—often from curious pets, insects, or even flying embers—a simple patch kit is your best friend. You can grab these at just about any hardware store. They’re usually just small, self-adhesive squares of screen mesh that you press right over the hole. Done.
Another go-to trick for tiny tears is a small dab of waterproof super glue or even clear silicone caulk. This is a great way to seal a small rip before it has a chance to get any bigger. Just apply a thin bead to bring the torn edges together and let it dry.
- Using Adhesives: Apply a tiny amount and gently pinch the torn fibers together until they hold.
- Applying Patches: Always clean the area around the hole with some rubbing alcohol first. This gets rid of any dust or grime and helps the patch stick much better.
- Heads Up: These fixes are really only for fiberglass mesh. They won't work well on aluminum screens.
Straightening Minor Frame Bends
A slightly bent aluminum frame often looks worse than it is. You can usually persuade it back into shape without any fancy equipment. The first step is to carefully pop the screen out of the window. Find a flat, solid surface to work on, like your garage floor or a sturdy workbench.
Lay a piece of scrap wood over the bent part of the frame and give it a few gentle taps with a rubber mallet. The key here is to use light, repeated taps, not one big, forceful whack. Hitting it too hard can actually make the bend worse or even crack the frame. Just tap and check, tap and check, until it’s straight again.
One of my favorite pro tips involves using a hairdryer to make vinyl spline more flexible before installation. A little bit of heat makes the spline much easier to press into the frame's channel, especially on a cool day. This simple trick prevents frustration and ensures a tighter fit for your new screen mesh.
Tools for the Job
While you can manage some basic repairs with what you already have in your toolbox, a few specialized tools will make the job much easier and give you a far more professional result. If you're planning on rescreening an entire frame, a spline roller is an absolute must-have. This little gadget has a wheel on each end (one curved in, one curved out) designed specifically to press the spline perfectly into the frame’s groove.
Besides a spline roller, a sharp utility knife is crucial for trimming the excess screen mesh for a clean, flush finish. You'll probably also want a small flathead screwdriver or an awl handy to help you dig out the old, brittle spline. For a complete list of what we recommend, check out our guide on essential window screen repair tools. These items are the foundation of any solid DIY screen repair kit.
Knowing When to Repair or Replace Your Screens
Figuring out whether to patch a screen or replace it entirely can be a tricky decision. A tiny, clean hole from a stray pebble seems like an easy fix, but what about a screen with several tears or one that just feels old and fragile? The right answer isn't just about the quick fix; it's about making a smart decision for the long haul.
The choice really boils down to the extent and location of the window screen damage. A single, small hole—think smaller than a quarter—is usually a perfect candidate for a simple DIY patch, as long as it's not right up against the frame. If the tear is touching the edge, a patch just won't get a good enough grip to last.
Assessing the Screen's Age and Material
You also have to consider the screen's age and what it's made of. Over time, especially under the intense Arizona sun, standard fiberglass mesh suffers from what we call "sun rot." It gets brittle, loses all its flex, and can feel almost chalky to the touch. If your screen feels stiff or you hear a slight cracking sound when you gently press on it, patching is just throwing good money after bad.
Patching brittle, sun-damaged mesh is like putting a bandage on a crumbling wall. The patch might hold for a short while, but the surrounding material is already compromised and will likely tear again nearby, often within a few months. A full rescreen is the only durable solution.
This simple decision tree can help you visualize the best course of action based on the condition of your screen.
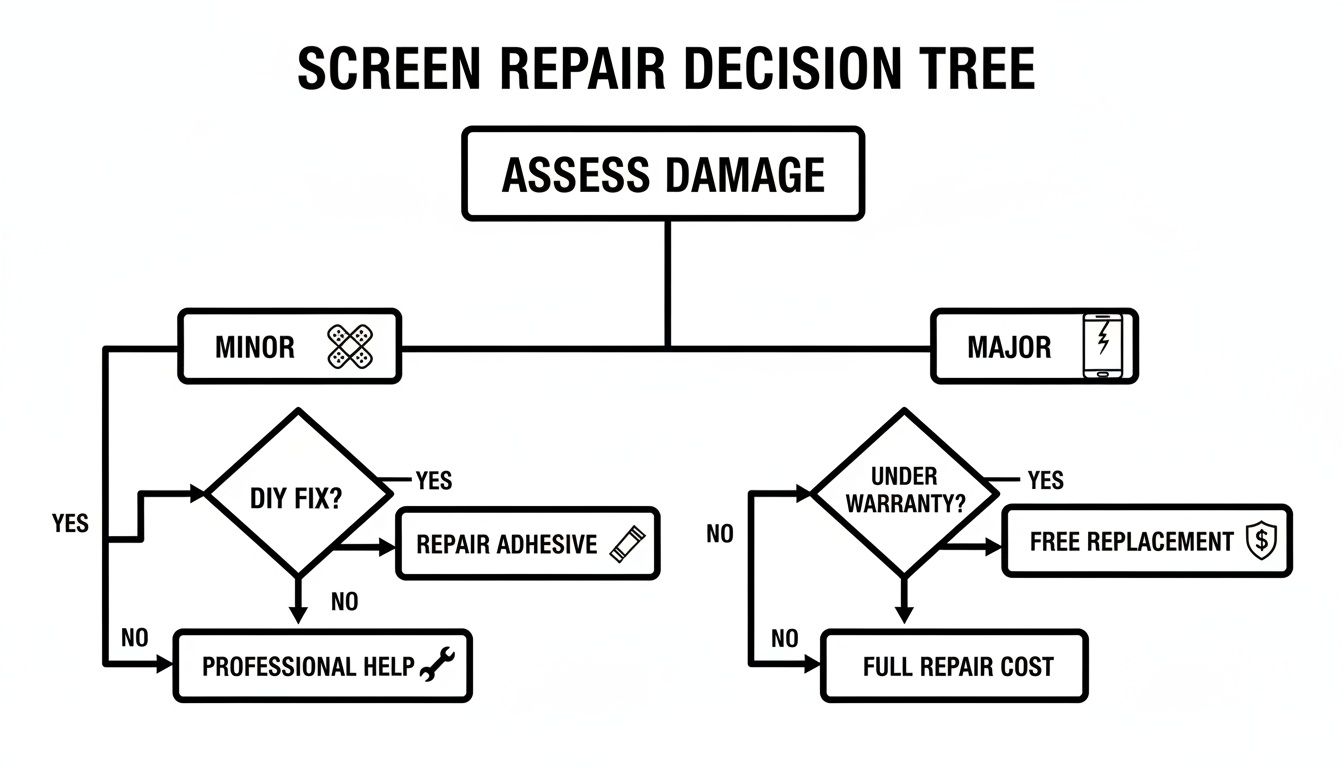
As you can see, a little bit of damage on a newer screen is something you can probably handle yourself. But once you're dealing with major damage or an old, brittle screen, it's time to call in a pro for a replacement.
When Rescreening Is More Cost-Effective
It might sound backward, but replacing the entire mesh is often cheaper and works better than trying to apply multiple patches. Picture a screen that's been through a hailstorm or met the claws of a determined pet—it’s dotted with little holes everywhere. Patching each one would be a pain, look terrible, and the cost of all those little kits adds up.
Even more importantly, multiple weak spots are a clear sign that the whole screen is on its last legs. A full rescreen solves the underlying problem, giving you a brand-new, tight, and secure barrier for way less than the cost of a whole new screen and frame. It makes your screen look and work like new. Of course, if the frame itself is bent, cracked, or broken, then your only real option is to replace the entire unit.
Proactive Tips to Prevent Screen Damage
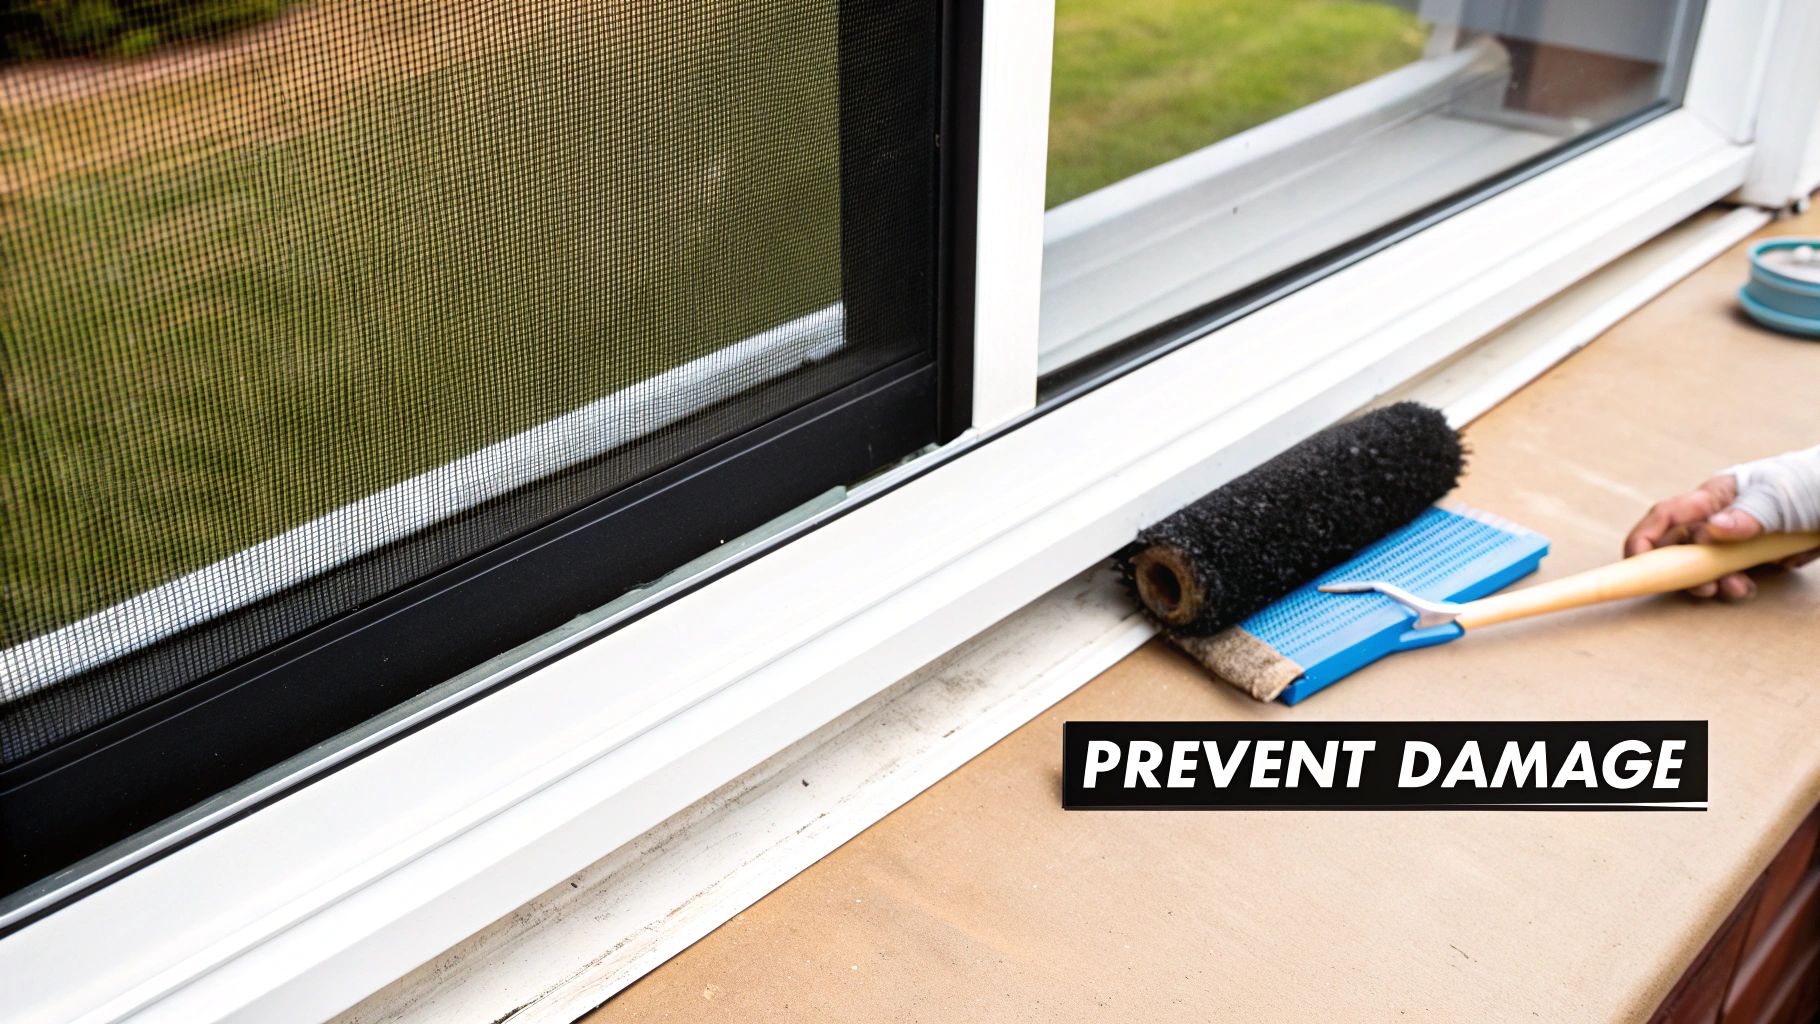
The best repair is always the one you don't have to make. Instead of just reacting when a hole or tear finally appears, a few simple habits can extend the life of your screens by years. This is especially true here in Arizona, where the intense sun and constant dust take a serious toll. Preventing window screen damage is all about smart, consistent maintenance.
A little proactive care really does go a long way. You’ll save money on future repairs, sure, but you’ll also keep your home's first line of defense against bugs and debris intact year-round. It's about working smarter, not harder.
Regular Cleaning and Maintenance
In Arizona, dust is more than just a nuisance—it’s actively destructive. Those fine particles of sand and dirt get trapped in the screen mesh. Add a little moisture from a monsoon storm, and you’ve got a gritty paste that acts like sandpaper, slowly wearing down the screen material every time the wind blows.
You don’t need anything fancy to fight back. In fact, a power washer or harsh chemicals can do more harm than good.
- Gentle Washing: Grab a soft-bristled brush and a bucket of water with a little mild soap. Gently scrub both sides of the screen to lift off all that accumulated grime.
- Thorough Rinsing: Use a garden hose on a low-pressure setting to rinse away all the soap and dirt.
- Drying: Let your screens air-dry completely before popping them back in the frame. This stops any mold or mildew from getting a foothold.
Try to tackle this at least twice a year—maybe once in the spring and again after the monsoons have passed. It’s a simple routine that removes the gunk that makes screens brittle and weak over time.
A quick spline check can save your screen. Just press your finger along the rubber spline that holds the mesh in the frame. If it feels hard, looks cracked, or is popping out of its channel, it's time to replace it. Catching it early prevents the whole screen from coming loose.
Reinforcing High-Traffic and Vulnerable Areas
Let's be honest, not all screens live the same life. Your sliding screen door to the patio gets a workout every single day, while a second-story bedroom window screen might not be touched for months. It’s smart to reinforce those high-traffic areas.
If you have pets or young kids, the standard fiberglass mesh just won't cut it for long. For those vulnerable spots—like patio doors or low-to-the-ground windows—consider upgrading the material.
Pet-resistant screens are a brilliant investment. They're made from a tough, vinyl-coated polyester that can stand up to claws and paws without tearing. You could also opt for a stronger aluminum or a specialized "tough screen" material. These provide an extra layer of defense against accidental pushes and bumps, dramatically cutting down the chances of window screen damage. This targeted approach helps your most-used screens last just as long as the others.
When It's Time to Call in the Pros
While I’m a big fan of a good DIY project for small rips and tears, some jobs are just better left to a professional. Knowing when to put down the tools and pick up the phone can save you a ton of hassle, money on wasted materials, and even prevent a nasty fall.
So, when is it time to hand the job over?
High & Hard-to-Reach Windows: If the damaged screen is on the second story, it’s an immediate pro-call. Juggling tools and materials on a tall ladder is a recipe for disaster. We have the proper safety equipment and experience to get it done without the risk.
Custom or Oddly-Shaped Frames: Arched windows, hexagons, or just old, non-standard frames can be a real headache. Store-bought kits won't work, and getting a perfect, bug-proof fit requires precision cutting and installation that only comes with experience.
Specialty Screen Materials: Upgrading to tougher materials like solar screens or pet screens isn't as simple as swapping out standard mesh.
These heavier materials need to be pulled incredibly tight with specialized tools to be effective. If you don't get the tension just right, a solar screen will sag and won't block the heat properly, and a pet screen won't stand up to claws.
When you run into these situations, that’s where we come in. Here at Sparkle Tech Screen Service, we’ve seen it all. We can build and install brand-new bug screens, fit durable sun screens, and even handle tricky slider repairs.
For homeowners all over Phoenix and the Valley who need a fast, reliable fix for their window screen damage, our same-week service gets the job done right and quickly.
Don’t wrestle with a frustrating or dangerous repair. Get an expert opinion and a fast quote. Just Text or Call us at 623-233-0404.
Got Questions About Window Screens? We've Got Answers
We hear a lot of the same questions from homeowners about their window screens. Let's tackle some of the most common ones right now.
How Long Should a Window Screen Actually Last?
This is a big "it depends," mostly on the screen material and what it's up against every day. For a standard fiberglass screen, especially in a place with intense sun, you might only get 5-7 years before it gets brittle.
But if you've got a tougher material, like aluminum or one of the newer solar screens, you can easily expect it to hold up for 10-15 years, sometimes even longer if you take good care of it.
Can I Just Patch Any Damaged Screen?
I wish it were that simple, but definitely not. A small hole or a tiny tear in fiberglass? Sure, a patch kit can work wonders. But for bigger problems, a patch is just a band-aid.
- Sun Rot: If you touch the screen and it feels chalky or crumbles easily, the whole thing is shot. Patching it is pointless because the material around the patch will just tear next.
- Lots of Holes: If your screen looks like it lost a fight with a hailstorm or the cat used it as a climbing gym, you're better off getting it rescreened.
- Bent Frames: A frame that's badly bent, warped, or cracked can't be fixed properly. You can't get the screen tight, and it won't fit right in your window. That's a full replacement job.
Here's a good rule of thumb: A solid repair should be hard to spot. If your screen looks like a patchwork quilt, it’s not really doing its job anymore. It's time to call in a pro.
What's the Difference: Rescreening vs. Replacing?
People use these terms interchangeably, but they are two very different jobs. It's important to know which one you need.
Rescreening is when we take your existing screen frame, pull out all the old, torn mesh and the rubber spline that holds it in, and then install brand-new screen fabric. This is perfect—and much cheaper—if your frames are still straight and in good shape.
Replacing a screen means the whole thing is getting tossed. We build you a brand-new frame and install a new screen in it. This is your only option when the metal frame itself is bent, broken, or just too beat up to save.
Don't let window screen damage mess with your home's comfort and security. When you need a fast, professional fix, the team at Sparkle Tech Screen Service has you covered. We offer same-week service for all repairs, rescreening, and full replacements.
Get your quick quote today by visiting https://sparkletechscreenservice.com or just text or call us at 623-233-0404.


