


When you spot a tear in your screen enclosure, your first thought is probably just to patch it up. But that visible damage is often just the tip of the iceberg. A truly effective repair starts with a good diagnosis—looking beyond the obvious rip to understand the full picture, from tiny punctures to the slow, steady wear caused by years of sun and storms.
Decoding the Signs of Screen Enclosure Damage
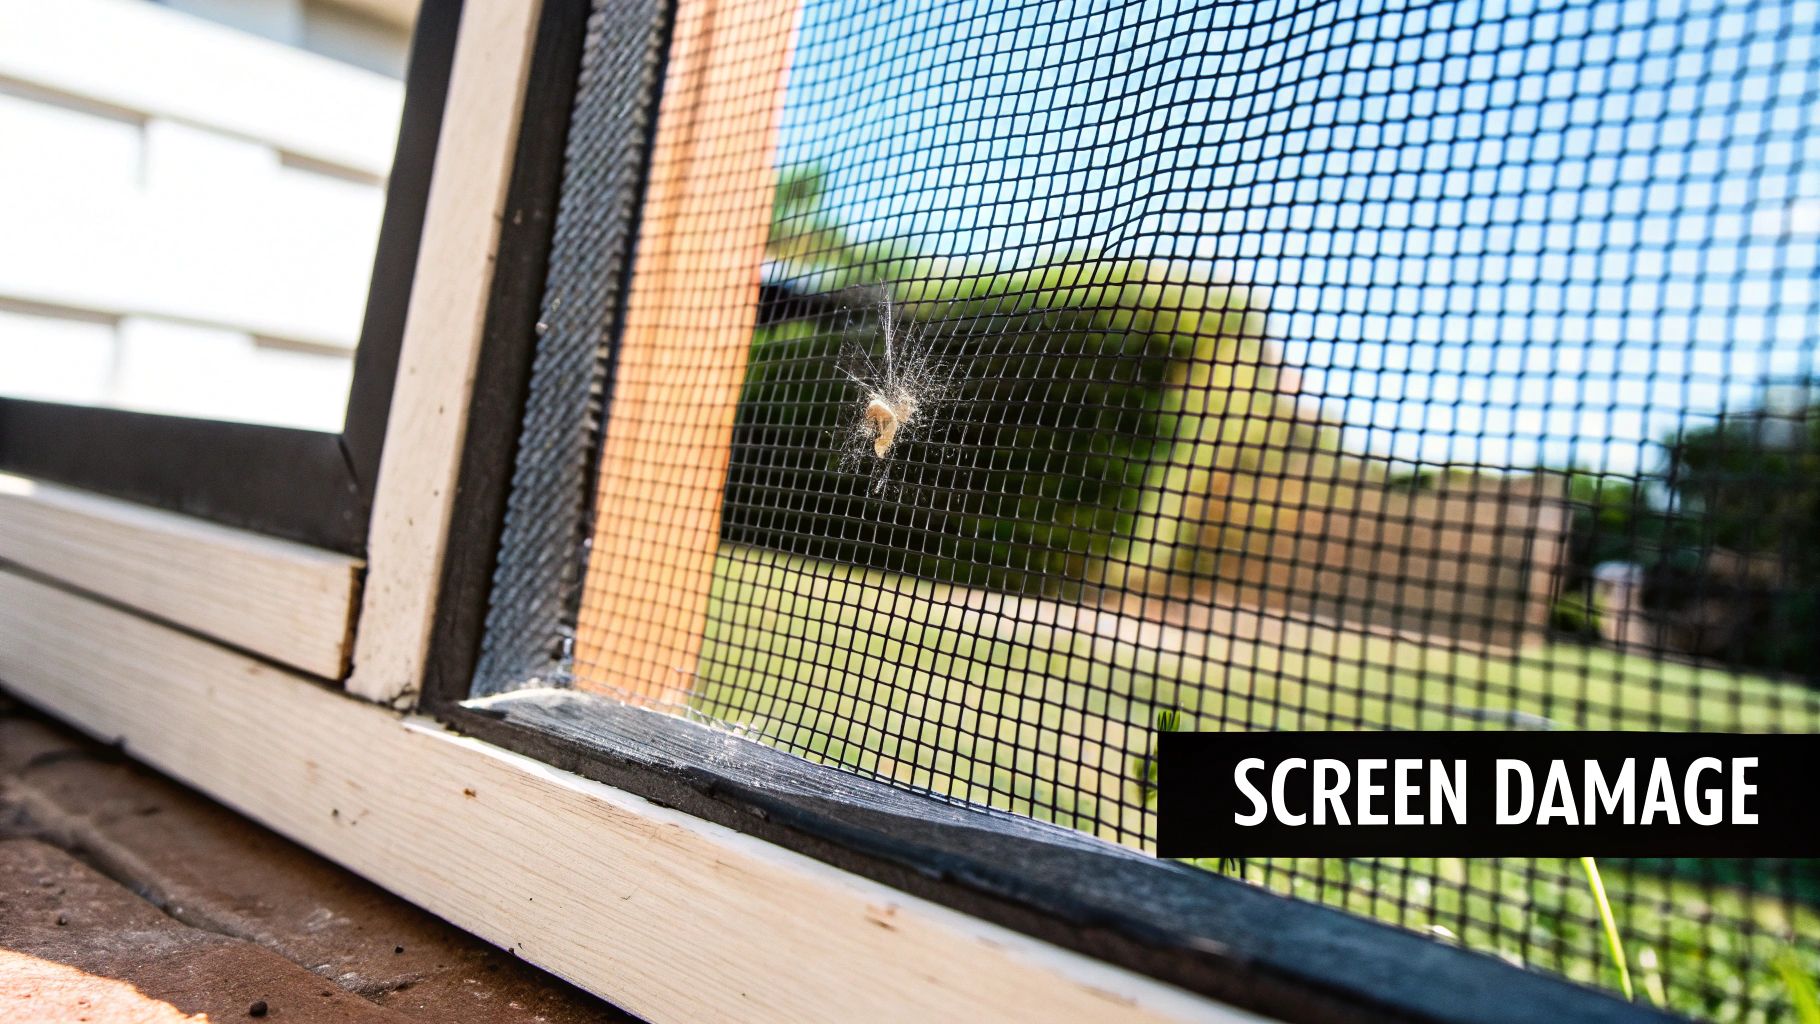
That small hole in your patio screen might feel like a minor inconvenience, but it's often the first domino to fall. It’s an open invitation for pests, and it slowly chips away at the comfort of your outdoor living space. More importantly, that little tear can point to bigger problems. If you ignore it, you could be looking at a much more expensive fix down the road.
Your screen enclosure is in a constant battle with the elements. Learning to spot the early signs of wear is the best way to keep it in top shape. It's clear homeowners are investing more in these spaces. The global market for retractable enclosures, which includes many screen systems, is already valued at $1.5 billion and is expected to keep climbing. This trend, highlighted in recent market analysis, shows just how much we value these outdoor rooms, making their upkeep more critical than ever.
Common Types of Screen Damage
Damage doesn't always show up as a huge, gaping hole from a storm. Most of the time, it’s a slow burn. Catching these subtle signs early can save you from a major headache later.
Keep an eye out for these common issues:
- Punctures and Tears: These are the easy ones to spot. They’re usually caused by pets, kids playing, or debris kicked up by the lawnmower.
- Fading and Brittleness: Here in Arizona, the relentless sun is a screen's worst enemy. Over the years, UV exposure breaks down the mesh, making it brittle and easy to tear.
- Sagging Screens: If you see a panel looking loose or wavy, the problem is likely the spline. That's the rubber cord that holds the screen tight in the frame's channel. When it fails, the screen loses its tension.
- Corroded Fasteners: The screws and bolts holding the aluminum frame together can rust, especially with moisture. This corrosion compromises the strength of the entire structure.
Here's a pro tip: The condition of the spline is just as important as the screen itself. A perfectly good screen held by a cracked, shrunken spline will sag and eventually pop right out. You'll end up having to replace the whole panel anyway.
Figuring out what caused the problem is key to a lasting screen enclosures repair. If you only treat the symptom—like patching a tear without replacing a bad spline—you'll just be doing it all over again next season.
How to Properly Inspect Your Screen Enclosure
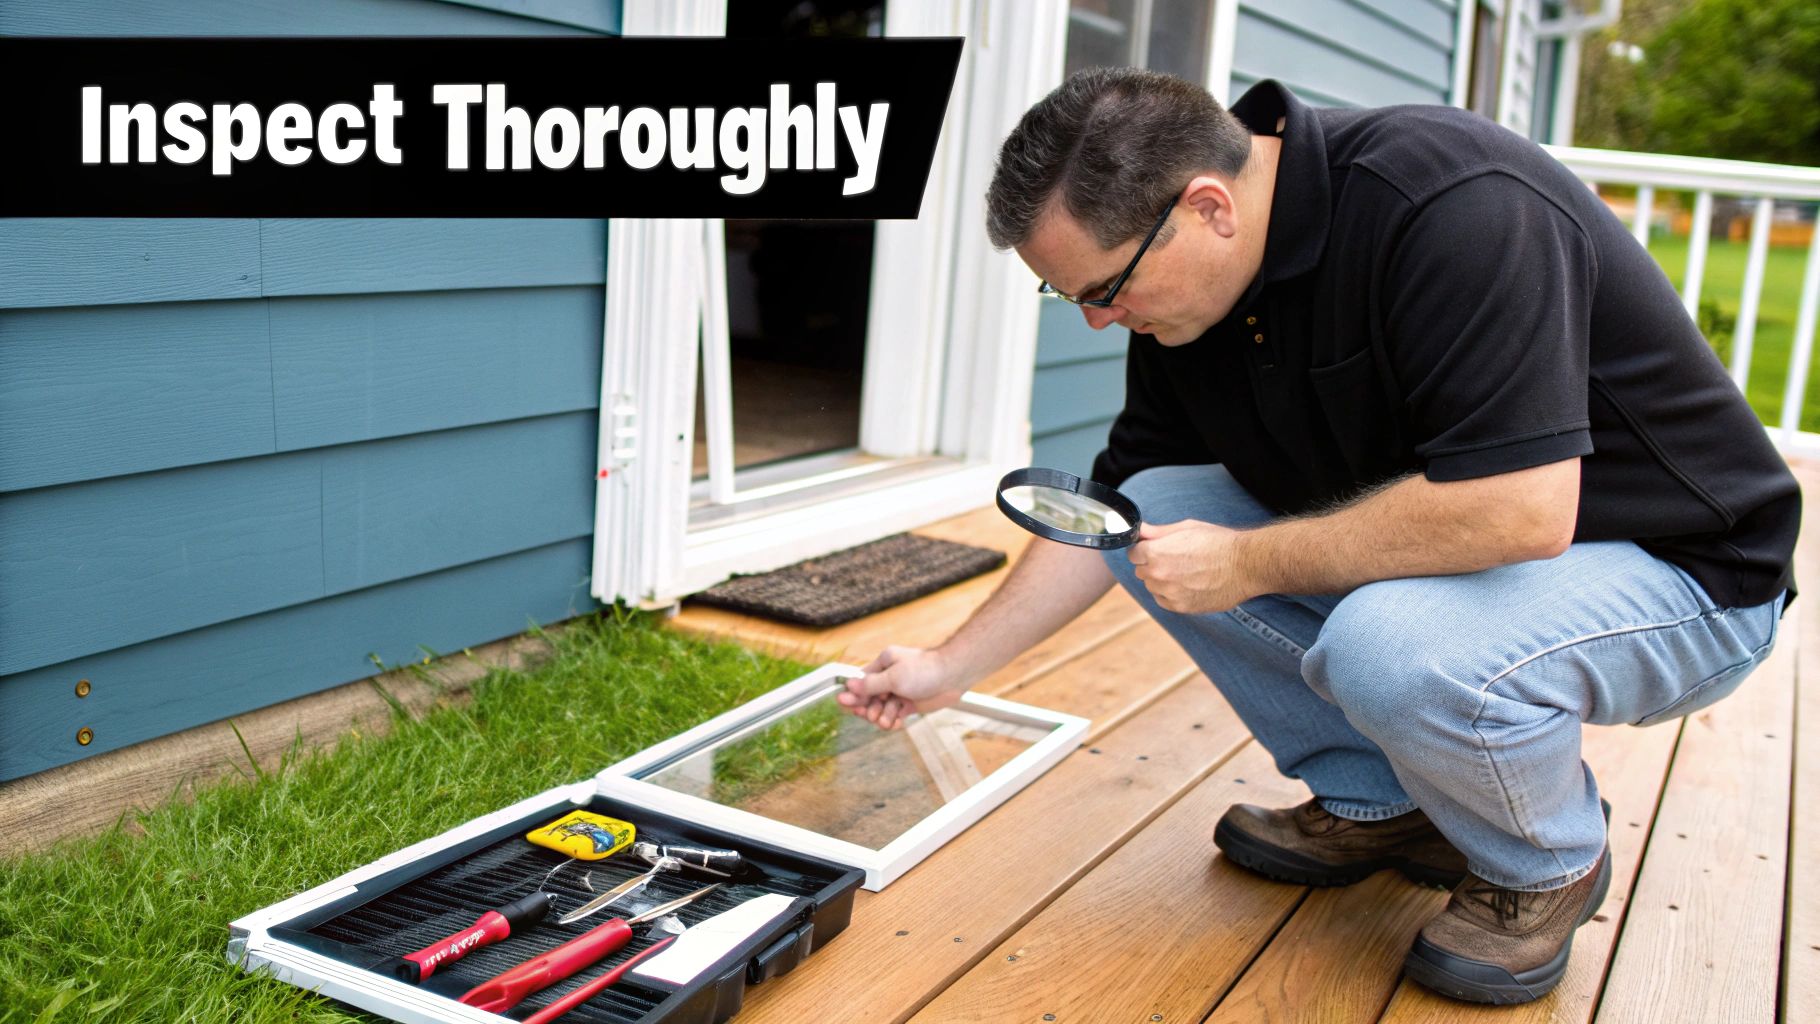
Before you even think about buying supplies, the most important thing you can do for any screen enclosures repair is a thorough inspection. This is more than just spotting a few obvious holes. You need to put on your detective hat to find out why the damage happened and catch any hidden issues that will just cause you headaches down the road. A little methodical work now saves you from having to do the same job twice.
Start by taking a few steps back. Walk the perimeter of your enclosure and just look at the overall structure. Do you see any large panels that look wavy or seem to sag? That’s a classic sign of lost tension, which often points to a problem with the spline, not just the screen mesh itself. Make a mental note of any panels that aren't perfectly flat and tight.
A Closer Look at the Mesh and Spline
Now it’s time to get up close and personal with each panel. I like to start in one corner and work my way around methodically so I don't miss anything. Gently run your hand over the screen. You're feeling for brittle spots, which are a dead giveaway for sun rot. Healthy screen has some flex to it, but sun-damaged material will feel stiff and might even make a slight crackling sound.
Next, zero in on the groove where the screen tucks into the aluminum frame. That rubber cord holding it all together is called the spline, and it’s a common culprit in screen failure.
- Is the spline sticking out? If you can see it popping out of the channel, it's lost its grip.
- Does it look dry-rotted or shrunken? Over time, spline gets brittle and shrinks, which is a primary reason screens start to sag.
- Is it the right size? Using a spline that’s too thin for the channel is a rookie mistake that guarantees the screen will never be tight.
A common mistake I see is people replacing their screen but trying to reuse the old, brittle spline. It’s a recipe for disaster. If the screen is old enough to need replacing, you can bet the spline does, too.
Inspecting the Frame and Fasteners
The aluminum frame is the backbone of your enclosure, so you can't overlook it. Check every single beam—vertical and horizontal—for any dents, bends, or warping. Even a slightly bent frame piece can prevent a new screen from sitting properly, creating a weak point that's sure to fail in the next strong wind.
Finally, look at all the hardware. Check every screw and anchor bolt, paying special attention to the base where the enclosure meets your concrete patio and at the connection points between panels. You're looking for rust and corrosion. A single rusted fastener can compromise the structural integrity of an entire section, making it vulnerable in a storm. If you spot significant rust, those fasteners are non-negotiable—they have to be replaced.
Once you’re done with this top-to-bottom check, you’ll have a complete diagnostic report. This list becomes your shopping list and your battle plan, letting you tackle your screen enclosures repair with the confidence that you're fixing the real problem, not just patching over the symptoms.
Before you finalize your plan, it can be helpful to categorize the damage you found. This quick guide breaks down common issues to help you decide on the best course of action.
Screen Damage Diagnosis Guide
This table provides a quick reference to help you identify what kind of damage you're dealing with and what the most effective repair strategy will be.
| Type of Damage | Common Cause | Recommended Repair Action | DIY Difficulty |
|---|---|---|---|
| Small Punctures (< 1 inch) | Tree branches, pet claws, insects | Adhesive screen patch kit | Easy |
| Long Rips or Tears | Wind stress, fallen branches, impact | Full panel screen replacement | Moderate |
| Sagging or Loose Screen | Old/shrunken spline, frame damage | Replace spline; possibly re-screen panel | Moderate |
| Screen Popping Out of Frame | Incorrect spline size, old spline | Replace with correctly sized spline | Moderate |
| Frame Damage (dents, bends) | Impact from mowers, storms | Section replacement or professional repair | Difficult |
| Rusted or Missing Fasteners | Age, moisture, improper materials | Replace with stainless steel fasteners | Easy to Moderate |
Using this guide, you can match your inspection findings to a clear repair path, making the entire project feel much more manageable.
Choosing the Right Tools and Materials
Walking into the hardware store for a screen enclosures repair project can feel a little overwhelming. You're faced with giant rolls of different mesh, bags of various-sized splines, and an entire wall of tools. It's easy to get lost and just grab the first thing that looks right.
But getting these choices right from the start is the secret to a durable, professional-looking repair you won't have to tackle again next season.
Selecting the Perfect Screen Mesh
Your first big decision is the screen mesh itself. Don't just reach for the cheapest roll on the shelf; take a moment to think about what you actually need. Your climate, your lifestyle (especially if you have pets or kids), and your budget should all play a role.
The type of mesh you pick has a huge impact on how long your repair lasts and how well it does its job. Each one has a specific purpose.
- Standard Fiberglass Mesh: This is what you'll find on most enclosures. It’s affordable and does a great job of keeping out common insects. The downside? It's the least durable option, so it’s not ideal if you have pets who like to scratch or kids who might lean against it.
- Pet-Resistant Screen: If you have dogs or cats, this is an absolute must. It’s made from a tough, vinyl-coated polyester that's seven times stronger than the standard stuff. It’s designed to stand up to claws and paws.
- Solar Screen: For patios that get hammered by the sun all afternoon, solar screens are a lifesaver. They can block 80-90% of the sun's heat and damaging UV rays. This not only keeps your outdoor space more comfortable but also stops your patio furniture from fading.
- No-See-Um Screen: Living in an area with those tiny, biting gnats (no-see-ums)? This tightly woven mesh is your best defense. The openings are much smaller, creating a barrier that those minuscule pests can't get through.
I always tell people to think of their screen mesh like tires for a car. You wouldn't put standard highway tires on a heavy-duty off-road truck. In the same way, if your patio is a high-traffic area with pets, investing in a pet-resistant screen will save you from making the same repair year after year.
Getting the Right Spline and Tools
Once you've picked your mesh, the next piece of the puzzle is the spline. This little rubbery cord is what locks the screen material tightly into the channel of the aluminum frame.
From my experience, using the wrong size spline is the single most common mistake people make. Get it wrong, and you'll end up with a loose, sagging screen that’s just waiting for a strong gust of wind to pop it right back out.
The easiest way to get the right size is to cut out a small, intact piece of your old spline and take it with you to the hardware store to match it up. If it's too rotted or brittle, you can measure the width of the channel in the frame. Spline typically comes in diameters from .125 inches to .250 inches.
Beyond the spline and mesh, a few simple tools will make this job go a lot smoother. We have a complete guide covering the essential window screen repair tools on our blog, but the one you absolutely cannot skip is a good spline roller. This handy little tool has a rounded (convex) wheel on one end for pushing the screen into the channel, and a grooved (concave) wheel on the other for pressing the spline in after it.
It's interesting to see how material science is evolving, even for enclosures. The US electrical enclosures market, for example, is shifting toward materials like polycarbonate for their incredible durability and corrosion resistance. According to Mordor Intelligence's latest market analysis, this focus on stronger, lighter materials is a major trend. We're seeing that trickle down into residential products, too, which is great news for homeowners looking for longer-lasting solutions.
A Practical Guide to Replacing a Screen Panel
Alright, you've done your homework, got your materials ready, and now it's time to roll up your sleeves. We're going to tackle the most common job in screen enclosure repair: replacing an entire panel. It might look a little daunting, but it's really about being patient and methodical. Rushing is your enemy here.
First things first, get your workspace set up. Lay out your new roll of screen, your spline, and all your tools right where you'll be working. Move any patio furniture or planters out of the way. Trust me, having everything you need within arm's reach makes the whole process go a lot smoother.
Getting the Old Screen and Spline Out
The first real step is to tear out the old, damaged screen. To do that, you have to get the old spline out of its channel first. Grab a flathead screwdriver or the tip of a utility knife and find a corner or a loose spot to pry up one end of the spline.
Once you’ve got a little piece to grab onto, just start pulling. It should come out in a long, satisfying strip. If the screen is old and has been baking in the sun for years, the spline might be brittle and break into a bunch of little pieces. That's fine—it's annoying, but just keep working your way around the frame, digging out all the fragments until the channel is totally clear. Once the spline is gone, the old mesh will basically fall right out.
Cutting and Positioning the New Mesh
Now for the new screen. Unroll your mesh and drape it over the entire opening of the panel you're working on. You'll want to have at least a few inches of extra material hanging over all four sides. This overlap is your safety margin; it gives you something to hold onto and ensures you don't accidentally come up short on one side.
A great little trick is to use painter's tape or a few small clamps to hold the top edge of the screen in place. This keeps the mesh from sliding around while you're trying to install the new spline, which is key to getting that tight, professional-looking finish. Pull the screen taut, but don't yank on it so hard that the mesh pattern starts to look warped or wavy.
Choosing the right materials is what makes a repair last. This visual guide breaks down the essential components you'll need to get started.
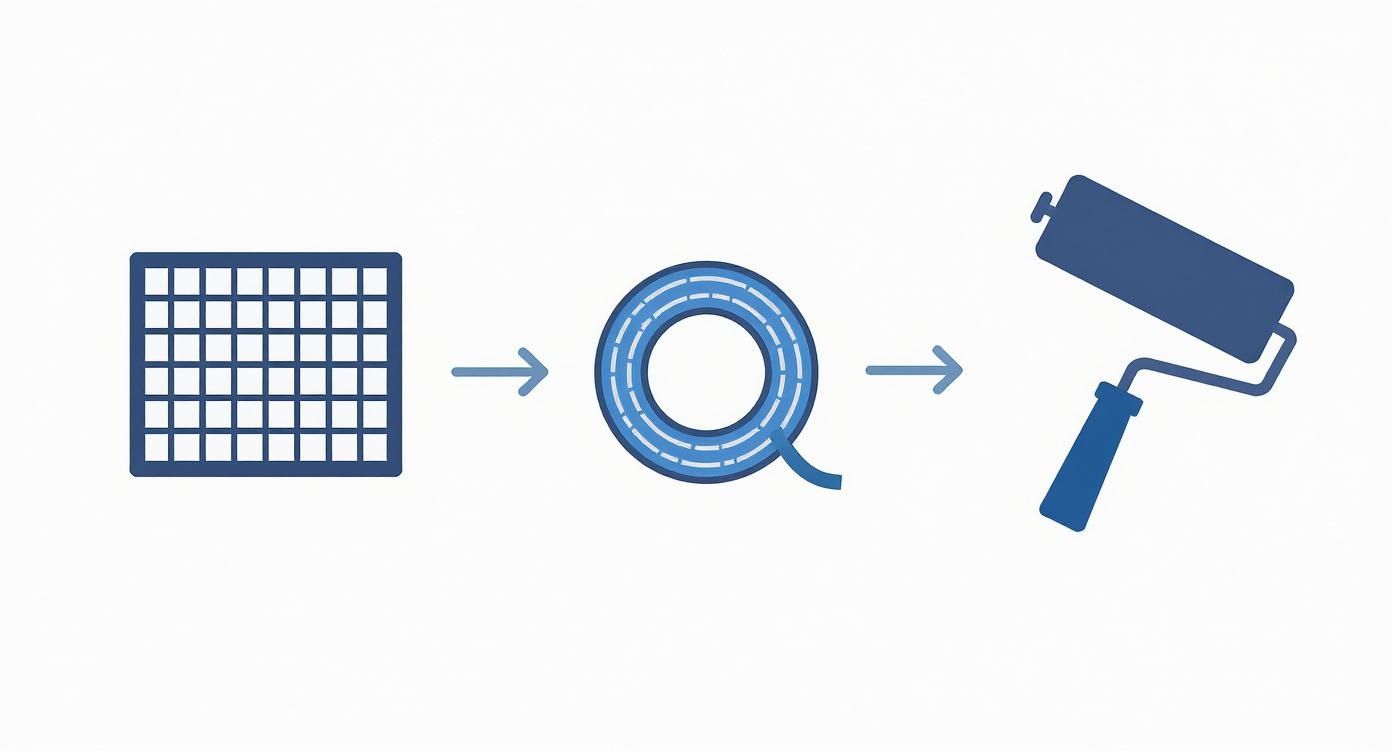
As you can see, picking the right mesh for your needs is the first step, and that decision helps you select the correct spline and tools for the job.
Installing the New Spline
This is where the magic happens. Your technique here is what separates a DIY job from a pro job.
Start at a top corner. Take your spline roller and use the convex wheel (the rounded one) to gently press the screen mesh into the channel for a few inches. This creates a little groove for the spline to sit in.
Now, lay the end of your new spline over that groove you just made. Switch over to the concave wheel (the one with the groove in it) and press the spline firmly down into the channel, right on top of the screen. You'll feel a solid "pop" as it seats itself. Slowly work your way down the first side, using your free hand to keep a bit of gentle, even tension on the screen.
A common mistake I see all the time is people trying to stretch the screen super tight as they install the spline. This is a surefire way to get wrinkles and a warped panel. Your goal is to keep the screen flat and smooth—let the spline do the work of tightening and securing it.
When you get to a corner, don't cut the spline! Use your screwdriver to push it snugly into the corner, then make the turn and continue down the next side. Do this for all four sides of the frame. The process for a big enclosure panel is pretty much the same as for a smaller project, and our guide on screen replacement for patio doors has some extra pointers that apply here, too.
Once the entire spline is in place, do a quick final pass and make sure every inch is pressed firmly into its channel.
All that's left is the finishing touch. Take a sharp utility knife and carefully trim away the excess screen. For a perfectly clean cut, run the blade right along the outside edge of the spline. And that's it—you've just replaced a full screen panel like a pro.
Proactive Maintenance for a Longer Lasting Enclosure
Let's be honest, the best kind of screen enclosures repair is the one you never have to make. Once you've gotten the hang of fixing things, the smartest move is to shift your focus to proactive care. It’s the single best way to protect your investment and keep your enclosure standing strong for years to come.
Think of it like owning a car—you don't wait for the engine to seize before you change the oil. Small, regular check-ups prevent massive headaches later. Your enclosure is in a constant battle with sun, rain, and grime, and a simple maintenance routine is your best weapon.
This isn’t about dedicating your whole weekend to chores. A few minutes of your time each month is all it takes to catch problems when they're small, cheap, and easy to fix.
Your Simple Maintenance Checklist
It's easier to build a good habit when you know exactly what you're looking for. Instead of just wandering around and hoping to spot something, focus on the most common problem areas. This turns a big task into a quick, manageable walkthrough.
Here's a practical checklist I'd recommend running through a few times a year:
- Gentle Cleaning: Twice a year is usually enough. Just wash the screens and frame with a soft-bristle brush and some mild, soapy water. This gets rid of dirt and pollen, but more importantly, it stops mold and algae from taking hold and eating away at the screen material.
- Fastener Inspection: Do a quick lap around the enclosure and eyeball the screws and bolts. Pay close attention to the base and where the panels meet. If you see any rust or corrosion, you've found a weak point. One bad fastener can compromise the entire section.
- Tension Check: Gently push on the middle of each screen panel. It should feel tight, with almost no give. If it's sagging, that’s a clear sign your spline is starting to dry out or pull loose.
"An ounce of prevention is worth a pound of cure, especially with outdoor structures. Regular cleaning not only keeps your enclosure looking great but also removes corrosive elements like bird droppings and acidic pollen that can eat away at both the screen and the aluminum finish."
Landscaping and Environmental Factors
Your enclosure is part of your backyard ecosystem, and the immediate surroundings have a huge impact on how long it lasts. Managing the landscaping around it is one of the most powerful preventative steps you can take to avoid a major screen enclosures repair.
First, trim back any tree branches so they're at least five feet away from the roof and walls. It’s a simple task that drastically lowers the risk of a branch coming down in a storm and tearing through a panel.
Also, check your sprinklers. Make sure the heads aren't spraying water directly onto the enclosure. That constant moisture is a fast track to rusty fasteners and mildew growth. By taking control of these outside factors, you're actively adding years to the life of your screen.
Knowing When to Call a Screen Repair Professional
Taking on a DIY screen enclosures repair can be really rewarding, and for a lot of small fixes, it’s the perfect weekend project. But there’s a big difference between patching a small tear and taking on a major structural problem. It’s crucial to know when to put down the tools and call in someone with experience.
Recognizing your limits isn't admitting defeat; it's just smart. Some jobs are more complex than they look and can even be dangerous without the right gear and know-how. Pushing ahead can lead to a botched job, wasted money, or worse, an injury.
Red Flags That Signal It's Time for a Pro
During your inspection, if you come across any of these issues, your best bet is to pick up the phone. These aren't just bigger jobs—they often involve structural integrity and safety risks that are best left to a seasoned crew.
Here are the clear signs it's time to call an expert:
- Significant Structural Frame Damage: I’m not talking about a little scuff or a minor dent. If you see aluminum beams that are bent, badly corroded, or pulling away from their connections, that's a serious problem. The entire stability of your enclosure is at risk, and a professional needs to assess whether a repair is even possible or if a full replacement of that section is required.
- Roof Panel Replacements: The second your repair work involves getting up on a ladder to fix overhead panels, the risk factor skyrockets. Professionals use proper scaffolding, safety harnesses, and equipment designed for this kind of work. For a homeowner, a single slip could lead to a devastating fall. It’s just not worth it.
- A Full Rescreening Project: Ripping out and replacing every single panel of screen in an enclosure is a huge job. It's physically exhausting, requires hours of repetitive work, and getting every panel perfectly tight without any wrinkles takes a lot of practice. The sheer scale of a full rescreening is often more than most people bargain for.
- Foundation and Anchor Issues: Take a close look at where your enclosure meets the concrete. Are the anchor bolts rusted out, loose, or snapped off? If so, your enclosure isn't properly secured. A strong gust of wind could turn it into a giant kite. This is a foundational problem that requires a pro to fix correctly and ensure the structure is safe.
It really comes down to a cost-benefit analysis. You might save some money on labor by tackling a huge rescreening yourself, but is it worth giving up several weekends, dealing with the frustration, and potentially ending up with a saggy, unprofessional-looking result? Sometimes, paying for peace of mind is the best investment you can make.
The Cost of Professional Screen Repair
Often, the final decision between DIY and hiring someone comes down to the cost. So, what should you expect? In 2025, the national average to repair or rescreen a pool enclosure is about $924. Most homeowners find their projects fall somewhere between $297 and $1,587. The final price tag will always depend on the size of the job, the materials you go with, and what labor costs look like in your area. You can learn more about the factors influencing screen repair costs at homeadvisor.com.
When you hire a good company, you're not just paying for labor. You're paying for their experience, specialized tools, and efficiency. Look for pros who can walk you through their process and explain the work clearly. It's also a good sign when companies have their operations in order, including things like efficient job tracking and cost management. Finding a trustworthy local expert is everything, and our guide can help you find screen repair near me to get a few quotes.
For reliable, professional screen repairs that save you time and hassle, Sparkle Tech Screen Service offers quick quotes and expert service to get your enclosure looking brand new. Visit us online to schedule your repair today.


