


A patio screen door that grinds, sticks, or just won't cooperate often comes down to a handful of common culprits. It could be something as simple as a dirty track, worn-out rollers, or a small tear in the mesh. The trick is figuring out the exact problem before you start buying parts—it's the single most important step and will save you from multiple frustrating trips to the hardware store.
What Is Wrong with Your Screen Door
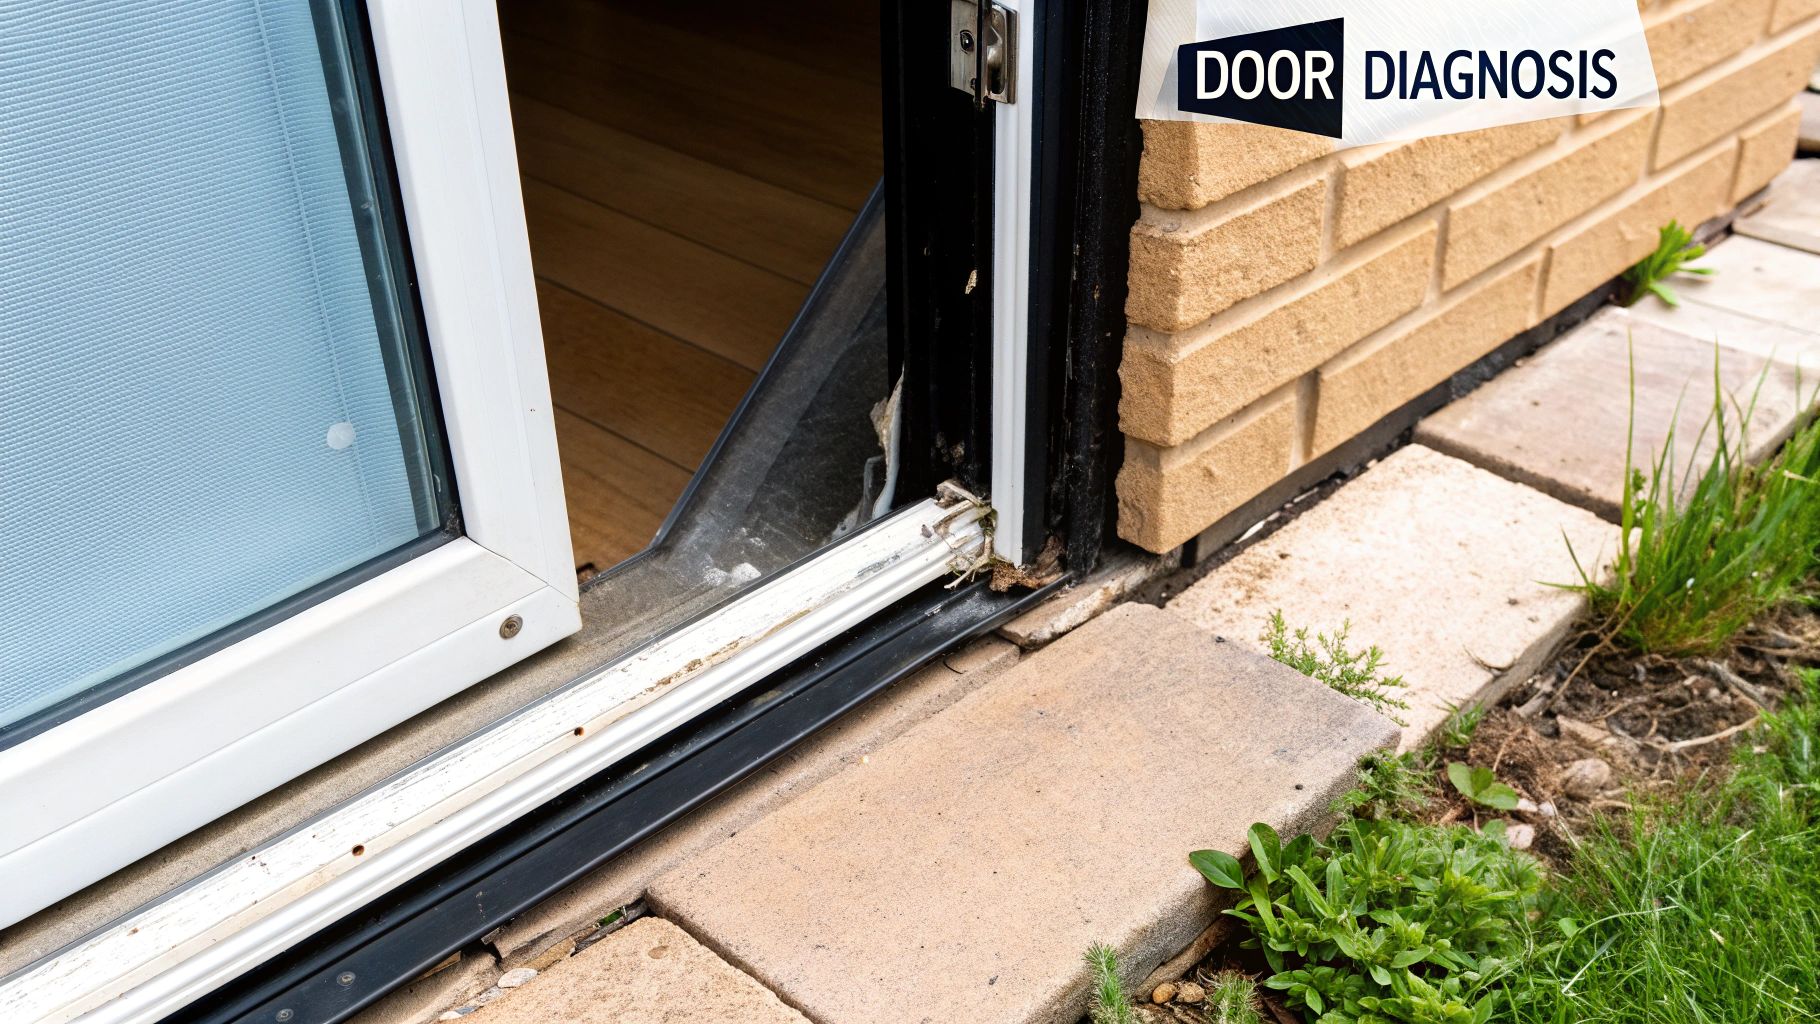
Before you can fix anything, you need to play detective. That grating sound or the stubborn way your door refuses to slide isn't just an annoyance; it's a symptom. Your door is practically telling you what’s wrong, so learning to read the signs is the key to getting it right.
A quick visual check is the best place to start, but don't just look for an obvious hole. Pay close attention to how the door actually sits in its frame and, more importantly, how it moves.
Diagnosing Movement Issues
One of the biggest complaints I hear is about a door that sticks, jumps off the track, or makes a horrible grinding noise. Don't jump to the worst-case scenario. More often than not, the issue is with the track itself or the little rollers that are supposed to glide smoothly inside it.
First things first, give that bottom track a really good cleaning. Get in there with a vacuum and a stiff brush. It’s amazing how often a tiny pebble or a bit of caked-on grime is the real villain.
If a good cleaning doesn't fix the problem, your attention should turn to the rollers. Here’s what to look (and listen) for:
- Wobbly Glide: Does the door feel loose and rock back and forth as you slide it? The rollers are probably worn down or have popped out of alignment.
- Grinding Noise: That metallic squeaking or grinding is a dead giveaway. The rollers are likely rusted, damaged, or completely seized.
- Stubborn Resistance: If you have to put your shoulder into it to get the door open, the rollers might be completely broken. This means the metal door frame is dragging directly on the metal track—a recipe for damage.
A bent frame can also cause major problems. Take the door off and lay it on a flat surface like your driveway. If it doesn't lie perfectly flat, the frame is warped and will need to be gently straightened. Learning the root cause is half the battle, and this approach applies to more than just screen doors; it's about identifying common signs that indicate a need for door repair of any kind.
To make this easier, I've put together a quick reference chart to help you match your door's symptoms to the most likely cause and solution.
Common Problems and Real Solutions
| Symptom | Likely Cause | DIY Difficulty | Typical Fix |
|---|---|---|---|
| Door jumps the track | Dirty track or worn rollers | Easy | Thoroughly clean the track and inspect/replace rollers. |
| Grinding or squeaking sound | Damaged/rusted rollers | Moderate | Remove the door and replace both top and bottom rollers. |
| Requires force to slide | Broken rollers or bent frame | Moderate-Hard | Replace rollers; carefully straighten the frame if warped. |
| Door feels wobbly | Rollers out of adjustment | Easy | Use a screwdriver on the adjustment screws at the bottom corners. |
This table should give you a solid starting point for troubleshooting whatever issue your door is throwing at you.
Checking the Hardware and Screen
Next up, take a look at the parts you touch every day. Is the handle wobbly? It might just need its screws tightened. If the latch doesn't click securely into the frame, check the alignment. Sometimes the latch itself is broken and needs to be replaced entirely. For a deeper dive into these mechanics, our guide on https://sparkletechscreenservice.com/patio-door-slider-repair/ has more details.
Pro Tip: When you're testing a stubborn latch, close the door very slowly and watch exactly where it meets the frame. Often, a slight misalignment is the culprit, which can be fixed by adjusting the strike plate—saving you the cost of a new latch assembly.
Finally, give the screen mesh a thorough inspection. Look for any small tears, punctures, or spots where the screen is pulling away from the frame. If you see that, it means the spline—the little rubber cord holding the mesh tight—has dried out, gotten brittle, or popped out.
A proper diagnosis now will give you the confidence to walk into the hardware store knowing exactly what you need to get the job done right the first time.
Your Essential Repair Toolkit and Materials
Walking into a patio screen door repair with the right gear is more than half the battle—it's the difference between a frustrating afternoon and a job you can be proud of. You don't need a professional workshop, but gathering a few specific items beforehand will make the whole process go smoothly.
The undisputed hero of this project is the spline roller. It's a small, inexpensive tool with two wheels: one rounded (convex) and one grooved (concave). Trust me on this one. Trying to jam the spline in with a screwdriver is a recipe for a torn screen and a loose, sloppy finish.
Core Tools for the Job
Your toolkit can be pretty minimal, but it needs to be specific. These are the workhorses that will handle over 90% of any screen repair you'll encounter.
- Utility Knife: Make sure it has a fresh, sharp blade. A dull knife will snag and pull the screen fibers, leaving you with a frayed mess instead of a clean cut.
- Spline Roller: I can't say it enough—this is the essential tool for pressing the spline securely into the frame's channel.
- Tape Measure: For getting accurate measurements of your frame and the new screen mesh.
- Flat-Head Screwdriver or Awl: This is perfect for digging out the old, stubborn spline, especially from the corners where it likes to get stuck.
If you want a more comprehensive look at what the pros use, you can find a detailed guide on essential https://sparkletechscreenservice.com/window-screen-repair-tools/ right here. And while you're at it, if the seals around your door frame look cracked and worn, knowing how to remove old caulk like a pro is a handy skill for making the entire repair last.
This simple infographic gives you a great visual for the prep work, from tool gathering to material selection.
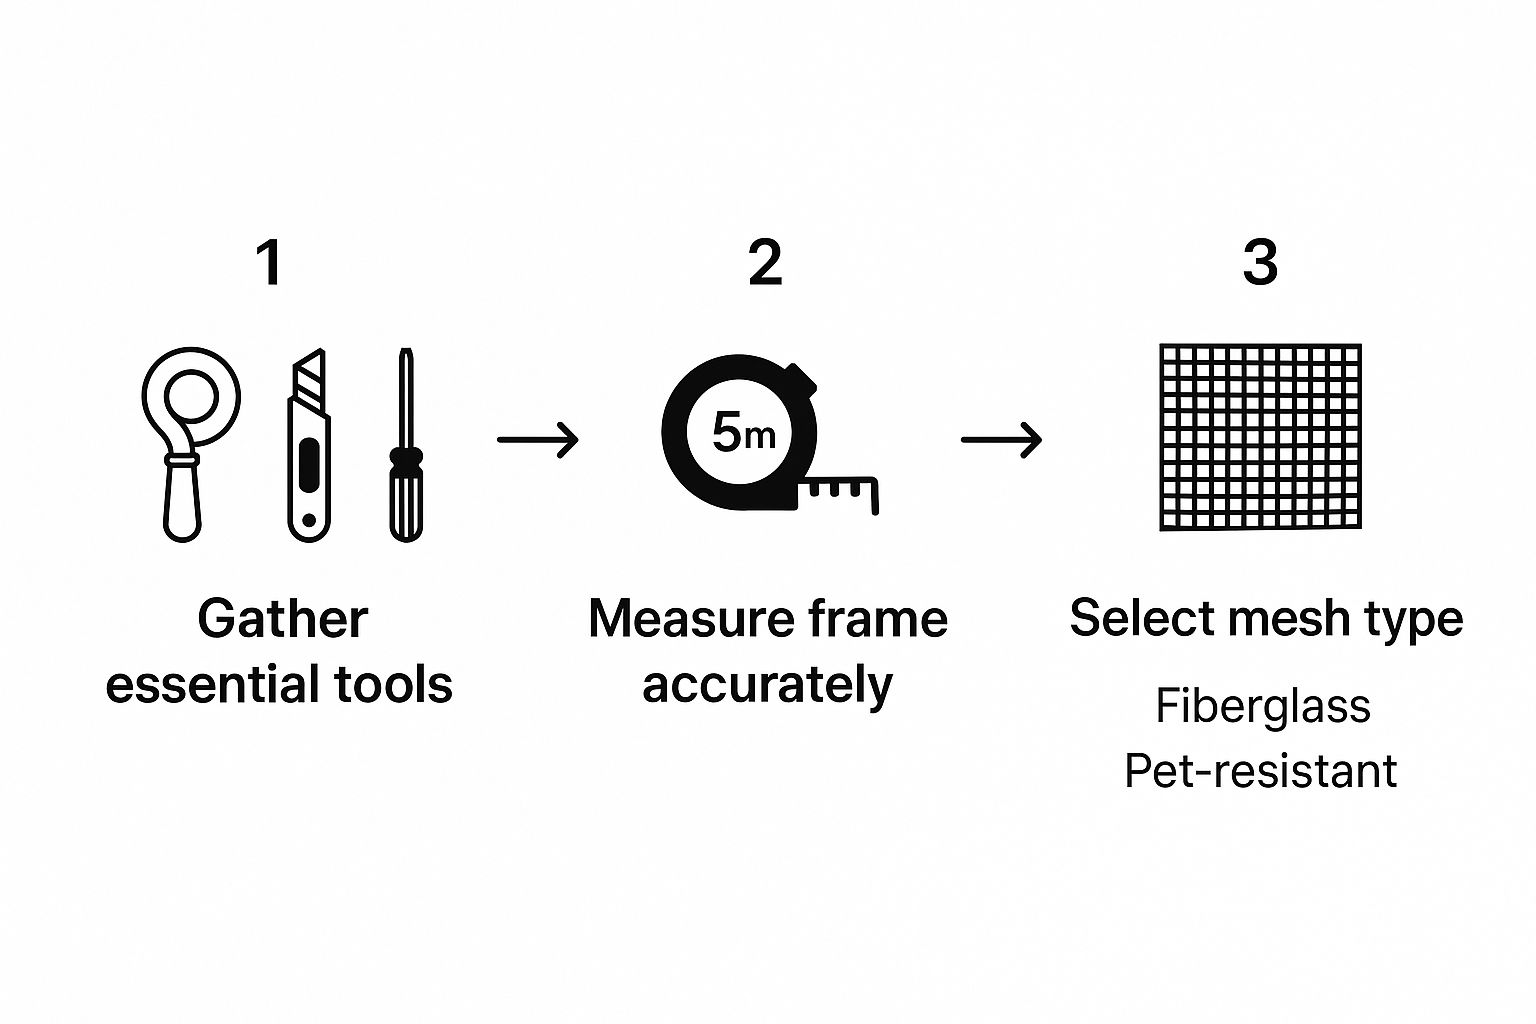
It really just breaks down how a successful repair is just a series of good choices, starting with your equipment.
Choosing Your Screen Mesh and Spline
The material you pick makes a huge difference in how your door performs and holds up. For most homes, standard fiberglass mesh is the way to go. It's affordable, flexible, and easy to work with.
But if you've got pets or kids who are rough on screens, do yourself a favor and upgrade to a pet-resistant screen. It’s much thicker and can take a serious beating from claws and collisions without tearing. It's a smart investment to avoid doing this job all over again in a few months.
And don't forget the spline! This little rubber cord is what locks the mesh into the frame. Spline comes in different diameters, and getting the wrong size is a common mistake. The easiest trick? Just snip off a small piece of the old spline and take it with you to the hardware store. It's the only way to guarantee a perfect match.
With the right tools and materials laid out and ready to go, you're all set to tackle the actual repair with confidence.
How to Replace Your Screen Mesh Like a Pro
A ripped, faded, or hole-filled screen is probably the most common headache for patio door owners. The good news? Swapping out the mesh is a project most people can tackle in an afternoon. With the right tools and a bit of patience, you can get a tight, professional-looking result that brings your door back to life.
First things first, you need to get the door off its track. Find a flat, stable surface to work on, like a workbench, a pair of sawhorses, or even a clean garage floor. To get the door out, lift it straight up into the top track. Most have spring-loaded rollers at the top that will compress, giving you the clearance you need to swing the bottom of the door out and away from the bottom track.
Getting Rid of the Old Screen and Spline
Lay the door down flat and turn your attention to the spline—that rubbery cord tucked into a groove around the frame's perimeter. It’s what holds the screen mesh under tension. Find where the spline starts (usually at a corner) and use a small flat-head screwdriver or an awl to carefully pry up the end.
Once you’ve got a piece to grab, you can typically pull the entire length out in one go. Just be gentle so you don't scratch the door frame's paint.
Pro Tip: Don't just guess the spline size. Snip off a small piece of the old spline and take it with you to the hardware store. They come in several diameters, and getting an exact match is absolutely critical for a secure fit.
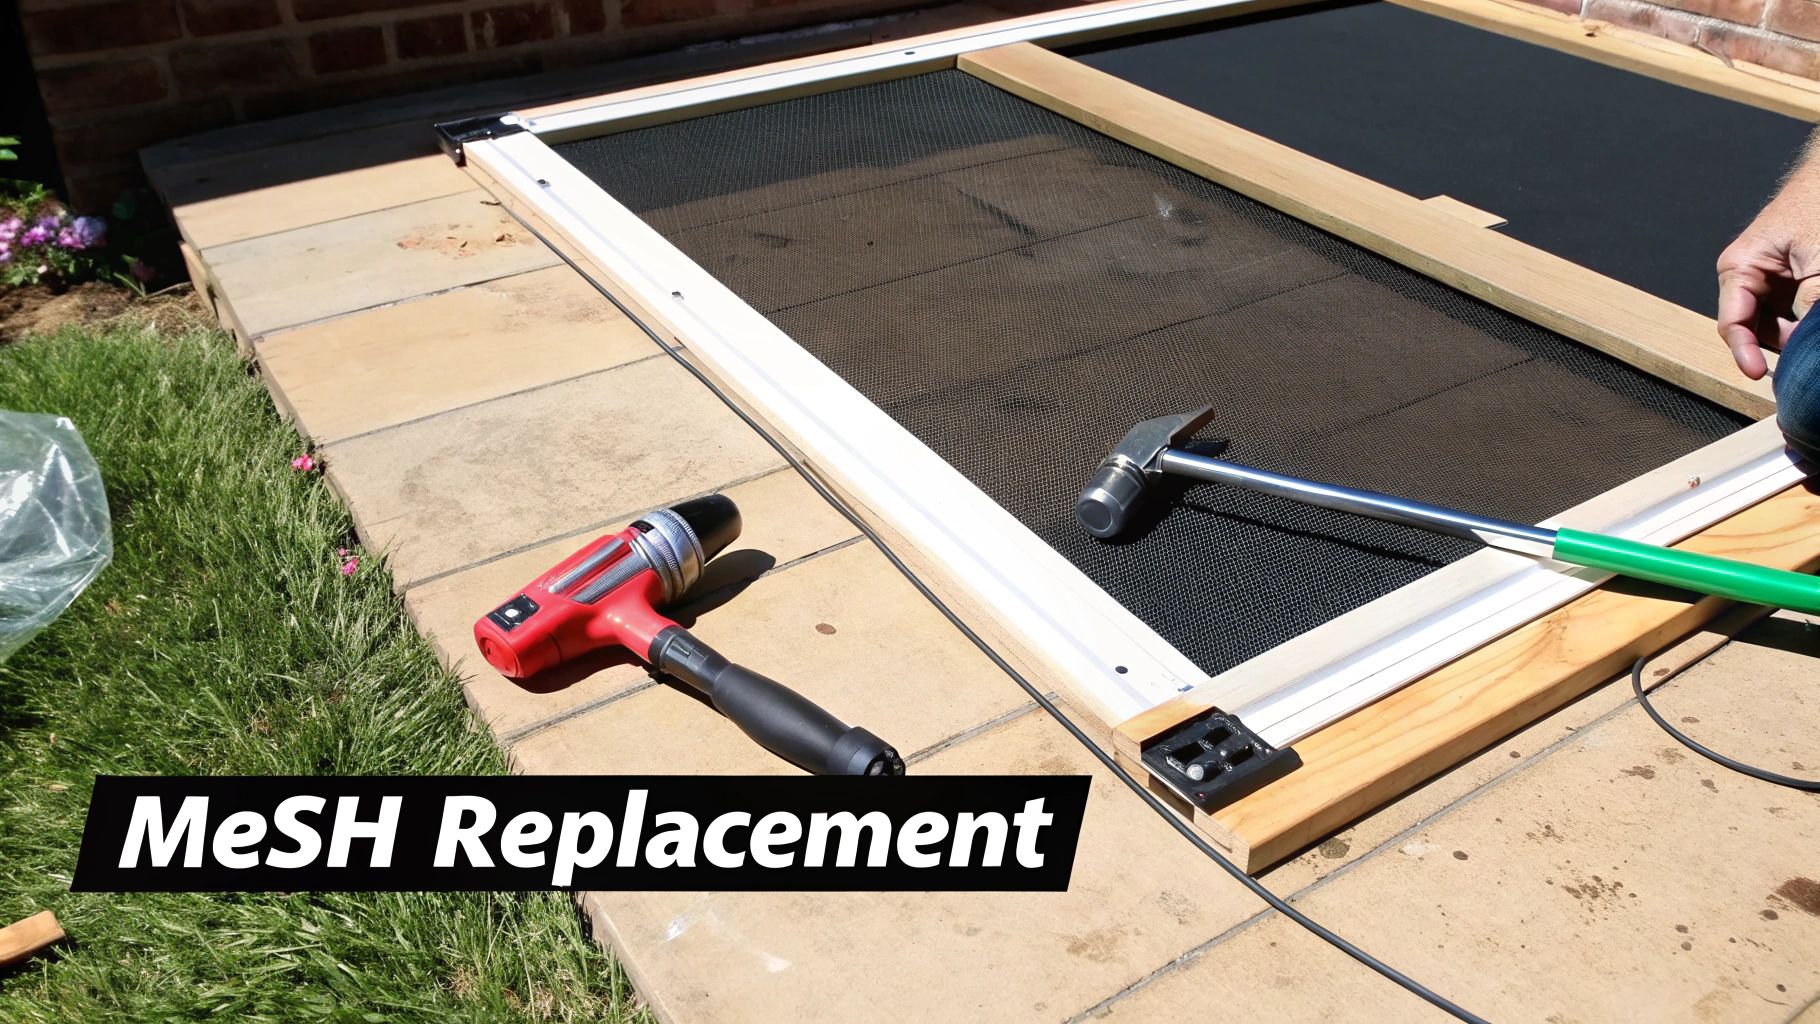
Installing the New Mesh and Spline
Time for the satisfying part. Drape your new screen mesh over the entire door frame, leaving at least 2-3 inches of overhang on all four sides. This extra material is your "handle" and ensures you have enough slack to work with.
Start on one of the long sides. Take your spline roller and use the convex wheel (the rounded one) to gently press the screen into the channel. This creates a helpful little crease and preps the groove for the spline.
Now, grab your new spline and start pressing it into the channel right over the mesh, beginning at a corner. Switch to the concave wheel (the grooved one) on your roller and use steady, even pressure to seat the spline deep into the channel.
Keeping the screen taut as you go is the real secret to avoiding sags. Here’s how I do it:
- Gentle Tension is Key: As you roll the spline into one side, use your free hand to pull the mesh taut from the opposite side. Don't yank it—a firm, gentle pull is all you need to prevent warping the frame.
- Work Across the Frame: After securing the first long side, move directly to the opposite long side. Follow the same pattern for the shorter sides. This helps distribute the tension evenly.
- Tackle the Corners: When you get to a corner, use your screwdriver to carefully push the spline snugly into the 90-degree angle before you continue rolling down the next side.
The technique for replacing a door screen is almost identical to a window screen. If you want a few more pointers, our guide on how to replace window screen mesh offers some great extra details.
With the spline fully installed, the only thing left is to trim the excess mesh. Grab a sharp utility knife with a fresh blade. Run the blade along the outside of the spline, angling it slightly away from the center of the door. This angle is crucial for avoiding an accidental slip that could cut your brand-new screen. Go slow, and you'll end up with a perfectly clean, professional finish.
Fixing Rollers, Latches, and Handles
Sometimes the screen mesh itself is in perfect shape, but the door still groans, sticks, or just won't lock properly. When that happens, you're dealing with a hardware problem. These mechanical issues are behind most of the daily frustration with screen doors, but the good news is the fixes are usually surprisingly simple and can make a rickety old door feel brand new again.
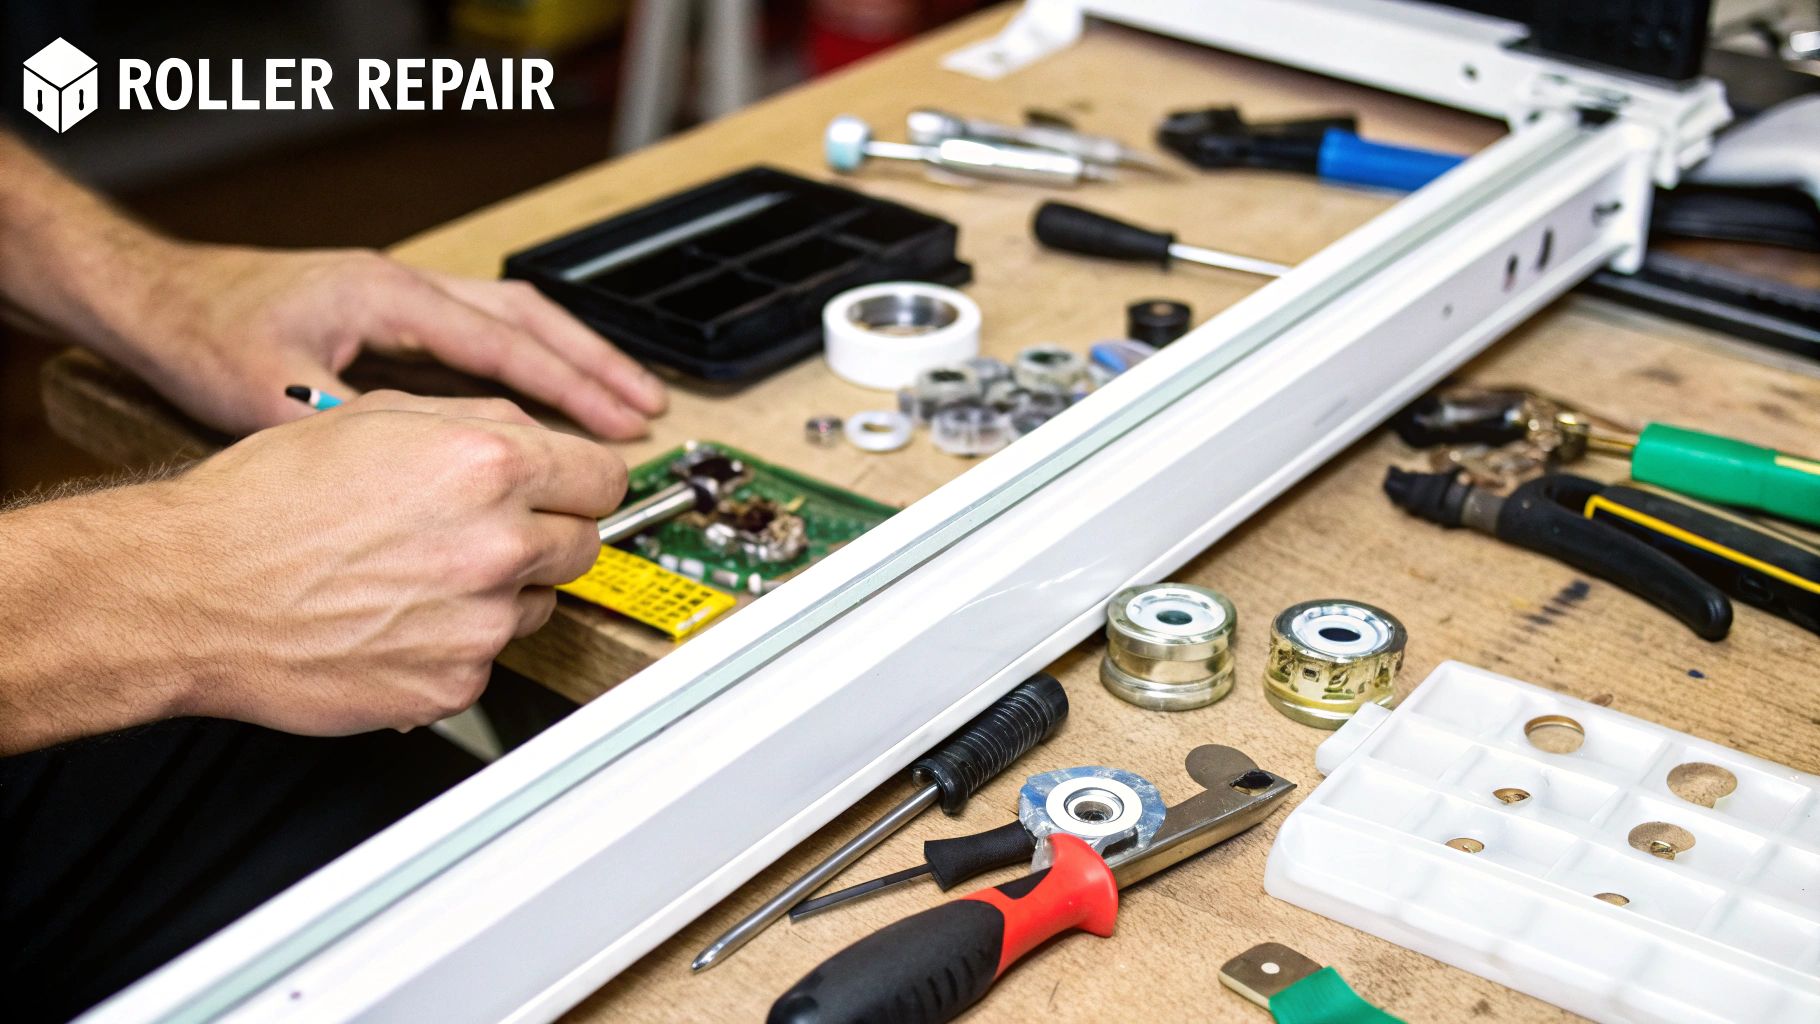
The number one culprit for a door that fights you is almost always the rollers. These little wheels are tucked away at the top and bottom of the door frame, and they take a ton of abuse. After years of use, they get caked with dirt, develop flat spots, or simply seize up.
Tackling Worn-Out Rollers
First things first, you'll need to get the door off its track to access the rollers. It's easier than it sounds. Just lift the door straight up until the spring-loaded top rollers compress, then you can swing the bottom of the door out toward you. Lay it down on a pair of sawhorses or a flat, protected surface so you can work comfortably.
The rollers are typically housed in a corner assembly, held in place by a couple of screws. Once you back those screws out, the whole roller assembly should slide right out of the frame.
My Personal Tip: Before you run to the hardware store, snap a clear photo of the roller assembly. Better yet, bring the old part with you. There are dozens of different styles out there, and having the original in hand is the only guaranteed way to get a perfect match.
Putting the new ones in is just the reverse of taking them out. Screw the new assembly into place, and you're set. While you've got the door off, take a minute to give the track a really good cleaning with a vacuum and a stiff brush. You will be absolutely amazed at the difference a clean track and a fresh set of wheels make.
Troubleshooting Stubborn Latches and Handles
A latch that won't catch or a handle that feels like it's about to fall off is more than an annoyance; it's a security and convenience issue. But don't worry, these are usually quick fixes. For instance, a wobbly handle can often be firmed up simply by tightening its mounting screws.
If the latch just won't engage, it's probably an alignment issue.
- Check the Strike Plate: This is the little metal plate on the door jamb that the latch hooks into. Loosen its screws a bit and slide it up or down until the latch clicks in perfectly.
- Inspect the Latch Mechanism: If adjusting the strike plate doesn't work, the spring inside the latch might have given up the ghost. In that case, your best bet is to replace the entire handle and latch set.
Replacing a handle set is a high-impact patio screen door repair that looks great and only takes a few minutes. Most are just held on by two or three screws. Swapping in a new one not only gets your door working again but also gives it a nice visual refresh.
These little hardware fixes cost next to nothing but deliver huge improvements in how your door functions day-to-day. In fact, many common screen door repairs are quite affordable. You can discover more insights about repair costs and see just how much you save by tackling these simple jobs yourself. Paying attention to these mechanical parts is the key to a smooth, secure, and blissfully silent patio screen door.
Keep Your Door Gliding Like New: Simple Maintenance Tips
You’ve just finished your patio screen door repair, and it’s sliding beautifully. The last thing you want is to be right back where you started in a few months. The secret to making that smooth glide last for years? A little bit of preventative care.
These quick and easy habits will keep your door in top shape and stop common problems from coming back to haunt you.
It All Starts with a Clean Track
Think about what your door’s track goes through. It’s a magnet for dirt, dust, pet hair, and tiny pebbles tracked in from outside. All that grit acts like sandpaper, slowly grinding down your rollers and making the door a nightmare to open and close.
Honestly, just keeping the track clean is the most important thing you can do.
Your 5-Minute Cleaning Routine
Spending just a few minutes on this once a month can prevent over 90% of track-related headaches. It’s a small time investment that pays off big in protecting your door’s hardware.
- Vacuum First: Grab your vacuum and a crevice tool. This is the easiest way to suck up all that loose dirt and debris from inside the track.
- Scrub the Grime: For anything caked on, an old toothbrush or a small, stiff-bristled brush works wonders. Just give the track a quick scrub to dislodge stubborn grime.
- Wipe it Clean: Finish up by running a damp cloth along the track to pick up any leftover dust and residue.
A clean track is a happy track. This five-minute chore is truly the single best way to protect your new rollers and ensure a smooth, quiet glide every time.
The Right Way to Lubricate
While cleaning is king, a little lubrication is the other half of the secret sauce for a perfect slide. The key here is using the right product in the right places. Step away from the oil-based lubricants like WD-40—they’re notorious for attracting dirt and creating a gunky, sticky mess over time.
Instead, reach for a silicone-based spray lubricant. This stuff is magic because it repels dust and moisture, creating a slick surface without any gummy buildup. Once or twice a year, give a quick, light spray directly onto the rollers and into the latch mechanism. That’s all it takes to keep everything moving freely.
This kind of proactive maintenance doesn't just save you from future headaches; it's a core part of what keeps homes in good shape. It’s no surprise that the broader door and window repair service industry is projected to be worth around $50 billion USD by 2025. It just goes to show how much homeowners value keeping their property in working order. You can see more details about the door and window repair market on datainsightsmarket.com.
By adding these simple cleaning and lubricating steps to your regular home maintenance schedule, you can be sure your newly repaired door will feel brand new for a long, long time.
A Few Common Questions About Patio Screen Door Repairs
Even with the best instructions, you're bound to run into a few head-scratchers, especially when you're halfway through the project. It happens to everyone. Let's tackle some of the most common questions that come up when people are fixing their patio screen door for the first time.
Repair It or Replace It?
This is the million-dollar question, isn't it? For the usual stuff—a simple tear in the mesh, a busted handle, or rollers that have given up the ghost—a DIY repair is absolutely the way to go. You can usually get these jobs done for well under $50 in an afternoon.
But if the door frame itself is the problem—we're talking bent, cracked, or seriously warped—it's probably time to start shopping for a new one. Slapping new parts on a bad frame is just a temporary fix for a long-term headache.
My rule of thumb: If your repair costs are creeping up toward half the price of a new door (which usually land in the $150-$300 range), a full replacement is the smarter investment.
What's the Best Screen to Use if You Have Pets?
If you've got four-legged family members, don't even think about using standard fiberglass mesh. You need to go straight for a pet-resistant screen. This stuff is made from a tough, vinyl-coated polyester that can stand up to claws and paws without instantly shredding.
Yes, it costs a little more, and its thickness makes it a bit tougher to work with. But that initial hassle will save you from the endless cycle of re-screening your door every time your dog gets a little too excited. For pet owners, it's non-negotiable.
Why Does My Sliding Screen Door Always Jump the Track?
Nine times out of ten, a door that constantly derails is a problem with the rollers, the track, or both. The first thing you should always do is give that bottom track a serious cleaning. Get a vacuum with a brush attachment and dig out all the dirt, pebbles, and general gunk that builds up in there. You'd be surprised how often that's the only problem.
If the track is spotless and the door still jumps, take a close look at the rollers.
- Most have adjustment screws. Tweak them to raise or lower the door until it sits securely in the track.
- If the rollers look cracked, have flat spots, or just refuse to spin, they're shot. Replacing them is an easy and permanent fix for this incredibly common issue.
If you've worked through these issues and are still stuck, or just decide you’d rather have an expert take care of it, Sparkle Tech Screen Service is ready to help. We provide same-week service and fast quotes to get your door working like new again. Contact us today for a free estimate!


