


Any good project starts with a trip to the hardware store, and rescreening your door is no exception. Honestly, getting the right gear lined up beforehand is what separates a frustrating Saturday afternoon from a pro-level finish that’ll last for years. It's not just about having a list; it's about knowing why you're buying what you're buying.
Gathering Your Tools and Materials
Before we dive in, let’s talk about the big picture. DIY home improvement is huge right now. The market for window and door components in the US recently hit a staggering $24 billion, and screen repairs are a big piece of that pie. It’s a project countless homeowners are tackling themselves.
Essential Gear for the Job
Your shopping list is pretty straightforward, but don't just grab the first thing you see. Each item has its own quirks.
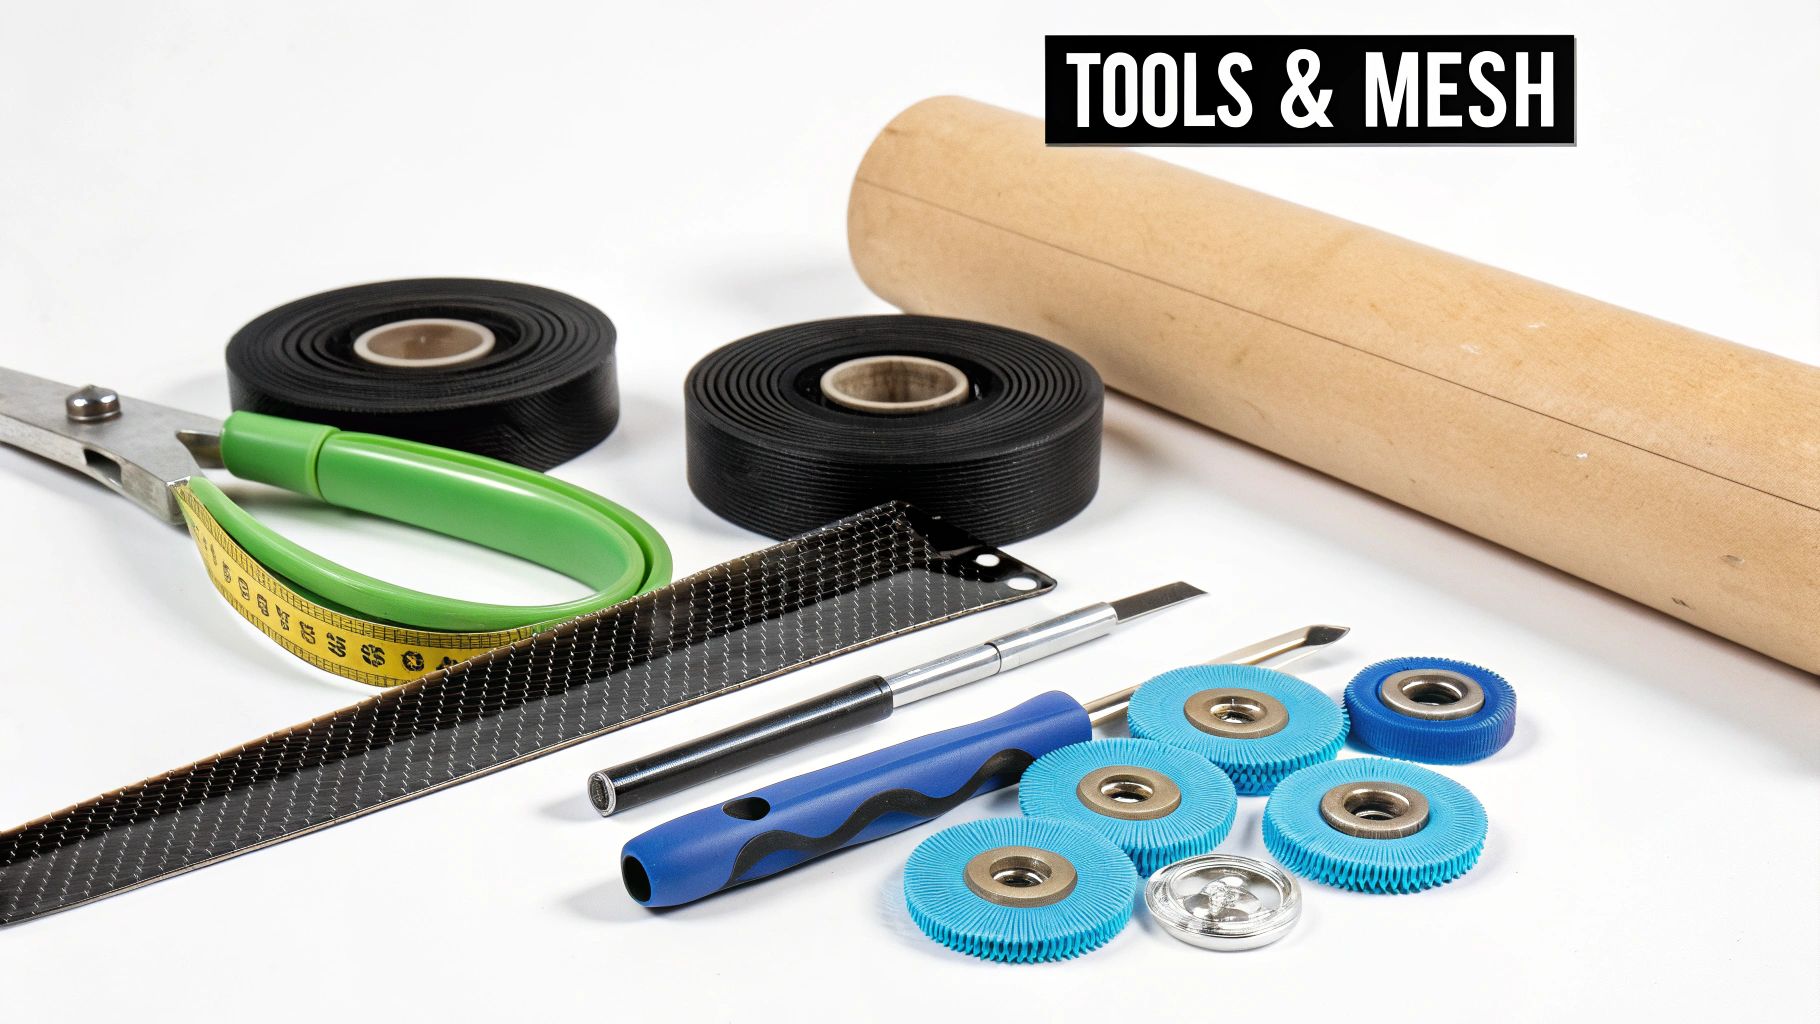
Here’s the rundown of what you absolutely need to have on hand:
- New Screen Mesh: Standard fiberglass is the go-to for a reason—it's affordable and does the job well. But think about your needs. If you have a dog that loves scratching, pet-resistant mesh is a lifesaver. Live in a hot climate? Solar screens are worth their weight in gold for cutting down heat and glare.
- Replacement Spline: This is the rubbery cord that locks the screen into the frame's channel. It comes in different diameters, and getting the right size is critical. More on that in a second.
- Spline Roller: This is the one specialty tool you cannot skip. It’s a simple little gadget with two wheels: one rounded (convex) and one with a groove (concave). Trust me, this little guy is the secret sauce for a tight, professional-looking installation. We break down all the essential window screen repair tools if you want to learn more.
- Utility Knife: Make sure you have a fresh, sharp blade. A dull one will snag and pull the mesh, ruining your clean lines.
- Flathead Screwdriver or Awl: You'll need something pointy to dig out the old, stubborn spline.
- Tape Measure & Clamps: You’ll want a tape measure for obvious reasons, and a few spring clamps are a huge help for keeping the new screen pulled tight while you work.
Your Rescreening Project Checklist
Here's a quick-glance table to take to the store with you. Think of it as your cheat sheet for making sure you come home with exactly what you need.
| Item | What to Look For and Why It Matters |
|---|---|
| Screen Mesh | Measure your door first! Buy a roll that's at least 2-3 inches wider and longer on all sides. This gives you extra material to pull on for tension. |
| Spline | Take a small piece of the old spline with you. Matching the diameter is non-negotiable. Too small, and the screen pops out. Too big, and you'll fight to get it in. |
| Spline Roller | Get a sturdy one with both a convex and concave wheel. Cheap plastic ones can break mid-project, so a quality tool is a good investment. |
| Utility Knife | Grab a pack of extra blades. A sharp blade is key for a clean, snag-free trim at the end. |
Getting these four things right from the start will make the entire process smoother and give you a much better final product.
Choosing the Right Spline and Mesh
I can’t stress this enough: the most common mistake I see DIYers make is buying the wrong size spline. The absolute best way to get it right is to cut a small, one-inch piece of your old spline and take it with you to the hardware store. Hold it up and match it exactly.
Pro Tip: If you're stuck between two sizes that look almost identical, go with the slightly larger one. You can always use the spline roller to gently persuade a snug spline into the channel, but a spline that's too loose is a guaranteed failure.
As for the mesh, always buy more than you think you need. That extra material on all four sides isn't just for insurance against a bad cut; it's what you’ll use to grip and pull the screen taut as you install it. Coming up short is a project-ending mistake.
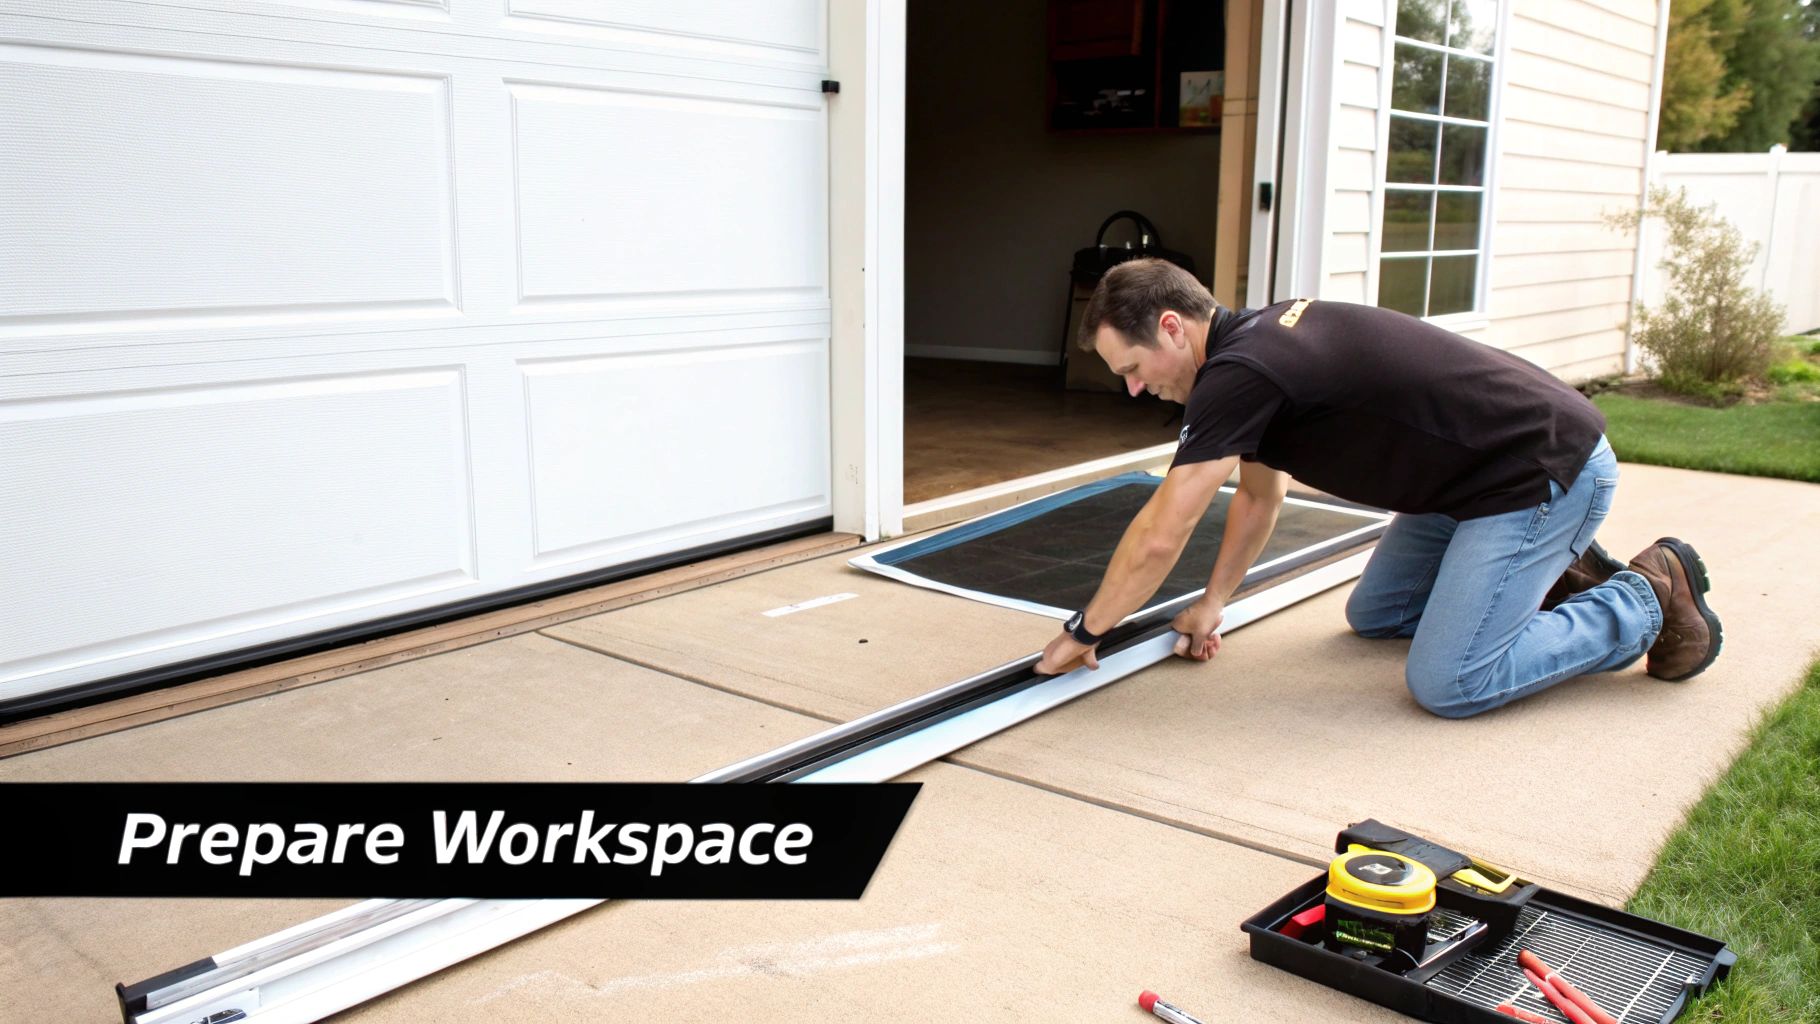
Preparing the Door and Your Workspace
Before you even think about unrolling that new screen, let’s talk about setup. Honestly, getting your workspace right is the secret to avoiding the most common—and frustrating—mistake I see: bending the door frame. These frames are usually lightweight aluminum, and they will warp if you work on an uneven surface like a bumpy lawn.
A clean garage floor, a smooth driveway, or a large patio is perfect. You need a big, flat, solid surface that will keep the door frame completely square while you apply pressure. Getting this right from the start can be the difference between a simple repair and having to buy a whole new door.
Getting the Door Ready
Okay, workspace is sorted. Now, let's get that door off its track. Look for the adjustable rollers, usually tucked into the top and bottom corners of the frame. You'll see small adjustment screws.
Loosen them up a bit—this will retract the wheels and give you the slack you need. From there, you should be able to lift the door straight up and swing the bottom out of the track. Just be gentle. Forcing it is a good way to wreck the rollers or bend the track.
Once the door is laid flat, it's time to pull out the old stuff. Grab a small flathead screwdriver or an awl and find a spot to carefully pry up the old spline. After years in the sun, it's going to be brittle, so don't be surprised when it breaks into a million little pieces. Just work your way around the frame until it's all out.
The One Step Everyone Skips (Don't Be That Person):
That little channel where the spline sits has been collecting dirt, pollen, and grime for years. If you don't clean it out, the new spline won't seat correctly, and you'll end up with a saggy screen.
Take a stiff brush or even your screwdriver with a rag wrapped around it and dig all that gunk out. You’ll be shocked at what you find. A perfectly clean groove is your ticket to a tight, professional-looking finish. If you get the door down and realize it’s in worse shape than you thought, now is a good time to see how to measure for a screen door and consider your options.
Final Prep Before the New Screen
With the channel clean, give the entire frame a quick wipe-down with a damp cloth. You don't want old dust and cobwebs trapped under your brand-new screen.
Here’s a quick mental checklist before you grab the new mesh:
- Is the door perfectly flat? Check that all four corners are supported with no bowing in the middle.
- Is the spline groove spotless? Run a finger through it one last time. It should be totally smooth.
- Are your tools handy? Have your new screen, spline, and spline roller right next to you and ready to go.
Taking an extra five minutes on this prep work saves you from massive headaches down the line. It sets the stage for a smooth installation and that tight, drum-like finish we're all after.
Getting the New Screen Mesh on for a Taut Finish
Alright, this is where the magic happens and your door starts looking brand new. The real secret to a professional job that lasts isn't about speed. It’s all about maintaining a steady, even tension as you work your way around the frame.
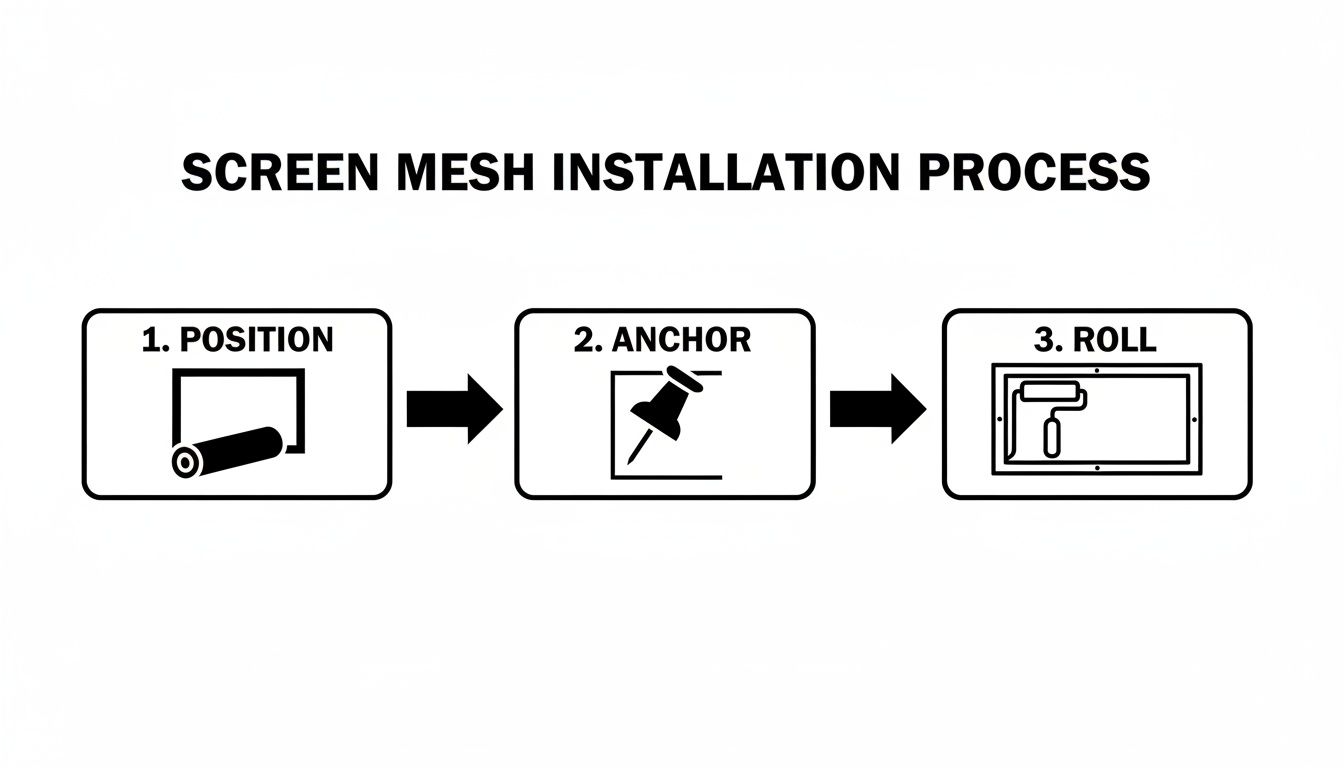
First, unroll your new screen mesh and lay it completely over the door frame. Make sure you have at least 2-3 inches of extra material hanging over all four sides. This isn't waste—it's what you'll use to grip and pull the screen tight. I always use a couple of spring clamps on one of the short sides to hold it in place. It’s a simple trick that keeps the mesh from sliding around on you.
Setting Your First Anchor Point
I find it easiest to start on one of the shorter sides. Grab your spline roller and use the convex wheel (the one that looks like a pizza cutter) to gently press the screen mesh into the groove. You only need to do this for about four to six inches. You’re not trying to seat it all the way, just creating a little channel for the spline to follow.
Now, grab the end of your new spline. Push it firmly into the corner where you just pre-rolled the mesh. That’s your anchor. Switch to the concave wheel (the grooved one) on your roller and press the spline down into the channel, right over the mesh. You're looking for a snug fit that locks that first section down solid before you move on.
The Art of Rolling the Spline
With your anchor set, just keep rolling the spline down that first short side. Use firm, consistent downward pressure. You'll feel a satisfying little pop as the spline settles into the groove. Take your time here; a steady hand works much better than trying to force it.
Once that first side is done, move to the adjacent long side. This is where tension really comes into play. Before you start rolling, give the screen mesh a gentle pull diagonally, away from the corner you just finished. You just want to pull out the slack—not so hard that you start seeing ripples or distortion in the mesh.
Hold that tension with one hand while you roll the spline in with the other. I like to work in small, manageable sections, about a foot at a time. Pull, hold, and roll. This rhythm is the key to getting that tight, wrinkle-free finish we're after.
Crucial Insight: Avoid the Bow
The most common mistake I see people make is yanking the screen way too hard. If you pull with all your might while installing the spline, you'll actually bend the lightweight aluminum frame inward. It looks terrible, and worse, it can stop the door from sliding properly in its track. The goal is "taut," not "guitar-string tight."
Nailing the Corners and Finishing Up
When you get to a corner, don't try to force the roller into that tight 90-degree angle—you'll probably just rip the mesh. Instead, use a flathead screwdriver to carefully poke the spline down into the corner. Once it's seated, you can start rolling down the next side, always pulling the screen taut toward the opposite, unsecured corner.
Just repeat that process all the way around the frame:
- Second Short Side: Pull the mesh taut across the door's width and roll the spline in.
- Final Long Side: This is your last shot to get the tension right. Pull out any remaining slack and roll that last bit of spline into its channel.
Learning this skill is a lifesaver for homeowners, especially if you live somewhere sunny. In a place like Arizona, for example, over 70% of homes have sliding doors, and that intense sun can chew through a screen every 2-3 years. Pros have this down to a science and can get the old mesh off in just minutes, making it a super common repair. You can even find data on the frequency of screen repairs to see just how often people are doing this.
Once the spline is all the way in, take a step back and look at your work. The screen should be perfectly flat and smooth. And if this project has you thinking about what other kinds of screens you can use, check out our guide on the best window screen material for different jobs.
Finishing Touches: Trimming and Reinstalling Your Door
Alright, the new screen is in and the spline is seated. You're in the home stretch now, but don't rush this part. These final steps are what separate a good-enough job from a truly professional-looking one.
First up is trimming that extra screen mesh. Grab your utility knife and—this is important—make sure you have a brand-new, sharp blade. Seriously. A dull blade is the fastest way to snag your new screen and ruin all that work you just did.
Getting a Clean, Professional Cut
Here’s a pro tip for a perfect trim: don't cut right up against the new spline. If you do, you risk slicing it or the screen itself.
Instead, angle the blade slightly outward, away from the spline. Use the metal edge of the spline channel as your guide. This gives you a buffer and a perfect line to follow.
Apply light, steady pressure and let the sharp blade do the cutting. This simple technique prevents you from accidentally nicking the screen or scratching up your door frame's paint.
Putting the Door Back and Dialing It In
Time to get the door back where it belongs. But before you lift it into place, take a quick look at the rollers on the top and bottom. They're probably full of gunk. A small brush or a shot of compressed air can clear out any trapped dirt, dust, or pet hair. Clean rollers make for a smooth ride.
For an even better glide, a quick spray of a silicone-based lubricant on the wheels works wonders. I'd steer clear of oil-based products like WD-40, as they tend to attract and hold onto more grime over time.
Putting the door back on is the reverse of how you took it off:
- Angle the door and guide the top rollers into the upper track.
- Lift the entire door up into the track until the bottom rollers can clear the lower track.
- Swing the bottom in and carefully set the wheels down onto their track.
The Final Tweak for a Perfect Glide:
Your door is back on, but it probably won't slide perfectly just yet. Remember those roller adjustment screws you fiddled with earlier? Now's the time to dial them in. Tightening a screw raises that corner of the door; loosening it lowers it.
Play around with the adjustments on all four corners. It takes a bit of trial and error, but you’re aiming for a door that slides without effort and creates a solid, bug-proof seal against the frame when it's closed. Nailing this final adjustment is the cherry on top of a job well done.
Troubleshooting Common Rescreening Problems
Even with the best intentions, things can go sideways when you're rescreening a door. A little too much tension here, a little too little there, and suddenly your perfect DIY project isn't so perfect. But don't worry, most common mistakes are fixable without having to tear everything out and start over.
Let's walk through how to handle the most frequent hiccups.
Fixing a Loose or Saggy Screen
It’s a frustrating moment: you've finished the job, hung the door back up, and then you spot it—a noticeable sag right in the middle of the screen. The good news is this is usually a quick fix.
First, figure out which side is the loosest. Just gently push on the screen with your hand; you'll feel which direction has the most give.
Once you’ve identified the culprit side, take your flathead screwdriver and carefully pry up just that one strip of spline. Pull the screen mesh taut (but not crazy tight!) from that edge and use your spline roller to press the spline back into its groove. That one small adjustment is often all it takes to get that clean, drum-tight finish.
Dealing with a Bowed Frame
If your door frame now has a slight curve or "bow" to it, you've fallen into a classic trap: pulling the screen too tight. The tension is literally bending the lightweight aluminum frame inward, which can mess with how the door slides.
To fix a bowed frame, you have to release some of that pressure. Carefully remove the spline from the two long sides of the door, but leave the top and bottom sections installed.
The moment the spline is out, you should see the frame relax and straighten. Now, reinstall the spline on those long sides, but this time, be much more gentle. Your goal is just to get the wrinkles out, not to make it tight as a guitar string.
Key Takeaway: Tension is a Balance
Finding the sweet spot between saggy and overly tight is the real art of this project. A properly tensioned screen should be flat and smooth to the touch, with just a slight give. Forcing it too tight will always cause more problems than it solves.
Having a good handle on these kinds of fixes is useful. A broader understanding of screen enclosure repair, including DIY tips and professional options, can also help you tackle bigger projects down the road.
When the Spline Is Wrong
This is one of those mistakes that happens to everyone at least once. You get home from the store only to discover the spline you bought is the wrong size.
If the spline is too thin, the screen will just pop right out of the channel with the slightest push. If it's too thick, you’ll be fighting to get it in, and you’ll probably end up tearing your brand-new screen mesh in the process.
Unfortunately, there's no clever workaround for this one—you simply need the right size. Your best bet is to take a small piece of your old spline with you to the hardware store and match it up exactly. It’s the only way to be sure and avoid a frustrating second trip.
Common Questions After a Rescreening Project
Once you've wrapped up your project, a few questions might still pop into your head. It's completely normal. Here are some quick answers to the things I get asked most often by homeowners tackling this for the first time.
Is It Really Cheaper to DIY vs. Hire a Pro?
Absolutely. Going the DIY route is one of the most cost-effective home repairs you can do. You can usually grab a roll of standard fiberglass screen and a new spline for $20 to $40. If you don't already have a spline roller, that'll add another $10 or so. It's a small price for a big improvement.
So, what's the catch? Time and hassle. Hiring a professional service will likely cost anywhere from $75 to $150, sometimes more depending on where you live and the materials you pick. You're basically paying for their expertise and the convenience of having it done perfectly, and fast, without any of the learning curve.
What’s the Best Screen for Pets or Hot Climates?
The standard fiberglass mesh is fine for most situations, but it's not a one-size-fits-all solution. Your lifestyle and location really matter here.
- Got Pets? If you have a cat that likes to climb or a dog that scratches at the door, don't even think about standard mesh. You need a pet-resistant screen. It’s made from a super-durable, vinyl-coated polyester that can take a beating from claws.
- Live in the Sun? For those of us in sunny, hot climates, a solar screen is a game-changer. This stuff is designed to block a significant chunk of the sun's UV rays, which does wonders for keeping your home cooler and your energy bills down. Plus, it helps protect your floors and furniture from fading.
Can I Rescreen a Door If the Frame is a Little Bent?
You can, but you'll need a bit of extra patience. First things first, get that door on a perfectly flat surface. See if you can gently coax the frame back into shape before you even start pulling out the old screen. A minor bend can often be corrected this way.
The real trick is during installation. You have to resist the urge to pull the new screen super tight to get rid of wrinkles. Too much tension will just make the bend worse. Aim for a "just taut enough" feel—smooth, but not straining the frame.
Know When to Throw in the Towel
If the frame is seriously kinked or damaged, you're probably fighting a losing battle. A screen on a warped frame will never be perfectly taut, and worse, the door itself might not slide right anymore. In that case, it’s probably time to look at replacing the entire door, not just the screen.
If you get halfway through and realize the frame is too far gone or the whole project just feels like more than you bargained for, calling in a professional is always a smart move.
For a flawless finish without the hassle, trust the experts at Sparkle Tech Screen Service. We offer same-week service and quick quotes to get your doors looking and working like new. Visit us at https://sparkleechscreenservice.com to get started.


