


Replacing a window screen is one of those classic home improvement projects. At its core, you're just popping out the frame, pulling out the old spline and mesh, and then rolling in the new stuff. With the right tools and a bit of patience, you can absolutely do this yourself. It’s a fantastic weekend project that makes a surprisingly big difference in your home's look and feel.
Getting Started Without the Guesswork
Let's face it, a torn or sun-bleached window screen is a real eyesore. It’s also an open invitation for every bug in the neighborhood to come inside. Learning how to swap out an old screen is a great skill for any homeowner to have, and the payoff is immediate—better airflow, a clearer view, and a cleaner look for your home.
Plus, if you get fancy with materials like solar mesh, you can even see a little difference in your energy bills. This guide is all about setting you up for success before you even head to the hardware store.
Understanding the Scope of Your Project
First things first, take a moment to figure out exactly what you're up against. Are we talking about one easy-to-reach screen on the first floor? Or are you planning to tackle every screen on the second story? The job can get complicated fast. A standard rectangular screen is pretty simple, but a custom-shaped window or a massive patio door screen is a whole different ballgame. A little planning now saves you a lot of headaches (and extra trips to the store) later.
Getting your measurements right is absolutely critical. If you're off by even a little, the screen just won't fit. For a complete walkthrough on this crucial first step, check out our guide on how to measure your window screen size. Do this before you buy anything.
Expert Tip: A lot of people think this will eat up their whole Saturday. Your first screen might take an hour or two as you get the hang of it, but you'll get much faster. The real secret is having all your tools and materials laid out and ready to go before you start.
It's interesting to see how things have changed. While many homeowners are still tackling this themselves, we're seeing a big shift toward calling in the pros. Someone doing this for the first time might spend 2–3 hours on a single screen. A trained technician like one of ours at Sparkle Tech? We can usually knock out the same job in under 30 minutes. That's a time savings of about 75%. It really shows how practice and specialized tools make a difference.
Getting Your Hands Dirty: The Step-by-Step to a Perfect Screen
Alright, you've got your tools and materials laid out. Let's get to the good part. The trick to replacing a window screen without pulling your hair out is to think of it as a natural workflow, not just a list of instructions. We'll go from prepping your workspace to getting that satisfyingly taut finish.
First thing's first: find a good spot to work. A flat, stable surface is non-negotiable. I've used everything from a proper workbench to a clean patch of the garage floor. Just lay down an old blanket or some cardboard first—it'll save your screen frame from getting scratched up and protect your work surface. This little bit of prep work prevents a lot of common headaches, like a bent frame or a snagged screen.
Getting the Frame Out and Taking the Old Screen Apart
Popping the screen frame out of the window is usually the first hurdle. Most modern screens have little pull tabs or springs. Just pull them gently toward the middle of the screen, and the frame should come right out. If you're dealing with older, stubborn screens, a flathead screwdriver can give you a bit of leverage. Be gentle, though; you don't want to bend the aluminum frame.
With the frame on your work surface, it's time to find the old vinyl spline. Look for the end—it usually looks like a little seam in the channel. I use a small screwdriver or an awl to carefully dig under it and pry it up. Once you get a little bit out, the rest will pull out like a long piece of string.
With the spline gone, the old mesh just lifts right off. Before you move on, take a second to wipe down the frame's channel with a cloth. You'd be surprised how much dirt and gunk builds up in there.
This whole process really boils down to three main phases: getting the frame out, swapping the mesh, and locking in the new screen with spline.
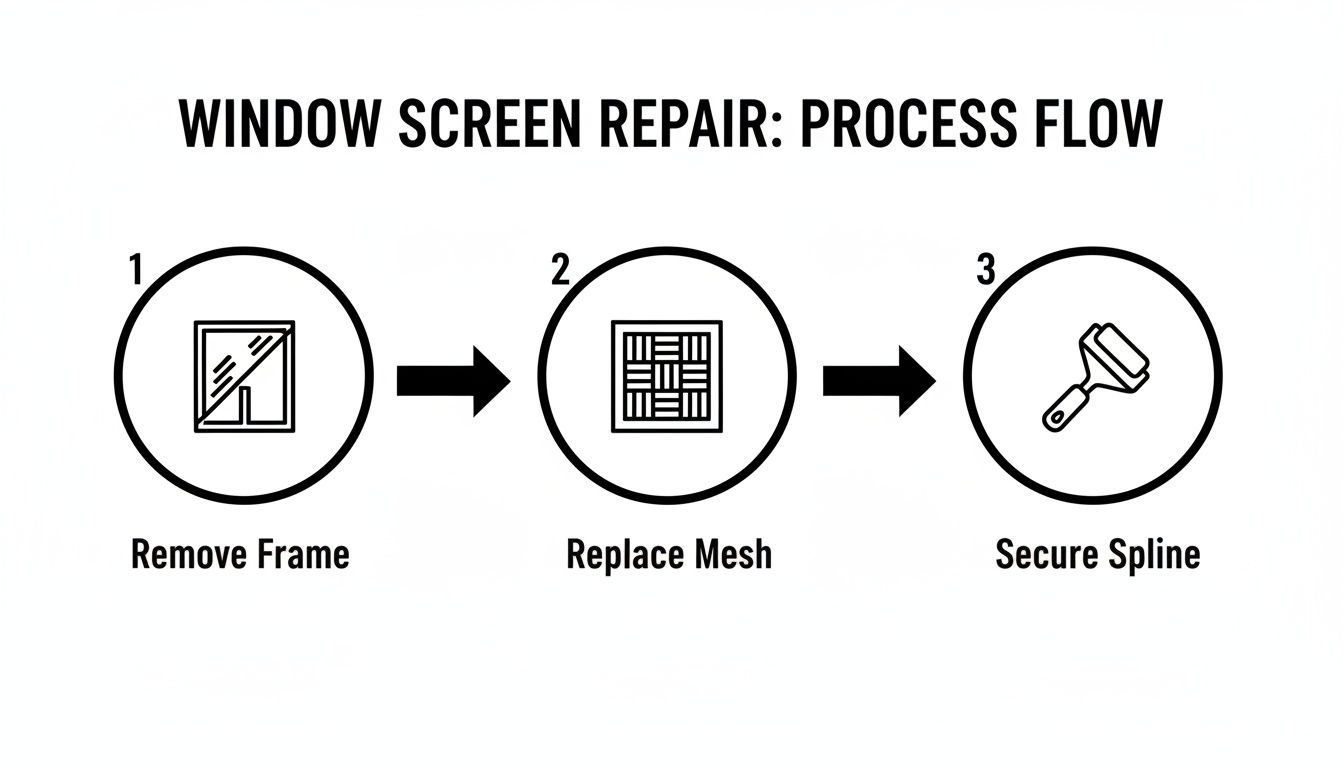
As you can see, it's a pretty straightforward sequence. The real craft comes in how you secure that new mesh to get it perfectly tight.
Sizing and Setting the New Mesh
Now for the new screen material. Unroll it over the frame, making sure you have plenty of overlap on all four sides. A classic rookie mistake is cutting the mesh to the exact size of the frame, which leaves you with nothing to hold onto. You'll want about two inches of overhang all the way around. Trust me, you need that extra material to pull against for tension.
Here's a tip I learned the hard way: use a couple of small spring clamps to hold the mesh in place at one end of the frame. This keeps the screen from shifting while you work on the other side, which is the number one cause of wrinkles. It's like having an extra set of hands.
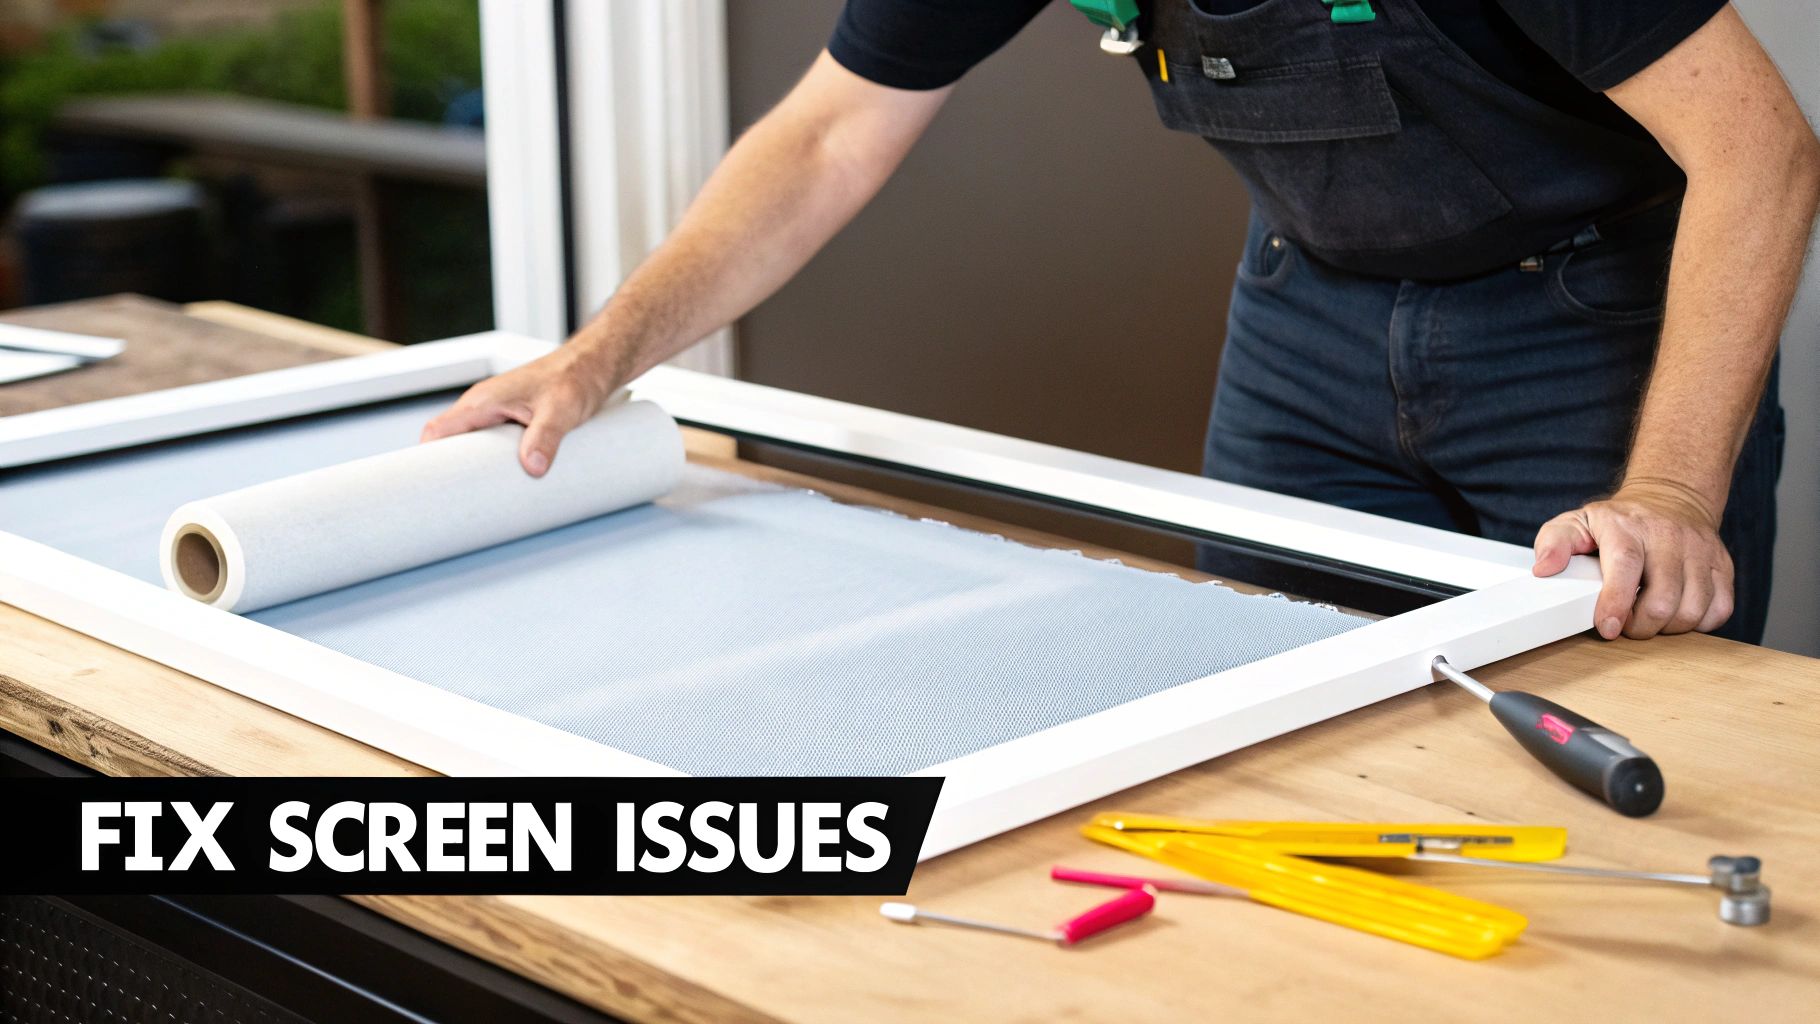
Using a Spline Roller for a Drum-Tight Finish
This is where the magic happens. Start at one corner and use the convex, or rounded, wheel of your spline tool. Gently press the mesh into the frame’s channel. This first pass just creates a little crease and gets the screen seated without tearing it. Don't go crazy with the pressure yet; this is all about alignment.
After you've done one full side, switch over to the concave (grooved) wheel on your tool. Lay the new spline over the channel and roll it in firmly. You want to seat it deep into the groove, and you’ll feel a satisfying little pop as it locks everything in place.
Pro-Tip: The secret to a professional, sag-free finish is to create opposing tension. As you push the spline in with one hand, use your other hand to gently pull the overhanging screen material away from the frame. This slight, steady pull is what makes the screen perfectly tight.
Work your way around the frame, one side at a time. When you reach the corners, you might need to use the tip of a flathead screwdriver to carefully tuck the spline into that tight space. Some older wooden frames are a different beast entirely; for certain types, you might even use tools like heavy-duty staple pliers to staple the mesh directly to the frame.
Once the spline is seated all the way around, you’re ready for the final, satisfying step. Grab a sharp utility knife and carefully trim the excess mesh. I like to run the blade right along the outside edge of the spline, using the frame's channel as a guide. Take your time here for a clean, straight cut.
And that's it! You'll have a perfectly taut, brand-new screen ready to pop back into your window.
Choosing the Right Screen for Your Climate and Needs
When you're replacing a window screen, you're doing more than just a simple fix—you're getting a chance to make a real upgrade. The type of screen mesh you pick can make a huge difference in everything from how long it lasts to how much you spend on your energy bills. So, instead of seeing it as just another task on your to-do list, think of it as a smart investment in your home.

The go-to material you'll find at any big-box store is fiberglass screen mesh. It's popular for a reason: it's affordable, it’s flexible, and it won't crease or dent easily, which makes it pretty forgiving if this is your first time tackling a screen replacement. The downside? It can get brittle and crack after a few years of constant sun exposure.
For something a bit tougher, you might look at aluminum screen mesh. It gives you a really clear view and it’s strong enough that it won't start sagging over the years. Just be careful, because it can dent if it takes a hit, and if you live near the coast, the salty air can cause it to corrode.
Matching Mesh to Your Lifestyle
The best screen for you really depends on what's going on at your house. Do you have a cat that loves to climb the screens or a dog that scratches at the door? Or maybe you live in a place where the sun beats down all summer, sending your AC into overdrive. The answers to these questions will point you toward the perfect material.
Here’s a quick breakdown to make the choice a little easier:
| Screen Type | Best For | Key Benefit | Potential Drawback |
|---|---|---|---|
| Fiberglass | Everyday use, budget projects | Low cost, easy to work with | Can get brittle in the sun |
| Aluminum | Long-term durability, crisp views | Strong, resists sagging | Can be dented and may corrode |
| Pet Screen | Homes with cats and dogs | 7x stronger than standard fiberglass | Mesh is thicker, slightly reducing visibility |
| Solar Screen | Hot, sunny climates | Can block up to 90% of solar heat | Costs more upfront |
As you can see, what works for one home might not be the best for another. Learning how to pop in a new screen is one thing, but choosing the right material is what will really pay off in the long run. To get even more detail on your options, check out our guide on the best window screen material.
High-Performance Screens for Modern Homes
If you're dealing with intense sun, a solar screen can be a total game-changer. This stuff is specifically engineered to stop a huge chunk of solar heat and glare before it ever hits your window glass. The result is a cooler home and a noticeable drop in your cooling bills.
And for anyone with four-legged friends, pet-resistant mesh is practically a necessity. It’s made from a tough, vinyl-coated polyester that can stand up to claws and paws without shredding like standard fiberglass would.
Choosing a specialized screen is an investment in your home's comfort and resilience. A solar screen in a hot climate isn't a luxury; it's a practical tool for energy management that pays for itself over time.
This move toward screens that do more than just keep bugs out is a growing trend. In fact, the market for smart adaptive window screens is projected to hit around $7.49 billion by 2029. It just goes to show how many homeowners are seeing the value in these newer, more advanced screening technologies. Once you master a basic replacement, you’ll be ready to explore these upgrades, too.
Navigating Common Problems and Tricky Scenarios
Any DIY project can hit a snag, and replacing a window screen is no exception. It happens. You can follow every step to the letter and still end up with a wrinkle or a stubborn frame. Don't get discouraged! Let's walk through some of the most common headaches you might run into and how to fix them like a pro.
Trust me, we’ve seen it all, and most of these issues are surprisingly easy to solve with a bit of patience.
Wrinkles and Saggy Screens
This is, without a doubt, the number one frustration. You finish the job, hold up the screen, and see a sag or a few waves in the mesh. Annoying, right? This almost always boils down to one thing: uneven tension when you installed the spline.
The fix is usually pretty simple. Carefully use a flathead screwdriver or utility knife to lift the spline out of the channel on the wrinkled side. You might need to pull it from the two adjacent sides as well to give yourself enough slack. Now, reset the mesh and re-roll the spline, but this time focus on applying gentle, consistent tension. Pull the mesh taut away from the frame as you push the spline back in.
Think of it like stretching a canvas. You're not trying to yank it into submission. The goal is a firm, even pull across the entire length of the mesh. Consistency is what gives you that perfect, drum-tight finish.
If you’ve tried re-tensioning and the screen is still loose, the culprit might be your spline. A spline that's too thin for the frame’s channel won't have enough grip to hold the mesh tight.
The Spline Just Won't Cooperate
Getting the right spline size is non-negotiable. If you try to force a spline that’s too thick, you’ll fight it the whole way and likely tear your brand-new mesh. On the flip side, a spline that’s too thin will give you a saggy screen that might just pop right out in a strong breeze.
Here’s a foolproof trick I always recommend:
- Keep a sample: When you pull out the old, brittle spline, snip off a one-inch piece.
- Match it up: Take that little piece with you to the hardware store. It’s the easiest way to guarantee you buy the correct diameter.
- If you’re guessing: If you lost the original piece and are stuck between two sizes, it's usually safer to go with the one that's slightly larger. It will compress into the channel and create a much more secure fit.
Using the right tools for the job can prevent a lot of these problems from happening in the first place. If you're curious about what the professionals use, check out this list of essential window screen repair tools.
Bent Frames and Awkward Shapes
Sometimes, the issue isn't with your technique but with the frame itself. After years of exposure to the elements, an aluminum frame can get a little bent or warped. Before you even start, lay the frame on a flat surface. If you see a bow, you can often gently bend it back into shape by hand.
If a frame is severely bent, cracked, or broken at a corner, it's probably not worth trying to salvage. At that point, your best bet is to just buy a new frame kit.
And what about those non-standard projects, like a huge patio door screen or a custom arched window?
- Big screens: Definitely grab a helper. Trying to keep proper tension across a large patio screen by yourself is a recipe for frustration.
- Custom shapes: The method is the same, but patience is key. You'll need to be extra careful when trimming the excess mesh to make sure you follow the unique curves of the frame perfectly.
Knowing When to Call a Professional
There's a great sense of accomplishment in fixing something around the house yourself. But part of mastering any DIY project, including window screen replacement, is knowing your limits and recognizing when it’s time to call in an expert. What starts as a simple Saturday task can quickly become a frustrating, weekend-long ordeal.
Making that call isn't admitting defeat—it's just being smart with your time, your safety, and your sanity. Think about the real scope of the job. If you're just swapping out the mesh on a couple of ground-floor window screens, you've got this. It's a perfect DIY project. But if you're looking at rescreening every window in the house, that's a whole different ballgame.
Scenarios That Warrant a Professional
Some situations are clear signs that bringing in a service like Sparkle Tech is the right move. Before you even start pulling out spline, take a moment to be honest about the tools you have, the time you can spare, and any physical challenges the job might present.
Here are a few tell-tale signs that a pro is your best bet:
- Hard-to-Reach Windows: The moment a ladder comes out for a second-story window, the risk goes way up. We have the right equipment, safety training, and experience to work at heights without putting anyone or anything in danger. It's just not worth the risk.
- A Full Home Rescreen: Tackling 10-15 screens on your own can easily eat up your entire weekend. A professional crew, on the other hand, can knock out the whole job in just a few hours, leaving you with your weekend back.
- Bent or Damaged Frames: Sometimes you pop a screen out only to find the metal frame itself is bent, cracked, or broken. Just putting new mesh in a bad frame won't fix the underlying issue. We can often repair these frames on-site or, if needed, build a brand new custom one for a perfect, bug-proof fit.
Even when homeowners put off big-ticket items like full window replacements during uncertain economic times, they still prioritize essential maintenance. Screen repair is a perfect example—it's a relatively low-cost fix that makes a huge difference in how comfortable and usable your home is. You can read more about replacement window industry trends from Accio.
At the end of the day, a professional brings two things to the table: efficiency and a quality guarantee. Here at Sparkle Tech Screen Service, we use commercial-grade materials and specialized tools that ensure a flawless, drum-tight finish every single time. If you're short on time, facing a tricky job, or just want it done right without the headache, give us a call at 800-370-3998 for a quick, no-hassle quote.
Your Window Screen Questions Answered
We get a lot of the same questions from homeowners about replacing their window screens, so let's tackle the most common ones right here. Think of this as the final once-over to make sure you're ready to go.
Even with the best instructions, you can hit a snag. Getting these common questions answered beforehand can save you a lot of frustration when you're knee-deep in spline and mesh.
What’s the Cost Difference: DIY vs. a Pro?
If you're just fixing one or two screens and already have the tools, doing it yourself will definitely be cheaper on paper. You’re really only paying for a small roll of screen mesh and some spline.
But here’s the thing—the math starts to change when you have multiple screens to do. A professional service buys materials in bulk, so our cost per screen is lower. More importantly, we can knock out an entire house in a fraction of the time it would take a DIYer. Plus, you’re guaranteed a perfect, drum-tight finish without any wasted material from a slip-up.
How Do I Keep My New Screens Clean?
The good news is, maintenance is easy. All you need is a soft brush, a little bit of mild soap, and some water. Gently scrub the screen, give it a light rinse, and you're done.
Whatever you do, stay away from power washers and harsh chemicals. A pressure washer can shred the mesh or pop it right out of the frame, and chemical cleaners can ruin the frame's finish. A quick check of the spline every spring and fall is also a good idea to make sure everything is still seated properly.
A tip from the field: Don't wait until the screens are caked in dirt. A quick cleaning once or twice a year is all it takes to prevent grime from embedding in the mesh, which makes them last so much longer.
Can I Just Reuse the Old Spline?
I know it’s tempting. It’s right there, and it looks fine, right? But please, don't do it. We strongly advise against reusing old spline.
The sun bakes the vinyl over the years, making it shrink and turn brittle. It loses all of its flexibility. If you try to force that old, shrunken spline back into the channel, you'll end up with a screen that sags and looks terrible. New spline is incredibly cheap and is the single most important component for getting that tight, professional look. It's a few bucks that makes all the difference.
Feeling like this is more than you want to take on? If you're short on time or just want it done right, Sparkle Tech Screen Service is here to help. We offer same-week service and can get you a quick, no-hassle quote. Just text or call us at 623-233-0404 or schedule your service online today.


