



A torn patio screen is an open invitation for bugs, but it's a repair you can absolutely handle yourself. It really just comes down to a few key moves: pulling out the old spline and screen, laying the new mesh across the frame, and then using a special roller tool to press in a new spline. That last part is the trick to getting the screen taut for a clean, professional look.
Your Guide to a Flawless Patio Door Rescreen Project
A ripped or damaged sliding screen door is more than just an eyesore; it's a breach in your home's defenses against mosquitos, flies, and other pests. While your first instinct might be to call a pro, learning how to rescreen a patio door is one of the most satisfying and budget-friendly DIY projects you can tackle. With the right tools and a little patience, you can get your door back in perfect shape in just an hour or two.
This guide is here to walk you through the whole thing, from getting your workspace ready to making that final trim for a factory-fresh finish. Forget about ugly duct tape patches or propping the door just so. Soon, you'll have a durable, functional screen that lets the breeze in and keeps the bugs out.
Why Rescreening Is a Smart Home Improvement
Taking on this project yourself saves you a good chunk of change on labor costs and puts you in complete control of the material quality. It's a genuinely useful skill that boosts your home's curb appeal and makes your living space more enjoyable.
It turns out, plenty of homeowners are choosing to repair and refurbish what they have. The global patio doors market was valued at $38 billion and is projected to hit $59.3 billion by 2032, with the refurbishment segment owning the largest slice of the revenue pie in the United States. This trend really underscores a growing preference for updating rather than replacing.
As you get started on your rescreening project, think about how it enhances your whole outdoor area. If you're looking for more inspiration, you can find some great tips for designing a captivating patio.
Patio Door Rescreening Project At a Glance
Before you dive in, it helps to know what you're getting into. Most first-timers are pleasantly surprised by how quickly this project comes together once they have all the supplies lined up.
Here’s a quick breakdown of what you can generally expect.
| Metric | Typical Estimate |
|---|---|
| Estimated Time | 1-2 hours |
| Difficulty Level | Beginner |
| Approximate Cost | $25 – $75 |
As you can see, for less than the cost of a nice dinner out, you can permanently fix one of those annoying little household problems. It's the perfect weekend task to improve your home's function and aesthetic.
Now, let's get into the specific tools and materials you'll need to make it happen.
Getting Your Tools and Materials Ready
Nothing sinks a simple DIY project faster than multiple trips to the hardware store. To get this job done right and avoid a headache, you need to show up with a plan. This isn't just about grabbing a roll of screen; it's about knowing exactly what you need for a result that looks like a pro did it.
Let's walk through your pre-project checklist. Getting everything you need in one go is the key to a smooth, straightforward installation.
Your Essential Toolkit
Good news—you probably have most of these tools in your garage already. But there’s one special tool you absolutely can't skip if you want a tight, clean finish.
Spline Roller: This little gadget is your most valuable player. It's a small handle with two wheels: one convex (curved out) and one concave (curved in). The convex wheel tucks the mesh into the frame's channel, and the concave wheel presses the spline in over it. Don't even think about using a screwdriver instead—that's the number one cause of torn screens during installation.
Utility Knife: A sharp blade is non-negotiable for a clean cut. You'll need it to trim the extra screen mesh at the end. Always start with a fresh blade. A dull one will snag and fray the screen, ruining all your hard work.
Flat-Head Screwdriver or Awl: This is for the demo work. You'll need something with a fine point to dig into a corner and pry out the old, brittle spline so you can get a grip on it.
Tape Measure: You know the old saying: measure twice, cut once. You’ll need this to measure your door frame's height and width so you buy a big enough roll of screen. Always add a few inches to each measurement to give yourself some wiggle room.
Clamps (Optional but a Game-Changer): A few cheap spring clamps are a fantastic help. They hold the new screen taut and in place while you work, which is a pro trick to prevent annoying wrinkles and sags.
Choosing the Right Screen Material
Not all screen mesh is created equal. The right choice depends on your budget, your local climate, and whether you have pets or kids running around.
For a much deeper look at the options, check out our guide on the best window screen material. It’ll help you narrow down the perfect fit for your home.
Pro Tip: New screen mesh often has creases from being rolled up in the package. Before you start, lay it out flat in the sun for an hour or so. The warmth makes the material relax and become much easier to work with.
Here’s a quick rundown of the most common types you'll find:
| Screen Type | Best For | Key Features |
|---|---|---|
| Fiberglass | General use, budget-friendly projects | The standard choice. It's affordable, flexible, and doesn't crease easily. The trade-off is that it's the least durable. |
| Aluminum | Durability and a crisp appearance | Much stronger than fiberglass and won't sag over time. It offers fantastic visibility but can dent or crease if you bend it. |
| Pet-Resistant | Homes with cats, dogs, or small children | Made from tough vinyl-coated polyester, this stuff is about 7 times stronger than fiberglass. It resists tears from claws but is a bit thicker, slightly reducing visibility. |
| Solar Screen | Energy efficiency and sun protection | This heavy-duty mesh blocks 65% to 90% of the sun's heat and UV rays. It helps lower your A/C bill and stops your furniture from fading. |
Selecting the Perfect Spline
The last piece of the puzzle is the spline. This is the rubbery cord that locks the screen into the channel of the door frame. Getting the size right is absolutely critical.
If it's too thin, the screen will pop right out. If it's too thick, you'll fight it the whole way and probably tear your brand-new mesh.
Here are two foolproof ways to get the right size:
- Match the Old One: As you pull out the old spline, snip off a small one-inch piece that isn't totally rotted. Take it with you to the store and find an exact match. This is the easiest and most reliable method.
- Measure the Channel: If the old spline is long gone, use your tape measure to find the width of the channel in the frame. The spline you buy should have a diameter that's just a tiny bit larger than that channel to ensure a nice, snug fit.
Once you have your tools, screen, and spline in hand, you’re ready to get to work.
A Practical Walkthrough of the Rescreening Process
Alright, you've got your supplies laid out. Now it's time to roll up your sleeves and get to the fun part—the actual hands-on work. This is where you’ll see the transformation happen, taking you from a tired, torn screen to a fresh, new one. We’ll go through it step-by-step, from getting the door off its track to making that final, satisfying trim cut.
The single most important piece of advice I can give you is this: be patient. Rushing this job is the number one reason people end up with wrinkled screens or, even worse, a bowed frame. Take your time, follow the process, and you'll end up with a flawless finish that looks like a pro did it.
This picture shows the three key players you'll be working with.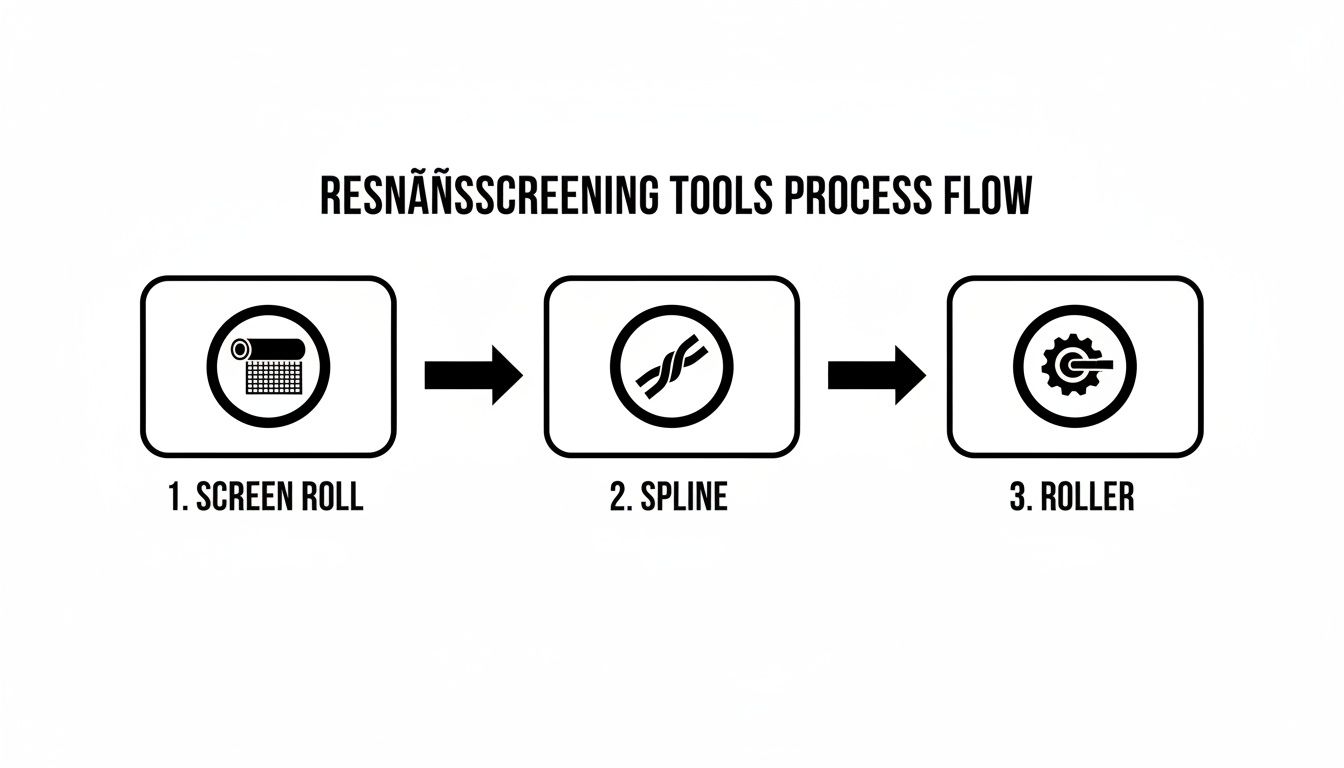
Getting a feel for how the mesh, the spline, and the roller tool all work together is the foundation for a successful rescreening project.
Removing the Door and Old Screen
First things first, you need to get the sliding screen door out of its frame and onto your work surface. Most modern doors are held in by spring-loaded rollers, usually at the bottom.
To pop the door out:
- Look for the adjustment screws on the bottom edge of the door's vertical frame, typically one near each corner.
- Grab a Phillips head screwdriver and turn those screws counter-clockwise. This sucks the rollers up into the frame, lowering the door and giving you the wiggle room you need.
- Once the rollers are up, lift the entire door straight up into the top track, then swing the bottom out towards you. Carefully guide it down and away from the frame.
Now, lay the door flat on your sawhorses. It's demolition time. Take a flat-head screwdriver or an awl and dig into a corner to pry up an end of the old spline. Once you’ve got a piece to grab, you can usually pull the whole thing out in one long, satisfying strip. With the spline gone, the old screen just lifts right off.
Prepping the Frame for New Mesh
Before you even think about unrolling that new screen, take a minute to clean out the empty spline channel. You’d be amazed at how much dirt, dust, and general gunk collects in that groove over the years.
A stiff brush or even a screwdriver with a rag wrapped around it works great for clearing out the debris. A clean channel is non-negotiable; it's what allows the new spline to sit properly and get a solid grip. This small step makes a huge difference in the final quality. If you want to see what the pros use, you can learn more about the essential window screen repair tools that make this job much easier.
Installing the New Screen and Spline
This is the most critical part of the whole project, where technique really matters. Lay your new screen mesh completely over the frame, making sure it overlaps the spline channel by at least two inches on all sides. If you have clamps, now's the time to secure the screen at the top to keep it from shifting. The screen should lie flat, but don't pull it tight yet!
The Golden Rule of Tension: Avoid the temptation to pull the screen taut before you start. The process of rolling the spline into the channel is what creates the perfect amount of tension. If you stretch the mesh tight beforehand, you'll almost certainly end up with a bowed, "hourglass-shaped" frame.
Start on one of the long sides of the door. Using the convex (rounded-out) wheel of your spline roller, gently press the screen mesh into the channel. Work your way slowly down the entire length. This creates a perfect little crease for the spline to follow.
Next, grab your new spline. Using the concave (grooved-in) wheel of the roller, press the spline firmly into the channel right on top of the mesh. You’ll want to apply steady pressure. You should feel a satisfying little pop as the spline seats itself, locking the screen in place.
Mastering the Corners and Final Sides
When you reach a corner, don't cut the spline. Instead, use the edge of your flat-head screwdriver to poke the spline securely down into the corner. Then, just turn the corner and continue rolling down the next side.
After you've secured the first long side, move directly to the opposite long side. Follow the same process: pre-crease with the convex wheel, then roll in the spline with the concave wheel. This is the side where you'll create the tension. As you roll, use your free hand to gently pull the screen fabric taut, smoothing out any slack or wrinkles as you go.
Finish up by installing the spline on the two shorter sides using the same technique. Your goal is a perfectly flat screen with no waves or sags.
Making the Final Trim
You're almost there! Once all four sides are splined in, the last real step is to trim off the excess screen material for that clean, professional look.
Grab your utility knife—and make sure it has a fresh, sharp blade. A dull blade will snag and ruin your work. Hold the knife at a 45-degree angle, pointing away from the new spline. Run the blade carefully along the outside edge of the spline, using the frame itself as a guide. That angle is crucial; it keeps you from accidentally slicing your new spline or fraying the edge of the mesh.
With the excess trimmed away, your door should look brand new. All that's left is to put it back. Just reverse the removal process: lift the top into the upper track, swing the bottom into place, and turn the adjustment screws clockwise to extend the rollers until the door glides smoothly.
Troubleshooting Common Problems and Finishing Like a Pro
Even the most carefully planned DIY project can throw you a curveball. Don't worry—most issues that pop up when you're rescreening a patio door are common and completely fixable. Knowing how to handle these little hiccups is what separates a frustrating afternoon from a successful project you can be proud of.
This section is your field guide to solving those frequent headaches. We'll also cover the finer points that elevate your work from "good enough" to a truly professional-grade finish that will last for years.
Fixing Wrinkles and Sags
By far, the most common frustration is finishing up only to see wrinkles or a saggy spot in your new screen. This almost always comes down to uneven tension, but it’s an easy fix as long as you catch it before trimming the excess mesh.
- Find the source: Pinpoint which side of the frame the wrinkle or sag is closest to.
- Backtrack a bit: Carefully pull out about one to two feet of spline on either side of the sag. This gives you room to work.
- Apply gentle, even tension: With your free hand, pull the screen mesh gently away from the frame. You're not trying to stretch it out, just smooth it flat. A firm, steady pull is all you need.
- Reseat the spline: While holding that tension, use your roller to press the spline back into its channel. You should see the wrinkle disappear as you lock the screen back down.
This simple technique works like a charm. The real key is to address any sags before you make that final trim with your utility knife.
Tackling Stubborn Spline and Tight Corners
Sometimes the spline just doesn't want to cooperate. This happens a lot if the new spline is slightly thicker than the old stuff or if the corners of the frame are tight and unforgiving. Trying to force it can tear the mesh, so a little finesse goes a long way.
If your spline feels too thick and won't seat properly, try this old-school pro trick: lightly lubricate the channel. A quick shot of silicone spray or even a bit of dish soap wiped along the channel with a cloth can make a world of difference. The spline will slide right in without a fight.
For those tricky corners, don't be afraid to use the tip of a flat-head screwdriver. Gently but firmly poke the spline deep into the corner before you continue rolling down the next side. This ensures it's fully seated and won't pop out later.
A Quick Finishing Tip: After trimming the excess screen, you might notice some tiny fibers or "hairs" along the edge. Run a lighter very quickly along the edge of the new screen—be extremely careful not to actually touch the mesh. That brief flash of heat will singe away the stray fibers, leaving an incredibly clean, professional-looking line.
Professional Finishing Touches
Beyond troubleshooting, a few small details are what truly make your project look flawless. These are the techniques we use to ensure durability and a crisp appearance.
- The Perfect Cut: When trimming the excess mesh, always hold your utility knife at a 45-degree angle, with the blade pointing away from the new spline. This is the secret to avoiding an accidental slice into your new screen or spline.
- Final Inspection: Before you hang the door back up, give it a final once-over in good light. Check that the spline is seated consistently all the way around and that there are no hidden sags you missed earlier.
- Clean and Lubricate: Your door is off, so now is the perfect time to clean the track! Wipe out all the gunk from the top and bottom channels. A quick spray of silicone lubricant on the rollers will make your door glide like new.
These final steps only take a few extra minutes, but they make a huge difference in the final result and the door's long-term performance.
While this is a satisfying DIY project, it's also part of a much larger home service industry. The market for door and window repair is projected to hit $38.34 billion by 2030, reflecting a strong trend of homeowners maintaining and improving their properties. You can explore more data on the growth of the repair service market to see the full industry scope.
Knowing When to DIY vs. Calling a Professional
Learning how to rescreen a patio door is a fantastic skill. It gives you a real sense of accomplishment and definitely saves you some money. For a standard, undamaged door, it’s a project most homeowners can confidently knock out in an afternoon.
But there's a fine line between a rewarding DIY task and a major headache. The key is knowing when to step back and call for help.
An honest look at the situation is crucial. Not every screen door issue is a simple mesh swap. Some problems demand specialized tools, know-how, and materials that you just won't find in a basic rescreening kit.
Signs You Should Call a Professional
Before you jump in, take a minute to really inspect your door frame and size up the project. Certain red flags are clear indicators that a DIY attempt could lead to bigger problems, wasted materials, and a whole lot of frustration. Calling a pro in these scenarios isn't giving up—it's just being smart.
You should probably pick up the phone if you run into any of these issues:
- Bent or Damaged Frame: A warped or bent aluminum frame is a job for a pro, period. If you try to force new screen into a compromised frame, you'll end up with a wavy, loose mess. Worse, it could prevent the door from sliding properly in its track.
- Oversized or Non-Standard Doors: Extra-large patio doors or custom-sized frames require more than just a bigger roll of screen. Getting the tension just right across a huge surface to prevent sagging is a skill that comes from doing this day in and day out.
- Specialty Screen Materials: Trying to install heavy-duty materials like dense solar screens or certain pet-resistant screens can be surprisingly tough. These materials are often stiff and unforgiving, requiring specific techniques and tools to get them in right without causing damage.
The Value of Professional Screen Service
Hiring an expert from a company like Sparkle Tech Screen Service brings a lot more to the table than just a finished job. For starters, we have access to commercial-grade materials that typically outlast anything you can grab at the local hardware store. We also bring years of hands-on experience, which means we can troubleshoot unexpected issues on the spot.
The biggest benefit, though, is the guarantee. A professional service stands by their work. We ensure your screen is perfectly tensioned and your door functions exactly as it should. If anything goes wrong, we'll make it right. That's a level of assurance a DIY project simply can't offer.
While many home projects are great for homeowners, understanding the benefits of hiring a professional can help you decide when expert help is the smarter choice for your peace of mind.
For homeowners in places like Phoenix or Scottsdale, professional https://sparkletechscreenservice.com/window-screen-repair-services/ are invaluable for getting a flawless result. The investment in quality screen solutions is growing, with the global retractable screen door market valued at $8,541.64 million and expected to keep expanding. This just shows how much people value durable, well-installed screens.
Still Have a Few Questions?
Even with a step-by-step guide, it's normal to have some "what if" questions pop up, especially if this is your first time tackling a rescreening project. Let's run through a few of the most common issues people face right before they start. Think of it as a final pre-flight check to get you ready for a smooth installation.
What’s the Best Screen for a House with Pets or Kids?
If you have pets or active kids, don't even think about standard fiberglass. You need pet-resistant screen, hands down. It’s made from a super-tough, vinyl-coated polyester that's way thicker and more durable than the regular stuff. It’s built to take a beating from claws, paws, and stray soccer balls.
Yes, it costs a bit more, and the view isn't quite as crystal clear. But that's a small price to pay for not having to do this whole job over again in six months. It's a smart investment in your own sanity.
How Do I Know What Size Spline to Buy?
This is a critical detail, and guessing is a recipe for frustration. The absolute best way to get it right is to cut a small, one-inch piece of the old spline before you throw it away. Just take that little sample to the hardware store and match it up perfectly. Problem solved.
What if the old spline is completely gone or turned to dust? In that case, you'll need to measure the width of the channel in the door frame itself. You're looking for a snug fit—the spline should hold the screen tight, but you shouldn't have to wrestle it into place.
A Pro's Rule of Thumb: You should feel firm, consistent pressure when rolling the spline in. If you're using all your strength and feel like you're about to rip the screen, the spline is too thick.
How Tight Should I Pull the Screen?
Here’s the part where a lot of projects go sideways. The goal is to make the screen taut, but not stretched like a drum. You just want to pull out any major slack or wrinkles before you start pressing in the spline. A classic rookie mistake is yanking the mesh as tight as humanly possible. This will actually pull the metal frame inward, bowing it into an ugly hourglass shape.
A bowed frame is a huge headache because it'll stop the door from sliding properly. Just trust the process—rolling the spline into the groove is what creates that final, perfect tension for a flat, clean finish.
Can I Rescreen a Bent Door Frame?
If you're looking at a frame with a clear bend, a warp, or a crack, my honest advice is to call a professional. Trying to rescreen a damaged frame is almost impossible. You’ll never get the tension right, and you'll end up with a saggy, wavy mess that looks terrible.
Worse, a bent frame can mess with the door's rollers and keep it from working at all. A pro can tell you if the frame can be salvaged or if it makes more sense to replace the whole door. It could save you a lot of time and money in the long run.
Don't let a bent frame or the hunt for the right materials derail your project. For a flawless finish without the fuss, give the experts at Sparkle Tech Screen Service a call. We handle these jobs every day and can get your patio door looking and working like new with our same-week service. Get a quick quote and let us take it from here. https://sparkletechscreenservice.com


