


When a window screen gets torn or the frame gets bent out of shape, the first thing most homeowners wonder is, "How much is this going to set me back?" The truth is, there's no single, flat-rate answer. The average window screen replacement cost lands around $317 per window, but that's just a ballpark figure. Most people end up paying somewhere between $147 and $514.
What causes such a wide range? It really boils down to the specifics of your project—things like the size of your window, the type of screen material you pick, and even the labor costs in your area.
Your Quick Guide to Screen Replacement Costs
Figuring out the budget for a screen replacement can feel a bit like a guessing game. You might get a few different quotes and wonder why they're all over the map. The final price tag isn't just one number; it's a mix of several different factors that all contribute to the total.
Think of it like buying a car. The base model has one price, but as soon as you start adding features like a sunroof, leather seats, or an upgraded sound system, the cost climbs. It’s the same with window screens. A standard fiberglass screen for a small bathroom window is your entry-level option. But if you need a huge screen for a patio door, or you want a specialty material that can stand up to pets or block the sun's heat, you're going to see those upgrades reflected in the final bill.
Breaking Down the Numbers
Let's put some real numbers to this to give you a clearer picture. While the national average hovers around $317 per window, most projects fall within that $147 to $514 sweet spot. The final cost depends heavily on the screen's size, the material it's made from, and how tricky the installation is.
For instance, a simple rescreening of a standard sliding window is usually on the more affordable end of the spectrum, typically running between $60 and $260. For a more detailed look at what impacts pricing, this guide on home window screen costs from HomeAdvisor is a great resource.
The main thing to remember is that your choices drive the cost. A straightforward job with basic materials will be far less expensive than a full custom replacement with high-performance mesh.
To help you budget, it's useful to see how different screen types compare side-by-side.
Estimated Window Screen Replacement Costs by Type
This table gives you a quick snapshot of the typical cost ranges for some of the most common window screen options. It's a great way to see how budget-friendly choices stack up against more premium, specialized materials.
| Screen Type | Average Cost Range (Per Window, Installed) | Best For |
|---|---|---|
| Standard Fiberglass | $60 – $260 | General use, affordability, and good visibility |
| Retractable Screens | $200 – $650 | Unobstructed views when not in use |
| Solar Screens | $60 – $850 | Reducing heat, blocking UV rays, and lowering energy bills |
| Security Screens | $100 – $1,000+ | Enhanced home security and durability |
As you can see, the options are broad. Whether you need a simple, functional screen or a heavy-duty security solution, there's a product out there to fit your needs and your budget.
What Really Drives Your Final Cost
Ever wonder why your neighbor paid a certain price for their new window screens, but your quote came in completely different? It’s a common question, and the answer isn't arbitrary. The final price tag is a mix of specific choices and factors, each one adding its own weight to the total.
Think of it like building a custom bike. The basic frame has a starting price. But then you choose the tires, the handlebars, the seat, and the gear system. Every component you select, from standard to high-performance, changes the final cost. Window screens work the exact same way.
The price you're quoted is almost always shaped by three main ingredients: the screen material you pick, the size of your windows, and the type of screen you need.
The Big Three Cost Factors
Once you get a handle on these three elements, any quote you see will make a lot more sense. You’ll know exactly what you're paying for and can make smart decisions that fit your home and your budget.
Let’s break them down.
-
Screen Material: This is usually the biggest variable. Standard fiberglass mesh is the go-to for affordability. But if you upgrade to something more robust like aluminum, a tough pet-resistant screen, or a specialized solar screen designed to block heat, you'll see the material cost climb.
-
Window Size and Shape: It's pretty straightforward—bigger windows cost more. They need more mesh and a larger frame. But don't forget about shape. A custom arch or a unique circular window is a whole different ballgame than a standard rectangle, requiring specialized cuts and careful fitting that adds to the labor and final price.
-
Screen Type or Mechanism: A simple, fixed screen that just pops into the window frame is your most budget-friendly option. Things get more expensive when you move to more complex systems like retractable screens that disappear into a housing or heavy-duty sliding screen doors. These have more moving parts and require a more involved installation.
How Size Dramatically Influences Price
The size of your windows plays a massive role in the final bill, and it’s about more than just using more mesh. A larger screen needs a stronger, more rigid frame to prevent it from bowing or warping over time, which bumps up the material cost. Plus, wrestling a huge screen into place can be a two-person job, which can increase labor time.
The price doesn't just creep up with size; it can jump significantly. For instance, a small, off-the-shelf screen measuring 18×18 inches might run you $30 to $210. But a much larger 32×55 inch screen can easily cost between $80 and $550. You can see more examples of this pricing scale in this detailed cost breakdown from Angi. It's not unusual for screens on large picture windows to cost two or three times more than those for small bathroom windows.
Key Takeaway: The choices you make are what build your final bill. A big, custom-arched window fitted with a premium solar screen is simply in a different league, cost-wise, than a standard-sized bedroom window with basic fiberglass mesh.
Understanding these key drivers helps you set a realistic budget. To see how all these factors come together in a typical project, you can learn more about our comprehensive window screen installation cost and what to expect from the process.
Choosing the Right Screen Material for Your Budget
Picking a screen material isn't just a cosmetic decision. It’s a practical choice that directly impacts your window screen replacement cost, how long the screen will last, and even your home's comfort. Think of it like buying a jacket. You could get a simple windbreaker for a cool day, or you could invest in a heavy-duty parka for a blizzard. Both work, but they're built for different needs and come with very different price tags.
The material you choose is the single biggest factor you can control when it comes to your budget. From basic, budget-friendly fiberglass to specialized solar mesh, your selection sets the stage for both the initial price and the screen's long-term performance.
This breakdown shows you where the money typically goes, splitting the cost between the materials themselves and the labor to get them installed.
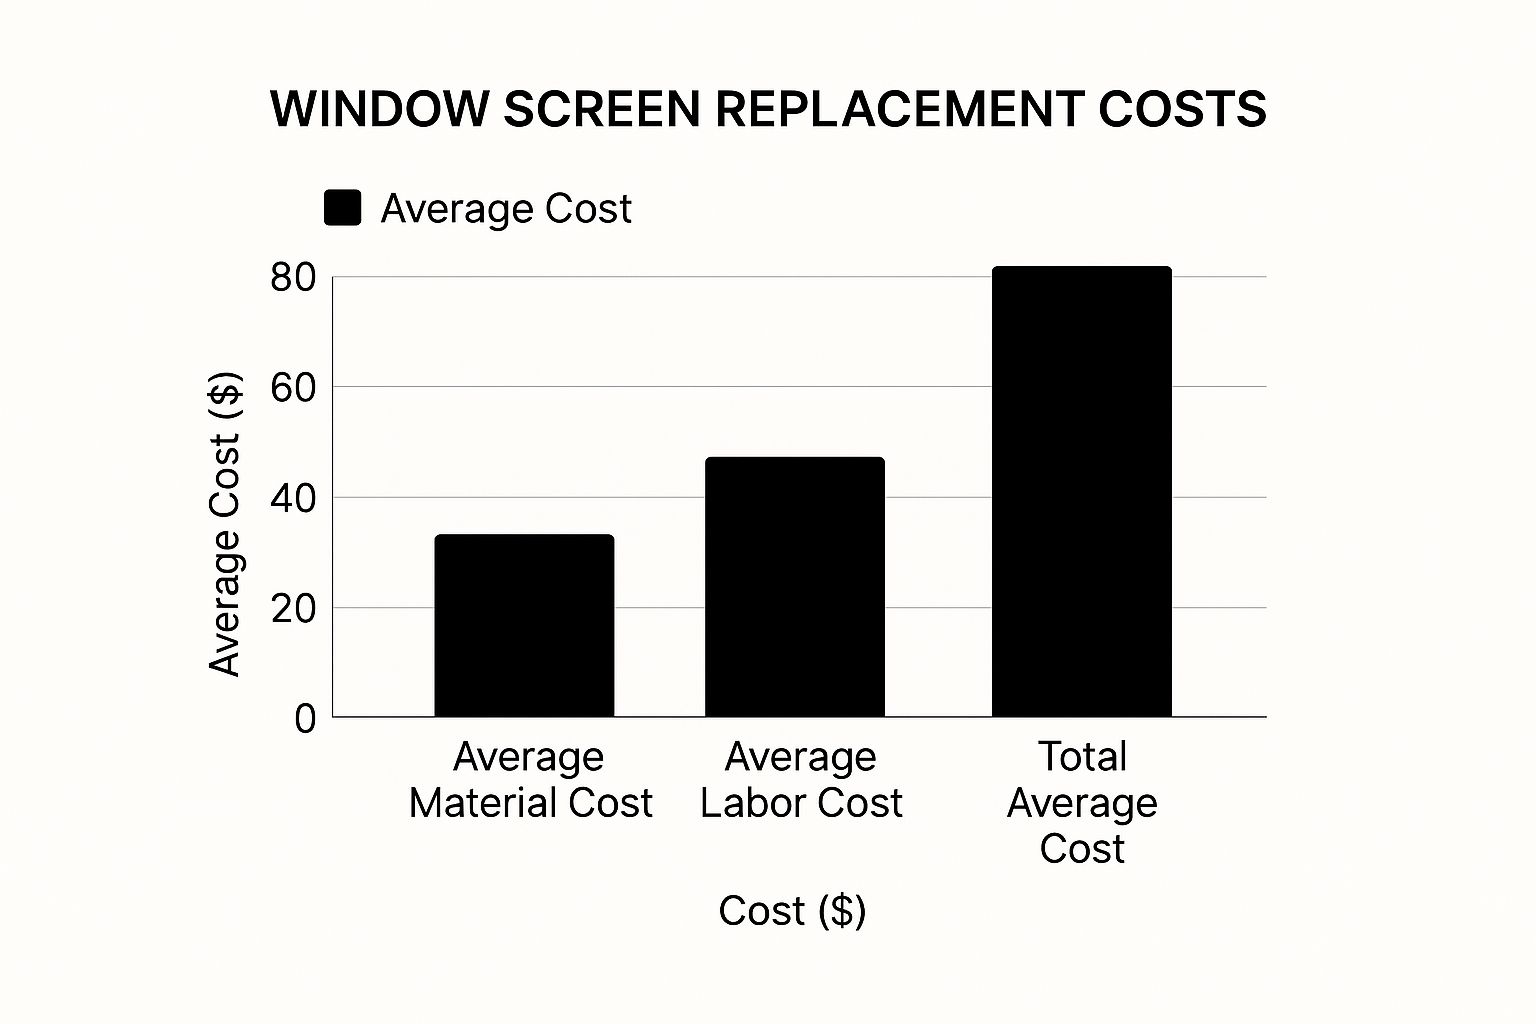
As you can see, labor is a big piece of the pie. But the material cost is where you have the most direct control to dial your project's price up or down.
Comparing Common Screen Materials
So, what are your options? Let's walk through the most common materials on the market. Each one has its own strengths, weaknesses, and price point, so it’s all about matching the material to your home's specific needs.
To make it easier to see how they stack up, here’s a quick comparison of the most popular choices.
Window Screen Material Cost and Feature Comparison
| Material Type | Average Cost per Sq. Ft. | Durability | Key Benefit |
|---|---|---|---|
| Fiberglass | $0.40 – $0.60 | Standard | The most affordable option for basic needs. |
| Aluminum | $0.60 – $0.80 | High | Resists sagging and offers a crisp, clean look. |
| Pet-Resistant | $0.90 – $1.20 | Very High | Seven times stronger than fiberglass; resists tears from claws. |
| Solar Screens | $1.25 – $2.00+ | High | Blocks solar heat and UV rays, lowering energy bills. |
Each of these materials is a great choice for the right situation. The key is knowing what problem you're trying to solve—whether it's keeping costs low, standing up to a curious cat, or blocking the afternoon sun.
A Closer Look at Your Options
-
Fiberglass Screens: This is the default for a reason. It's the most common and wallet-friendly material, getting the job done without any fuss. The downside? It's the least durable of the bunch and can stretch or tear more easily than its metal or heavy-duty counterparts.
-
Aluminum Screens: A solid step up from fiberglass, aluminum offers great rigidity and won't sag over time. It holds up well against the elements and provides a very clear view. Just be aware that it can crease or dent if hit with enough force.
-
Pet-Resistant Screens: If you have dogs that jump or cats that climb, this screen is a lifesaver. It’s made from a super-strong, vinyl-coated polyester that’s built to withstand scratches and tears. The extra cost upfront can save you a ton of money on constant repairs.
-
Solar Screens: Think of these as an investment. They are specifically designed to block the sun's heat and harsh UV rays before they ever hit your window glass. This can make a huge difference in your summer cooling bills, especially for windows that get direct sunlight.
The "cheapest" material isn't always the most economical choice in the long run. A pet owner who has to replace a torn fiberglass screen every year would have been better off paying for a durable pet-resistant screen just once.
Making the Right Choice for Your Home
So, how do you decide which one is for you? It really comes down to your priorities. Are you just trying to keep the bugs out on the tightest budget possible? Or are you looking for a long-term solution that adds value and solves a specific problem?
For a more detailed breakdown, our guide on selecting the best window screen material dives even deeper into the pros and cons of each type.
Here’s a practical example: if you just need a functional screen for a window that's always in the shade, standard fiberglass is a perfectly smart choice. But for that big living room window that turns the room into a sauna every afternoon, the higher initial window screen replacement cost for a solar screen could easily pay for itself in A/C savings within a couple of years. It’s all about matching the material to your lifestyle.
Should You Hire a Pro or DIY This Project?
Alright, you've got a handle on the materials and the factors that drive costs. Now you're at the big crossroads: do you roll up your sleeves and do this yourself, or do you call in a pro? This choice is one of the biggest levers you can pull when it comes to the final window screen replacement cost, pitting your time and effort against a professional's expertise.
Making the right call really boils down to being honest with yourself about your skills, the tools you have, and how much time you're willing to spend on this. It's kind of like changing the oil in your car—sure, you can save a few bucks doing it yourself, but one stripped drain plug can turn a small job into a much bigger, more expensive headache.
The DIY Route: What to Expect
The DIY path looks incredibly appealing at first glance, especially when you see how cheap the materials are. You can often find a basic rescreening kit for just $15 to $50. But don't let that price tag fool you; the materials are only one piece of the puzzle.
To get a clean, professional-looking result, you’ll need a few essential tools.
- Spline Roller: This little gadget is a must-have. It’s designed specifically to press the rubber spline securely into the frame’s channel.
- Utility Knife: A sharp blade is crucial for trimming the excess mesh without fraying it.
- Flat Surface: You need a large, clean area to work on. This is non-negotiable for getting the screen properly stretched.
The real art—and the most common point of failure for first-timers—is getting the tension just right. If it’s too loose, your screen will sag and look wavy. Pull it too tight, and you can easily bend or even snap the frame. This becomes especially challenging on bigger windows or doors. To get a better feel for what's involved, it helps to understand the process for a sliding window screen replacement, which often requires more precision.
When to Call a Professional
Bringing in a professional will usually add $20 to $50 per screen for their labor, but you’re getting more than just an extra set of hands. You're paying for their experience, their specialized tools, and a guaranteed result. A pro has done this hundreds of times and knows exactly how to achieve that perfect, drum-tight finish that looks great and lasts for years.
A professional installation eliminates the guesswork and potential frustration of a DIY attempt. You're not just paying for labor; you're buying peace of mind and a warranty that protects your investment.
It probably makes sense to call a pro if any of these situations sound familiar:
- You have custom or oddly-shaped windows: Arches, circles, or other non-standard shapes require precise cutting and fitting that’s tough to master.
- Your window frames are old or fragile: An experienced installer knows how to handle delicate materials without causing cracks or other damage.
- You’re short on time or the right tools: The project can be more time-consuming than it looks, and the cost of buying tools for a one-time job might cancel out your savings anyway.
In the end, it’s all about what you value most. If you’re a confident DIYer with a few standard rectangular windows to fix, it can be a really satisfying and budget-friendly project. But for more complicated jobs, or if you simply want a flawless, worry-free outcome, the extra cost for a professional is money well spent.
How to Save Money on Your Screen Replacement
Getting a lower window screen replacement cost doesn't have to mean you're cutting corners on quality. With a bit of planning, you can bring that final bill down quite a bit while still getting fantastic, durable screens for your home. It’s all about making savvy choices before the project even starts.
Think of it like a trip to the grocery store. You already know you can save by buying in bulk, grabbing the store brand, or clipping a few coupons. The same kind of thinking applies here and can help you get the most out of your home improvement budget.
Combine and Conquer for Bulk Savings
Probably the easiest way to save a chunk of money is to bundle your screen replacements. If you’ve got a few windows with screens that have seen better days, it's almost always cheaper to get them all done at once instead of one at a time over the next few years.
Most screen repair companies are happy to offer a discount on labor or materials when they can knock out several windows in a single trip. It saves them time on travel and setup, and they usually pass those savings right along to you. You're paying for one efficient job instead of several smaller, more expensive service calls.
When you replace multiple screens at once, you're tapping into economies of scale. The price you pay per screen nearly always drops as the job gets bigger, making it a smart financial move if you have several screens on their last legs.
Smart Choices That Cut Costs
Beyond just bundling the work, a few other simple tactics can keep your expenses from creeping up. You’d be surprised how much of an impact things like timing and materials can have on your final invoice.
-
Stick to Standard Sizes: If you have standard-sized window frames, avoid the temptation to get something custom-made. Custom work is one of the biggest reasons costs go up, whereas standard screens are mass-produced and much easier on the wallet.
-
Time Your Project Wisely: Most home improvement work has a busy season, and screen repair is no different—spring and summer are usually packed. If you can wait to schedule your project for the off-season, like late fall or winter, you might find better pricing as companies look to keep their crews busy.
-
Invest in Durability: This one feels a little backward, but spending a bit more now can save you a lot later. For instance, if you have a cat or dog that loves clawing at the window, paying extra for a pet-resistant screen makes a ton of sense. That one-time upgrade can save you from replacing a torn fiberglass screen year after year.
Repair vs. Replace: What's the Right Call?
Before you jump to the conclusion of a full replacement, take a moment to assess the situation. Is a simple, less expensive repair a smarter move? A full window screen replacement cost isn't always necessary for minor issues, and knowing how to spot the difference can save you a good chunk of change.
Think of it like deciding whether to fix a flat tire or buy a whole new wheel. You wouldn't replace the entire wheel for a simple puncture, right? The same logic applies here. A proper diagnosis is the key to finding the most sensible and cost-effective solution.
When a Repair Makes Sense
A repair is usually your best bet when the screen's frame—its core structure—is still in good shape. If the frame is straight, solid, and fits perfectly in your window, you're likely just dealing with a mesh problem. Most repairs simply involve replacing the screen fabric, a job we call rescreening.
Consider repairing your screen if you spot these issues:
- Small Rips or Punctures: A few minor tears in the mesh are straightforward to patch or fully rescreen.
- A Loose Spline: The rubber cord holding the mesh tight can sometimes pop out. Often, it can just be pressed back into its groove.
- Sagging Screen: If the mesh is just droopy but otherwise undamaged, a quick rescreening will get it taut again.
A basic rescreening job typically runs between $25 and $70 per screen. When the frame is solid, this is almost always the most economical choice.
Signs It's Time for a Full Replacement
Sometimes, a repair is just putting a bandage on a much bigger problem. A full replacement becomes the only real option when the damage extends beyond the mesh and compromises the frame itself. At that point, investing in a brand-new unit is the only practical fix.
You’ll know you need a full replacement when you see:
- A Bent or Warped Frame: A damaged frame creates gaps, letting pests in and defeating the whole purpose of the screen. It can't be fixed.
- Brittle or Cracking Mesh: If the screen material is old and disintegrates when you touch it, it’s beyond repair.
- Major Tears or Large Holes: Big gaps mean the screen isn't doing its job. It's time for a new one.
Got Questions? We’ve Got Answers.
When you're diving into a home project, a few questions are bound to pop up. Let's tackle some of the most common ones about window screen replacement to help you get your plans sorted out.
What’s the Price to Just Rescreen One Window?
Good news! If your window screen frames are still solid, you don't need to replace the whole unit. You can just rescreen it, which is a much friendlier option for your wallet.
Hiring a pro to do this will typically run you between $35 and $100 per window. But if you're feeling handy, a DIY rescreening kit will only set you back about $10 to $20 in materials, making it a super affordable weekend project.
Are Solar Screens Really Worth the Extra Money?
For a lot of people, especially if you live in a sunny place like Arizona, the answer is a resounding yes. Solar screens do have a higher upfront cost than standard fiberglass, but their ability to block up to 90% of the sun's heat is a game-changer.
Think of it this way: it's not just about keeping your house cooler. It's about giving your air conditioner a much-needed break. That translates directly into lower energy bills, and over time, the screens can actually pay for themselves.
How Often Do I Need to Replace My Window Screens?
How long a screen lasts really depends on the material it's made from and the weather it has to put up with every day. Here’s a quick breakdown:
- Fiberglass Screens: These are the most common and usually last about 10-15 years before they start to get brittle and frail.
- Aluminum & Pet-Resistant Screens: Built tougher, these can easily last 20-30 years or more if you take care of them.
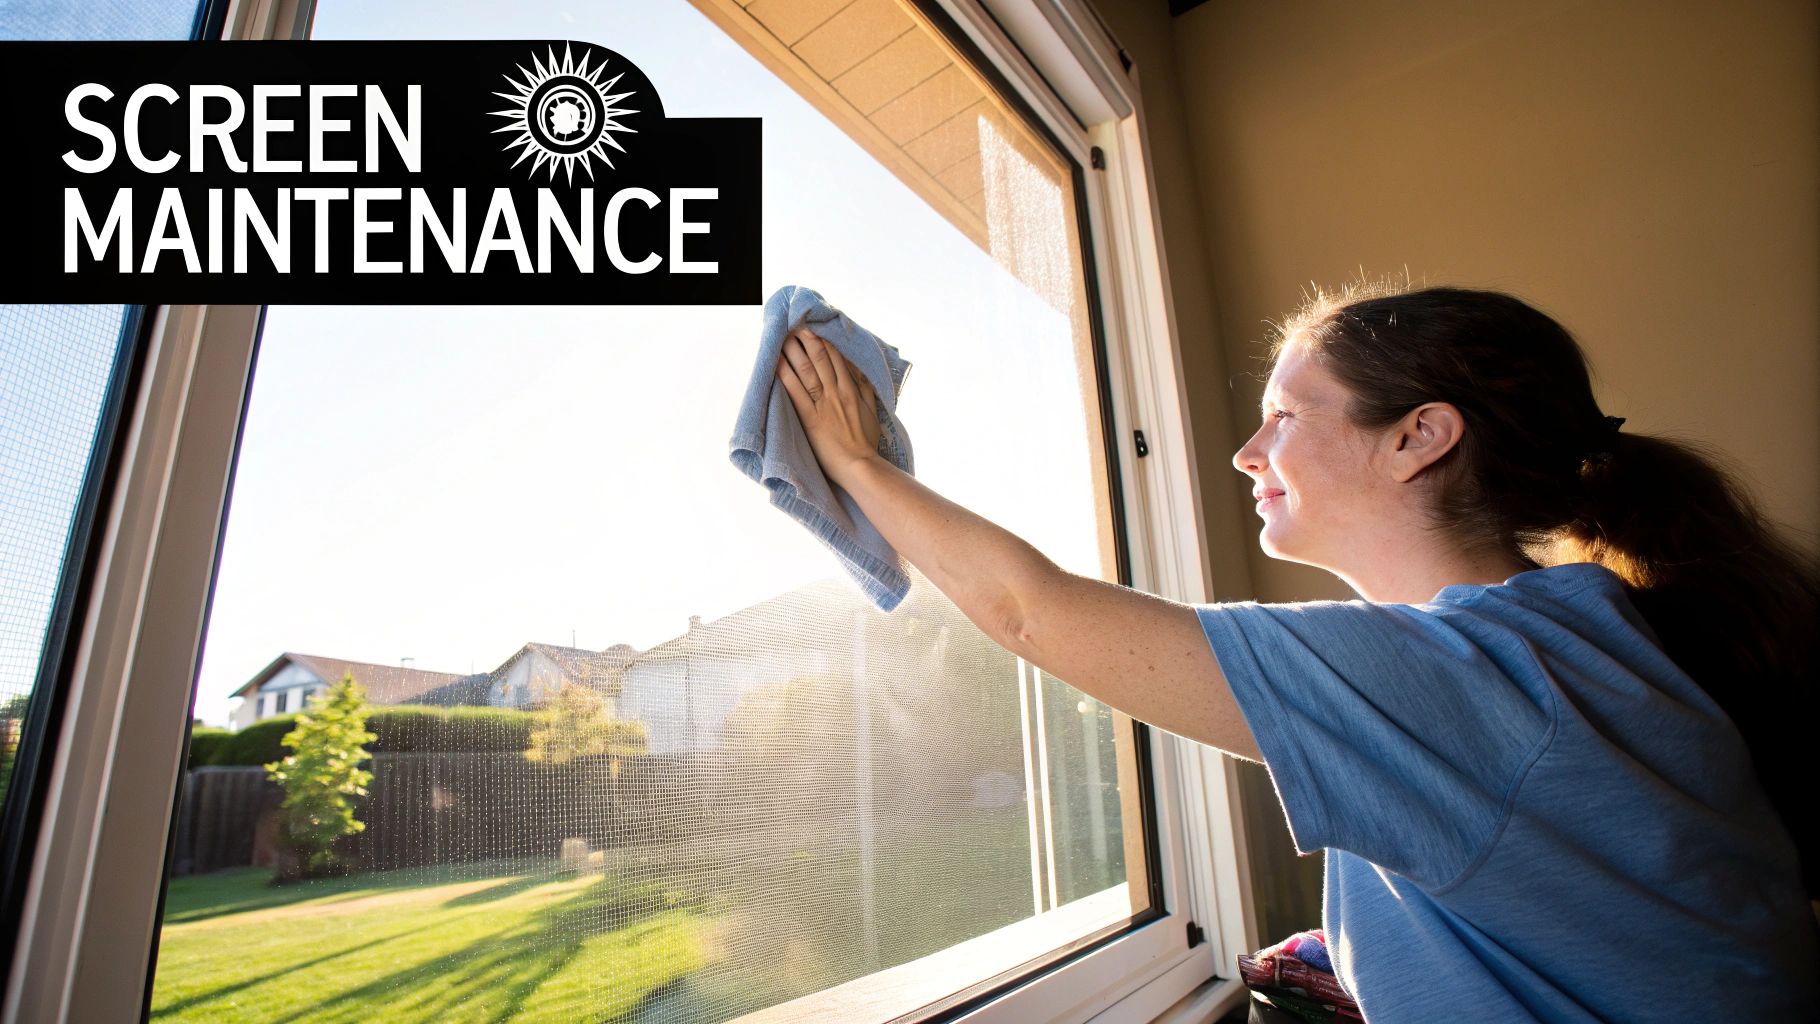
A good rule of thumb is to give your screens a quick inspection each year. If you spot big tears, see the mesh pulling away, or notice the frames are bent out of shape, it's time to get them replaced.
Ready to get a clear price for your project? Sparkle Tech Screen Service provides fast quotes and can often get your new screens or repairs done the same week. Head over to their site to get a quote for your window screen needs.


