


A worn-out sliding window screen is more than just a cosmetic problem—it’s a breach in your home's first line of defense against bugs, pollen, and yard debris. Knowing when it’s time for a sliding window screen replacement is the key to keeping your home comfortable and secure. The signs are usually pretty clear once you know what to look for.
Is It Time for a New Screen? Here’s How to Tell
Before you start pulling out tools or shopping for materials, take a good, hard look at your current screens. Sometimes the need for a new one is screamingly obvious, but other times the signs are more subtle. A quick inspection will tell you whether you can get away with a simple repair or if a full replacement is the smarter move.
Rips, Holes, and Other Obvious Damage
The most common red flags are the ones you can see from a mile away. Look for any visible rips, holes, or tears in the screen mesh. It doesn't take much—even a tiny puncture is a welcome mat for mosquitoes and other insects. Also, check if the mesh is sagging or looks loose. That’s a sure sign it has lost its tension and isn't doing its job anymore.
Pets are often the prime suspects. If you have cats or dogs, you know their claws can make quick work of standard fiberglass mesh. But damage can also come from accidental bumps with furniture, a stray baseball, or even a bad hailstorm.
Problems with the Frame
While the mesh gets all the attention, the frame is the screen's backbone. Give it a thorough check for any bends, warps, or cracks. A bent frame won't sit flush in the window channel, which creates gaps for pests and makes the screen a pain to slide back and forth.
A compromised frame is a critical failure. You can install the best, most expensive mesh on the market, but if the frame is warped, you'll still have a loose, rattling screen that lets bugs sneak right in.
Pay special attention to the corners. If those little corner pieces are cracked or broken, the whole frame's structure is shot.
The Toll of Sun and Weather
Your screens live outside, and constant exposure to the elements really wears them down. Over the years, harsh sunlight can bake the UV protection right out of fiberglass mesh, making it brittle and easy to crack. You might notice the material feels stiff to the touch or even flakes away when you handle it. That's a clear signal the material has reached the end of its life.
Sliding windows have become a staple in modern homes, and for good reason. It’s a massive industry—the global market for them hit $21.5 billion in 2023 and is still on the rise. You can learn more about this market trend and see the full research on sliding windows. A functional screen is essential to enjoying all the benefits these popular windows offer.
Before you decide whether to repair or replace, it helps to diagnose the exact issue. Sometimes a small patch is all you need, but other problems require a complete overhaul.
This table breaks down the common culprits and what to do about them.
Diagnosing Common Screen Problems
| Problem | Symptom | Recommended Action |
|---|---|---|
| Small Tear or Hole | A puncture or rip smaller than 3 inches in the mesh. | Use a screen repair patch or kit for a quick fix. |
| Large Rip or Multiple Holes | Significant tearing or numerous holes across the mesh. | Complete mesh replacement (rescreening) is necessary. |
| Sagging or Loose Mesh | The screen is wavy and no longer taut within the frame. | Rescreening the frame with new mesh and spline is the best solution. |
| Bent or Warped Frame | The metal frame is visibly bent, preventing a snug fit. | The entire screen and frame assembly needs to be replaced. |
| Broken Corner Pieces | The plastic or metal corners holding the frame together are cracked. | Replace the corner pieces and potentially rescreen the frame. |
| Brittle or Flaking Mesh | The screen material cracks or flakes when touched, due to sun damage. | The mesh has degraded; a full rescreening is required. |
Ultimately, a quick visual inspection tells you everything you need to know. If the frame is in good shape but the mesh is shot, a simple rescreening project might be in your future. But if the frame itself is bent or broken, it's time to measure for a brand-new screen.
Choosing the Right Tools and Materials
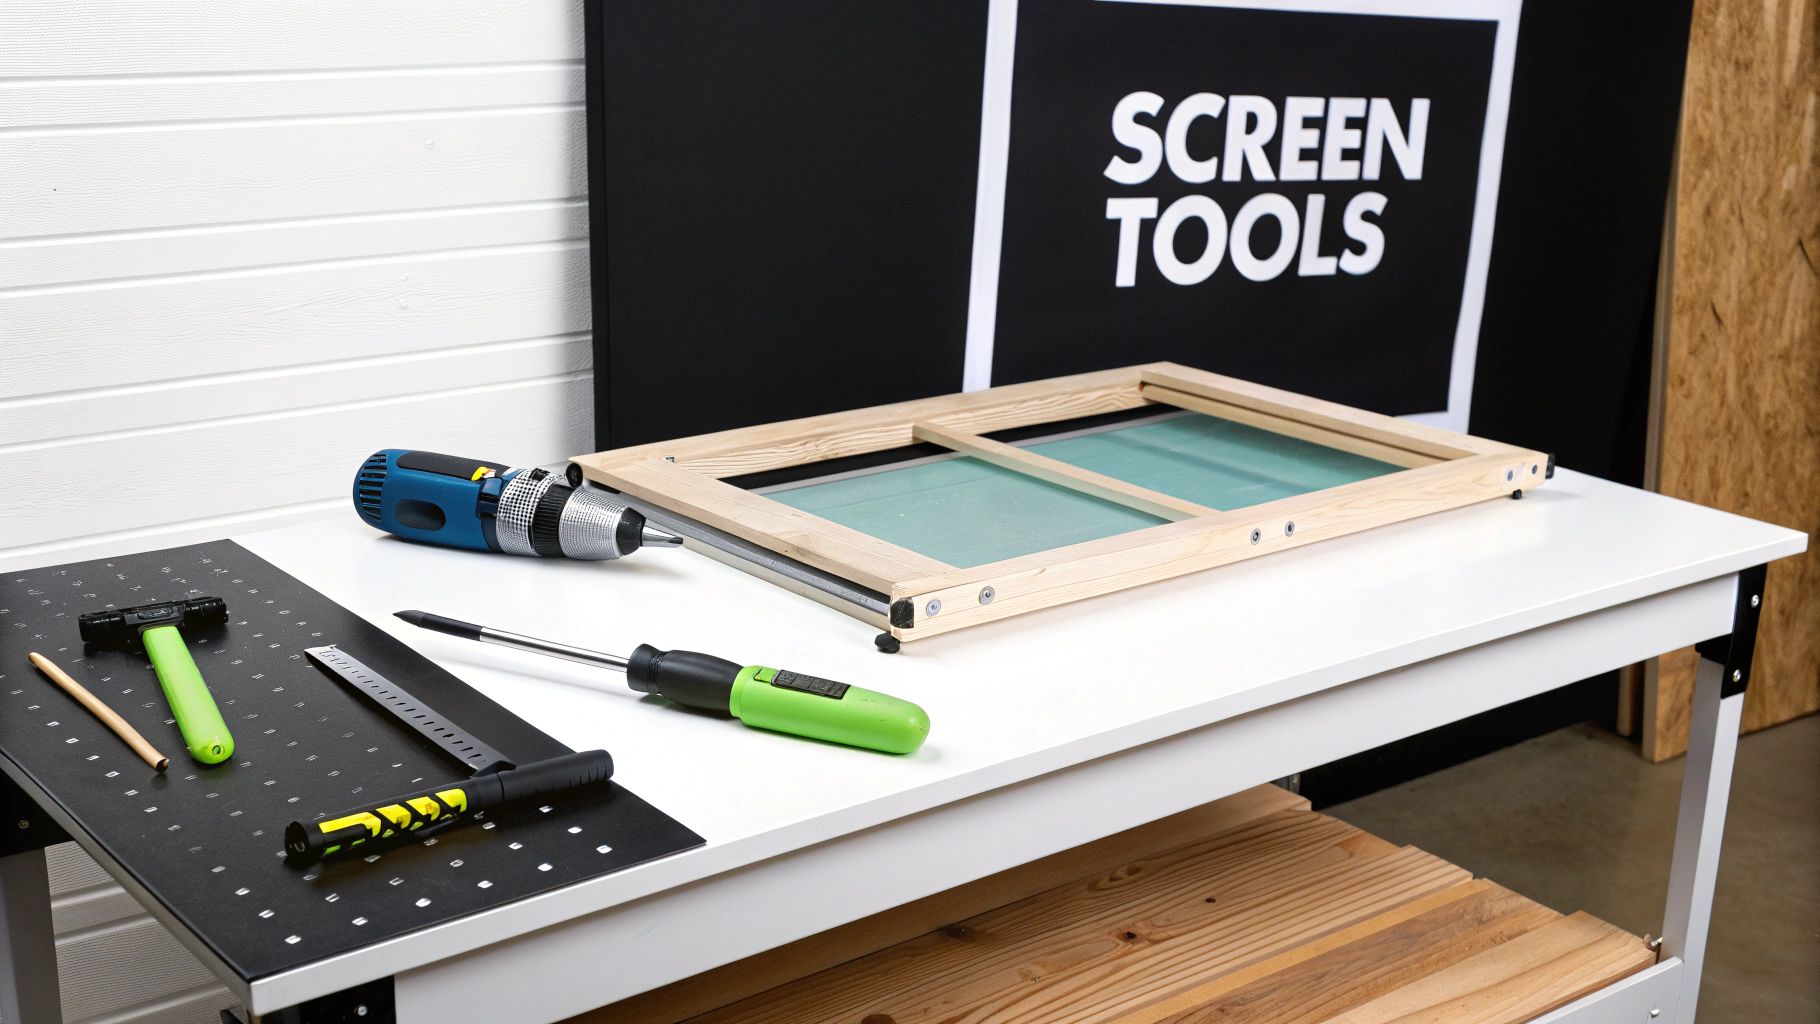
Starting any home project without the right gear can turn a simple task into a major headache. For a successful sliding window screen replacement, getting your tools and materials in order first is the secret to a smooth, professional-looking outcome. The good news? You don’t need an elaborate workshop—just a few key items.
Before you get started, find a clean, flat work surface large enough to comfortably hold the entire screen frame. A big table, a pair of sawhorses, or even a clean spot on your garage floor will work just fine.
Your Essential Toolkit
Chances are, most of the tools you'll need are already in your toolbox. The one exception might be a spline roller, which is a small but absolutely essential tool for this specific job.
- Tape Measure: For getting those frame measurements just right. Precision is everything here.
- Utility Knife: A fresh, sharp blade is your best friend for cleanly trimming the excess mesh.
- Flat-Head Screwdriver: Perfect for prying out that old, stubborn spline from the frame's channel.
- Spline Roller: This is the non-negotiable tool. It has two wheels—one concave and one convex—designed to press the new spline perfectly into its groove, which is what makes the mesh tight.
A spline roller is what separates a frustrating DIY attempt from a professional-looking repair. Trust me, trying to use a screwdriver or some other makeshift tool will only lead to uneven tension, frustrating wrinkles, and maybe even a torn screen.
Selecting the Right Screen Mesh
The mesh is the star of the show, and you've got a few options depending on what you value most—durability, visibility, or even sun protection. Each material brings something different to the table. We cover this in-depth in our comprehensive guide to the best window screen material.
For now, here’s a quick rundown of the most common types you’ll find:
- Standard Fiberglass Mesh: This is the go-to for most homes because it's affordable and effective. It’s flexible, won’t crease or dent, and offers great visibility.
- Pet-Resistant Screen: If you share your home with furry friends, this is a game-changer. Made from a tough, vinyl-coated polyester, it’s about seven times stronger than standard fiberglass and built to resist tears from claws and paws.
- Solar Screen: Designed to block the sun’s intense heat and UV rays, solar screens can genuinely help keep your home cooler and lower your energy bills. Just know they are thicker and offer more privacy, which means slightly less visibility from the inside.
The Importance of the Correct Spline
Finally, let’s talk about the spline. This flexible cord is what locks the mesh tightly into the frame’s channel. Using the wrong size is probably the most common mistake I see, and it always results in a saggy, loose screen.
Spline comes in various diameters, typically ranging from 0.125 to 0.250 inches. The absolute best way to get the right size is to take a small piece of your old spline with you to the hardware store and match it up. If that’s not an option, carefully measure the width of the channel in the frame. The spline should fit snugly, but not so tight that you have to fight it every step of the way during installation.
Measuring for a Flawless Fit
Getting your measurements right is everything when it comes to replacing a sliding window screen. I can't tell you how many times I've seen a project go sideways because of a simple measuring mistake. An error of even a quarter-inch can be the difference between a screen that glides like it’s on air and one that jams, rattles, or leaves just enough of a gap for every bug in the neighborhood to invite itself in.
So, before you order anything, let's get this part perfect.
If you still have the old screen and the frame isn't a mangled mess, you're in luck. Just pop it out, lay it on a flat work surface, and measure the height and width from one outside edge to the other. Easy.
But what happens when the screen is long gone, or so bent up that measuring it would be a complete guess? No problem. We'll just measure the window channel itself.
Measuring the Window Channel Directly
This takes a bit more finesse, but it's the most reliable way to get a true measurement for a new screen. You're basically measuring the opening where the screen needs to live.
- To get the height: Put the end of your tape measure up into the topmost part of the channel where the screen frame sits. Measure straight down to the top lip of the bottom channel. Do this on the left, in the center, and on the right.
- To get the width: Now, measure horizontally from the inside of the left channel across to the inside of the right channel. Just like before, take this measurement at the top, middle, and bottom of the opening.
Here's the crucial part: always use the smallest of the three measurements you took for both height and width. This is your safeguard. It ensures the new frame will slide in smoothly, even if the window opening has settled and isn't perfectly square.
From that smallest measurement, you’ll need to subtract between 1/8 and 1/4 inch. This little bit of wiggle room is essential for clearance and for the hardware to work properly. Don’t skip this deduction!
I’ve learned this the hard way: never assume a window is perfectly square, especially in older homes. Houses settle and things shift. Measuring in three spots is a pro-level habit that accounts for these little imperfections and keeps you from building a screen that gets stuck.
Don't Forget About Hardware and Clearance
A screen frame isn't just four pieces of metal. It has hardware—tension springs and pull tabs—and you have to account for them. This is where a lot of DIY projects hit a snag.
Most sliding screens have tension springs, either on the top or bottom, that press against the track to hold the screen in place. They need room to do their job. That 1/8 to 1/4-inch deduction we talked about? That’s usually what gives these springs the space they need to compress and expand.
You also have pull tabs, those little plastic grips you use to slide the screen. When you build or order the new frame, you'll need to know where they go so they don't get in the way of the window lock or handle.
My final piece of advice? Double-check your numbers. Then walk away, grab a coffee, come back, and triple-check them. It’s a simple step that has saved me countless headaches, trips to the hardware store, and a whole lot of frustration.
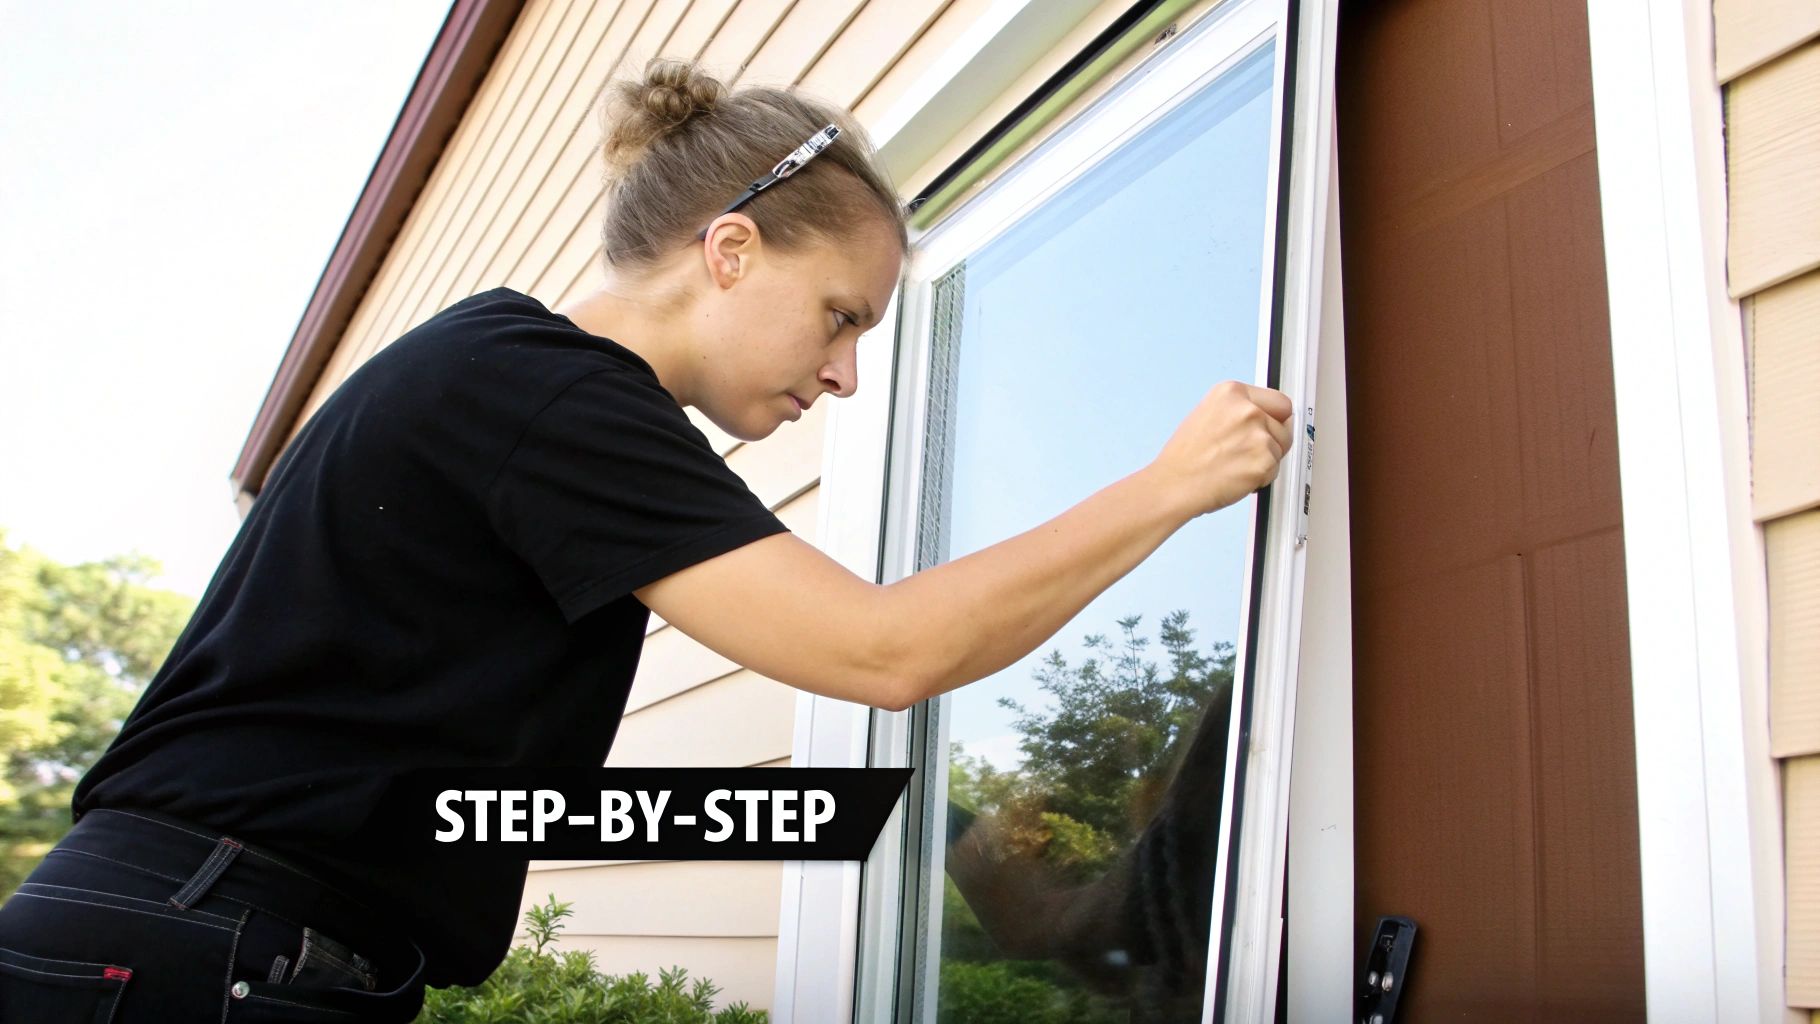
Removing the Old Screen and Prepping the Frame
Alright, with your tools and materials ready, it's time to dive in. The first real move in any sliding window screen replacement is getting the old, damaged screen out of its track. This can feel a little finicky, but it’s all about the right touch, not brute force.
Most sliding screens are held in place by tension springs, which you'll usually find at the top or bottom of the screen frame. To get the screen out, you just need to compress those springs. Gently push the screen frame up toward the top of the window channel (or down, depending on where the springs are). This should give you just enough wiggle room to swing the bottom of the frame toward you and lift the whole thing out. Be patient and avoid yanking on it.
Dismantling the Old Screen
Once you've got the screen out, lay it on your flat work surface. The next task is to carefully take it apart. The main goal here is to get the old spline—that rubbery cord holding the mesh tight—out of the frame's channel without bending the aluminum.
A small flat-head screwdriver or a pick is perfect for this. Find one end of the spline, which is almost always tucked into a corner, and gently pry it up. As soon as you get a little bit of it loose, you can usually just pull the rest out in one continuous piece. After the spline is gone, the torn mesh just lifts right off.
Taking a moment to properly prepare the frame is a step that many people rush, but it's the secret to a professional-looking result. A clean, straight frame is the foundation for a taut, long-lasting new screen. Don't cut this corner.
This kind of careful DIY work is becoming more common as homeowners tackle more projects themselves. It's part of a much larger window replacement market, which is a surprisingly big slice of the economy. In 2024, it's estimated to be worth USD 11.56 billion and is expected to keep growing. You can discover more insights about this expanding market and its drivers.
Frame Tune-Up and Cleaning
Think of this part as a quick restoration for your screen frame. Now that it’s completely empty, it’s the perfect time for a tune-up.
- Deep Clean the Channels: Grab a stiff brush or an old toothbrush and give the spline channels a good scrubbing. You want to get all the old dirt, grime, and cobwebs out. A blast of compressed air works wonders here, too.
- Inspect the Corners: Take a close look at the plastic or metal corner pieces holding the frame together. If you see any cracks or they feel brittle, now is the ideal time to replace them.
- Check for Bends: Lay a straightedge or level against each side of the frame to see if it's warped or bent. You can often straighten out minor bends by gently tapping them with a rubber mallet against a block of wood.
Working with a clean, straight frame makes installing the new mesh so much easier. For a complete rundown of everything you'll need for this job, check out our complete guide on essential window screen repair tools. Getting this prep work right from the start is what sets you up for a smooth and successful sliding window screen replacement.
Installing New Screen Mesh Like a Pro
This is where the magic happens. You've got a clean frame and a fresh roll of mesh, and it’s time to bring them together. Getting that screen perfectly taut without any wrinkles might seem tricky, but it's really all about technique. Once you get the hang of it, you’ll be able to do it every time.
Your best friend for this part of the job is a simple spline roller. This little tool is a game-changer. It has a rounded (convex) wheel for pushing the mesh into the channel and a grooved (concave) wheel for setting the spline right on top. Using them in the right order makes all the difference.
Creating Your Anchor Points
First, unroll your new screen mesh completely over the frame. Give yourself a few inches of extra material hanging over all four sides—you'll trim this off later. For now, don't worry about pulling it tight.
Pick one of the shorter sides to start. Take the rounded wheel of your roller and gently press the mesh into the frame’s channel for about two to three inches. Then, cut a small piece of spline and use the grooved wheel to push it snugly into that same spot. This creates your first anchor. Now, do the exact same thing on the corner diagonally opposite from where you started.
These two anchor points are the key. By securing opposite corners first, you set up a natural tension across the screen. This simple trick is what helps you avoid those frustrating wrinkles as you work your way around the rest of the frame.
It's a methodical approach—diagnose the problem (a torn screen), then follow a clear process to fix it. This mindset is behind almost every successful home repair job.
The basic flow is always the same: figure out what’s wrong, apply the right fix, and make sure it works perfectly.
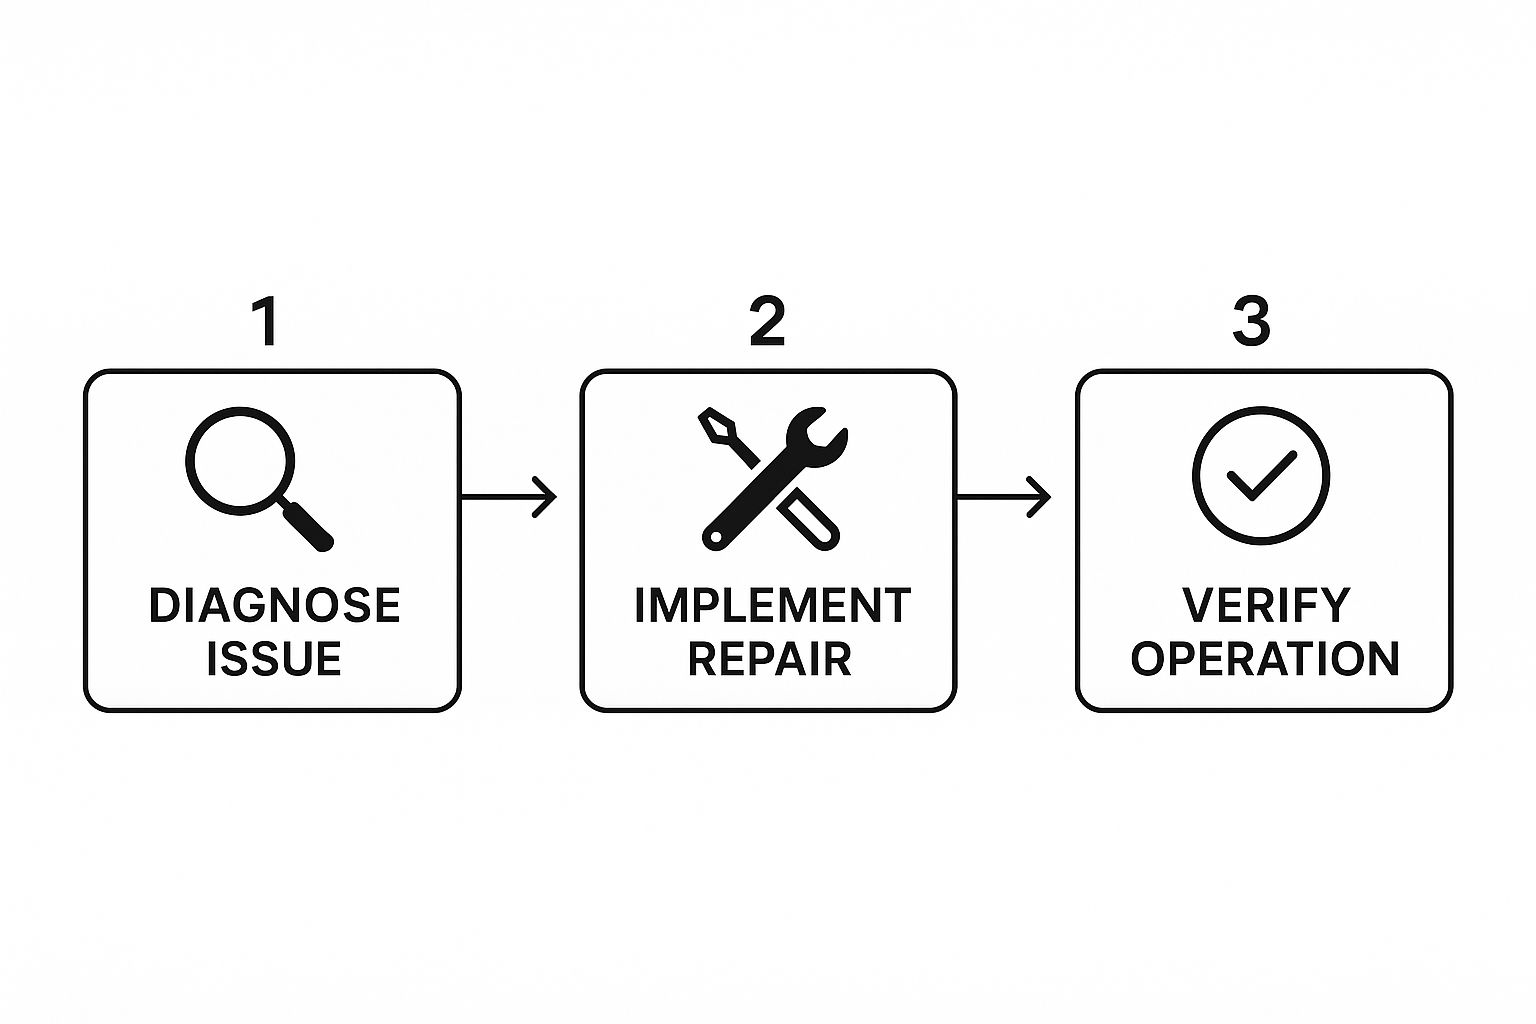
This visual really captures that idea. You move from identifying the issue to executing the repair, and finally, confirming the job is done right. It's the perfect way to think about your screen installation.
Working with the Spline
With your two corners anchored, you're ready to install the rest of the spline. Start on one of the long sides. Using your roller, press the spline into the channel from one end to the other with steady, gentle pressure. You don't need to stretch the spline itself—just guide it into place. A little bit of tension on the mesh with your free hand will help keep things smooth.
Next, move to the opposite long side. This is where you’ll really dial in the tension. As you roll the spline into its groove, gently pull the screen taut away from the side you're working on. Finish up by doing the two shorter sides. For an even more detailed breakdown, you can read our step-by-step guide on how to install screens.
Trimming for a Professional Finish
Once all the spline is seated, your mesh should be tight and smooth, almost like a drum. All that's left is trimming off the excess. Grab a utility knife with a fresh, sharp blade—dull blades will snag the mesh and ruin your hard work.
Hold the knife at a slight angle, with the blade pointing away from the new screen and toward the outside of the frame. Use the frame itself as a guide and run the blade carefully along the outer edge of the spline channel. This will slice off the extra mesh cleanly, giving you that crisp, professional-looking edge.
Common Questions About Screen Replacement
Even with a solid plan, any DIY project can throw you a curveball. Replacing a sliding window screen is no exception. Let's walk through some of the common snags you might hit and how to deal with them like a pro, so you can get the job done right.
What Should I Do If My Screen Frame Is Bent?
Finding a bent frame is frustrating, but it doesn't always mean you need a whole new screen. For a slight bend, you can often fix it yourself.
Lay the frame on a hard, flat surface like a garage floor or sturdy workbench. Place a block of wood over the bent section and give it a few gentle but firm taps with a rubber mallet. The wood block helps distribute the impact and prevents you from accidentally causing more damage.
If the frame is badly twisted or a corner has broken apart, your best bet is to replace the frame entirely. You can pick up a new frame kit at any hardware store. These kits give you everything you need—pre-cut aluminum pieces and new corner connectors—to build a perfectly square frame that will slide like new.
How Do I Handle Tension Springs?
Those little tension springs are what keep your screen snug in the window channel. When you're taking the old screen out, you'll feel them compress as you push the frame up or down to create enough wiggle room to pop it out. Installing the new one is just the same process in reverse.
Be gentle with these springs; they can bend or snap if you force them. Take a close look at them while the frame is out. If a spring looks rusty, weak, or has lost its bounce, it’s time for a replacement. Just take the old one with you to the store to make sure you get an exact match for size and type.
A quick pro tip: Never try to replace the screen mesh while the frame is still in the window. It might seem like a clever shortcut, but getting the new screen tight and wrinkle-free is nearly impossible that way. You really need a flat work surface to use the spline roller effectively and get that professional finish.
Taking the extra minute to remove the frame will save you a world of headache.
Why Is My New Screen Loose in the Window Track?
This is a classic problem. You've done a fantastic job rescreening, the mesh is drum-tight in the frame, but the whole screen still jiggles around in the window track. The issue isn't your mesh work—it's the frame's fit.
First, double-check your tension springs to make sure they're seated correctly and aren't damaged. If the springs look good, check the bottom of the frame for adjustable rollers. Many sliding screens have a small screw on the side that you can turn to raise or lower the roller. A small adjustment here can make a huge difference, creating a much more secure and smooth-sliding fit.
Don't let a tricky screen project get the best of you. If you'd rather have a perfect, hassle-free fit, Sparkle Tech Screen Service offers expert new screen installation, rescreening, and repairs. Get a quick quote and enjoy same-week service by visiting us at https://sparkletechscreenservice.com.


