


Taking on a sun screen repair or installation project is one of the smartest things you can do for your home. It’s not just another weekend task; it's a real investment in your comfort and energy savings, protecting your furniture from sun damage and seriously cutting down your cooling costs. Before you get started, it's worth understanding just how big a difference this upgrade can make.
Why Sun Screens Are a Smart Home Investment
Before you even think about picking up a tool, let’s talk about what sun screens actually do. They aren't just simple window coverings. Think of them as your home's first line of defense against the sun's blistering heat and harsh UV rays. By stopping a huge chunk of that solar energy before it even hits your window glass, they create a thermal barrier that makes a real difference in keeping your home cool.
The Payoff: Comfort and Lower Bills
The biggest win here is the immediate drop in your energy use. If you live in a sunny climate, you'll see a major reduction in how often your air conditioner has to kick on once you have good sun screens installed.
- Lower Energy Bills: With less solar heat getting in, your AC unit doesn't have to fight so hard. That translates directly into savings on your monthly electricity bill.
- A More Comfortable Home: Those rooms that used to feel like a sauna in the afternoon? They become pleasant, usable spaces all day long.
- Cut Down on Glare: Sun screens also eliminate that blinding glare, making it much easier to watch TV or work on your laptop without straining your eyes.
I've seen it firsthand. A homeowner in Phoenix with a west-facing living room was tracking their energy bills. After installing 90% UV-blocking screens, they saw a 22% reduction in cooling costs during the hottest summer months. That room went from being unusable to being their family's favorite hangout spot.
Protecting Your Home's Interior
Beyond keeping things cool, sun screens are like a powerful bodyguard for everything inside your house. Those damaging ultraviolet (UV) rays are the main culprit behind faded fabrics, bleached-out wood floors, and dull-looking artwork.
By blocking up to 90% of these harmful rays, sun screens dramatically extend the life and vibrancy of your most valuable possessions. We're talking about everything from hardwood floors and expensive rugs to cherished family photos and furniture.
This protective quality is what makes any sun screen repair and installation a smart, proactive move to preserve your home’s value. The cost of replacing faded furniture or refinishing a sun-damaged floor is way higher than the investment in quality solar screens. You can explore different types of sun block window screens to see which level of protection makes the most sense for you.
When you look at it this way, the project becomes more than just a simple fix. You’re not just mending a tear or adding some shade; you're boosting your home’s efficiency, safeguarding its interior, and making your daily life more comfortable. Keeping that perspective in mind is crucial as you move on to picking out materials and getting the job done.
Choosing the Right Tools and Materials

Any successful DIY project, especially with sun screens, starts with having the right gear on hand before you begin. Trust me, nothing is more frustrating than having to stop mid-job for another trip to the hardware store.
Let's walk through exactly what you'll need to get this done right the first time. Keep in mind that a simple re-screen of a good frame requires a much shorter shopping list than a brand-new installation.
Essential Tools for Every Project
No matter how big or small the job, a few tools are simply non-negotiable. Having these will make the work faster, safer, and give you that clean, professional look you're after.
- Utility Knife: You’ll need a sharp, retractable blade for trimming the excess screen fabric. A dull blade will just pull and fray the material.
- Tape Measure: This one’s obvious, but accuracy is everything. Measure twice, cut once is the golden rule here to avoid wasting money on new screen material.
- Flat-Head Screwdriver or Awl: The trick is to get the old, brittle spline out without scratching up the frame. A small flat-head screwdriver works perfectly for this.
- Spline Roller: This is the one specialty tool you absolutely must buy. It has two wheels: one to push the screen into the channel and the other to seat the spline snugly on top. It’s a game-changer.
Trying to improvise with the wrong tools is a classic rookie mistake. I’ve seen plenty of torn screens from people trying to use a screwdriver instead of a proper spline roller. Don't do it!
The secret to a professional, taut finish isn’t brute force—it’s the right tool. A spline roller costs very little but makes an enormous difference in the final quality of your sun screen repair and installation.
Selecting the Perfect Screen Fabric
Now for the main event: the screen material itself. This choice has the biggest impact on your home's comfort, energy bills, and how everything looks from the outside. The options might seem overwhelming, but they really boil down to what you need the screen to do.
Are you trying to stop your cat from shredding the screen on the patio door? Is your living room baking in the afternoon sun? Or is your main goal to keep the bugs out without spoiling a beautiful view? Each material strikes a different balance. For a more detailed look, you can learn more about the best window screen material to find what fits your home and climate.
Sun Screen Material Comparison Guide
Choosing the right fabric is critical for getting the results you want. This quick guide breaks down the most popular options to help you decide.
| Material Type | Key Feature | Best For | Estimated Cost Per Sq. Ft. |
|---|---|---|---|
| Fiberglass | Standard, flexible, and affordable | General use, good visibility, and areas without high physical stress | $0.50 – $0.75 |
| Pet-Resistant | Vinyl-coated polyester, 7x stronger | Homes with pets and children; high-traffic areas like patio doors | $1.00 – $1.50 |
| Solar/Sun Screen | Densely woven for UV and heat blockage | Hot climates, south/west-facing windows, maximizing energy savings | $1.25 – $2.00 |
| BetterVue/UltraVue | Fine mesh for enhanced outward visibility | Preserving scenic views while still offering insect protection | $0.90 – $1.40 |
Ultimately, the best choice depends on balancing your budget with your primary goal, whether it's durability, energy savings, or a crystal-clear view.
The Final Crucial Component: Spline
Last but not least, don't forget the spline. This little rubber cord is what holds the entire screen in place. Getting the diameter right is absolutely essential.
If the spline is too thin, your screen will be loose and saggy, and a strong gust of wind could pop it right out. If it’s too thick, you’ll fight to get it into the channel and might even bend the frame. The easiest way to get it right is to cut a small piece of the old spline and take it with you to the store to find an exact match. Most homes use sizes between .125" and .175". This one tiny detail makes all the difference for a durable, long-lasting repair.
Repairing Your Damaged Sun Screens
Seeing a tear or a sag in your sun screen can be frustrating, but don't dial the handyman just yet. Most of the time, this is a job you can absolutely handle yourself. Getting a professional, seamless look is more about technique and patience than anything else. This isn't just a quick patch-up; it's about restoring your screen so it works perfectly and looks great for years to come.
It's interesting to see how seriously we're taking sun protection everywhere. The market for sunscreen is expected to hit a staggering $38.6 billion by 2035, all because we're more aware of UV damage. That same thinking applies to our homes. Solar screens are a smart investment in preventing sun damage and boosting energy efficiency. You can actually learn more about these market trends to see just how vital sun protection has become.
Prepping the Frame for a Flawless Repair
Before you even think about the new screen, the old one has to come out properly. The biggest mistake I see people make is gouging the frame's channel when they're trying to dig out the old, brittle spline. Do that, and you'll have a miserable time trying to get the new spline to sit right.
Your best bet is to use a small flat-head screwdriver or an awl. Gently work it under a corner of the old spline and lift it up. Once you get a small piece free, you can usually just pull the rest out in one long strip. Go slow and be careful not to scrape up the aluminum. With the spline gone, the old screen mesh will come right out.
Measuring and Cutting the New Screen
Now that the frame is empty, it's time to cut your new screen fabric. Unroll your new screen material on a large, flat surface—the garage floor or a clean driveway works great. Then, lay the empty frame right on top of it.
You need to cut the new piece so it's bigger than the frame on all sides. I always aim for about one to two inches of overhang around the entire perimeter. That extra material is your "handle" for pulling the screen tight later and gives you a crucial margin of error. For a nice, straight cut, use a straight edge and a fresh, sharp blade in your utility knife.
Pro Tip: Whatever you do, never cut the screen to the exact size of the frame beforehand. When you roll the spline in, it naturally pulls the fabric inward. Without that overhang, you’ll be left with ugly gaps along the edges every single time.
This image breaks down the core installation process into its three main stages, from measuring to the final trim.

Thinking about the project in these three distinct parts makes it feel much less intimidating and helps ensure you don't miss a step.
Mastering the Art of the Spline Roller
This is where the real skill comes in, but it's easier than it looks. Your spline roller is the most important tool for this job, and using it correctly is the secret to getting a taut, professional-looking screen. Drape your oversized piece of screen over the frame and make sure it's centered.
First, take the convex (the rounded wheel) side of the roller and gently press the screen fabric into the frame's channel along one of the long sides. You're not trying to seat it fully, just creating a little depression for the spline to follow.
Next, grab your new spline and start pressing it into the channel right over the screen, beginning at a corner. Now, flip your tool over to the concave (the grooved wheel) side and use it to push the spline firmly down into the channel. As you roll, use your other hand to keep the screen fabric pulled slightly taut ahead of the tool. This is how you prevent wrinkles.
The key to even tension is working on opposite sides:
- Roll in the entire first long side.
- Move directly to the opposite long side, gently pulling the screen taut as you go.
- Finish by doing the two shorter sides, again maintaining that slight tension.
This method pulls the screen evenly from the center out and is the best way to avoid a saggy middle. When you reach the corners, use the edge of your roller or a flat-head screwdriver to poke the spline neatly into place.
Troubleshooting Common Repair Problems
Even the most careful DIYer can hit a snag. Here’s what to do if you run into trouble:
- Screen Bunching at Corners: If the fabric is puckering up, you're probably pulling too hard. Ease up a bit. You can also make a tiny diagonal relief cut into the excess screen fabric right at the corner. This gives the material a little more give so it can lay flat.
- Spline Popping Out: This is almost always a sign that your spline is too thin for the channel. The easiest fix is to take a piece of your old spline to the hardware store and match the diameter exactly.
- A Bowed Frame: Believe it or not, if you pull the screen too tight, you can actually bend the aluminum frame inward, giving it an hourglass shape. The goal is to pull the fabric just tight enough to eliminate wrinkles—not so tight that you're warping the frame itself.
Once the spline is seated securely all the way around, the last thing to do is trim off the excess screen. Grab your utility knife and carefully run the blade along the outside edge of the spline. This will slice off the extra material perfectly, leaving you with a clean, finished repair.
Installing New Sun Screens from Scratch

While patching up an old screen is a handy skill, there's a special kind of satisfaction that comes from building a brand-new one from the ground up. When you do a full sun screen installation yourself, you get to customize everything for a perfect fit and peak performance that will last for years.
The entire project hinges on one thing: precision. Getting your measurements right is, without a doubt, the most critical part of the whole process. A tiny mistake here can leave you with a frame that’s either too loose to be secure or too tight to even get in the window. Nail this first step, and the rest of the build will be a breeze.
Nailing the Perfect Measurements
How you measure will depend entirely on the kind of windows you have. Most modern windows come with a built-in channel around the exterior—a groove made specifically to hold a screen. If you have this, you're in luck; it’s the easiest scenario.
For windows with a channel, simply measure the opening from the inside of the left channel to the inside of the right for your width. Do the same from the top channel down to the bottom for the height. I always measure in a couple of different spots for both dimensions, just in case the window isn't perfectly square. If you get different numbers, always use the smaller measurement.
Crucial Tip: Once you have your final numbers, subtract 1/16 of an inch from both the width and the height. This little bit of "fudge factor" is the pro secret for getting the screen to pop in easily without being sloppy and loose.
If your windows don't have that channel, you'll have to mount the screen directly onto the surface of the window frame. For this method, measure the entire window opening you want to cover, and then add about 1.5 inches to both the width and height. This gives the frame enough overlap for a really secure mount.
Assembling a Square and Sturdy Frame
With your final dimensions locked in, it's time to cut the frame stock. A hacksaw with a fine-toothed blade made for metal is your best bet for getting clean, straight cuts. I strongly recommend using a miter box; it’s the only way to guarantee your corners will be perfectly square.
Don't forget that your corner connectors add length! Most standard corners will require you to cut each piece of the frame 1.5 inches shorter than your final measurement to account for them. So, if your finished screen needs to be 30 inches wide, you’ll cut your two horizontal pieces to 28.5 inches each.
Assembly is pretty straightforward from here:
- Take two pieces of the frame and tap the plastic or metal corner connectors into the hollow ends, forming an "L" shape.
- Use a rubber mallet to gently seat them so you don't dent the aluminum.
- Keep going until you have a complete rectangle.
Before you go any further, lay the frame on a flat floor and grab a carpenter's square. Check every single corner to make sure it's a perfect 90-degree angle. A frame that isn't perfectly square will be a nightmare to screen and will never look right.
Screening a New Frame for Lasting Tension
Screening a new frame is a lot like repairing one, but now the goal is to achieve flawless, even tension that will stay drum-tight for years. This is where your patience and attention to detail will really pay off.
Lay your new frame down on your oversized piece of screen fabric. Just like before, start on one of the long sides. Use the convex (rounded) wheel of your spline roller to push the screen into the groove, then follow with the concave (grooved) wheel to press the spline in tight. The only real difference is that you'll want to apply just a little more tension as you go.
Next, move to the opposite long side. Pull the screen fabric taut—not so tight that you start to bow the frame inward, but enough to make it completely smooth. Once that side is done, finish the two shorter sides, always keeping that gentle, consistent pull. This cross-tension technique is what separates a DIY job from a professional one.
Applying the Finishing Touches
Once the screen is splined in and you've trimmed the excess fabric, it's time to add the hardware that makes it all work. It's the little things, like pull tabs and mounting clips, that make a huge difference in how your screen functions day-to-day.
Pull tabs are those little plastic or metal tabs that make it easy to get the screen out for cleaning. You usually slide them into the frame's channel on one side just before you roll in the spline.
For mounting the screen itself, you have a few options:
- Tension Springs: These are little springy clips that go on one side of the frame. They let you compress the screen slightly to get a really snug fit inside a window channel.
- Slide Latches: These plastic latches get screwed onto the side of the screen frame and can be slid in and out to lock the screen into place.
- Brick Clips or Screws: If you're surface-mounting the screen, you might need special clips for brick or just use small screws to attach the frame directly to the window casing.
The right choice just depends on your window style. Picking the right hardware ensures your screen stays put, even in high winds, but is still easy enough to remove when you need to.
Screen Maintenance and When to Call a Pro
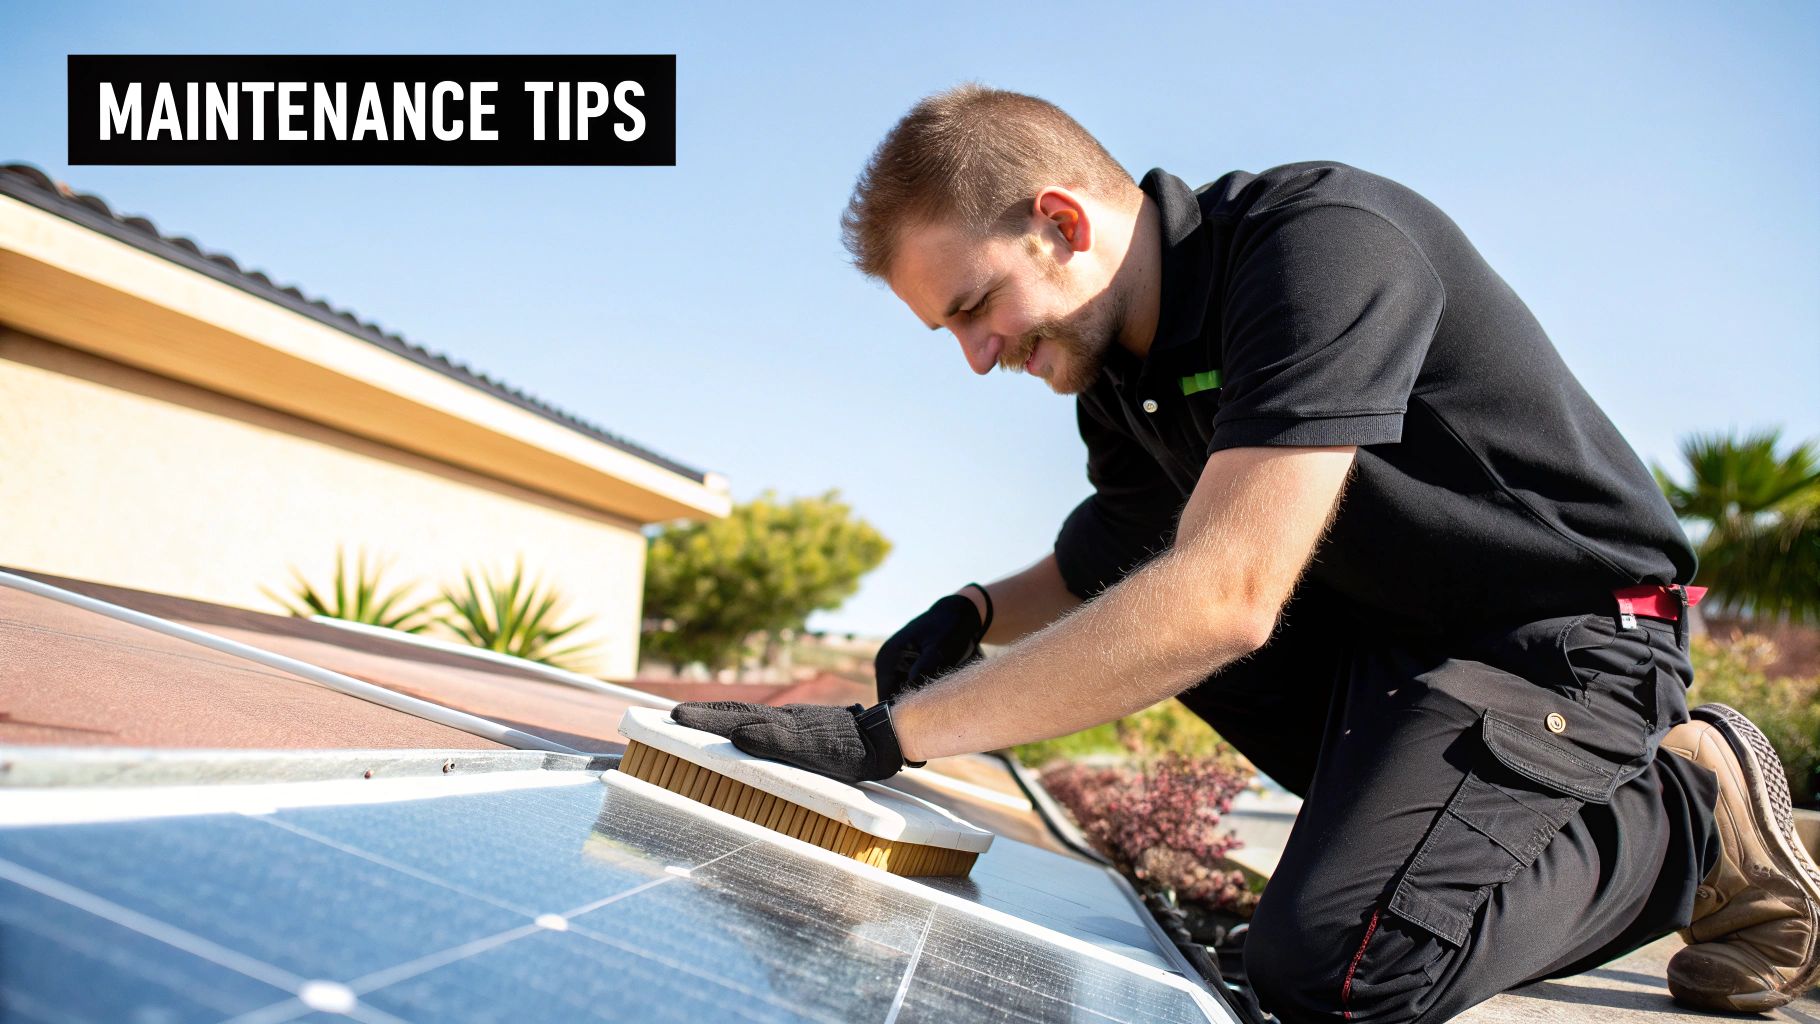
Now that your new or repaired sun screens are up, a little routine care will go a long way in keeping them looking sharp and working effectively for years. Think of it less as a chore and more as protecting your investment. Good maintenance ensures you're getting the most out of their energy efficiency and UV-blocking power.
Over time, screens naturally pick up dust, pollen, and general grime from the outdoors. A quick cleaning a couple of times a year—usually in the spring and again in the fall—is all it takes to make a huge difference. The best part? The process is incredibly simple and doesn't require any harsh chemicals.
A Simple and Safe Cleaning Routine
The key here is to be gentle. Sun screen fabric is built to be durable, but you don't want to go at it with abrasive cleaners or a high-pressure washer, which can strip the protective coating or damage the mesh itself. All you really need is a soft-bristled brush and some mild, soapy water.
Just mix a little dish soap into a bucket of warm water to create some light suds. Gently scrub the screens from top to bottom, then give them a thorough rinse with a garden hose on a low-pressure setting. It’s truly that easy.
Fight the urge to grab the pressure washer, even on its lowest setting. The force is often too much for screen fabric. It can stretch the material, leading to sagging, or even tear the screen right out of the spline. A gentle rinse is all it takes.
This small bit of upkeep keeps your view crystal clear and helps extend the life of the screen material, potentially saving you from another sun screen repair and installation project anytime soon.
Knowing When to Step Back
While many screen fixes are perfect weekend DIY projects, there are definitely times when calling in a professional is the smartest move. Knowing when to hand over the reins can save you from frustration, costly mistakes, or even a dangerous fall from a ladder.
The demand for better sun protection is growing everywhere. In fact, the global sunscreens market was valued at $13.5 billion in 2024 and is expected to climb to $18.4 billion by 2029. You can dive into more of the data with these global market insights. This trend shows a wider awareness of protective measures, and just as you'd see an expert for your skin, sometimes your home needs that professional touch, too.
So, when should you pick up the phone? Here are a few scenarios where an expert is your best bet:
- Second-Story or Hard-to-Reach Windows: Any job that involves a tall extension ladder brings a serious safety risk. Pros have the right safety equipment and the experience to work at heights without putting themselves—or your property—in danger.
- Custom or Unusually Shaped Frames: Got an arched, circular, or other funky-shaped window? Getting the screen tension perfect on these is an art form. A DIY attempt can easily result in a saggy, wrinkled mess.
- Major Frame Damage: If a screen frame is badly bent, broken, or corroded, a simple repair won't cut it. A pro can build a brand-new frame with precise measurements, guaranteeing a snug, secure fit that a patched-up frame just can't provide.
- Large-Scale Projects: Outfitting your entire house with new sun screens is a big job. A professional service can knock it out efficiently, often in a single day, saving you what could be weeks of weekend work.
Knowing your limits is a huge part of being a successful homeowner. For those straightforward, ground-level repairs, rolling up your sleeves is a fantastic way to save some money. But for the jobs that are complex, risky, or just plain big, investing in a professional ensures you get a quality result that will last.
Got Questions About Sun Screens? Let's Clear Them Up.
Even with a step-by-step guide, it's totally normal to have a few questions pop up before you dive into a project like this. In fact, getting these details sorted out beforehand is what separates a frustrating afternoon from a job you can be proud of.
Let's walk through some of the things people ask me all the time.
What’s Really the Best Material for a Sun Screen?
This is the big one, and honestly, there's no single "best" material for everyone. The best choice is the one that solves your specific problem.
You have to think about what you're trying to accomplish.
- Just need to keep bugs out? Standard fiberglass is your go-to. It’s cheap, it’s effective, and it lets the breeze through. Simple.
- Got a dog who loves to scratch the door? Skip the fiberglass and get a pet-resistant screen. It’s a vinyl-coated polyester mesh that's about seven times stronger. It’ll save you from re-screening that door every few months.
- Trying to beat the heat? Then you need a true solar screen. These are specifically designed to block up to 90% of the sun's heat and UV rays, which makes a huge difference in your cooling bill and stops your furniture from fading. The only trade-off is visibility—the more heat it blocks, the darker the screen will look from the inside.
Can I Just Patch a Small Hole Instead of Replacing the Whole Thing?
Absolutely. For those tiny little punctures or tears—anything under an inch or so—an adhesive screen repair patch is a lifesaver. You literally just peel and stick it right over the hole.
It's a quick and easy fix. The only catch is that you'll see the patch, especially when you're close to the screen. It works great in a pinch, but it's not the prettiest solution.
For a quick fix, a patch is perfect. But for a clean, professional look or for any significant damage, taking the time to replace the whole screen panel is the way to go.
How Do I Know What Size Spline to Buy?
Getting the spline size right is one of those small details that can make or break the whole project. If it's too loose, the screen will sag or pop out. Too tight, and you'll fight it the whole way and might even damage the frame.
The most foolproof method? Pull out a small piece of the old spline from the channel. Take that little piece with you to the hardware store and match its diameter perfectly.
If you don't have an old piece to go by, you'll have to measure the channel in the frame. You're looking for a snug fit—something you can push in with the roller tool without having to wrestle with it.
Is It Cheaper to Repair My Screen or Just Replace the Whole Frame?
Repairing is almost always the more budget-friendly option, and by a long shot. When you repair, you're just buying the screen fabric and a roll of spline. Both are pretty inexpensive.
A full replacement means buying a new aluminum frame, corner pieces, and all the hardware to mount it. Those costs add up fast.
The only time I'd recommend a full replacement is if the frame itself is shot—badly bent, cracked, or so corroded that it's losing its strength. As long as the frame is solid, stick with a repair.
Whether you're tackling a small fix or outfitting your whole home, sometimes you just want an expert to handle it. If you run into a tricky spot or decide you'd rather have a pro take care of it, Sparkle Tech Screen Service is here to help. We offer fast quotes and professional service to get the job done right. Check us out at https://sparkletechscreenservice.com or give us a call at 623-233-0404.


