


A sun blocking screen for windows is a type of heavy-duty mesh panel that gets installed on the outside of your windows. Its entire job is to absorb and bounce back the sun's intense heat and damaging UV rays long before they ever touch the glass. It’s a straightforward upgrade that can make a huge difference in cooling your home, protecting your furnishings, and shrinking your energy bills.
Why Sun Blocking Screens Are a Smart Home Upgrade
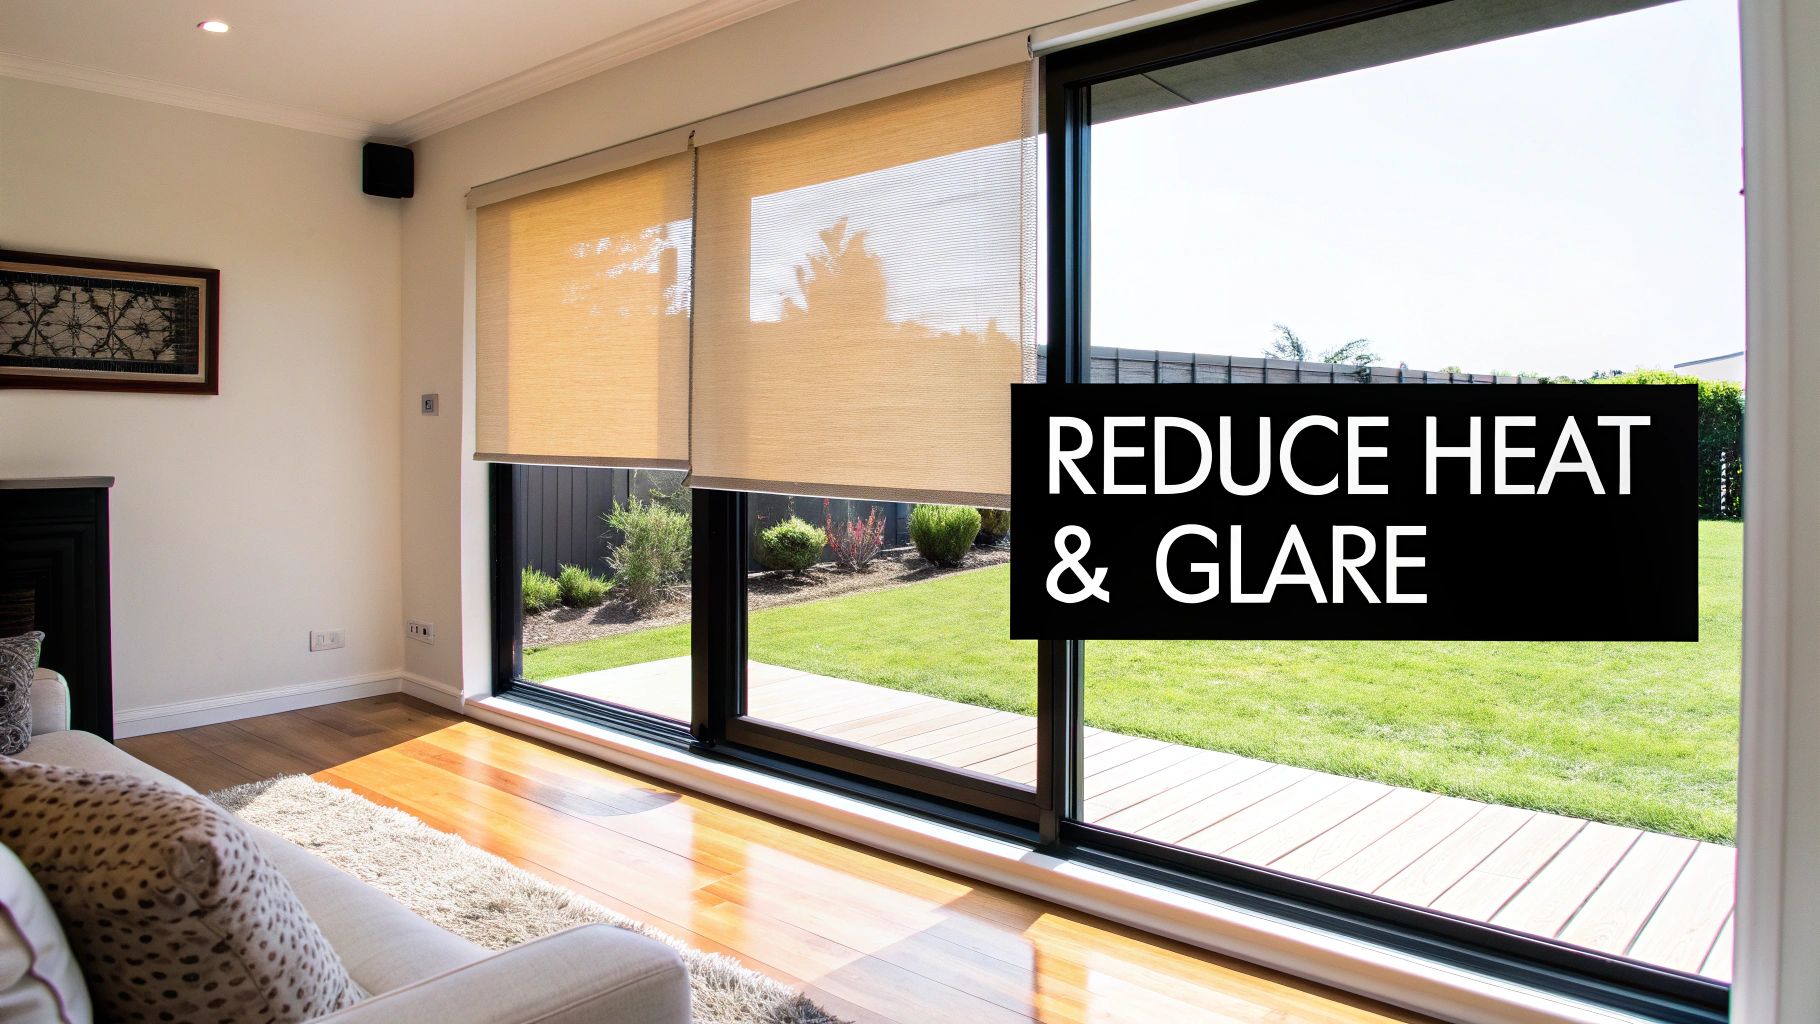
If you've ever walked into a west-facing room on a summer afternoon and been hit by a wall of heat, you know exactly what solar heat gain feels like. Those big, beautiful windows are fantastic until the sun decides to turn your living room into a sauna.
This is where a sun blocking screen for windows really proves its worth. It’s not just another window accessory; it becomes an essential part of keeping your home comfortable.
Think about it: blinds and curtains try to block heat after it's already passed through the window and is inside your house. Exterior screens, on the other hand, stop the heat at the source. By intercepting up to 90% of the sun's energy, they prevent the window glass itself from heating up, which is the secret to keeping your indoor space much, much cooler.
The Core Benefits of Solar Screens
The perks go well beyond just making a room feel less stuffy. A good quality sun blocking screen delivers a whole range of improvements for your home.
- Serious Energy Savings: When less heat makes it into your home, your AC unit gets a much-needed break. It doesn't have to cycle on as often or run for as long, which means you'll see a real difference in your monthly cooling costs.
- UV Ray Protection: Those same UV rays that give you a sunburn are also bleaching your hardwood floors, fading your sofa, and damaging your artwork. Solar screens act like a powerful SPF for your home, preserving the life and color of everything inside.
- Better Daytime Privacy: From the outside looking in during the day, solar screens make it surprisingly difficult for people to see into your home. You get an extra layer of privacy without having to give up your view of the yard.
The real magic of a sun blocking screen is that it's a preventative solution. It stops heat and UV damage from ever becoming a problem in the first place, making it one of the smartest and most effective upgrades you can make, especially in sunny climates.
This isn't just a niche product, either. The demand for energy-saving window solutions is on the rise. Take a related technology, solar control window films. That market was valued at USD 981.511 million in 2025 and is expected to climb past USD 1.2 billion by 2030. It just goes to show how many homeowners are looking for effective ways to reduce energy use and protect their homes from the sun.
While these specialized screens are incredibly effective, it's also worth looking into other simple ideas for how to block sunlight from windows with easy fixes to round out your strategy. For a deeper dive, our comprehensive guide on solar window screens covers even more of the specific benefits you can expect.
https://sparkletechscreenservice.com/solar-window-screens/
Choosing The Right Screen Material For Your Climate
Picking the right material for your sun-blocking screens is about more than just matching a color to your home's trim. The fabric you choose is the workhorse of the whole system, directly affecting how well it blocks the sun, how long it lasts, and how it holds up in your specific environment. It's a balancing act between UV protection, visibility, and airflow.
Think about it this way: a house in Phoenix, Arizona, baking in dry heat needs something entirely different from a coastal home in Florida that’s constantly battling salt spray and humidity. The Phoenix home needs maximum heat rejection, while the Florida home needs a material that won't corrode. This is why digging into the details of each material really matters.
Comparing Popular Screen Fabrics
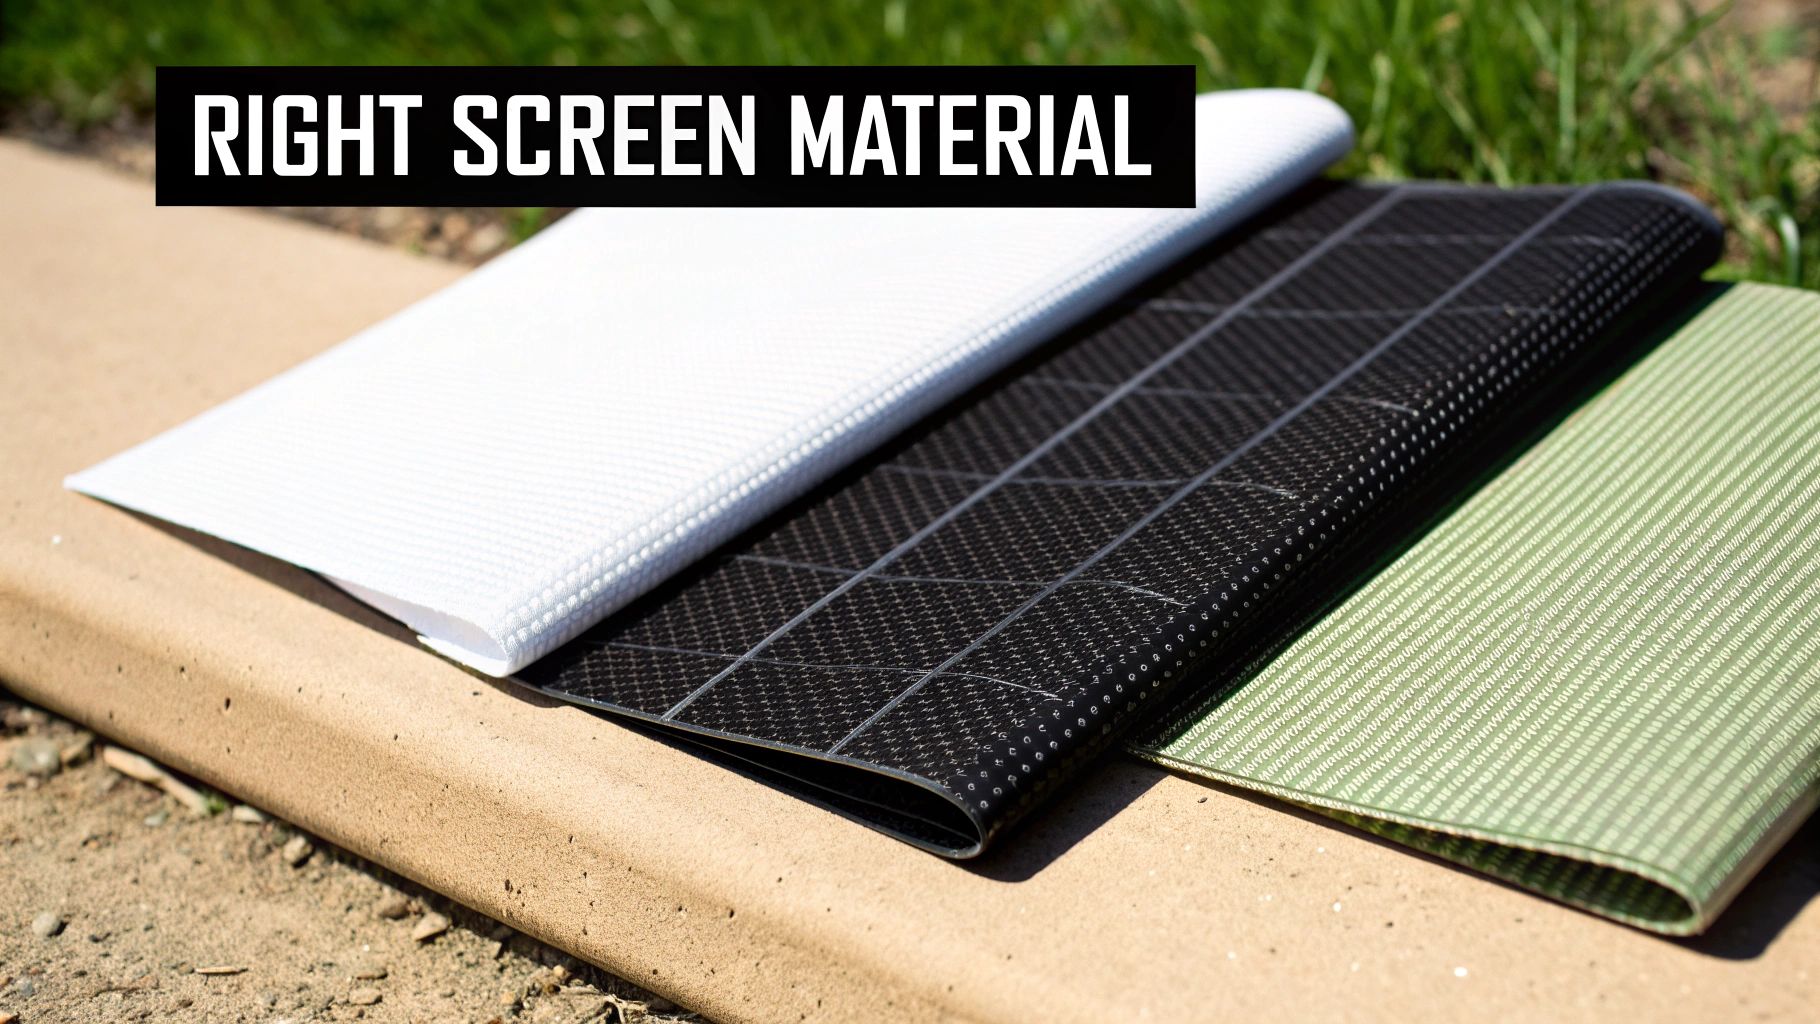
When we talk about sun-blocking screens, we're usually dealing with a durable, PVC-coated polyester or a fiberglass mesh. I’ve seen top-quality brands like Phifer and Twitchell last 10 years or more without any serious fading or performance issues. They just work.
But not all screen fabrics are created equal. Let's break down the common players:
- Standard Fiberglass: This is your basic insect screen material. It's affordable and common, but it provides minimal shading and isn't designed for serious heat or UV blocking.
- Aluminum: A step up in durability from fiberglass for insect screens. It holds its shape better but can dent easily and is a poor choice for coastal areas where salt in the air will cause it to corrode.
- High-Performance Solar Fabric: This is the real deal for sun blocking. It's a tightly woven, PVC-coated material engineered from the ground up to absorb and reflect a huge percentage of the sun's heat and light before it even touches your window glass.
The real decision for effective sun blocking isn't between fiberglass and aluminum—it's about choosing the right density of solar fabric. The magic is in the "openness factor," which tells you how much solar radiation it blocks, typically from 80% up to 95%.
Matching Material To Your Environment
Your local climate is the single most important factor in this decision. For instance, if you live anywhere near the ocean, a corrosion-resistant PVC-coated solar screen is a must. I've seen aluminum screens practically disintegrate in salty air, so it's a non-starter for coastal homes.
On the other hand, if you're in a desert climate where that intense, direct sun is the main enemy, a 90% or 95% blockage solar screen is your best bet. That denser weave is what gives you maximum heat reduction, and you can feel the difference it makes on your indoor temperature and your AC bill.
To give you a clearer picture, here’s a quick comparison of the most common materials I work with:
Comparison Of Screen Materials
This table offers a side-by-side look at the features of common screen fabrics to help you weigh the pros and cons based on your specific needs.
| Material | UV Block Rate | Durability Rating | Visibility Impact | Approximate Cost |
|---|---|---|---|---|
| Standard Fiberglass | 10% – 30% | Low | Low | $ |
| Aluminum | 10% – 40% | Medium | Low | $$ |
| Solar Fabric (80%) | 80% | High | Medium | $$$ |
| Solar Fabric (90%) | 90% | High | High | $$$$ |
| Solar Fabric (95%) | 95% | Very High | Very High | $$$$$ |
As you can see, as the UV block rate and durability go up, so does the impact on your view and the overall cost. It's all about finding that sweet spot for your home and budget.
The push for this kind of technology is only getting stronger. A related market, solar control window films, was valued at USD 1,586.40 million in 2024 and is expected to hit over USD 3.6 billion by 2034. This shows just how much homeowners are prioritizing energy efficiency and UV protection. You can see more on this trend at polarismarketresearch.com.
Ultimately, finding the perfect balance is the goal. If you want to dive even deeper, our guide on the best window screen material provides a more detailed breakdown to help you choose with confidence.
How to Measure Your Windows for a Perfect Fit
You've picked out the perfect material—that's a huge step. But even the best sun-blocking screen won't do its job if it doesn't fit correctly. A screen that’s even a fraction of an inch off can leave annoying gaps, letting in the very heat and light you’re trying to block. Worse, one that's too big is a nightmare to install.
Getting this right isn't rocket science, but it does demand a bit of precision. It's all about being methodical. Before you even reach for your tape measure, take a look at your windows. A simple single-hung window is measured differently than a sliding glass door or a custom arched window.
Getting Started: Tools and the First Measurements
Forget fancy gadgets. All you really need is a good-quality metal tape measure. The fabric or plastic ones can stretch, which is the last thing you want when accuracy is the goal. Grab a pen and paper too, so you can write down the numbers as you go.
Your target is to measure the width and height of the opening where the screen will actually sit, which is usually inside the main window frame or in a dedicated screen channel.
Here’s the process I always follow:
- For the Width: Measure across the window opening in three spots—top, middle, and bottom. It’s surprising how often window frames aren't perfectly square. Always write down the smallest of the three measurements.
- For the Height: Do the same thing, but this time measure vertically on the left, in the center, and on the right side. Again, use the smallest number. This guarantees your screen will slide in smoothly.
A bit of old-school advice that's gold here: "Measure twice, cut once." Seriously, take a second measurement. It can save you from a major headache later on.
Adjusting for Different Window Styles
Double-hung windows are usually the most straightforward. But what if you have sliders? For sliding windows and doors, you’ll be measuring inside the screen track itself. If there's no existing screen to use as a guide, you'll measure the "daylight opening" (the part you see through) and then add a little extra so the new frame can overlap properly.
Sometimes a picture is worth a thousand words. This image clearly shows where you should place your tape measure on a standard residential window.
See how the measurements are taken right from the inside edge of the frame? That’s what ensures a snug, professional-looking fit.
This level of detail is becoming standard practice. The market for window shades is expected to hit USD 7.76 billion by 2032, a boom driven by homeowners wanting smarter, energy-saving solutions that rely on precise installation.
To really nail this, our in-depth guide explains how to measure window screen size and covers different frame types with clear examples. For a different perspective, other experts also have great tips on how to measure window size accurately.
Window Size Versus Screen Dimensions
To help visualize how your measurements translate to the final screen size, I've put together this table. It gives you a general idea of the "margin allowance" needed—the extra bit for the screen frame—based on common window sizes.
| Window Type | Nominal Width | Nominal Height | Margin Allowance |
|---|---|---|---|
| Single-Hung | 24 inches | 36 inches | +1.5 inches to width/height |
| Double-Hung | 30 inches | 48 inches | +1.5 inches to width/height |
| Slider | 48 inches | 36 inches | +2.0 inches to width/height |
| Picture Window | 60 inches | 48 inches | +2.5 inches to width/height |
These are just general guidelines, of course. Your specific window's channel depth and frame style will determine the exact dimensions, but this gives you a solid starting point for understanding how the raw opening measurement relates to the finished product.
A Practical Guide to Installing Your Sun Blocking Screen
Alright, you’ve got your custom-sized screen, and now it's time for the fun part: the installation. Getting this right isn't about having a workshop full of fancy tools. It’s about being methodical and focusing on the details. The goal here is a snug, secure fit that keeps your screen looking sharp and professional for years.
First things first, prep your window frame. You can’t expect mounting hardware to stick to a dirty surface. I always take a moment to wipe down the exterior frame with a damp cloth. Getting rid of the dust, cobwebs, and general grime is a simple step that makes a huge difference in how well your brackets or strips will adhere.
Preparing for Mounting
For most installs, your tool list is pretty straightforward. You'll likely need a power drill, a set of drill bits, a level, and the tape measure you used earlier. I also keep a pencil in my pocket to mark my drill holes—way more accurate than just winging it.
Before you even think about drilling, do a "dry fit." Hold the assembled sun blocking screen up to the window opening. This is your last chance to spot any measurement mishaps before you make permanent holes. It sounds basic, but trust me, this little check has saved me from some major headaches over the years.
This infographic is a great reminder of the key measurements that get you to this point. A perfect installation starts with perfect measurements.
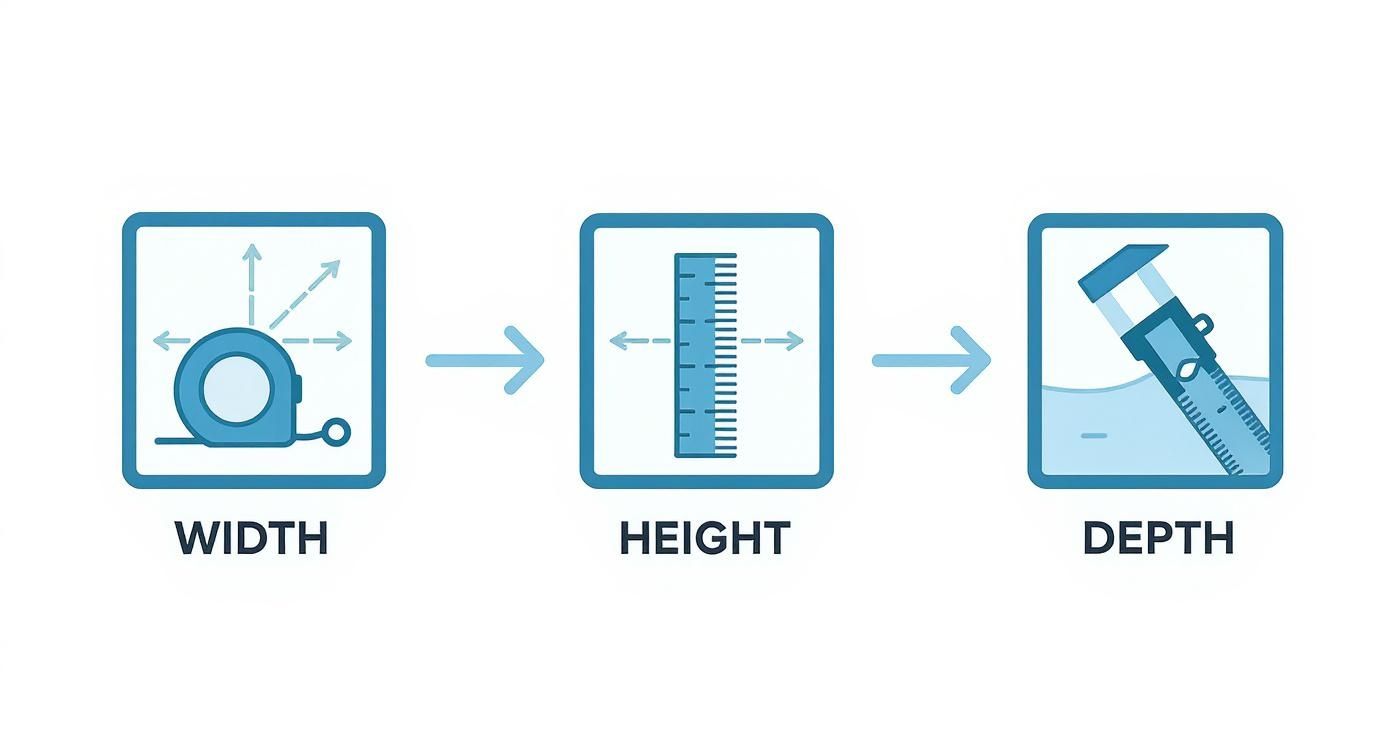
As the graphic shows, getting the width, height, and depth spot-on is the foundation for everything that follows.
Attaching the Hardware
Now, let's talk about where to put your mounting hardware. Whether you're using simple clips or something more complex, placement is everything. You need to space them out evenly to distribute the screen’s tension.
- Start at the Top: I always put the top clips on first. Place one a few inches in from each corner. Grab your level and make sure they're perfectly aligned before drilling.
- Hang the Screen: Once the top clips are in, you can hang the screen from them. This frees up your hands and makes positioning the rest of the clips a whole lot easier.
- Secure the Bottom and Sides: Gently pull the screen taut—not so tight that you bend the frame—and mark where your bottom clips should go. Install those, and then add any side clips if your system requires them. You're looking for just enough tension to keep the fabric smooth.
Here’s the most important tip I can give you: make sure there’s a small air gap between the screen fabric and the window glass. That space is critical. It’s what stops the heat from transferring directly to the glass, which is the whole point of an exterior sun blocking screen.
Special Installation Scenarios
Of course, not every window is a simple in-and-out job. What if you're mounting on a brick or stucco wall? You'll need to swap out standard wood screws for proper masonry fasteners. A hammer drill will also be your best friend here, making the job much cleaner.
If you want to be able to remove your screens easily for cleaning, magnetic strips or 3M Dual Lock fasteners are brilliant. One side sticks to the window frame, the other to the screen frame. They form a surprisingly strong bond that can handle wind but lets you pop the screen off without any tools. For a secure hold, I’d recommend placing fasteners every 12-18 inches.
And let’s be honest, while DIY is satisfying, sometimes it’s smarter to call a pro. If you’re looking at second-story windows, tricky arched frames, or just don't love the idea of spending your afternoon on a ladder, hiring an installer is the way to go. They have the right gear and experience to do the job safely and quickly, making sure your investment performs perfectly from day one.
Keeping Your Screens Looking and Performing Like New
Now that your sun-blocking screens are perfectly installed, you’ll be happy to know that keeping them in top shape is surprisingly easy. With just a little bit of routine care, you can expect them to perform beautifully for a decade or more.
Think of it like washing your car—a regular, gentle cleaning is all you need to prevent long-term damage from built-up dirt and environmental grime.
A Simple Cleaning Routine That Works
For most of the year, a quick rinse with a garden hose is all it takes to knock off loose dust and pollen. This simple step is huge because it prevents the kind of buildup that can slowly degrade the screen material over time.
When you want to do a more thorough job, maybe once or twice a year, you don't need anything fancy.
- Grab a bucket of warm water.
- Add a few drops of mild dish soap.
- Use a soft-bristle brush.
The most important thing to remember is to avoid harsh chemicals. Things like bleach or ammonia-based cleaners are a big no-no; they can eat away at the screen's protective PVC coating and weaken its ability to block UV rays.
Here’s the process I’ve used for years:
First, give the screen a gentle spray with your hose to get rid of any loose debris. Just use a standard garden nozzle—a pressure washer is way too aggressive and can easily stretch or even tear the mesh.
Next, dip your soft brush into the soapy water and lightly scrub the screen, working from top to bottom. This is usually all it takes to lift off any stubborn grime or bird droppings without damaging the fabric.
Then, just rinse all the soap residue away with the hose. Make sure you get it all, because leftover soap can actually attract more dirt. Let the screen air dry, and you're done. It's that simple.
I can't tell you how many times I've seen homeowners grab a pressure washer, thinking it's a shortcut. It might seem fast, but it can easily ruin the delicate weave of the fabric or even bend the frame. What starts as a simple cleaning job can quickly turn into a costly replacement.
Quick Fixes for Common Screen Issues
Even the best screens can run into minor issues over the years. A small tear from a wind-blown branch or a little sagging doesn't automatically mean you need to replace the whole thing. Most of these are easy fixes you can handle yourself.
If you spot a small puncture or tear, a screen repair patch kit is your best friend. They're cheap, effective, and designed to blend right in with your screen. Applying one takes just a few minutes and stops a tiny hole from turning into a massive rip.
What if your screen starts to look a bit saggy? The culprit is almost always the spline, which is the rubbery cord that holds the screen material inside the frame's channel. It can get brittle and shrink over time, losing its tension.
Fixing it is straightforward. You can carefully pull the old spline out and use a screen rolling tool to press a new, slightly thicker spline back into the channel. This will pull the fabric tight again, just like new.
For a slightly bent frame, you can sometimes gently straighten it out by hand or with a rubber mallet. If the damage is more significant, though, it might be time to call in a pro like Sparkle Tech Screen Service. They can tell you whether a simple repair will do the trick or if a full replacement makes more sense. A few minutes of simple maintenance really can save you from bigger headaches down the road.
Answering Your Top Questions About Sun Blocking Screens
When you're thinking about adding sun blocking screens to your windows, a few questions always come to mind. It's smart to get all the details before you commit, so I've put together answers to the questions we hear most often from homeowners.
How Long Will My Sun Blocking Screens Actually Last?
This is one of the best parts about investing in a quality solar screen. They're built to be incredibly durable. If they're installed correctly, you can easily expect fabrics from top-tier brands like Phifer or Twitchell to hold up for 10 years or more, even in really tough climates like ours. These are American-made materials engineered to fight off fading and breaking down, so they keep blocking heat effectively for years to come.
Will These Screens Make My House Feel Like a Cave?
That's probably the number one concern I hear, but the reality is much less dramatic. Sun blocking screens are designed to cut glare and heat, not eliminate daylight. They definitely reduce the intensity of the light, but they don't plunge your rooms into darkness.
Here’s a practical breakdown:
- 80% Screens: This is a fantastic middle ground. You get significant heat blockage, but you don't have to sacrifice a ton of natural light or give up that beautiful view you love.
- 90% Screens: These are the heavy hitters. They offer the best heat rejection, making them perfect for those rooms that get absolutely baked by the afternoon sun. They will make the room noticeably dimmer, but you can still see outside without any issue.
The trade-off is almost always worth it. You lose some of the harsh brightness, but you gain a much cooler, more comfortable room. You still get plenty of usable, ambient light without having to squint.
Aren't Solar Screens Just Like Window Tint?
Nope, and this is a really important distinction. Window tint is a film that gets applied directly to the inside of the glass. While it does reduce some heat and light, it can't stop the glass itself from getting hot.
A sun blocking screen, on the other hand, does its work on the exterior of your window. It intercepts and absorbs the sun's intense energy before it even has a chance to hit the glass. This approach is far more effective at stopping solar heat gain and keeping your home from overheating in the first place.
Ready to feel the difference a cooler, more comfortable home can make? The experts at Sparkle Tech Screen Service offer professional installation of high-quality sun blocking screens designed for the Arizona climate. Get a quick quote and enjoy a more energy-efficient home this season. Visit us online at https://sparkletechscreenservice.com to get started.


