


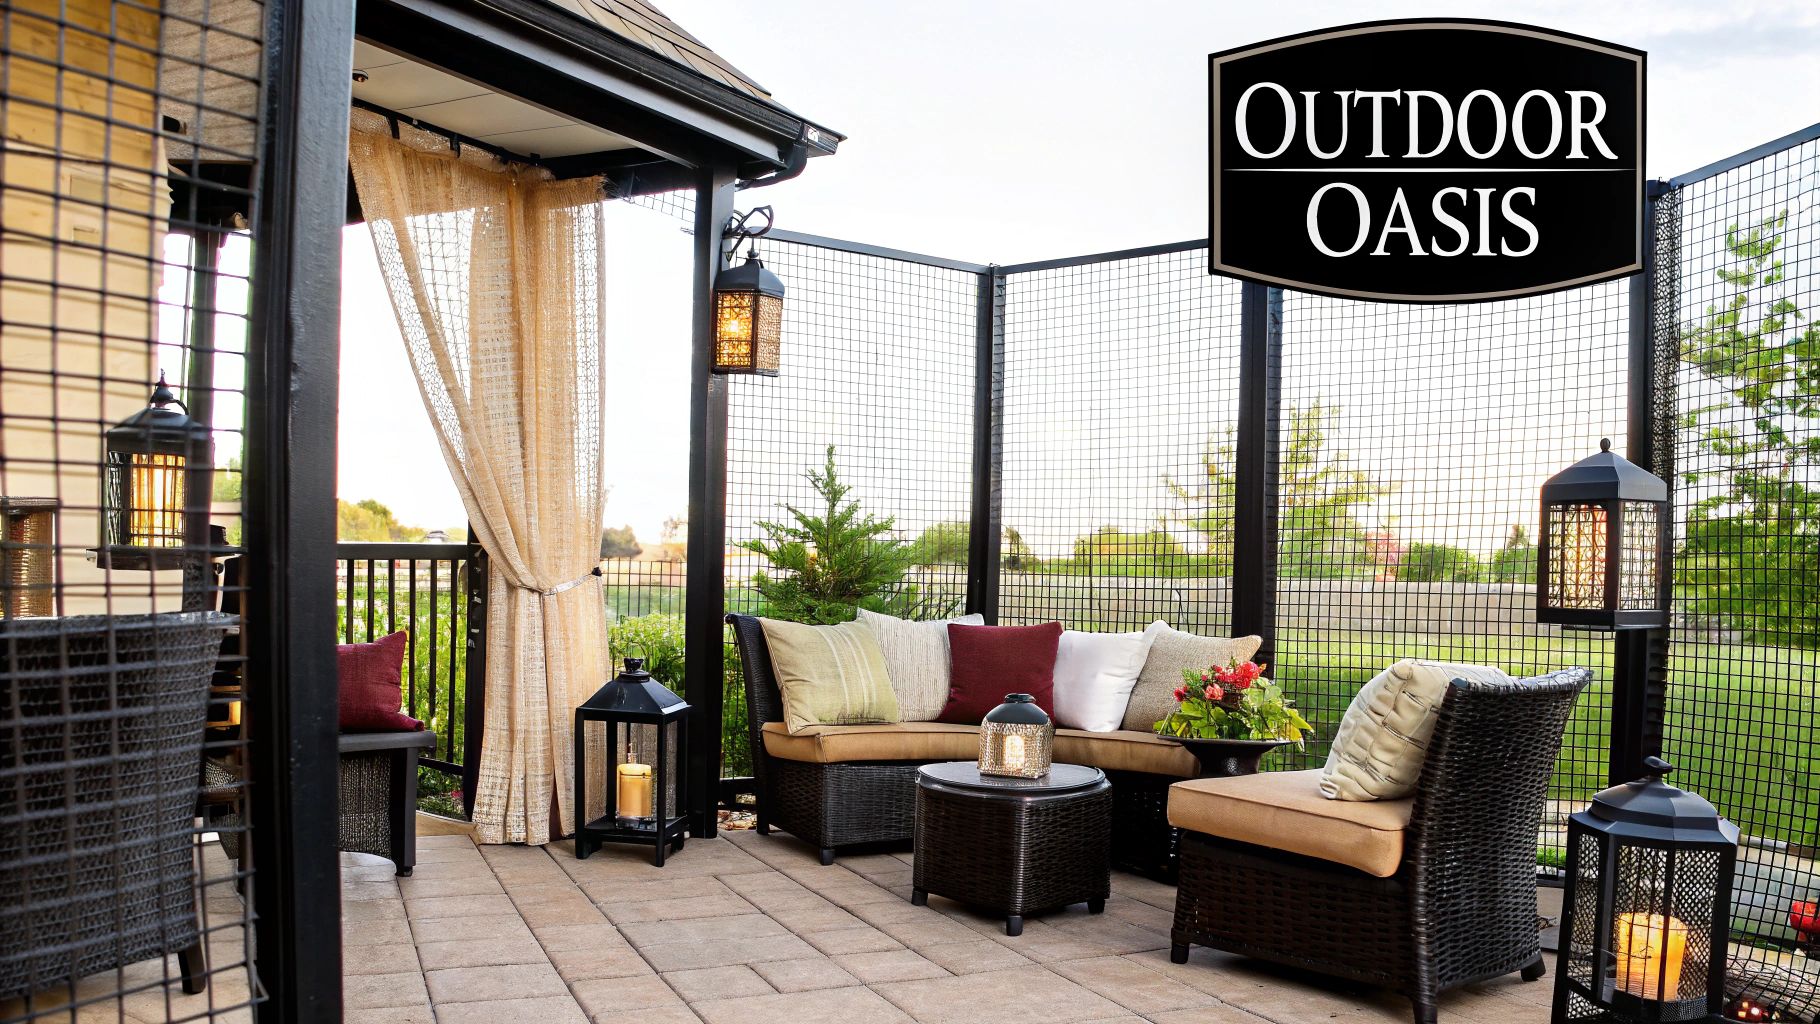
Imagine turning your patio into a bug-free oasis. A place where you can unwind without battling mosquitoes or worrying about the neighbors peeking in. The right screens for patio can do just that, transforming a simple outdoor slab into a genuine extension of your home. They add privacy, keep pests out, and even cut down on the sun's heat, letting you enjoy your patio for more of the year.
Why Patio Screens Are a Smart Home Upgrade
Screening in your patio is so much more than a cosmetic touch-up; it’s a practical upgrade that boosts your home's comfort and function. You're essentially creating a defined "outdoor room" that gives you the best of both worlds—fresh air and a view, but with the protection you’d expect indoors. It’s no surprise this is a booming trend.
The market numbers back it up. The global outdoor privacy screen market was valued at around USD 1.2 billion in 2023 and is expected to hit USD 2.1 billion by 2032. That kind of growth shows a real desire from homeowners for more functional, private, and comfortable outdoor spaces.
The Core Benefits of a Screened-In Patio
A screened enclosure fundamentally changes how you use your backyard. It solves all those little annoyances that send you running back inside, letting you enjoy your patio from the first warm days of spring to the crisp evenings of late fall.
Here are the biggest wins:
- Complete Insect Protection: Forget about swatting away mosquitoes and flies. A well-installed screen forms a solid barrier against all kinds of bugs.
- Enhanced Privacy: If you have neighbors close by, screens with a tighter weave or a darker tint create a wonderfully secluded atmosphere.
- Sun and UV Ray Reduction: Specialized solar screens are a game-changer. They can block up to 90% of the sun's heat and damaging UV rays, keeping your patio cooler and safer.
- Increased Home Value: A beautiful, functional screened-in patio is a huge selling point for buyers, adding usable square footage and major curb appeal.
By enclosing your patio, you’re not just adding a feature; you’re expanding your home’s livable space. It becomes a versatile area for dining, entertaining, or simply relaxing with a book, regardless of pests or glaring sun.
As you think about your outdoor setup, check out these great ideas for designing a cozy patio to create a space that perfectly complements your new screens. We'll walk you through all the options, from permanent enclosures to slick retractable systems, so you know exactly what’s out there.
Selecting The Right Screen Material For Your Climate
Picking the material for your patio screens is easily the most important decision you'll make. It’s the difference between a screen that lasts for years and one that you're fixing or replacing way too soon. The goal is to find the perfect match for your local weather, your lifestyle, and your budget.
Think about it: a homeowner in coastal Florida is battling constant humidity and salty air, while someone in Arizona is dealing with relentless, scorching sun. The first needs a material that won't sag or corrode; the second needs something that won’t get brittle and crack under intense UV rays. Your climate really does call the shots here.
Fiberglass: The Versatile Standard
Fiberglass is what you'll see most often. It’s affordable, flexible, and pretty forgiving to work with, which makes it a go-to for many homeowners. It won't crease or dent like metal can, and the visibility is great. For most people in fairly mild climates, fiberglass hits that sweet spot between performance and price.
The trade-off? Durability. Over time, especially in sun-drenched areas, fiberglass can become brittle and start to tear. It’s a fantastic entry-level choice, but just know that you might be replacing it sooner than you would with a more robust material.
Aluminum: For Durability And Humid Climates
If you're in a humid area, you know the struggle with sagging screens. This is where aluminum really shines. It's a more rigid material that stays taut and crisp-looking for years without drooping. It also offers incredible strength and some of the clearest, most unobstructed views you can get.
While it’s much tougher than fiberglass, it isn't indestructible—a hard-hit baseball or a big piece of hail can leave a dent. And if you’re right on the coast, you’ll want to make sure it has a protective coating to fend off corrosion from the salt air. Otherwise, it's a solid, long-term investment.
Specialty Screens: For Specific Needs
Sometimes, the standard options just don’t solve the problem at hand. That's when you turn to specialty screens, which are engineered to tackle everything from rambunctious pets to oppressive heat.
- Pet-Resistant Screens: Made from a tough, PVC-coated polyester, this stuff is about seven times stronger than typical fiberglass. It’s built to stand up to claws, paws, and the occasional full-body lean from a curious dog, saving you a ton of hassle on repairs.
- Solar Screens: If you live somewhere hot and sunny, solar screens are a game-changer. Their dense weave can block up to 90% of the sun’s heat before it ever reaches your patio. This not only makes your outdoor space more comfortable but can actually help lower your cooling bills.
To help you weigh the pros and cons at a glance, I've put together a quick comparison table.
Comparing Patio Screen Materials
This table breaks down the most common screen materials to help you decide which one best fits your needs, based on what matters most to you—whether that's durability, visibility, or cost.
| Material Type | Key Benefit | Best For | Average Lifespan | Relative Cost |
|---|---|---|---|---|
| Fiberglass | Affordability & Flexibility | Mild climates, DIY projects | 5–8 years | $ |
| Aluminum | Durability & Clear View | Hot, humid regions (non-coastal) | 10–15 years | $$ |
| Solar Screen | Heat & UV Reduction | Hot, sunny climates | 8–12 years | $$$ |
| Pet Screen | Tear & Puncture Resistance | Homes with pets or children | 10+ years | $$$ |
Ultimately, the right choice balances your immediate needs with long-term value. While fiberglass is easy on the wallet upfront, a specialty screen might save you more in the long run through energy savings or fewer repairs.
The information here is a solid foundation, and you can dig even deeper into the best window screen material to see how these choices translate to other parts of your home.
Choosing a material isn't just about durability; it's about function. A pet screen protects your investment from your furry friends, while a solar screen actively improves your comfort and energy efficiency.
This chart gives you a clear visual of what to expect in terms of longevity from the most popular options.
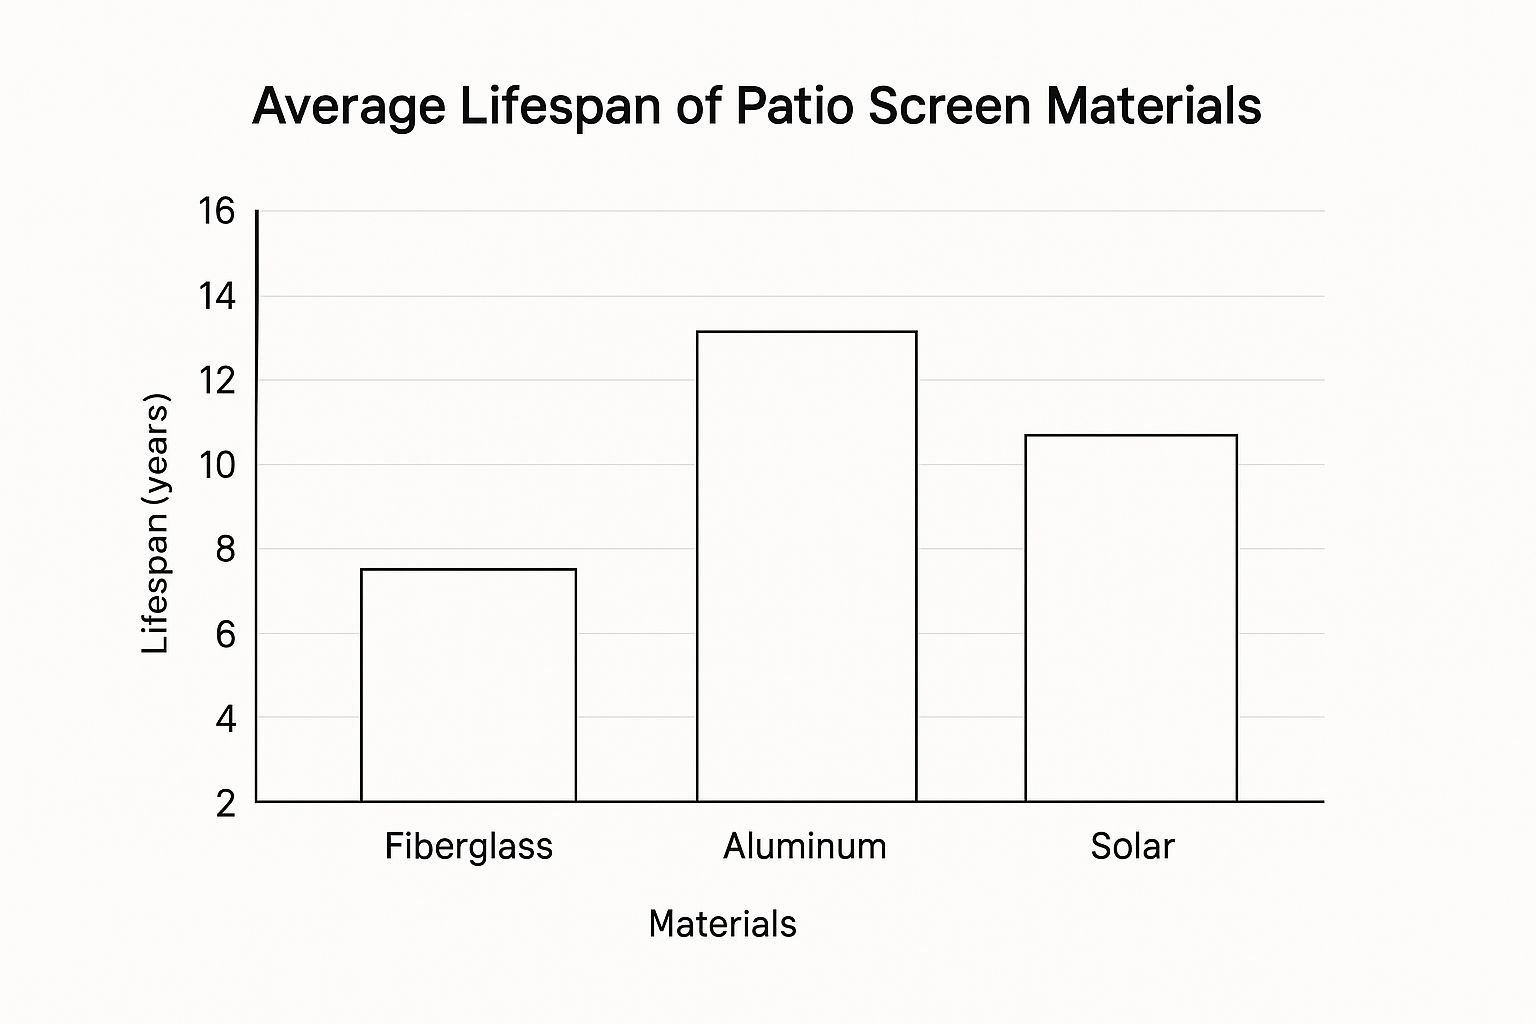
As you can see, spending a bit more on aluminum or a quality solar screen can easily double the life of your patio enclosure compared to the standard fiberglass. It's a classic case of "you get what you pay for."
Fixed vs Retractable: Which Screen System Is for You?
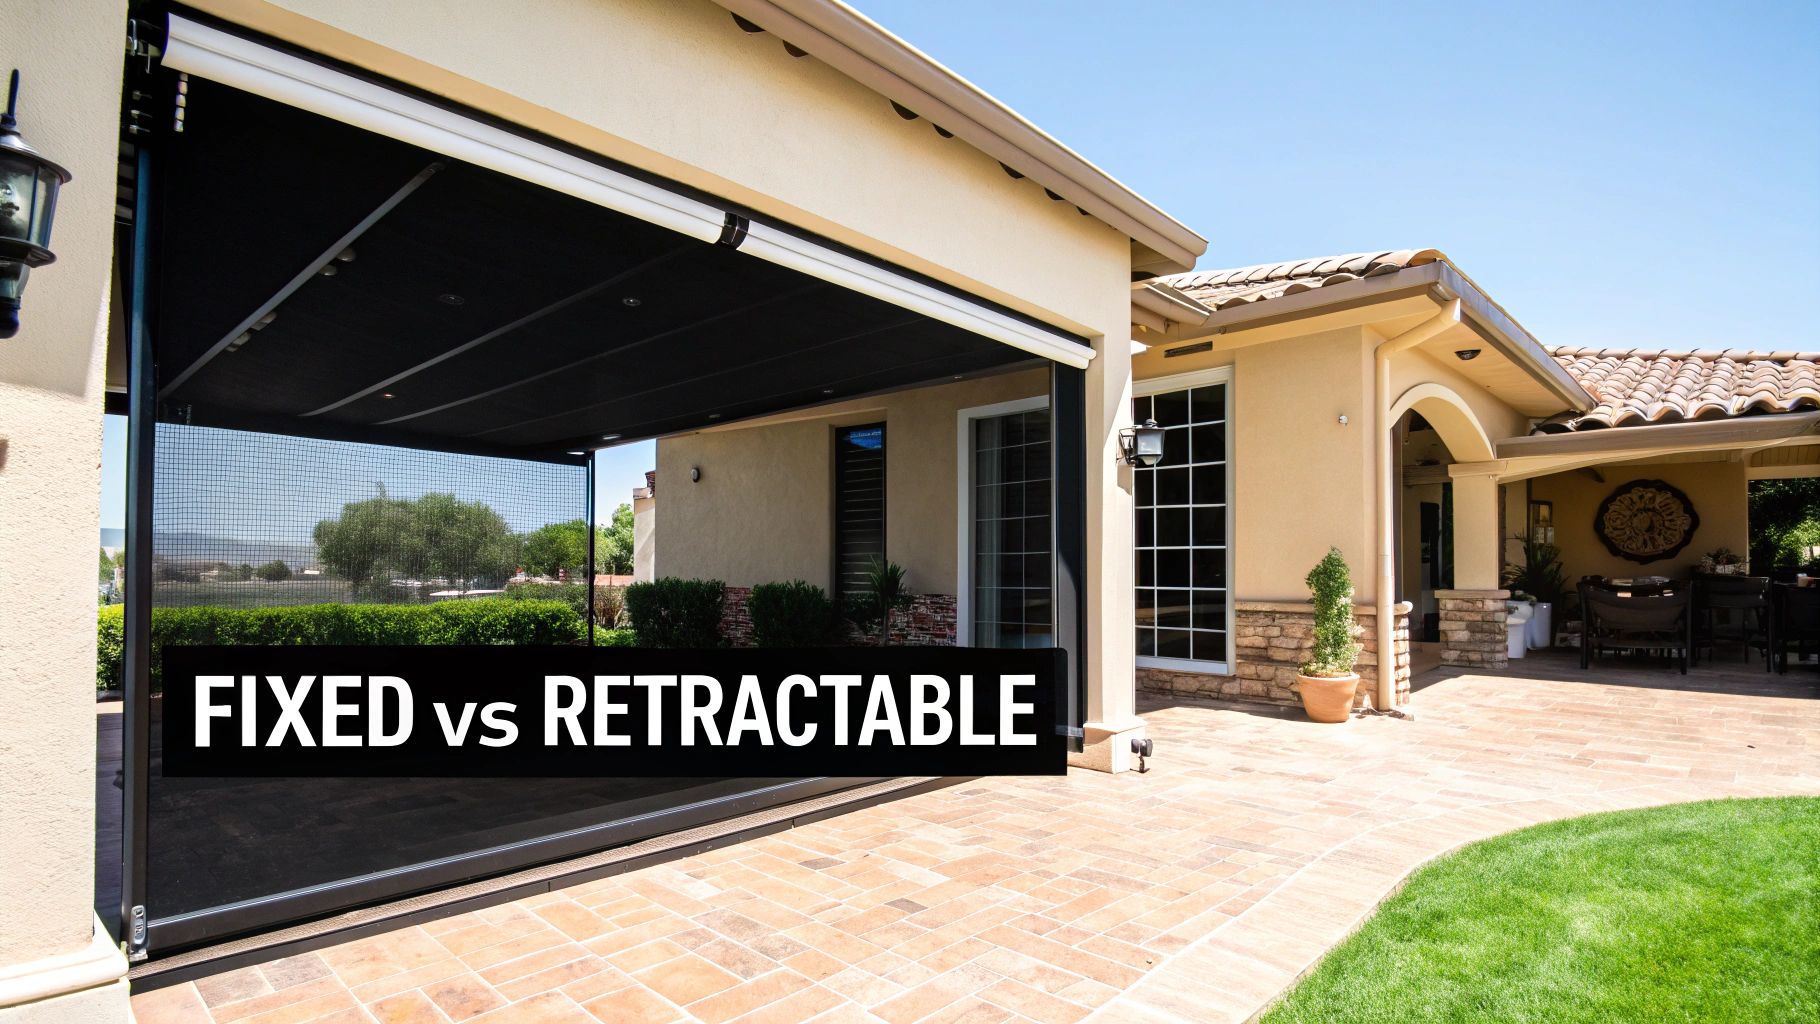
After you've picked the perfect screen material, the next big decision is the system that holds it all together. This framework is what you'll live with every day, and it really comes down to one question: do you want a permanent, screened-in room or the flexibility to open your patio up completely?
Your answer will point you toward either a fixed or a retractable system. Both are fantastic options, but they're built for very different lifestyles.
The Case for Fixed Patio Screens
Fixed screens are the classic, tried-and-true way to enclose a patio. They’re built into a sturdy, permanent frame—usually aluminum or wood—which essentially turns your patio into a dedicated three-season room. This is the way to go if your main goal is to maximize your bug-free living area all the time.
Think of it as a permanent addition. The protection is always there, which is perfect if you want to furnish your patio with comfy couches and decor without constantly worrying about the weather or pests.
The Freedom of Retractable Screens
For ultimate versatility, nothing beats retractable screens. They give you the power to have an open-air deck one moment and a fully screened-in porch the next.
These screens for patio are housed in a discreet cassette and roll down only when you need them, often with just the push of a button. They disappear when you don't. This is an ideal setup for anyone who loves hosting backyard barbecues but also wants a quiet, protected space to unwind in the evening.
This kind of flexibility is becoming incredibly popular. In fact, the global market for retractable screen doors—a close cousin to patio systems—was valued at USD 8.54 billion back in 2021 and is only expected to grow. You can dive into the numbers in this detailed report if you're curious. This trend shows a clear demand for adaptable outdoor spaces that don't lock you into one configuration.
Modern retractable systems are also highly customizable and can integrate smoothly into smart homes with various motorization and control options. Getting the installation just right is crucial for these systems, and our guide on retractable screen door installation walks you through what to expect from a professional job.
Your choice of system really defines your patio’s personality. A fixed screen creates a consistent, cozy sunroom vibe, while a retractable screen offers a dynamic space that adapts to your mood and the occasion.
Ultimately, choosing between fixed and retractable is about matching the system to your life. Think about how you entertain, how you relax, and how you truly see yourself using that outdoor space from one day to the next.
How to Install Patio Screens Like a Pro
Thinking about installing your own patio screens? It’s one of those DIY projects that’s genuinely satisfying. You get to save a good chunk of change on labor costs, and there's nothing like kicking back on a patio you screened yourself. The good news is, you don’t need to be a seasoned contractor to get a fantastic, professional-looking result. It’s all about being methodical and paying close attention to the small stuff.
Before you get anywhere near the screen mesh, the absolute most important thing is getting your measurements right. I've seen it time and again—one wrong measurement is the fastest way to frustration, wasted material, and a screen that just doesn't fit properly.
Preparing for a Flawless Installation
First things first, let's get your tools in order. Scrambling around for a tool mid-project is a momentum-killer. You don't need a fancy workshop, just the right gear for the job.
Your Go-To Tool Checklist:
- A solid tape measure: Don’t skimp here; accuracy is key.
- Utility knife with fresh blades: A dull blade will snag and tear your new screen. Start sharp.
- Spline roller: This is the one tool you absolutely can't skip. It has two wheels (one concave, one convex) and is designed specifically to push the spline perfectly into the frame's channel.
- Screen spline: Make sure you've got the right diameter for your frame. It's the rubbery cord that holds everything in place.
- Safety glasses: An absolute must. You don't want bits of spline or metal flying into your eyes.
With your tools laid out, it's time to measure. And I mean meticulously measure. For every opening, measure the width at the top, middle, and bottom. Then do the same for the height. Here’s the pro tip: always use the smallest measurement for both the width and height. Homes settle, and frames are rarely perfectly square, so this ensures your screen will fit without a fight.
Achieving That Professional Taut Finish
What separates a DIY job from a professional one? It’s that perfectly taut, drum-tight finish. No sags, no wrinkles. This is where your spline roller earns its keep.
Lay your frame down on a flat, clean surface. Cut your screen mesh so it's at least two inches larger than the frame on all four sides. This extra bit is your handle—it gives you something to grip while you create tension.
Start on one of the shorter sides. Using the concave wheel of the spline roller, gently press the spline into its channel right over the mesh. At this stage, you’re just tacking it in. Don't worry about tension yet.
Now, move directly to the opposite side. This is the crucial step. As you roll the spline into its groove, pull the screen mesh gently but firmly across the frame. You're aiming for just enough tension to eliminate slack. The goal is a smooth surface, not a bowed frame.
I can't stress this enough: don't pull the screen too tight! It’s the number one mistake I see. Over-tightening can bend the frame into a "banana" shape, which looks terrible and won't sit flush. It's all about consistent, even pressure.
Once the short sides are done, do the exact same thing for the two long sides. You’ll feel the screen getting tighter with each pass. If you spot a wrinkle forming, stop. Pull that section of spline out and redo it. A little patience here goes a long way.
If you’re a visual learner and want to see this process in action, you can find some great video walkthroughs and guides on how to install screens.
Keeping Your Patio Screens in Top Condition

Now that your beautiful new patio screens are up, a little routine care is all it takes to keep them looking great. Simple, consistent maintenance not only preserves that crystal-clear view but also protects your investment for the long haul. A few minutes of upkeep can stop a small issue from turning into a big, expensive headache down the road.
When it comes to cleaning, think gentle. For most screen types, like fiberglass and aluminum, all you'll need is a bucket of warm, soapy water and a soft-bristle brush. Just give the screen a light scrub to loosen any built-up dust, pollen, and general grime.
Finish up by rinsing everything off with a garden hose on a low-pressure setting. It’s tempting to grab a power washer, but don't do it! A high-pressure blast can easily stretch, tear, or even pop the screen right out of its frame. If you want that deep-cleaned look for the surrounding area, consider professional pressure washing services for the hardscapes like concrete or pavers instead.
Performing Seasonal Checkups
Make it a habit to give your screens for patio enclosures a quick walk-around inspection a couple of times a year—once in the spring and again before winter. You're looking for any small rips, holes, or signs of wear. Pay close attention to the edges near the frame, as this is where the material is under the most tension.
Catching a tiny hole early is a five-minute fix. But if you let it go, that small snag can quickly grow into a major tear that means you have to rescreen the entire panel.
Pro Tip: The best time to inspect your screens is on a bright, sunny day. The sunlight shining through the mesh makes even the tiniest imperfections incredibly easy to spot.
For those small issues, a simple screen repair kit is your best friend. They're cheap, easy to find, and usually come with adhesive patches or a small piece of matching screen material. A patch takes just a few seconds to apply and does a great job of stopping a small hole in its tracks.
Special Care for Retractable Systems
If you've got a retractable screen system, it needs a little extra attention, particularly if you live somewhere with harsh winters. Before the cold weather really sets in, make sure the screen is fully rolled up into its protective housing. This keeps the material safe from heavy winds, ice, and snow that can cause some serious damage.
It's also a smart move to clean out the tracks before you retract the screen for the season. Use a vacuum with a brush attachment or just a simple hand brush to clear out any leaves, dirt, or debris. This prevents the mechanism from jamming up and ensures the screen rolls smoothly when you're ready to use it again in the spring.
Answering Your Top Patio Screen Questions
Even with all the material and system options laid out, you're probably still mulling over a few practical details. That's completely normal. Let's tackle some of the most common questions I hear from homeowners when they're planning a patio screen project.
How Much Does It Cost to Screen In a Patio?
This is always the first question, and the honest-to-goodness answer is: it really depends. The final price tag for your screens for patio project is a mix of your patio's size, the screen material you pick, and whether you're a DIY warrior or calling in a pro.
For a small, straightforward patio, you could be looking at as little as $100 to $300 for materials if you're rescreening it yourself with standard fiberglass mesh. It's a very manageable weekend project.
But if you're hiring someone to screen a typical 10×20 foot space, the numbers jump. A professional installation with basic materials will likely land somewhere between $1,500 and $2,500. Start adding premium upgrades like motorized retractable screens or heavy-duty solar mesh, and that cost can easily climb to $5,000 or more.
What Is the Most Durable Screen Material?
When you’re looking for something that will truly last, two materials rise to the top: PVC-coated polyester (you'll often see this sold as pet-resistant screen) and classic aluminum.
Aluminum is fantastic because it's rigid and holds its shape incredibly well, so you won't see it sagging after a few humid summers. Pet-resistant mesh, on the other hand, is a different kind of tough. It's engineered to be about seven times stronger than standard fiberglass, making it the hands-down winner if you have dogs that scratch, cats that climb, or kids who might lean against the screens.
I always tell people to think about their biggest headache. If sagging drives you crazy, go with aluminum. If you're constantly patching holes from pets or kids, pet screen is your best investment.
Can I Add Screens to My Existing Porch or Deck?
Absolutely. In almost every case, you can add screens to an existing structure like a covered porch, pergola, or deck. The most common approach is to build simple wood or aluminum frames between the posts you already have and then install the screen into those frames.
The only real requirement is making sure your current structure is in good shape and structurally sound before you start adding to it. If you want a more polished, built-in look, you can explore custom-fit screen systems designed to blend in with your home's style. This kind of flexibility is a big reason why privacy screens are becoming so popular. In fact, the market for privacy screens is projected to grow from USD 250 million in 2025 to USD 443.5 million by 2035, with panels being a top choice for how easily they can be integrated.
Will Patio Screens Reduce the Breeze?
Yes, any screen will reduce airflow a little bit. But for most people, the trade-off for an outdoor space free of mosquitos and flies is well worth it. Your standard fiberglass and aluminum screens are designed for great ventilation, so you'll still feel a nice breeze.
Where you'll notice a more significant difference is with tighter-weave screens. Think "no-see-um" mesh designed to stop the tiniest gnats, or dense solar screens meant to block the sun's heat. It all comes down to what you're trying to achieve. Are you after maximum airflow, or is top-notch bug protection and shade your main goal?
Ready to create that perfect bug-free oasis? Whether you have a small tear that needs fixing or want to screen your whole patio, Sparkle Tech Screen Service offers quick, reliable solutions with same-week service.
Get Your Quick Quote Today!


