


Figuring out how to clean your window screens is pretty straightforward. The basic process is to pop them out, give them a gentle scrub with some soapy water, rinse them off, and let them dry completely before putting them back. But before you start sudsing up, let’s talk about why this simple chore is more important than you might think.
Why Bother Cleaning Your Window Screens?
Dirty screens are more than just an eyesore. Think of them as a filter that’s constantly catching dust, pollen, and all sorts of grime that would otherwise just blow on by. When that gunk builds up, it doesn’t just muck up your view—it can seriously impact the air quality inside your home and choke off that fresh breeze you're trying to let in.
Ever opened a window on a beautiful day, hoping for a nice cross-breeze, but the air still feels heavy and stale? A clogged screen is often the reason why. That packed-in layer of dirt blocks the very airflow you want. Plus, all that grime traps moisture right against the mesh and frame, which can lead to rust and corrosion over time.
More Than Just a Pretty View
Keeping your screens clean pays off in ways that go far beyond just aesthetics and a bit of fresh air. It’s a small bit of maintenance that delivers some real benefits.
- Better Air Inside: When you wash away all those allergens and dust particles, you stop them from getting sucked into your house every time a breeze kicks up.
- A Sharper Look: Let's be honest, clean and clear screens just make a home look better and more cared for from the street. It’s a small detail that makes a big difference to your curb appeal.
- Screens That Last Longer: Getting rid of corrosive gunk and dirt buildup helps prevent the screen material from degrading, which means you won't have to replace them as often.
It's clear that homeowners are paying more attention to home hygiene and appearance these days. In fact, the professional window cleaning market is projected to grow to USD 6.57 billion by 2033. That really shows how much value people place on a clean exterior.
Taking care of your screens is one of the most practical tips to improve indoor air quality at home. Of course, if you're looking for that perfectly clear, streak-free look, a professional https://sparkletechscreenservice.com/window-cleaning/ can tackle both the glass and the screens for a flawless finish.
Assembling Your Screen Cleaning Toolkit
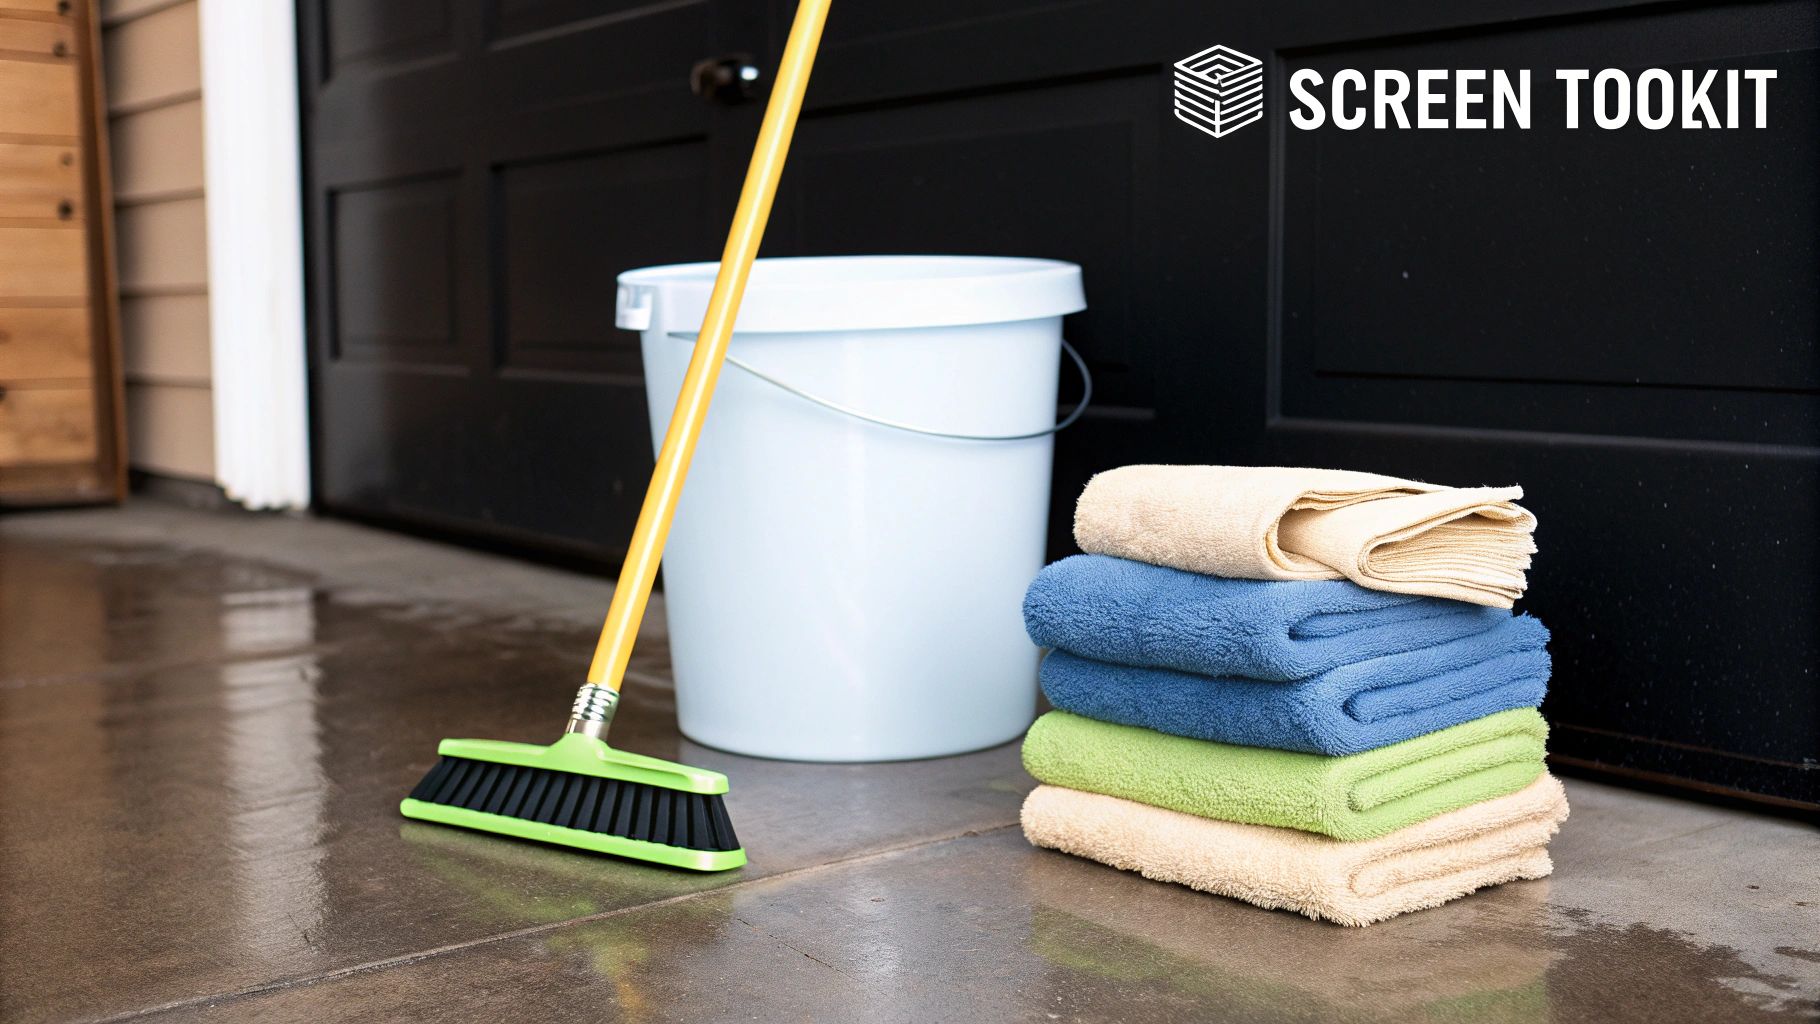
Before you even think about pulling a screen out of its frame, let's talk tools. Getting everything you need in one spot turns screen cleaning from a frustrating chore into a quick, satisfying task. Trust me, you don't need any fancy gadgets; most of this stuff is probably already in your garage or under the kitchen sink.
Think of this as your prep station. A little organization now means you won't be running back inside with a wet, dripping screen, looking for a towel you forgot.
Your Core Cleaning Supplies
For a standard screen cleaning job, you only need a few basics. These are the tried-and-true tools that will get the job done right without damaging your screens.
- Soft-Bristle Brush: This is non-negotiable. A brush with soft bristles is key to scrubbing away grime without snagging or ripping the delicate mesh. An old dish brush or a soft car-detailing brush is perfect for this.
- Bucket of Warm Water: Just a simple, clean bucket filled with warm (not hot) water.
- Mild Dish Soap: A few squirts of a gentle dish soap like Dawn is usually all you need to cut through everyday dirt and grime.
- Microfiber Towels: Grab at least two or three. Microfiber is fantastic because it’s super absorbent and won't leave lint all over your clean screens.
Expert Tip: Steer clear of harsh chemical cleaners or stiff-bristled brushes. They can easily scratch your window frames or, even worse, strip the protective coating off the screen mesh, which can lead to it breaking down much faster.
Deciding on the right cleaning solution is crucial, as some screens are more delicate than others. Here’s a quick breakdown of common DIY options.
Choosing Your Cleaning Solution
| Cleaning Agent | Best For | Mixing Ratio | Cautions |
|---|---|---|---|
| Mild Dish Soap | General grime on fiberglass, aluminum, and most standard screens. | 1/4 cup soap to 1 gallon of warm water. | Use a gentle, non-degreaser soap to avoid residue. |
| White Vinegar & Water | Hard water stains, mineral deposits, and mold/mildew spots. | 50/50 mix of white vinegar and water. | The smell can be strong. Rinse thoroughly. Not ideal for all screen frame materials. |
| Hypochlorous Acid | All screen types, especially for disinfecting and removing odors. | Ready-to-use spray. | A great alternative for a deeper clean. Check out these gentle and effective hypochlorous acid cleaning sprays. |
Ultimately, the classic soap and water method works for about 90% of situations. Start simple and only bring out the vinegar solution if you're dealing with stubborn mineral buildup.
Optional Tools for an Easier Job
While the basics will get you far, a couple of extra items can make the process even smoother, especially if your screens are caked with a season's worth of dust and pollen.
A wet/dry vacuum with a soft brush attachment is my secret weapon. A quick vacuum of the screen before it gets wet pulls off all the loose debris—cobwebs, dust, pollen—and prevents you from just smearing it all into a muddy mess. It’s a simple step that saves a ton of scrubbing.
The material of your screen also plays a role in how you should care for it long-term. Knowing the best window screen material for your climate and home can help you choose cleaning methods that extend its life.
The Quick Refresh for Lightly Dusted Screens
Sometimes, a full-on deep clean is just overkill. If your screens are only dealing with a light layer of dust, pollen, or the occasional cobweb, you can get them looking great in minutes without ever popping them out of the window frame. This is my go-to method for second-story windows or anytime I'm pressed for time.
The trick is to handle the loose stuff first. Grab your vacuum cleaner with the soft brush attachment and give the inside of the screen a gentle pass. This pulls off all the surface-level gunk before you add any water, which is key to avoiding a muddy mess.
The Two-Cloth Technique
Once you've vacuumed, you'll need two clean microfiber cloths. Get one damp with just plain water—make sure to wring it out well so it’s not sopping wet.
Now, here's the clever part. Press the damp cloth against the inside of the screen and place the dry cloth on the outside, directly opposite it. It’s like you're making a little screen sandwich. Wipe down the entire screen by moving both cloths together with light pressure, which traps and lifts any remaining grime from the mesh. I usually work from top to bottom and just rinse the damp cloth if it starts looking dirty.
This simple, fast approach is incredibly effective for routine upkeep. In just 5-10 minutes per window, you'll see a huge difference in your view and even your indoor air quality, all without the hassle of a big project.
The visual below breaks down this speedy process.
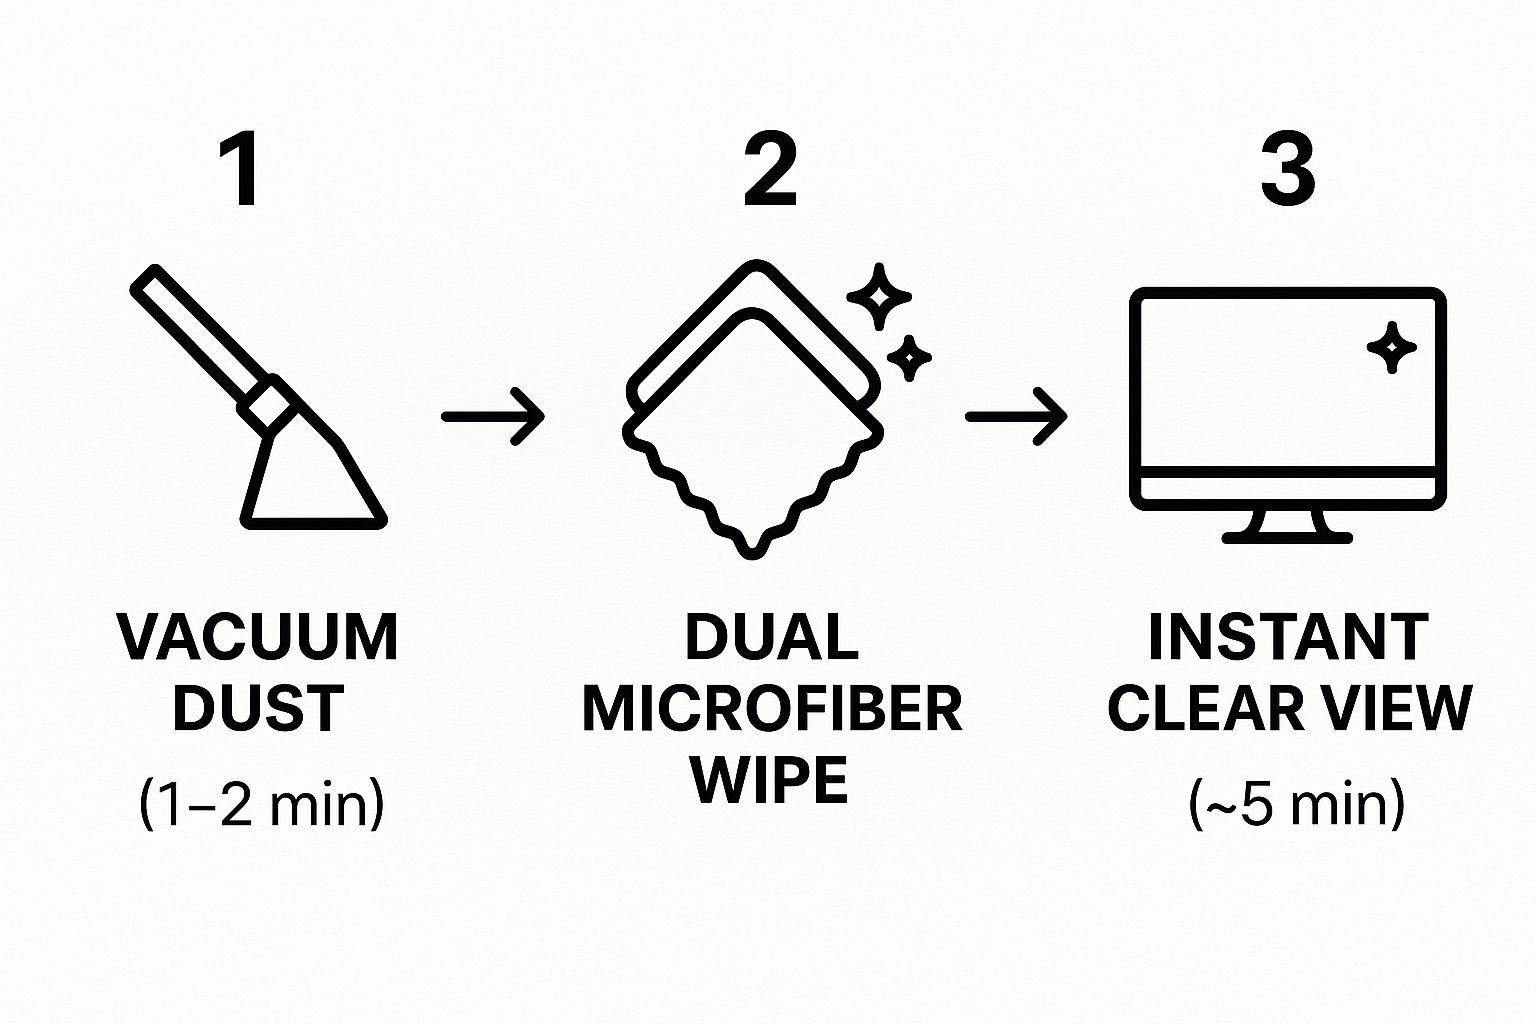
As you can see, the whole refresh is quick and painless, making it easy to tack onto your regular cleaning schedule. It’s the perfect way to keep things looking sharp between those bigger annual cleanings.
The Deep Clean Method for Stubborn Grime
Sometimes, a quick wipe-down just isn’t enough. If your screens have survived a long winter or are caked in a thick layer of spring pollen, it's time for a deep clean. This method is a bit more hands-on, but the sparkling results are well worth the effort.
First things first, you need to get the screens out of the window frames. Most newer screens have little pull tabs or springs that make this easy. Just be gentle and try not to bend the frame—I've seen plenty of people do that, and it makes putting them back in a real headache.
Setting Up Your Cleaning Station
Find a good spot outside, like a flat patch of lawn or your driveway. I like to lay down an old blanket or a tarp to give the screens a soft, clean surface to rest on. Propping them up against a wall or fence also works great and makes rinsing a lot cleaner.
Now for the cleaning mix. Forget fancy chemicals. Just grab a bucket and fill it with warm water and a few good squirts of a mild dish soap. You want a simple, sudsy solution that's tough on grime but won't harm the screen material. People are definitely moving toward greener, gentler cleaners these days, which is great for avoiding damage. If you're curious about this trend, you can find some interesting data in the screen cleaner market on futuremarketinsights.com.
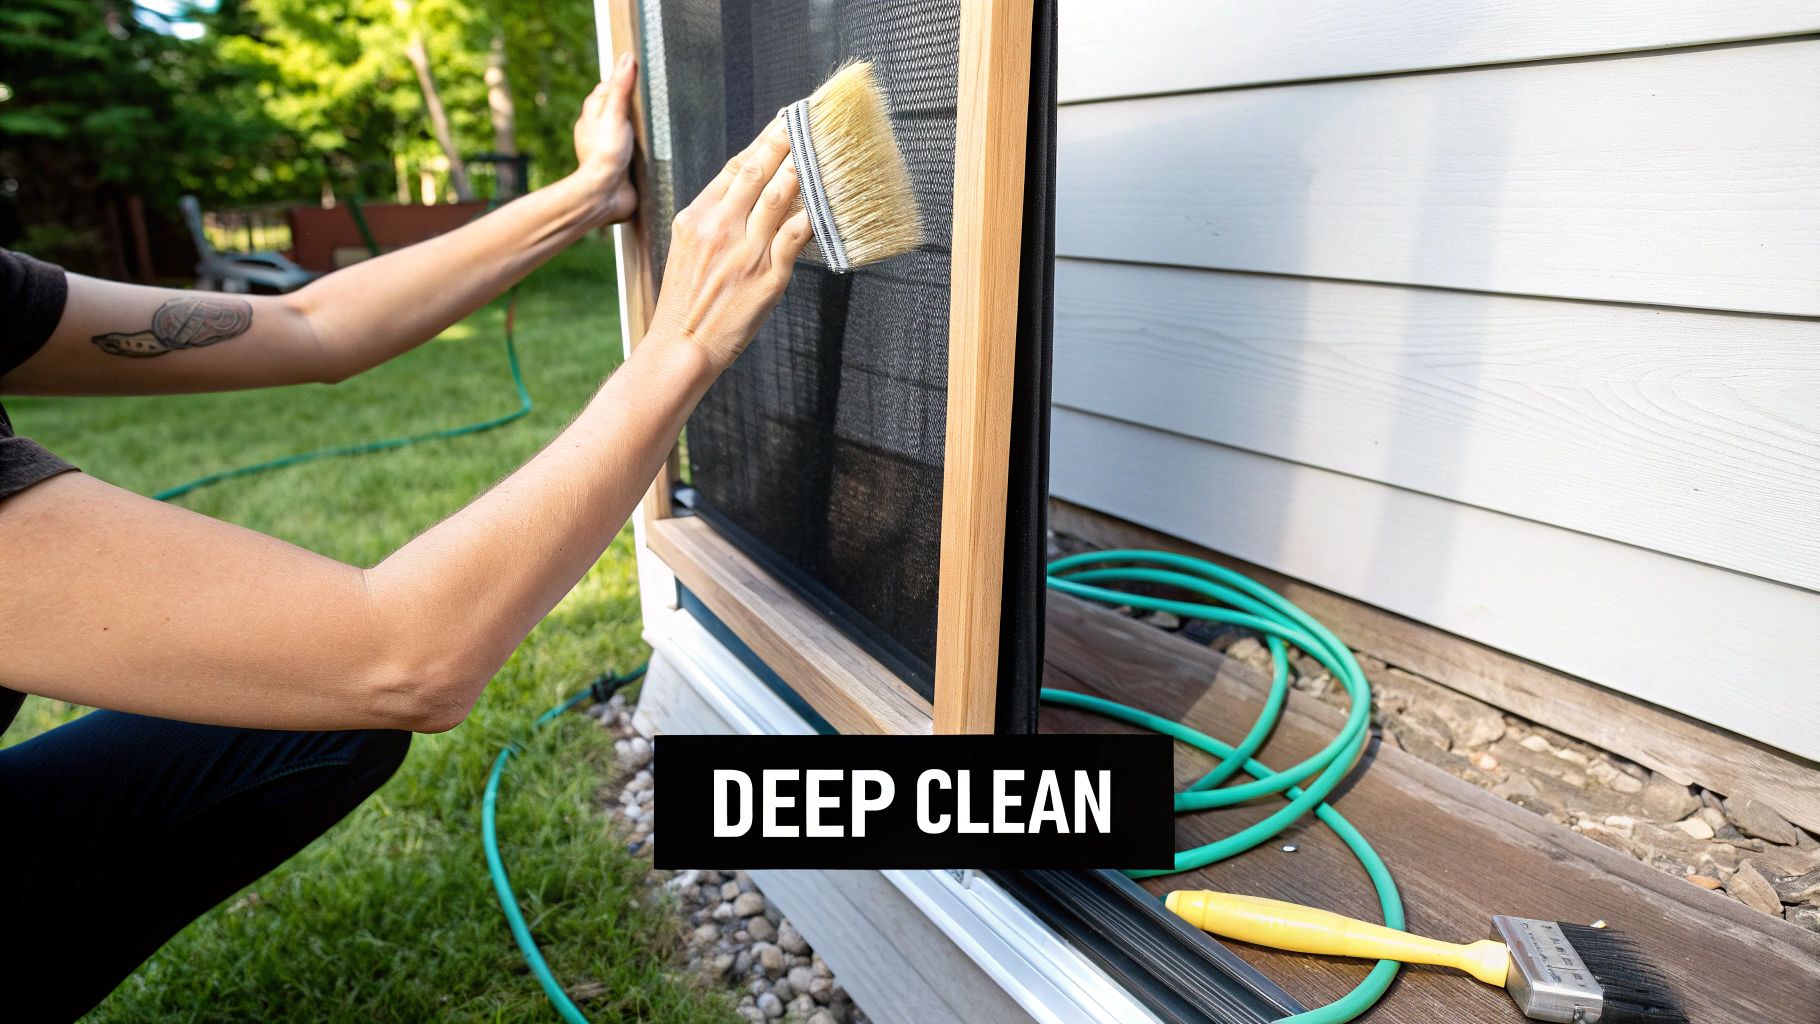
The Scrubbing and Rinsing Process
Dip a soft-bristle brush into your soapy water and start scrubbing one side of the screen. I always work from top to bottom using gentle, circular motions. The goal is to loosen the dirt from the mesh without pushing too hard, as you can easily stretch or even tear the screen.
Pro Tip: Don't forget the corners! Dust, pollen, and even tiny cobwebs love to hide out in the corners of the frame. A little extra attention there goes a long way.
After you've done one side, carefully flip the screen and give the other side the same treatment.
Once you’re done scrubbing, it's time to rinse. Use a garden hose with a gentle spray nozzle—definitely avoid any high-pressure jet settings. Make sure you thoroughly wash away all the soap from both sides. A good rinse is crucial, otherwise you'll be left with a sticky film that just becomes a magnet for more dirt.
This deep clean is hands-down the best way how to clean window screens that have been seriously neglected. You’ll not only get a crystal-clear view but also help your screens last longer by getting rid of all that built-up gunk.
Proper Drying and Reinstallation Techniques
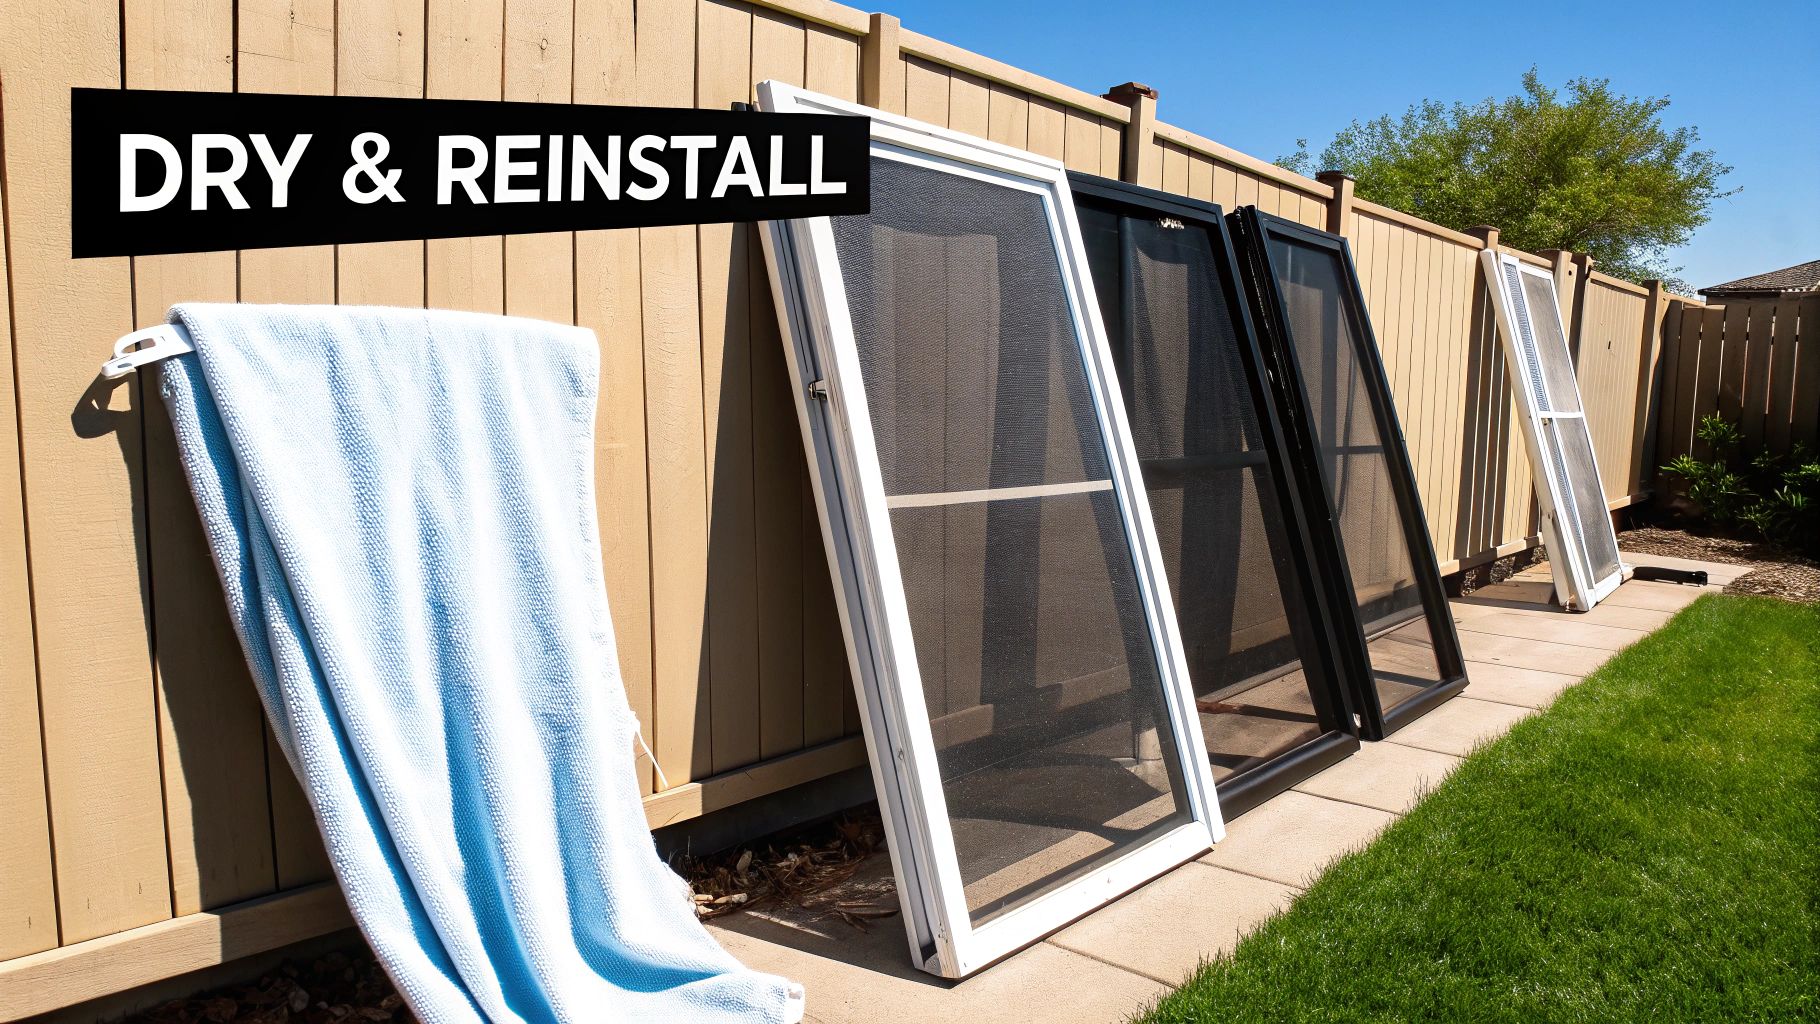
You've done the hard part and washed away all that grime. Now, you're on the home stretch, but don't rush this final step. Getting the drying and reinstallation right is just as important as the cleaning itself. If you put them back too soon, you’re just asking for mildew, water spots on your clean glass, or even a warped screen frame.
The best way to dry them is also the easiest: let mother nature handle it. Find a sunny spot and lean the screens upright against a wall, fence, or even patio furniture. Standing them up lets air circulate on both sides, which is key for a quick, even dry. Just try to avoid laying them flat on the lawn, as that can trap moisture underneath and slow things down.
Speeding Up the Drying Process
Of course, sometimes you're in a hurry or the weather just isn't cooperating. In that case, you can give them a helping hand. Grab a clean, lint-free microfiber towel and gently pat the screen mesh and frame. You're just blotting up the extra water, not scrubbing—you don't want to accidentally stretch out the mesh.
A word of caution from experience: never reinstall screens that are still even slightly damp. It's a classic mistake that traps moisture between the screen and the window frame. Before you know it, you could be dealing with mold, mildew, and potential water damage to your sill. Patience is key here.
Securely Reinstalling Your Screens
Once your screens are 100% dry to the touch, it's time to pop them back in. Hopefully, you labeled them when you took them out, which makes this part a snap. For most modern window screens, you’ll want to angle the top edge into the window channel first, then gently push the bottom edge in until you hear the clips or springs click into place.
Give it a quick once-over to make sure the screen is sitting snug and flush against the frame with no gaps. If you happened to notice a tear or hole while you were handling the screen, now is the perfect time to address it. Learning how to replace window screen mesh is a simple DIY fix that will save you money and keep the bugs out for good.
Common Window Screen Cleaning Questions
https://www.youtube.com/embed/3-rG4JUw62o
Even with the best instructions, you’ll probably have a few questions pop up when you're in the middle of cleaning your screens. It happens with every home project. Getting the details right can save you a lot of frustration and help you avoid rookie mistakes, so let's tackle the questions I hear all the time.
How Often Should I Clean My Window Screens?
For most of us, a good, deep clean once or twice a year is plenty. I usually tell people to plan on doing it in the spring to wash away winter grime and again in the fall to clear out summer dust and pollen.
Now, if you live somewhere particularly dusty, have construction going on nearby, or suffer through a heavy pollen season, you might need to adjust. In those cases, a quick in-place wipe-down every couple of months can make a huge difference in your air quality and keep your view from getting hazy.
Can I Use a Pressure Washer?
I know it’s tempting. You see all that caked-on dirt and think a pressure washer will just blast it clean in seconds. Please, resist the urge.
The intense spray from a pressure washer is way too powerful for delicate screen mesh. It can easily stretch, tear, or even blow the screen right out of its frame, especially with older fiberglass screens. A regular garden hose with a gentle spray nozzle has more than enough power to get the job done safely.
A common mistake is using too much force. Remember, the goal is to lift dirt away, not blast it through. Gentle scrubbing and a soft rinse are far more effective and will protect your investment.
What About Stubborn Spots Like Sap or Droppings?
For those really annoying, sticky messes like tree sap or bird droppings, you'll want to spot-treat them first. Don't just start scrubbing—you'll smear it everywhere.
Here’s what I do:
- Mix a slightly stronger solution of warm water with a few drops of dish soap.
- Dab it right onto the spot and let it soak for a good 10-15 minutes.
- This gives the soap time to break down the gunk, so you can then gently scrub it away with your soft brush before you wash the rest of the screen.
This little pre-treatment trick makes the final wash much quicker and a whole lot less messy.
If you've noticed your screens are looking brittle, have a few tears, or are just showing their age, it might be time for more than a cleaning. Sparkle Tech Screen Service offers expert repair and replacement for everything from bug screens to sun screens, with quick quotes and same-week service. Get your windows looking their best by visiting https://sparkletechscreenservice.com.


