


I've always said that a successful DIY screen door installation is 90% preparation and just 10% execution. Seriously. Before you even think about picking up a power drill, getting the prep work right is what separates a fantastic result from a frustrating afternoon of hardware store runs.
Your Pre-Installation Game Plan
Let's get our strategy straight from the very beginning. A solid plan is what turns a project that feels intimidating into something you can absolutely handle. This isn't just about grabbing a tape measure—it's about really understanding your doorway's unique quirks and what your family actually needs from a screen door.
Gather the Essential Tools
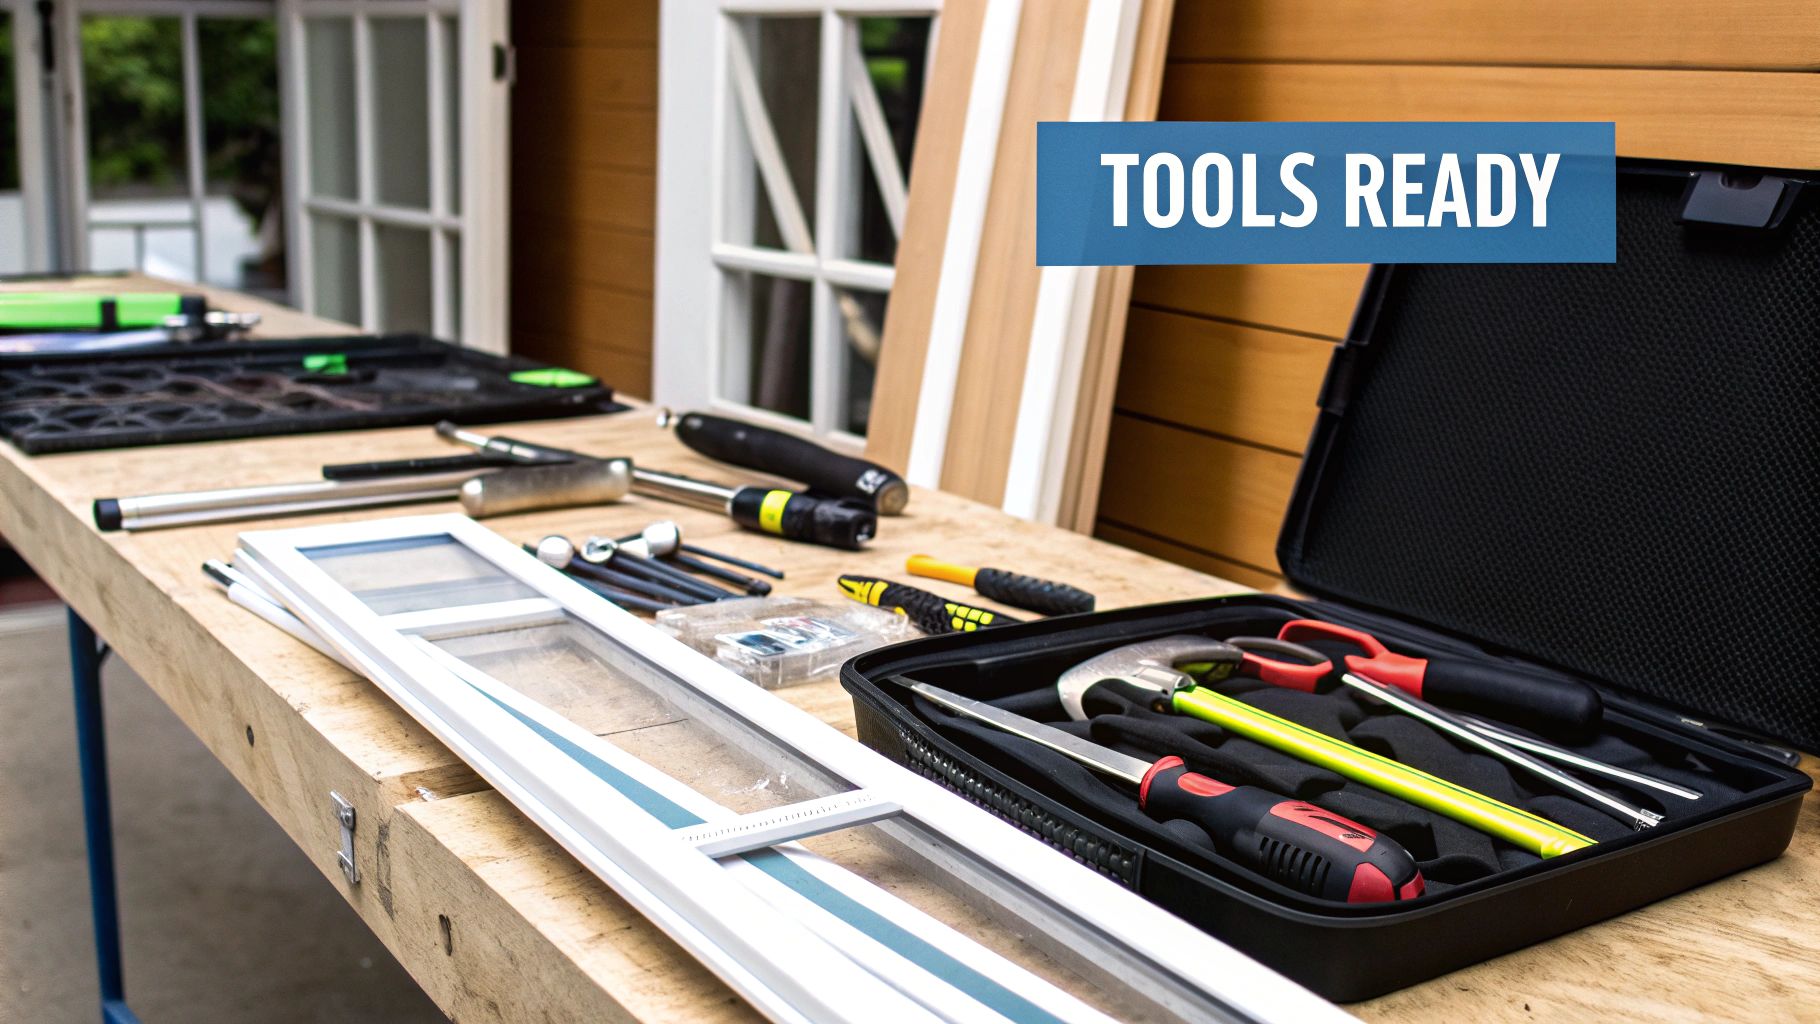
Nothing kills momentum faster than having to stop mid-project to hunt for a tool. While every screen door kit has its own little differences, there are a few core pieces of equipment you'll almost certainly need.
- Power Drill with Assorted Bits: This is a must-have for drilling pilot holes and driving in all the screws.
- High-Quality Tape Measure: Precision is everything here. A flimsy, cheap tape measure is a recipe for bad measurements and an even worse fit.
- A Reliable Level: Your door frame might look perfectly square, but trust me, your eyes can play tricks on you. A level is the only way to guarantee the door will hang straight and close without a fight.
- Wood Shims: These little tapered wedges of wood are a DIYer's secret weapon. They're perfect for squaring up a door jamb that isn't quite plumb.
Having these laid out and ready to go before you even unbox the door will make the whole process feel ten times smoother.
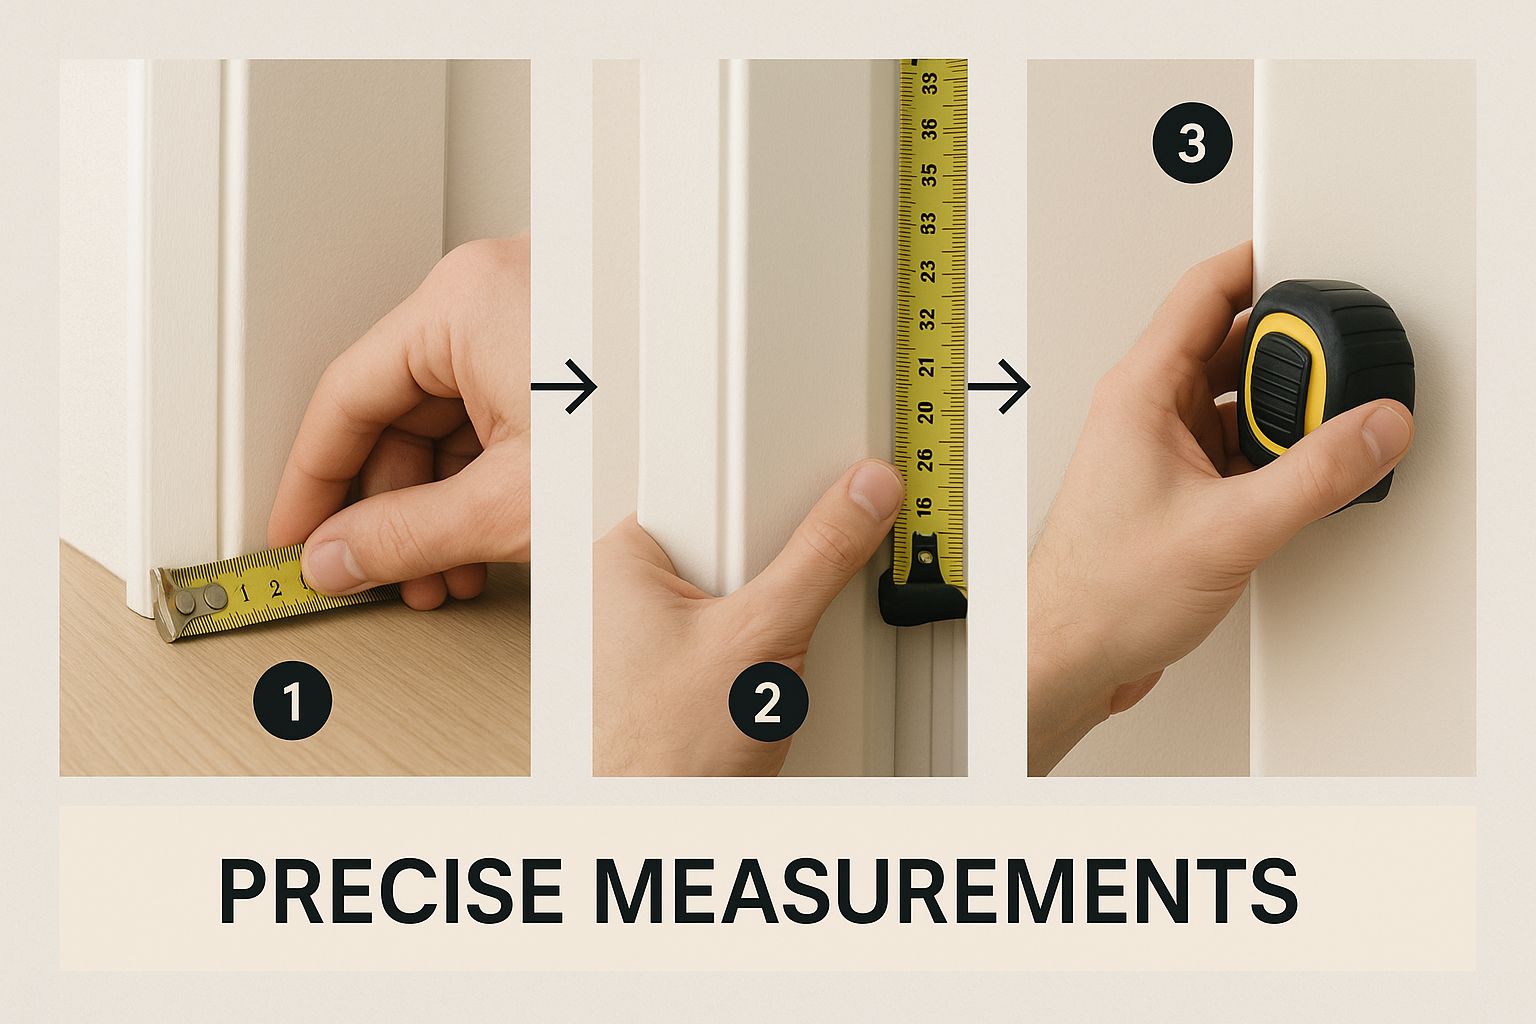
Accurate Measurements Are Everything
If there's one place people go wrong with a DIY screen door installation, it's with the measurements. Measure twice, maybe even three times, just to be certain. For the width, measure across the top, middle, and bottom of the doorway and write down the smallest number. Do the exact same thing for the height, measuring along both the left and right sides. This simple step accounts for any subtle imperfections in the door frame that you can't see.
A door that’s even a quarter-inch too big just won't fit. One that’s too small will leave annoying gaps for bugs to sneak through. Taking five extra minutes to double-check your numbers is the best investment you can make in this entire project.
Match the Door to Your Lifestyle
Now, think beyond just the dimensions. Which screen door is the right fit for your home? A quick comparison can help you narrow down the options.
Which Screen Door Fits Your Home?
A quick comparison to help you choose the right screen door based on your doorway, budget, and lifestyle.
| Door Type | Best For | Installation Complexity | Typical Cost Range |
|---|---|---|---|
| Hinged | High-traffic areas, families with kids/pets. | Low to Moderate | $100 – $400 |
| Retractable | Preserving views, patios, French doors. | Moderate to High | $300 – $1,000+ |
| Sliding | Existing sliding glass door tracks. | Low | $150 – $500 |
| Magnetic | Renters, temporary solutions, low budgets. | Very Low | $20 – $50 |
Choosing the right type—from a classic hinged door to a sleek retractable one—really sets the stage for a successful outcome you'll be happy with for years.
Finally, consider the full scope of your project. If you're also thinking about upgrading your window screens at the same time, it helps to understand the factors that influence the window screen installation cost to get a complete picture of your home improvement budget.
How to Select the Perfect Screen Door
Choosing the right screen door is the first real step in your DIY screen door installation journey. It’s about more than just finding one that fits the opening; the perfect door has to match your daily needs, your home’s style, and how comfortable you are with the installation process. It's really about matching the product to the reality of your life.
Think about it this way: a family with energetic kids and a big dog will have very different needs than a couple who wants to preserve an unobstructed mountain view from their patio. One needs durability and convenience for constant in-and-out traffic. The other needs subtlety and clear sightlines.
Comparing Your Main Screen Door Options
Let's break down the most common types you’ll find. Traditional hinged screen doors are the industry's workhorses. They're sturdy, relatively simple to install, and fantastic for high-traffic entryways. Their robust frames are built to handle daily use (and abuse), making them a solid choice for a main front or back door.
Retractable screen doors, on the other hand, are a more modern and discreet option. The screen itself rolls up into a sleek housing when you’re not using it, essentially vanishing from sight. This makes them perfect for French doors or any entryway where you don’t want a permanent screen getting in the way of a beautiful door or a great view.
And of course, there are sliding screen doors. These are the go-to for patio sliders, designed to operate on the existing track system of your glass door. They’re practical and integrate seamlessly with what’s already there.
The Rise of Magnetic and Specialty Screens
A huge part of the market now belongs to magnetic screen doors. These have been a game-changer for renters or anyone who doesn't want to drill into their door frame. They are essentially mesh curtains that hang in the doorway and snap shut automatically with magnets, offering a completely tool-free installation. The magnetic screen door market is already valued at around USD 500 million and is expected to more than double, which shows just how popular they’ve become with DIYers.
The screen material itself is another critical choice.
- Fiberglass Mesh: This is the industry standard. It gives you a great balance of visibility, airflow, and affordability.
- Pet-Resistant Mesh: If you have cats or dogs, this is a must. It's a vinyl-coated polyester that's 7 times stronger than standard fiberglass and can actually resist tears from claws.
- Solar Screen Mesh: This is a smart choice for sunny climates. It blocks a significant amount of the sun's UV rays, which helps keep your home cooler and protects your furniture from fading over time.
Your lifestyle dictates the best material. I've seen pet owners choose standard fiberglass and have to replace it within a single season. In contrast, someone in a hot climate will notice real energy savings from a solar screen. You can learn even more by exploring our guide on the best window screen material for your specific needs.
Mounting and Assembling Your Screen Door
Alright, you've got your measurements double-checked and your tools laid out. This is where the real work begins—the part where a little patience and precision pay off big time. We're going to walk through putting up a standard hinged screen door, focusing on the techniques that I’ve seen make the difference between a frustrating mess and a door that swings smoothly for years.
The whole game here is about careful alignment and making sure every piece sits exactly where it should.
As you can see, getting those frame measurements just right isn't just a friendly suggestion—it’s the foundation for a project that won't give you a headache later.
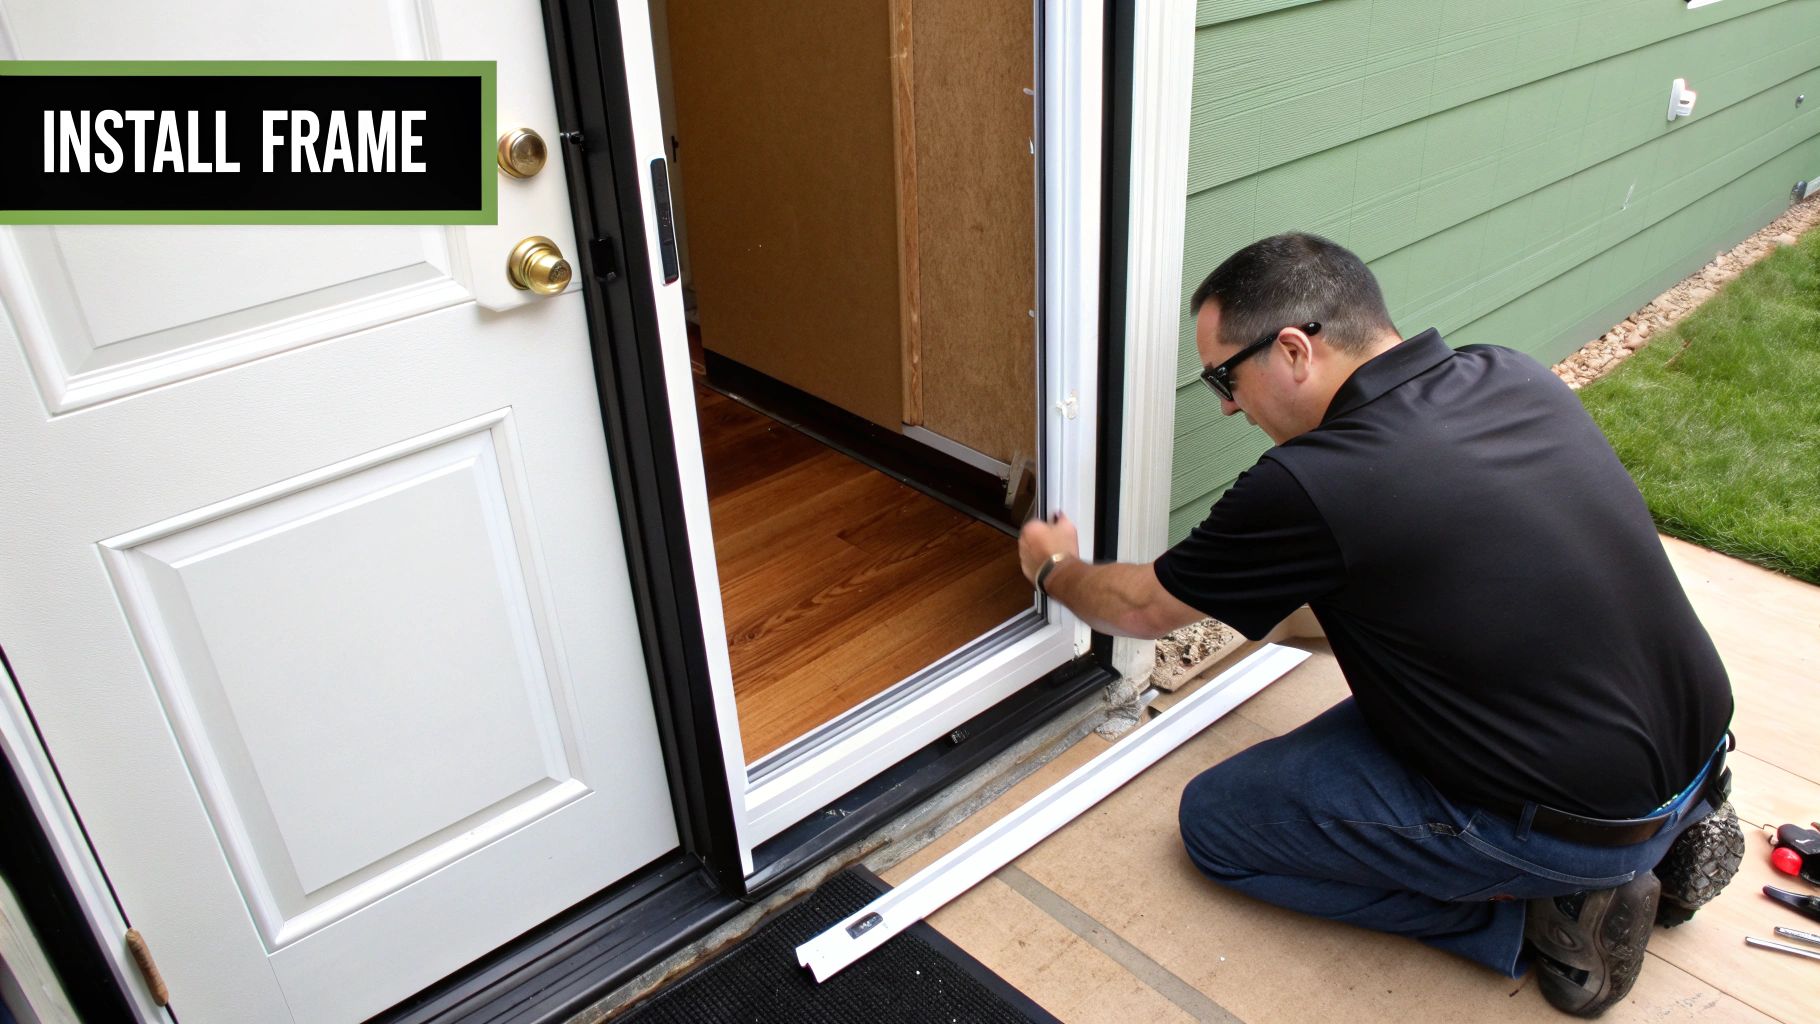
Starting with the Hinge Side
First things first, you'll want to install the hinge-side frame piece, which is often called the z-bar. This is the vertical strip that runs along the door jamb where your new door's hinges will sit. I can't stress this enough: getting this piece perfectly straight is the most critical step of the entire installation.
Grab your level and hold the z-bar against the door jamb. Nudge it back and forth until that bubble is dead center. If it’s not perfectly plumb (that's the pro term for vertically straight), your door will either swing open on its own or stubbornly refuse to close all the way. It's that important.
Once it's perfectly plumb, lightly mark the screw hole locations with a pencil. Here's a tip: always drill small pilot holes first. This simple action stops the wood of your door frame from splitting when you drive the screws in, giving you a much stronger and cleaner finish.
The "Dry Fit" Test Run
Now for a piece of advice that has saved me countless headaches: do a quick "dry fit" before you attach anything else. With the hinge-side z-bar screwed securely in place, carefully hang the screen door on it. This is your first real look at how the door will actually sit in the frame.
While the door is hanging, you can hold the top and latch-side frame pieces in position to check their fit. This lets you mark their final locations with confidence, ensuring you have a consistent, even gap (usually about 1/8 inch) around the entire door. This little preview is so much better than finding out something is off after you’ve already drilled a bunch of holes.
Don't skip the dry fit. It’s the single best way to spot potential problems, like an out-of-square frame, before they become permanent. This step turns guesswork into a calculated, precise installation.
Dealing with Out-of-Square Frames
It’s incredibly common, especially in older houses, for door frames to be a little crooked. If you notice an uneven gap during your dry fit, don't panic. This is exactly why you have those wood shims handy.
If you see a wider gap at the top or bottom on the latch side, you can slip thin shims behind the z-bar on the hinge side. This subtly adjusts the door's angle.
- Gap too wide at the top? A thin shim behind the upper hinge area will usually fix it.
- Gap too wide at the bottom? You guessed it—a shim behind the lower hinge area should do the trick.
Make your adjustments, hang the door again, and check the fit. It might take a few tries to get it just right, but this fine-tuning is what separates a DIY job from a professional one. For a closer look at these kinds of techniques, our guide on how to install screens has some great visual examples.
Once you’re happy with the dry fit and any shim adjustments, you can mark the holes for the rest of the frame pieces. Drill your pilot holes, then drive in the screws to permanently secure the top and latch-side pieces. Take your time here, making sure every screw is snug but not so tight that you risk warping the frame.
Installing Hardware for a Flawless Finish
With your door hanging straight and swinging freely, it's time for the details that make it truly functional. The hardware—the handle, latch, and closer—is what turns a simple panel into a proper door. Taking your time here is what separates a frustrating project from a fantastic DIY screen door installation.
This is where you guarantee smooth, everyday operation. A well-installed handle feels solid in your hand, the latch clicks shut with a satisfying sense of security, and the closer guides the door with a gentle whisper instead of a startling slam. Let's get these critical pieces installed the right way.
Attaching the Handle and Latch
Thankfully, most screen door kits have pre-drilled holes for the handle, which takes a lot of the guesswork out of the equation. Start by sliding the handle pieces through their designated openings. The exterior handle will usually have a long spindle that goes all the way through the door to connect with the interior latch.
Thread in the provided screws to secure the handle set, but don't crank them down just yet. You want them snug, but leave a little wiggle room for tiny adjustments. If you overtighten the handle, it can cause the internal latch mechanism to bind up, making the handle stiff and hard to turn.
Next up is the strike plate. That's the little metal piece that mounts on the door jamb for the latch to catch on. With the door fully closed, make a small, precise mark on the jamb right where the latch bolt touches it. Center the strike plate on your mark and carefully trace its outline with a pencil.
Using a sharp utility knife or a chisel, score the outline you just traced. The goal is to carefully shave away just enough wood for the strike plate to sit perfectly flush with the surface of the jamb. Once it fits, drill your pilot holes and fasten it with the screws. Give the door a test swing—you should hear a confident click as it latches securely.
Taming the Swing with a Pneumatic Closer
The pneumatic closer is the unsung hero of every screen door. It's that little air-powered cylinder that stops the door from slamming shut and makes sure it closes all the way. Getting it installed is a straightforward process involving a couple of brackets.
Your closer kit will come with two main parts:
- A door bracket that mounts directly onto the screen door, usually near the top on the hinge side.
- A jamb bracket that attaches to the door frame, positioned to align perfectly with the door bracket.
With the door held closed, place the brackets where the manufacturer’s diagram shows they should go. After screwing them firmly in place, you can connect the main cylinder to both brackets, typically with a pair of metal pins.
The real secret to a perfectly closing door is the small adjustment screw, usually found on the end of the cylinder. Turning this screw changes the closing speed. Clockwise generally slows it down, while counter-clockwise speeds it up. Play with it until the door shuts at a controlled, steady pace and latches every time without slamming.
Getting this final adjustment right is what will make your installation feel truly professional. It's a popular home improvement for a reason; the screen door installation services market is growing and is now valued at around USD 2 billion. Homeowners everywhere are looking for ways to boost comfort and energy efficiency. You can dive deeper into this trend in the full market research report.
Troubleshooting: What to Do When Things Go Wrong
Alright, so you've got the door up, but it's not quite perfect. Don't sweat it. A door that rubs, a latch that won't catch, or a closer that slams shut are all pretty common hiccups. Before you start questioning your handiwork, know that these are almost always fixable with a few simple tweaks.
This isn't about generic advice; it's about what actually works. Let's walk through the most frequent issues so you can get your door working smoothly without having to call in a professional.
That Annoying Rubbing Sound
If your new door is scraping against the frame, the first thing to do is figure out exactly where it's happening. Is it rubbing at the top, the bottom, or on the handle side? Pinpointing the spot tells you what’s wrong.
- Top Edge Rub: This usually points to the top frame piece being a tad bowed or not perfectly level.
- Bottom Edge Scrape: The culprit here is often a bit of sag, which can come from the hinge placement or an uneven threshold.
- Latch Side Rub: A classic sign the door isn't perfectly plumb. Your hinge-side z-bar is likely just a hair off.
Sometimes, all you need to do is tighten the hinge screws. This can pull the door back into alignment just enough. If that doesn't solve it, you'll need to make a small adjustment with a shim.
Here's a pro tip: a small piece of cardboard is your best friend here. Loosen the screws on the hinge farthest from the rub, slip the cardboard behind it, and tighten everything back up. It’s amazing how a tiny shim can completely fix a stubborn rub.
When the Latch Just Won't Catch
There’s nothing more frustrating than a screen door that won't stay closed. This problem is almost always about the alignment between the latch on the door and the strike plate on the jamb.
Start by closing the door slowly and watching where the latch bolt actually hits the frame. Mark that spot with a pencil. You'll likely find the strike plate is just a little too high or too low. Simply loosen its screws, slide it into the right position using your pencil mark as a guide, and then tighten it down again.
This kind of fine-tuning is exactly why many homeowners decide to hire a pro. In fact, the market for screen door installation services is expected to jump from USD 3.5 billion to over USD 6.1 billion as more people look for a perfect, hassle-free installation. You can see more about this growth and its trends on Verified Market Reports.
Got a Few More Questions About Your DIY Screen Door Project?
Even with the best instructions, it's completely normal to have a few "what if" scenarios running through your head before you pick up the drill. Let's tackle some of the most common questions I hear from homeowners, so you can start your project with total confidence.
Probably the biggest question on everyone's mind is, "How long is this really going to take me?" If this is your first time putting in a standard hinged screen door, do yourself a favor and block out 2 to 3 hours. A seasoned pro could knock it out in under an hour, sure, but giving yourself that extra time is a smart move. It allows you to double-check your measurements, patiently work with a door frame that isn't perfectly square, and actually read the instructions without feeling rushed.
What About My Specific Doors?
The type of door you have often brings up its own set of questions.
A popular one is, "Can I even put a retractable screen on my French doors?" You absolutely can, and they're a fantastic solution. Retractable screens are perfect for French doors because they cover that wide opening when you want a breeze, but they roll away and disappear when you don't, keeping the elegant look of your doors intact. You can get a single unit for one door or a double set that meets right in the middle.
I also get asked if a whole new sliding glass door unit is needed just to add a screen. Good news—no, it's not. You can simply buy a sliding screen door by itself. Nearly all sliding glass door frames have an exterior track built-in, ready and waiting for a screen to be popped right in.
No matter what kind of screen door you're installing, the single most important thing to check is your existing door frame. If it's rotted, badly warped, or damaged, it's not going to hold your new door securely. Always take the time to inspect and repair the jamb and trim before you start.
Worried About Durability and Mistakes?
"Will my dog destroy this screen in a week?" If you have a pet, this is a very real concern. And honestly, standard fiberglass mesh doesn't stand a chance against excited paws and claws.
For any home with pets, I always recommend upgrading to a door with pet-resistant screen mesh. It’s a vinyl-coated polyester that's worlds stronger and more flexible than the standard stuff. It can handle a lot more scratching and pushing, giving you peace of mind that your hard work will last.
And finally, the classic fear: "What if I mess up and drill a hole in the wrong spot?" It happens, and it’s usually not a big deal. A small, misplaced screw hole is an easy fix. Just fill it with a bit of wood putty, sand it down once it's dry, and touch it up with paint. The real trick is to measure twice (or three times!), mark your spots carefully, and always drill pilot holes. This simple prep work goes a long way in preventing major mistakes from the get-go.
If you decide you'd rather leave it to the experts, or need a repair on any type of screen, Sparkle Tech Screen Service can handle it all, from sun screens to sliders. We offer quick quotes and same-week service. To get your project done right, check out our professional installation and repair services.


