


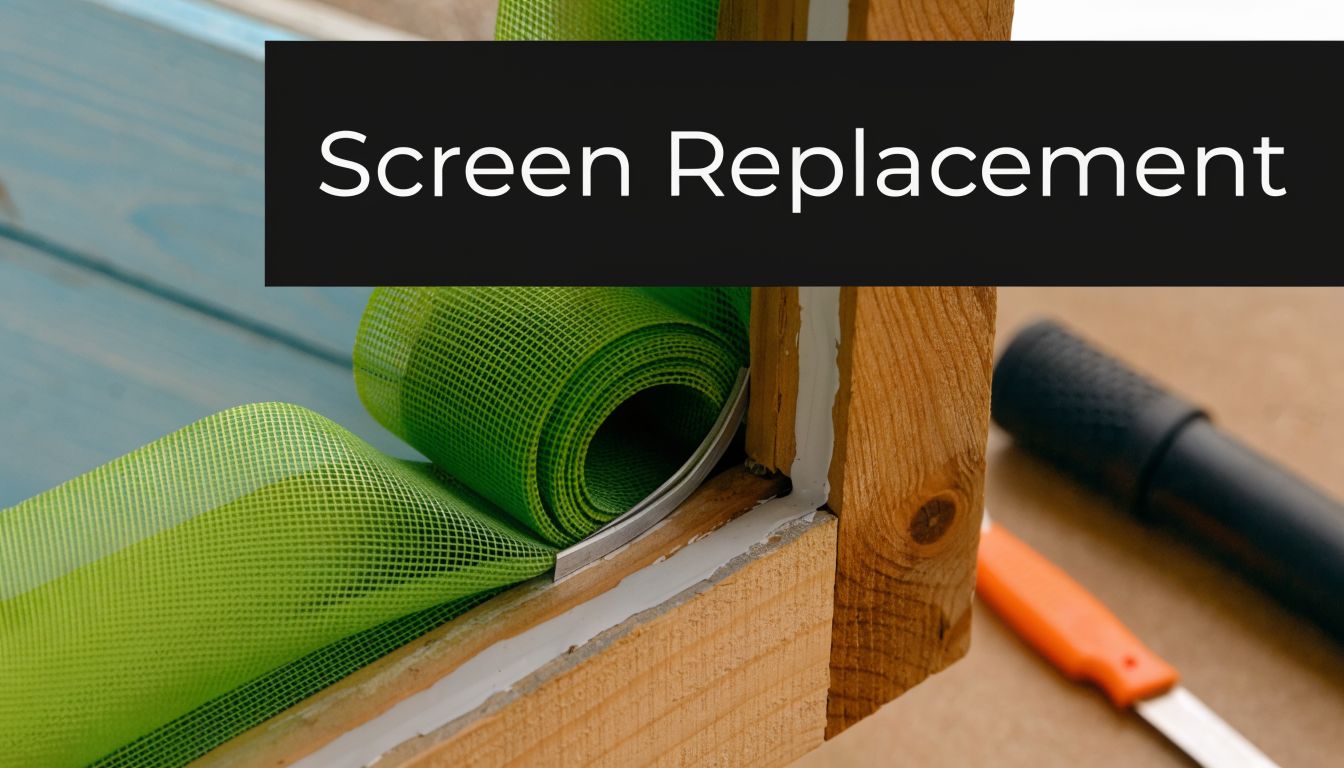

A torn screen usually gets ignored until the first mosquito gets inside, the room feels dusty, or the afternoon sun starts bleaching the floor near the window. Then it suddenly turns into a job you want done today. The good news is that if the frame is still in decent shape, replacing the mesh is one of the more approachable home repairs you can do yourself.
The catch is that a decent result and a clean, tight, long-lasting result are not the same thing. In a place like Phoenix, Mesa, or Scottsdale, heat and UV punish cheap mesh, brittle spline, and sloppy tensioning fast. If you want to replace window screen mesh once and have it stay looking right, material choice matters just as much as technique.
Your Guide to Flawless Window Screen Replacement
A faded, sagging screen makes the whole window look tired. It also stops doing the basic job you bought it for in the first place, which is keeping bugs out while letting air move through the house. If the frame isn't bent or cracked, rescreening is usually the smart fix.
Modern rescreening really took off during the postwar housing boom, and fiberglass became the dominant material by the 1950s, now making up over 70% of standard installations globally according to Angi's window screen cost guide. Solar screens arrived later and became especially important in hot climates where sun exposure is part of the problem, not just insects.
That history matters because it explains why there isn't one universal "best" screen. A standard bug screen may be fine in a mild climate, while a high-UV market demands better judgment on mesh type, spline condition, and frame handling. If you're comparing designs in different climates, it also helps to compare UK window fly screen options because installation priorities and mesh choices can shift with weather, insect pressure, and window style.
For homeowners deciding whether to repair an existing frame or start fresh, this practical guide pairs well with Sparkle Tech's page on home window screen replacement. The basic tools are simple. The skill is in how you use them.
Practical rule: A good screen job looks easy when it's finished. Getting there depends on prep, mesh selection, and even tension from the first corner to the last.
Gathering Your Tools and Choosing the Right Mesh
A screen repair usually goes wrong before the new mesh ever touches the frame. The trouble starts when someone grabs the wrong spline, cuts the mesh too small, or tries to make bargain fiberglass survive desert sun year after year. Preparation decides most of the outcome.

The core tools that actually matter
You don't need a huge kit, but you do need the right few items.
- Spline roller: This is the tool that makes the job possible. One side helps pre-roll the mesh, and the other seats the spline into the channel.
- Flathead screwdriver: Use it to lift out the old spline carefully without chewing up the frame groove.
- Utility knife: A sharp blade gives you a clean trim along the frame edge. Dull blades snag mesh and cause ugly cuts.
- Measuring tape: Frame size matters, but so does extra overlap. Sloppy measuring creates a fight later.
- Replacement spline: Old spline can get hard, flattened, or brittle. If it doesn't compress properly, it won't hold mesh properly.
- Mesh cutter or shears: Not mandatory, but they make handling heavier material easier.
One trade habit that helps in hot weather is to keep your work surface flat and shaded. Mesh behaves better, the frame stays square, and you can spot waves before they lock into place.
Choosing mesh for your climate, not just your budget
For Arizona homes, the baseline options are straightforward. Fiberglass bug screen with an 18×16 weave is a practical airflow-friendly choice, while Phifer SunTex 90 blocks 90% of UV rays and can last 15+ years in high-UV zones compared with the 5 to 7 year lifespan of standard fiberglass there, based on Phifer installation guidance.
That difference is exactly why generic advice often falls short in the desert. Fiberglass is forgiving and easy to install, but it's not always the best long-term answer for a west-facing window that takes hard afternoon sun. Solar mesh costs more up front, but it addresses the primary problem many Phoenix-area homeowners are trying to solve, which is heat load and interior fading.
If you want a broader homeowner-friendly explanation of why that upgrade matters, this guide on understanding solar screens for your property is useful context before you buy material.
For a local breakdown of common options, Sparkle Tech also has a helpful page on types of window screen mesh.
Window Screen Mesh Comparison
| Mesh Type | Best For | Pros | Cons | Avg. Lifespan (AZ Climate) |
|---|---|---|---|---|
| Fiberglass Mesh | Standard bug protection on shaded or less demanding windows | Flexible, affordable, easiest for beginners | Faster UV degradation in intense sun | 5 to 7 years |
| Aluminum Mesh | Homeowners who want a stiffer, more rigid screen feel | Stronger feel, clean appearance | Less forgiving to install, can kink | Qualitatively longer-lasting than basic fiberglass, but varies by use |
| Pet-Resistant Mesh | Homes where claws or pushing at screens is common | More durable than standard mesh | Heavier material, harder to tension cleanly | Qualitatively better wear resistance than standard mesh |
| Solar Screen Mesh | Sun-exposed windows in hot climates | Blocks heat and UV, protects interiors, long service life | Darker view outward, trickier to fit neatly | 15+ years |
| No-See-Um Mesh | Tiny insect control where standard bug mesh isn't enough | Finer barrier against small pests | Can reduce airflow compared with standard bug mesh | Qualitative only |
What works well and what usually disappoints
The easiest material to install isn't always the one that performs best. Fiberglass is still a good choice when the goal is a clean, affordable bug screen, especially if it's your first rescreen. It stretches less aggressively than heavier specialty products and is forgiving when you're learning hand pressure on the roller.
What disappoints homeowners most often in extreme heat is choosing by price alone. Cheap mesh on a sun-baked elevation may look fine at install and tired much sooner than expected. On the other hand, using solar mesh everywhere can be unnecessary if some windows are fully shaded and only need insect control.
The best material choice usually follows the window, not the whole house. South and west exposures often justify better mesh first.
The Complete Rescreening Process From Start to Finish
A screen that looks fine on the table can start sagging fast after one Phoenix summer if the mesh was set unevenly or stretched too hard. Heat exposes every shortcut. Clean technique matters as much as the material you picked.

Removing the screen and setting up the frame
Start by removing the screen and laying it on a flat, fully supported surface. A workbench is ideal. A folding table works too. What does not work is letting one corner hang in the air, especially with older aluminum frames that already have some flex.
If the screen is still in the window, use this step-by-step guide on how to remove a window screen before you begin the rescreen itself.
Lift the old spline from a corner with a flathead screwdriver or pick, then pull it out in one steady pass. Remove the old mesh and clean the groove thoroughly. Dust, oxidized aluminum, and brittle spline fragments all interfere with how the new spline seats.
Go easy here. I see more bent frames from aggressive removal than from the actual install. Pry up, not down, and support the frame with your free hand so you are not twisting it while you work.
Cutting the mesh with the right overlap
Lay the new mesh over the frame and square the weave before you cut anything. If the pattern is drifting diagonally now, it will still be drifting after the spline is in.
Cut the mesh with about 2 to 3 inches of extra material on every side, following the overlap commonly used in Woodruff Windows' replacement method. That margin gives you enough control to keep the panel straight while you roll.
In high-heat, high-UV climates, this step matters more than many DIY guides admit. Solar mesh and pet-resistant mesh are less forgiving than standard fiberglass. They resist stretching, which is good for longevity, but they also show alignment mistakes sooner and fight you more at the corners.
Smooth the mesh flat by hand before you start rolling. Do not pull it drum-tight. The goal is straight, even positioning.
Pre-rolling and tensioning the mesh
Use the convex wheel of the spline roller first to press the mesh lightly into the groove without the spline. That pre-roll helps the mesh settle into place and shows you whether one side is starting to creep out of square.
Then install the new spline, usually starting near a corner and working the long sides first. That sequence gives better tension control across the widest span of the frame. It is the method many pros use because it reduces the chance of ending up with a tight center and loose corners.
Use firm pressure, but keep an eye on the frame. If you see the rail bowing while you roll, back off. This happens often with heavier mesh in desert climates, where old frames may already be a little tired from years of sun exposure.
One good habit is to pause after the first long side and check the weave. If the lines are no longer square, pull that section back out and reset it before you continue.
A good screen is evenly tensioned, not simply tight.
A visual walkthrough can help if you're more comfortable seeing hand position and roller angle before trying it yourself.
Seating the spline cleanly
Keep your free hand on the loose mesh as the spline goes in, using only light, steady pull. Too much force distorts the weave and can bow the frame. In hot regions, that over-tensioned screen often looks acceptable on day one and noticeably worse after repeated expansion and contraction.
Corners need patience. Roll them in short passes so the spline stays down in the groove instead of riding up. If a corner keeps bunching, stop and reset that few-inch section instead of trying to force it through.
Fresh spline is usually the better choice, especially on sun-baked screens. Old spline may look usable, but years of compression and heat hardening can leave it too flat or too stiff to grip the new mesh consistently.
Trimming without damaging the new screen
Trim only after all four sides are fully seated and you are satisfied with the tension. Hold the utility knife flat against the outer frame edge and cut the excess mesh with controlled, shallow passes. A fresh blade leaves a cleaner edge and is less likely to snag the weave.
Keep the blade outside the spline line. If the knife angles inward and nicks the tensioned mesh, that small cut can turn into an early failure point once the screen goes back into service.
Before reinstalling, inspect the finished panel carefully:
- Straight spline line: No lifted spots, especially at the corners.
- Square mesh pattern: The weave should look even, not pulled off-axis.
- Flat frame rails: No bowing along the long sides.
- Clean cut edge: No frayed strands or skipped sections.
- Consistent tension: The screen should feel firm without looking overstretched.
Reinstall the screen and check the fit in the opening. It should sit back in place cleanly. If it suddenly feels twisted or tight, the frame may have flexed during the job, or the mesh may be pulling unevenly on one side.
Troubleshooting Common Rescreening Problems
Most bad screen jobs don't fail because the person didn't try hard enough. They fail because people assume the last few inches will somehow fix mistakes made in the first few minutes. They won't. Screen work is cumulative. Small alignment problems become obvious by the time you reach the fourth side.

Wrinkles and waves in the mesh
Waves almost always come from uneven tension. One side got pulled harder than the opposite side, or the mesh started slightly out of square and the roller locked that error into place.
If the wrinkle is minor and you're early in the process, back out the spline from the affected side and reset that section while keeping the weave square. If the whole panel is wavy, it's usually faster and cleaner to remove the spline and start over than to chase one ripple at a time.
A screen can be tight and still look bad. Tightness alone isn't the goal. Even tension is.
Spline popping out at the corners
This usually means one of three things. The spline isn't seated fully, the corner turn was too abrupt, or the old frame groove has dirt or damage in it.
Try rolling the corner again with short, deliberate passes. Keep the mesh flat while you do it. If the spline still wants to climb out, inspect the groove for debris and make sure the spline size matches the frame.
Small tear near the edge after trimming
A tiny cut near the perimeter is one of the more painful DIY mistakes because the screen looked finished right before it happened. If the tear sits close to the spline line, the repair usually won't hold up well. The edge carries too much stress.
If the damage is clearly outside the tensioned field and very minor, you may get by. If the cut reaches into the installed mesh area, it's smarter to redo it. That sounds annoying, but redoing one screen is better than reinstalling a weak one and pulling it back out later.
Bowed or warped frame
A bowed frame tells you the mesh got pulled too tight or the frame was unsupported during rolling. Once the aluminum shape changes, the finished screen can fit poorly even if the mesh itself looks decent.
Set the screen back on a flat surface and check all sides visually. If the bow is mild, releasing one side and re-tensioning with less pull may fix it. If the frame stays distorted, replacement is often the better route than trying to force it back into the window.
A few practical saves
When a job starts going sideways, use this quick check:
- Mesh drifting diagonally: Stop and square the weave before more spline goes in.
- Corner bunching: Roll smaller sections, not one long aggressive pass.
- Frame flex while working: Support the full frame on a flat surface.
- Messy cut line: Change blades before trimming the next side.
The main thing is not to push through obvious problems. Screen repair rewards resets. It punishes stubbornness.
DIY Costs Versus Hiring a Professional Service
A Phoenix homeowner can buy mesh, spline, and a roller for less than the cost of a service call, then lose that savings on the first oversized solar screen that comes out wavy or loose. Cost matters, but in desert heat, material choice and execution decide whether the repair lasts one season or several.

What the numbers say
The average cost to replace a window screen professionally is about $322, with most homeowners spending between $147 and $523 per screen, while rescreening an intact frame can cost $15 to $50 per screen and DIY materials run $10 to $25 per screen according to HomeAdvisor's screen installation cost guide. The same source notes that professional labor typically adds $50 to $80 per hour.
On paper, that makes DIY look like the easy winner. For a basic fiberglass insect screen in a good frame, it often is. Material cost stays low, and one successful repair usually pays for the tool.
Phoenix changes that math a bit. Heavy solar mesh, pet screen, and larger west-facing panels are less forgiving than standard bug screen. If the mesh is expensive and the opening gets hammered by sun every afternoon, one bad install wastes more than just time.
Where DIY makes the most sense
DIY works best on simple, repeatable jobs. A small or mid-size window screen with a straight frame, clean spline groove, and standard mesh is a solid candidate. Ground-floor access helps too, because the work stays focused on the screen itself instead of removal, ladders, and reinstallation risk.
It also makes sense if you plan to do several ordinary screens and can accept a learning curve. The first one may take longer than expected. By the second or third, hand pressure and mesh control usually improve.
Good DIY candidates include:
- Frames that are still square: No corner separation, no bent rail, no twist.
- Standard fiberglass bug mesh: Lower material cost and easier tension control.
- Easy-access windows: No tall ladder setup or oversized panel handling.
- Homeowners who will reuse the tools: The value improves fast after the first few screens.
When a pro is the smarter call
Professional service starts making financial sense when the screen is large, the mesh is specialized, or failure would be expensive to redo. That comes up often in Phoenix. Solar screens on south- and west-facing windows need even tension and clean alignment, or they telegraph every mistake once the sun hits them.
I also tell people to be realistic about frame condition. If the frame is bent, the corners are loose, or the screen has to slide smoothly in a patio track, the job is no longer just "replace the mesh." You're correcting fit, tension, and hardware at the same time.
Sparkle Tech Screen Service handles bug screens, solar screens, sliders, and other screen repairs for Phoenix-area homeowners. That kind of service is useful when the material is costly, the quantity is high, or you want the finished screens to match across the house.
Quick rule: DIY is usually a good value for basic mesh in a sound frame. Hiring out is usually the better call for large panels, specialty mesh, damaged frames, and high-UV exposures where a mistake gets expensive.
Time, finish quality, and long-term value
The comparison is not just parts versus labor. It's parts, labor, waste, redos, and how long the finished screen will hold up in local conditions.
A careful DIY repair can look excellent. For standard insect screens, many homeowners do perfectly respectable work. But in extreme heat, long-term performance depends on choosing mesh that matches the window exposure and installing it without over-tensioning the frame or under-seating the spline.
If you need one straightforward repair, DIY is a sensible way to save money. If you need multiple solar screens to look consistent, fit correctly, and last through Phoenix summers, paying for professional work can be the cheaper decision in the long run.
Frequently Asked Questions About Window Screens
Can I patch a hole instead of replacing the whole screen?
Sometimes, yes. A patch kit makes sense for holes under 1 inch and away from the frame, but larger tears or damage near the edge call for a full remesh, according to Home Depot's repair guidance. Edge damage matters because that's where the screen carries tension.
For high-end solar screens, patching usually isn't the right fix. The repaired area often stands out visually and can compromise the uniform look and performance of the mesh.
How do I know if I should replace the spline too?
If the spline feels brittle, flattened, cracked, or loose in the groove, replace it. Old spline can look serviceable until you start rolling it back in, then it pops up in corners or fails to hold tension evenly.
Fresh spline is cheap insurance against a redo. When homeowners struggle with a screen that won't stay tight, worn spline is one of the first things to check.
What's the best mesh for Phoenix heat?
That depends on the window's job. If you mainly want insect protection and good airflow, standard fiberglass bug mesh is a workable choice. If the window gets punishing sun, solar mesh is often the better long-term answer because it addresses UV exposure and heat, not just bugs.
West-facing and south-facing windows are usually where better material earns its cost first. Shaded windows can often stay with simpler mesh without much downside.
Why does my screen look loose even though I pulled it tight?
Because hand tension and even tension aren't the same thing. Many first-time installers pull hardest on the side they're working on and accidentally create uneven load across the frame.
The fix is usually process, not strength. Keep the weave square, work the long sides first, and stop to inspect each side before you commit the next one.
Is aluminum mesh better than fiberglass?
Not automatically. Aluminum has a stiffer feel and some homeowners prefer its look, but it doesn't mean it's the right choice for every frame or installer. Fiberglass is easier to handle, especially if you're doing your first rescreen.
The better question is what you're optimizing for. If you want easy installation, fiberglass is usually simpler. If you want a different feel and don't mind a less forgiving material, aluminum may suit you.
How often should screens be inspected in a harsh climate?
In a hot, sunny climate, look them over regularly. You don't need a complicated schedule. Just check for fading, slack corners, brittle spline, and small tears before they become larger failures.
Early repairs are easier. Once mesh starts breaking down broadly from sun exposure, patching turns into wasted effort.
Can I replace window screen mesh without removing the frame from the window?
For a proper rescreen, no. You need the frame flat and supported so you can control the groove, the roller, and the tension correctly. Trying to do full mesh replacement in place usually leads to poor alignment and frame stress.
Small temporary patches can be done in place, but full rescreening should happen on a work surface.
If you'd rather skip the trial-and-error and get your screens back in service quickly, Sparkle Tech Screen Service handles rescreening, bug screens, solar screens, sliders, and related screen repairs for homeowners across the Phoenix area. It's a practical option when the frame is damaged, the mesh is specialty material, or you want a clean, professional finish without spending your weekend on it.


