


A torn window screen isn't just an ugly detail—it's basically a welcome mat for every bug in the neighborhood. The good news is that learning how to replace window screen mesh is one of the more satisfying and straightforward DIY projects you can tackle. All it takes is a few specific tools and the right materials.
Let's walk through exactly what you'll need to have on hand before you get started.
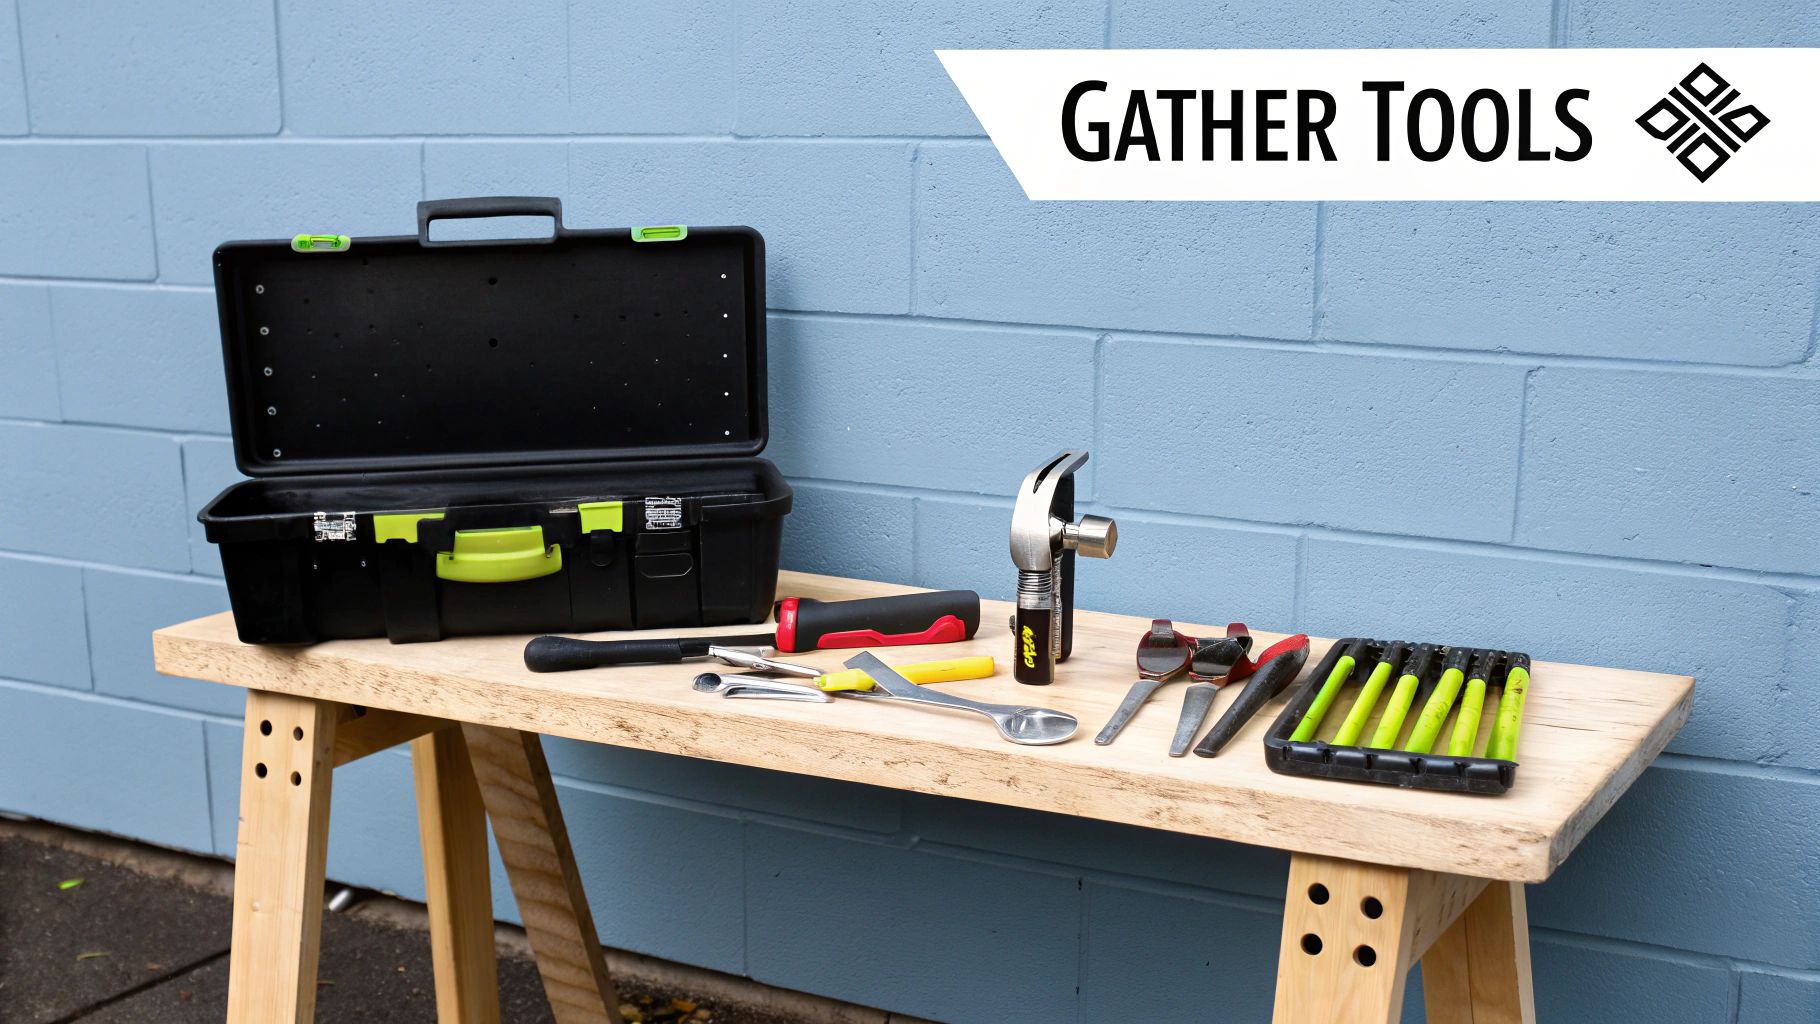
Gathering Your Tools and Materials
I can't stress this enough: get all your supplies lined up before you start. There's nothing more frustrating than getting halfway through a project only to realize you're missing a crucial tool. Taking 10 minutes to prep your workspace will save you a headache later and help you get that clean, professional-looking result.
If you're just starting to build your DIY arsenal, having a solid set of basic equipment is always a good idea. This practical guide on essential homeowner tools is a great resource for covering all your bases.
Your Screen Replacement Toolkit Checklist
To make things easy, here’s a quick-reference checklist of everything you'll need for this specific job. Having these items laid out and ready to go will make the whole process a breeze.
| Item | Description & Pro Tip |
|---|---|
| New Screen Mesh | Buy a roll that’s at least 2 inches wider and taller than your frame. You'll trim the excess later. |
| New Screen Spline | This rubber cord holds the mesh in place. Match the diameter of your old spline for a snug fit. |
| Spline Roller | The non-negotiable specialty tool. It has two wheels: one to push the mesh in, one to seat the spline. |
| Utility Knife | Start with a fresh, sharp blade. A dull knife will snag and ruin your new screen. |
| Flat-Head Screwdriver | Perfect for prying out the old, stubborn spline without damaging the frame. |
| Measuring Tape | "Measure twice, cut once" isn't just a saying—it's essential for getting this right. |
Once you've checked everything off this list, you're officially ready to dive in.
A Few Key Pointers on Your Supplies
The list is short, but a couple of items deserve a special mention. The spline roller is the one specialty tool you absolutely need. It has a convex wheel to press the mesh into the frame's channel and a concave wheel to pop the spline in right after it.
I’ve seen people try to use a screwdriver or a putty knife instead of a proper spline roller. Trust me, it never ends well. You won’t get the even pressure needed, and the screen will end up loose or wavy. The roller is what gives you that tight, drum-like finish.
For materials, you'll need the new window screen mesh and the screen spline. When you buy the mesh, always get a piece that's a few inches larger than the frame on all sides. This extra material gives you something to hold onto while you work and ensures you don't come up short.
Want to dive deeper into the tools of the trade? We've put together a complete breakdown of specialized window screen repair tools that the pros use to make the job even faster.
Choosing the Right Mesh for Your Home
Picking the right material for your new window screen is a bigger deal than most people think. It's not just about keeping bugs out; your choice impacts everything from your view and curb appeal to how much you spend on cooling your house. Not all mesh is the same, and what works for a home in sunny Arizona might not be the best fit for a coastal home in Florida.
Most of the time, you'll run into standard fiberglass mesh. It's the go-to for a reason: it's affordable, flexible, and surprisingly forgiving to work with. Unlike old-school metal screens, it won't hold a crease or dent if you bump it, which makes it a fantastic choice if this is your first time tackling a screen replacement.
Common Types of Screen Mesh
Once you look past the standard stuff, you'll find a whole world of specialty screens designed for specific problems. Knowing the difference can save you a lot of headaches down the road.
- Pet-Resistant Screens: If you have a cat that thinks your screen is a climbing gym or a dog that scratches at the door, this is your solution. Made from a tough, vinyl-coated polyester, it's about seven times stronger than regular fiberglass. It's a worthwhile upgrade to avoid re-doing the job in six months.
- Aluminum Screens: This is the classic choice for a sharp, clean look. Aluminum holds its shape well and won't sag over time, but it has a downside—it can dent permanently if hit hard. It’s also a bit stiffer and requires more patience during installation.
- High-Visibility Screens: Often marketed as "invisible screens," this material uses a finer thread to give you a much clearer, less obstructed view. It’s like having an open window, but the bugs still stay outside.
- Solar Screens: Think of these as sunglasses for your windows. They are designed to block a huge chunk of the sun's heat and UV rays. In a hot, sunny climate, they can make a real difference in your energy bills by keeping your home cooler.
Ultimately, picking the right material is a trade-off between durability, what you can see through it, and what you’re willing to spend. Fiberglass is a great all-rounder, but if you're dealing with a specific issue like pets or intense sun, a specialty screen is an investment that pays for itself.
It's no surprise that functional screens are a big deal for homeowners. The global market for insect screens was valued at USD 1.06 billion in 2023 and is expected to hit USD 3.0 billion by 2032. That's a lot of people wanting to keep the bugs out!
If you want to dig deeper, our guide to the best window screen material really gets into the weeds, comparing the pros and cons of each option. Taking a few minutes to choose wisely now means you'll have a screen that looks great and lasts for years.
Prepping the Frame for a Perfect Fit
Want a tight, professional-looking screen? It all starts with a clean slate. Before you even think about rolling in the new mesh, you've got to get rid of the old, damaged screen and that brittle spline holding it in place. It's tempting to rush this part, but trust me, getting the prep work right makes the rest of the job so much smoother.
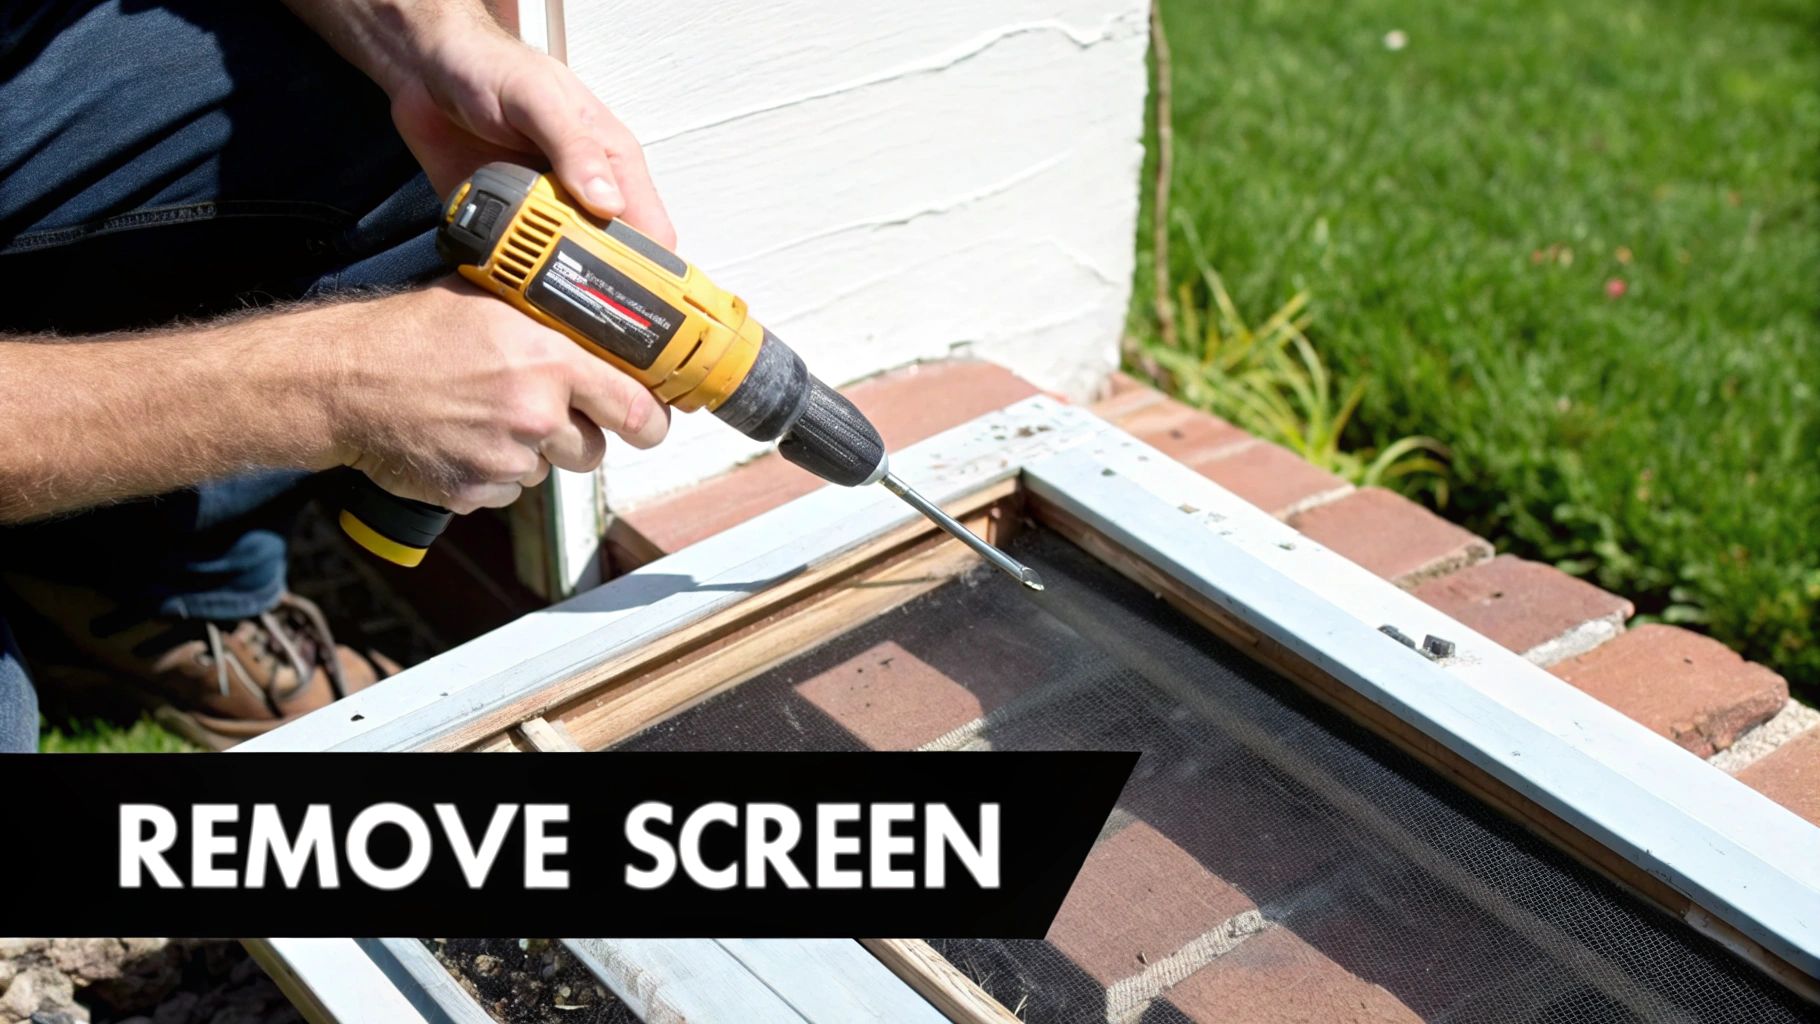
First, you need to find where the old spline starts. This is the rubbery cord tucked into the channel around the frame. I usually just use a small flat-head screwdriver or an awl to carefully dig in and pry up one end. Once you get a good grip on it, the whole thing should pull out in one long piece.
With the spline gone, the old screen mesh just lifts right out. A word of caution: be gentle with the aluminum frame. It's easier to bend or warp than you think, and even a slight bow can make it a real pain to get the new screen stretched tight later.
Cleaning the Spline Channel
This is the step everyone skips, and it's a huge mistake. Over the years, that little channel gets packed with an incredible amount of dirt, dust, and grime. If you don't clean it out, the gunk will stop the new spline from seating properly, and you'll end up with a loose, saggy screen.
Don't worry, you don't need any special tools. A few things from around the house will do the trick:
- A stiff brush: An old toothbrush is perfect for scrubbing out all the loose stuff.
- A flat-head screwdriver: For the really stubborn, caked-on gunk, gently run the tip of the screwdriver along the inside of the channel to scrape it loose.
- Compressed air or a vacuum: Finish the job by blowing out the last of the dust particles. A vacuum with a brush attachment works great, too.
Seriously, take your time here. A perfectly clean channel is your guarantee that the new spline will sit deep and secure. A few extra minutes of cleaning now will save you the headache of a saggy screen down the road.
Once the old materials are out and the channel is spotless, your frame is officially ready for its new mesh.
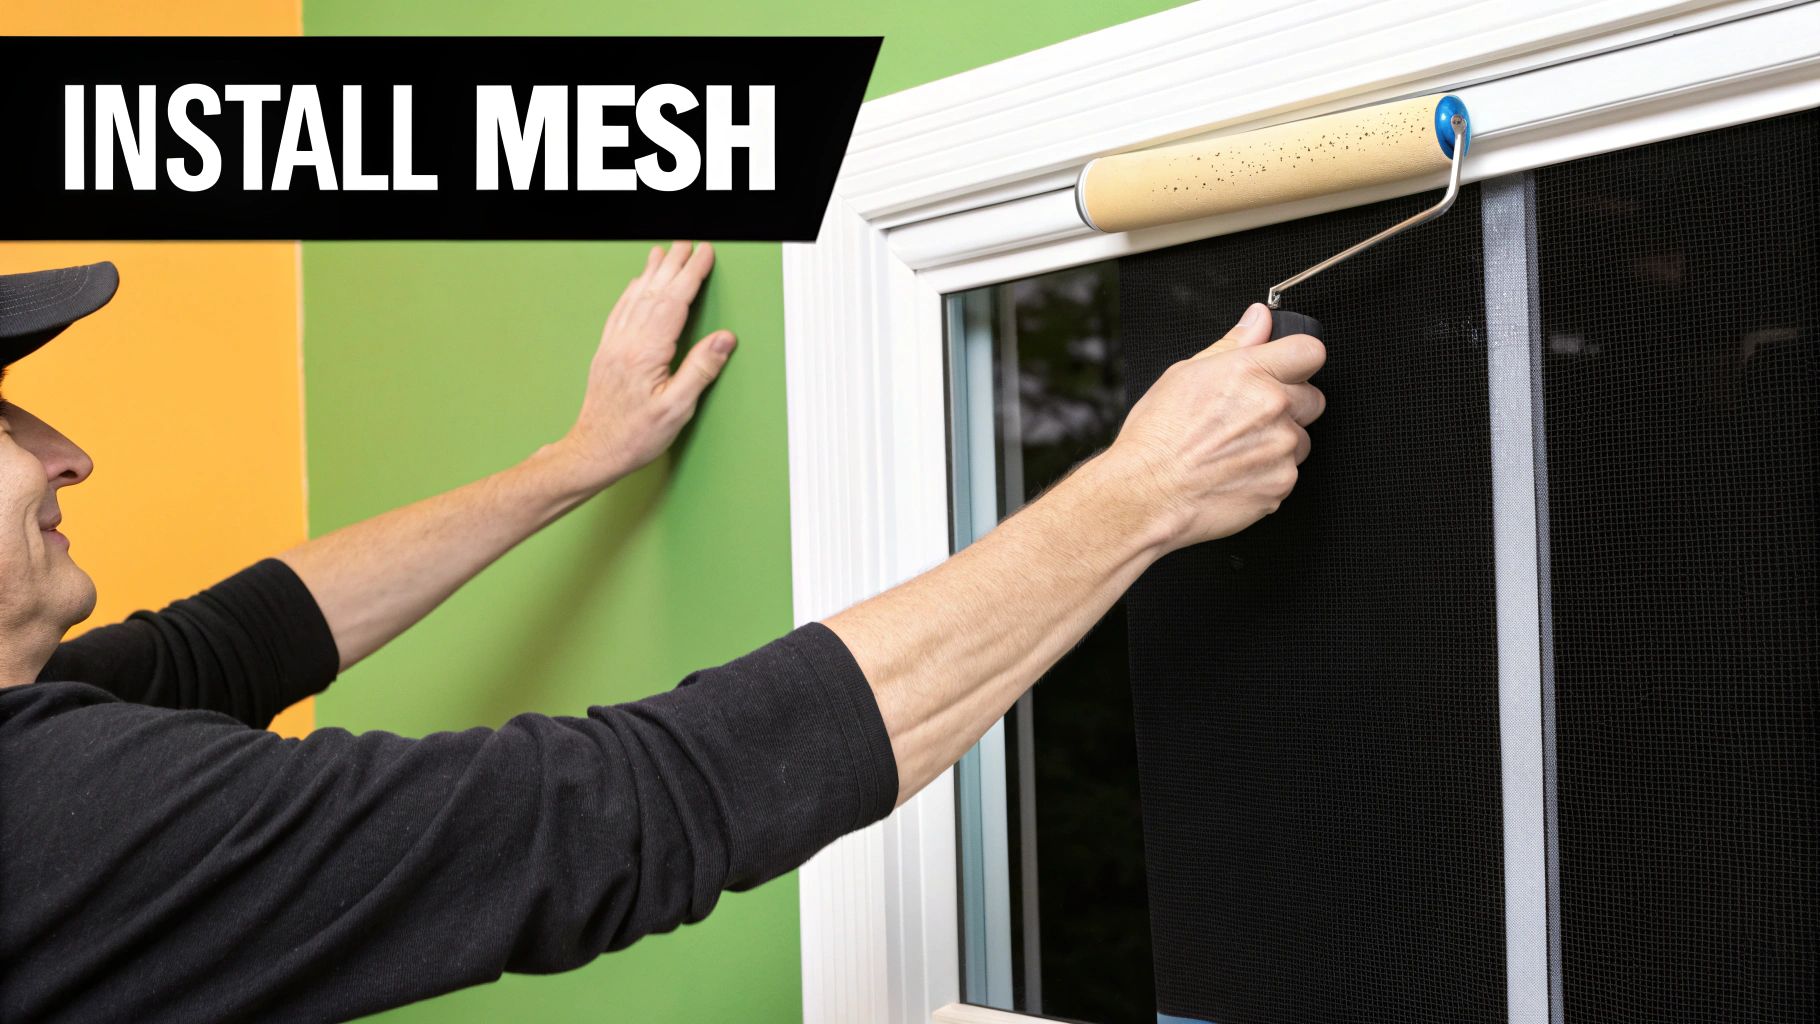
Installing the New Screen Mesh
Alright, with a clean frame in hand, you’re at the fun part. This is where all that prep work pays off and you start to see your new screen take shape. Getting a tight, professional-looking finish is all about managing tension and knowing how to handle your spline roller.
First things first, unroll your new screen mesh and drape it over the frame. You’ll want to leave at least one inch of overhang on all four sides. This extra bit is your handle—it makes it so much easier to keep the screen taut while you work. Take a second to make sure the weave of the mesh is running straight and parallel with the sides of the frame. If it’s crooked now, you’ll end up with a wrinkled mess later.
Setting the Mesh and Spline
Time to pick up your spline roller. You'll notice it has two different wheels, and there's a method to the madness of using them correctly.
Start on one of the longer sides. Using the convex (rounded) wheel, gently press the mesh down into the frame’s channel. Don't go crazy with the pressure; you're just creating a little groove for the spline to follow. This simple first pass secures the mesh just enough to keep it from slipping as you work.
With the mesh seated, grab your new spline. Start it in a corner and switch to the concave (grooved) wheel on your roller. Now, press the spline firmly into the channel, right on top of the mesh. You’ll want to apply steady, even pressure as you roll it down the entire length of that first side. You should feel it pop nicely into place.
I see this all the time: people yank the screen way too tight. You're looking for just enough tension to make it smooth and flat, almost like the top of a drum. If you pull too hard, you risk bowing the aluminum frame, and that bend is permanent. The key is gentle but consistent tension.
This graphic breaks down the basic workflow for getting it right.
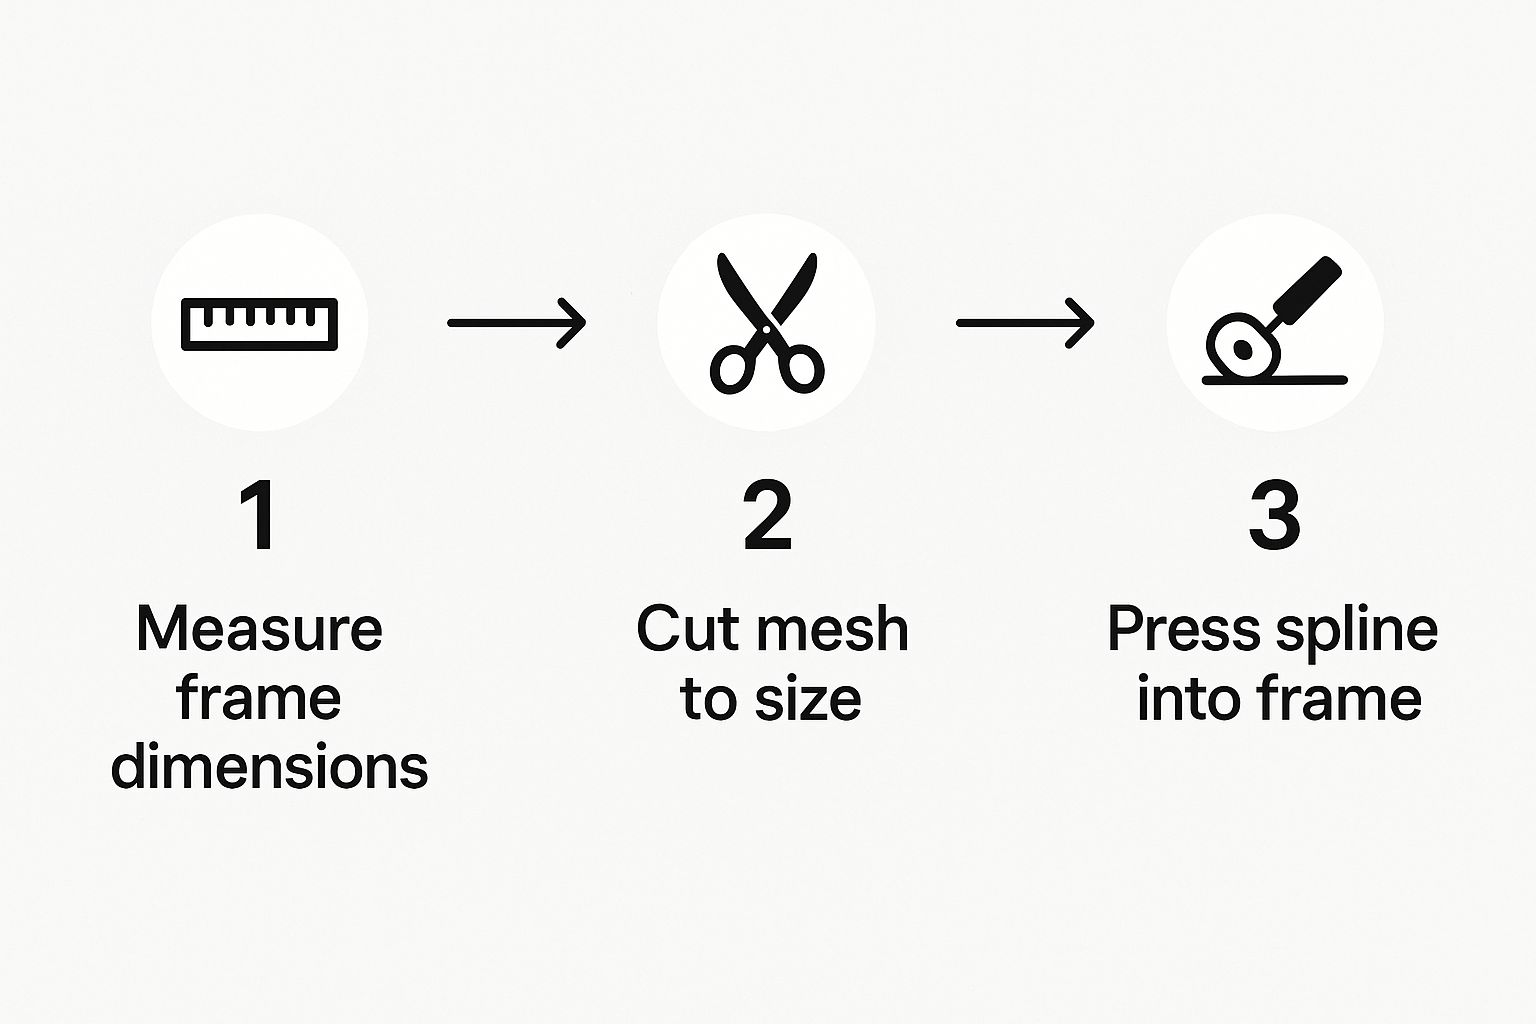
As you can see, it's a pretty straightforward process of measuring, cutting, and securing everything in place.
Once the first side is done, move directly to the opposite side. Pull the mesh gently with one hand to create that light tension we talked about, and then use your roller to seat the mesh and spline just like before. After that, you can finish up by doing the two shorter sides.
It’s interesting how even simple products like screen mesh evolve. The global industrial screen mesh market was valued at around USD 675 million in 2023 and is expected to hit USD 1.05 billion by 2032. The innovations happening on the industrial side—stronger, more durable materials—eventually trickle down and give us better options for our homes. You can actually read more about these industrial market drivers and how they influence the products we buy.
Nailing the Corners
The corners are where a lot of people get tripped up. Whatever you do, don't try to just roll the spline around the corner in one continuous motion. It will bunch up and look terrible.
Instead, roll the spline right up to the corner, then stop. Use your utility knife to cut it flush. Start a fresh piece for the next side. To get that perfectly clean, professional look, take a small flat-head screwdriver and gently tuck the ends of the spline snugly into the corner pockets. It’s a simple move that makes a huge difference in avoiding wrinkles and ensuring a tight fit.
Trimming and Finishing Your Project
Alright, the spline is in and your new screen is secure. Now for the satisfying part: the final trim. This is where a steady hand really pays off and gives your project that clean, professional look.
Grab your utility knife and—this is crucial—make sure it has a fresh blade. A dull blade will snag and pull at the mesh, potentially ruining all your hard work. Don't risk it.
Keep the knife at a low, shallow angle, with the blade pointed away from the center of the screen. You're going to use the outer edge of the spline as your guide. Just run the tip of the blade right along that groove, and it will slice off the excess mesh in one clean pass.
Final Inspection and Clean-Up
Once the excess is trimmed, take a moment to look over your work. Press your fingers along the spline to check for any spots that aren't fully seated in the channel. The screen itself should be tight and smooth, without any sags or wrinkles.
It’s this kind of detail that makes a DIY job look like it was done by a pro. Interestingly, the materials we use for these jobs are always getting better. The global market for plastics coating on window screens, for example, was valued at around USD 1.94 billion in 2024. This just shows how much innovation is going into making screens more durable and effective, making your choice of mesh more important than ever. You can discover more insights about window screen market trends if you're curious.
Pro Tip: If your knife slips and you nick the spline, don't panic. Just cut out the damaged piece with your utility knife and press in a small, new section of spline. The repair will be nearly invisible and won’t affect the screen’s tension.
When everything looks good, go ahead and pop the screen frame back into the window. Job done.
Answering Your Screen Replacement Questions
Even with a straightforward project like this, a few questions always pop up. Getting the answers sorted out beforehand can save you a lot of headache and make the whole process go much smoother.
What Size Spline Do I Need?
Getting the right spline size is critical, and it all comes down to the width of the channel in your screen frame. The most foolproof method is to simply take a small piece of your old spline with you to the hardware store. You can match it up right there.
If the old spline has turned to dust, you'll have to measure the channel opening instead.
Pro Tip: If you're stuck between two sizes, always go with the one that's slightly larger. A tighter spline gives you a much more secure and durable fit that won't pop out later.
How Do I Keep the Mesh from Wrinkling?
Wrinkles are the classic sign of uneven tension. The trick is to keep the mesh gently pulled taut while you're rolling in the spline. As you work on one side, use your free hand to apply some light, even pressure on the opposite side.
Just be careful not to pull too hard. Overdoing it can actually bend or bow the aluminum frame, creating a whole new problem.
Can I Just Patch a Small Hole?
You bet. For tiny punctures or tears, adhesive screen repair patches are a fantastic, budget-friendly fix. They just stick right on and can definitely buy you some more time before you have to do a full replacement.
For bigger rips, or if the mesh is old and brittle, replacing the whole sheet is the smarter long-term move. If you're weighing your options, you can learn more about the window screen replacement cost to help you decide.
A solid, intact screen is also your first line of defense against pests. It’s not just about keeping flies out; good screens are a great barrier against all sorts of critters. For more ideas, check out this guide on how to prevent spiders from coming inside your home.
If you decide you'd rather leave it to the pros, Sparkle Tech Screen Service is here to help with fast, reliable screen repair and replacement. Get in touch today for a quick quote! https://sparkletechscreenservice.com


